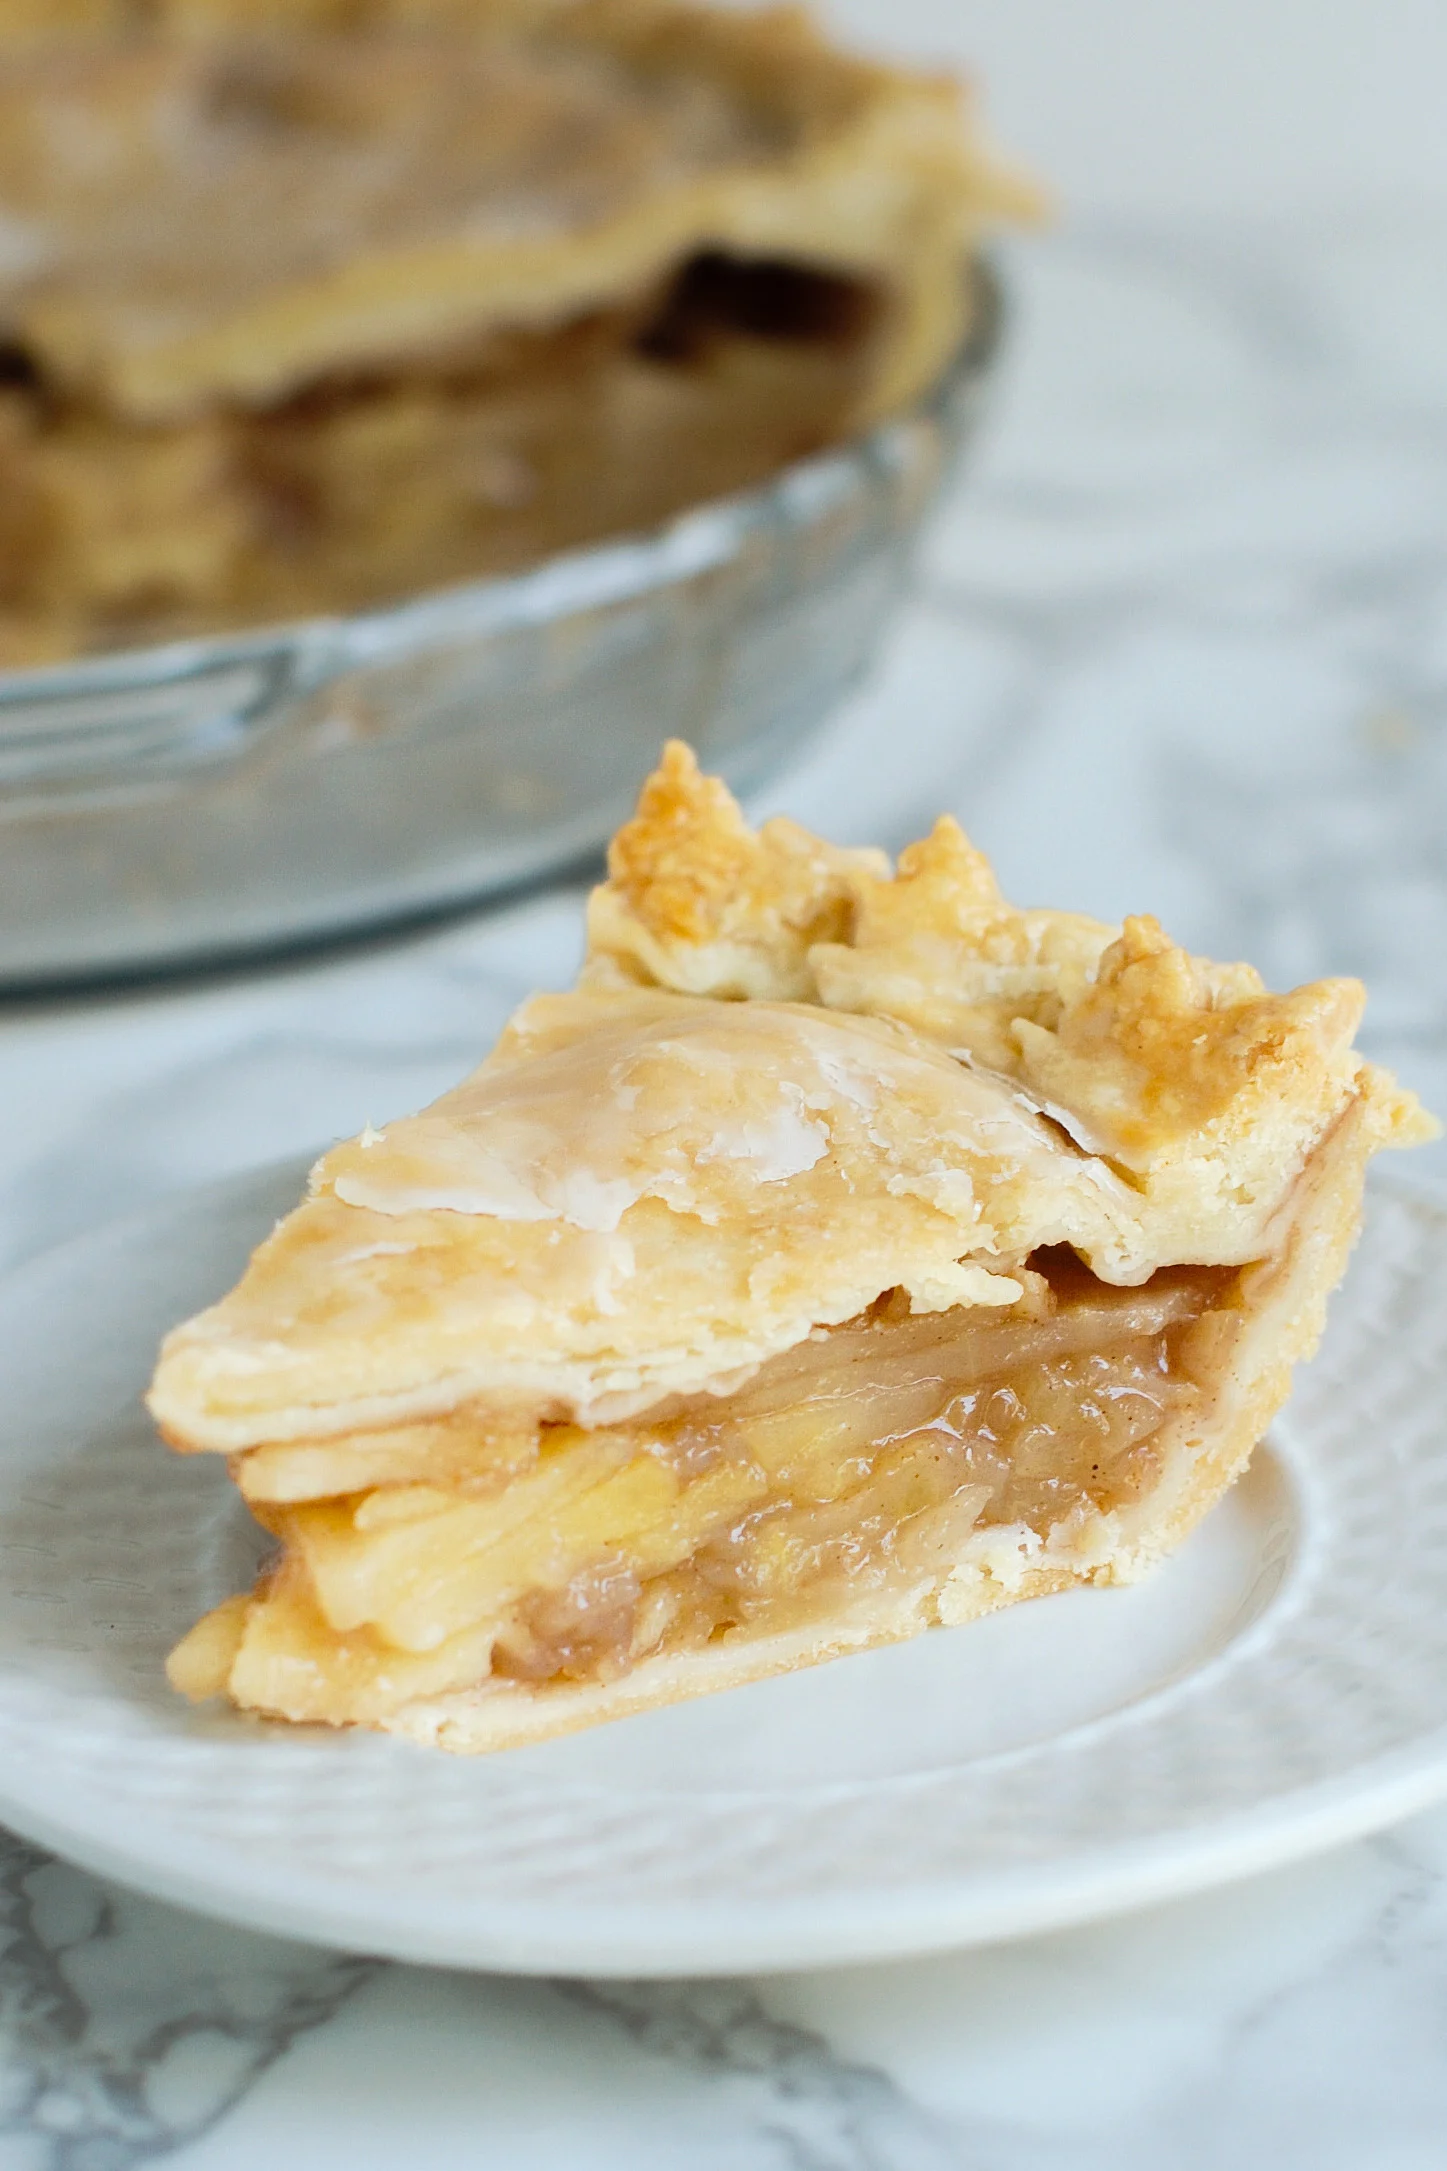
Glazed Maple Apple Pie
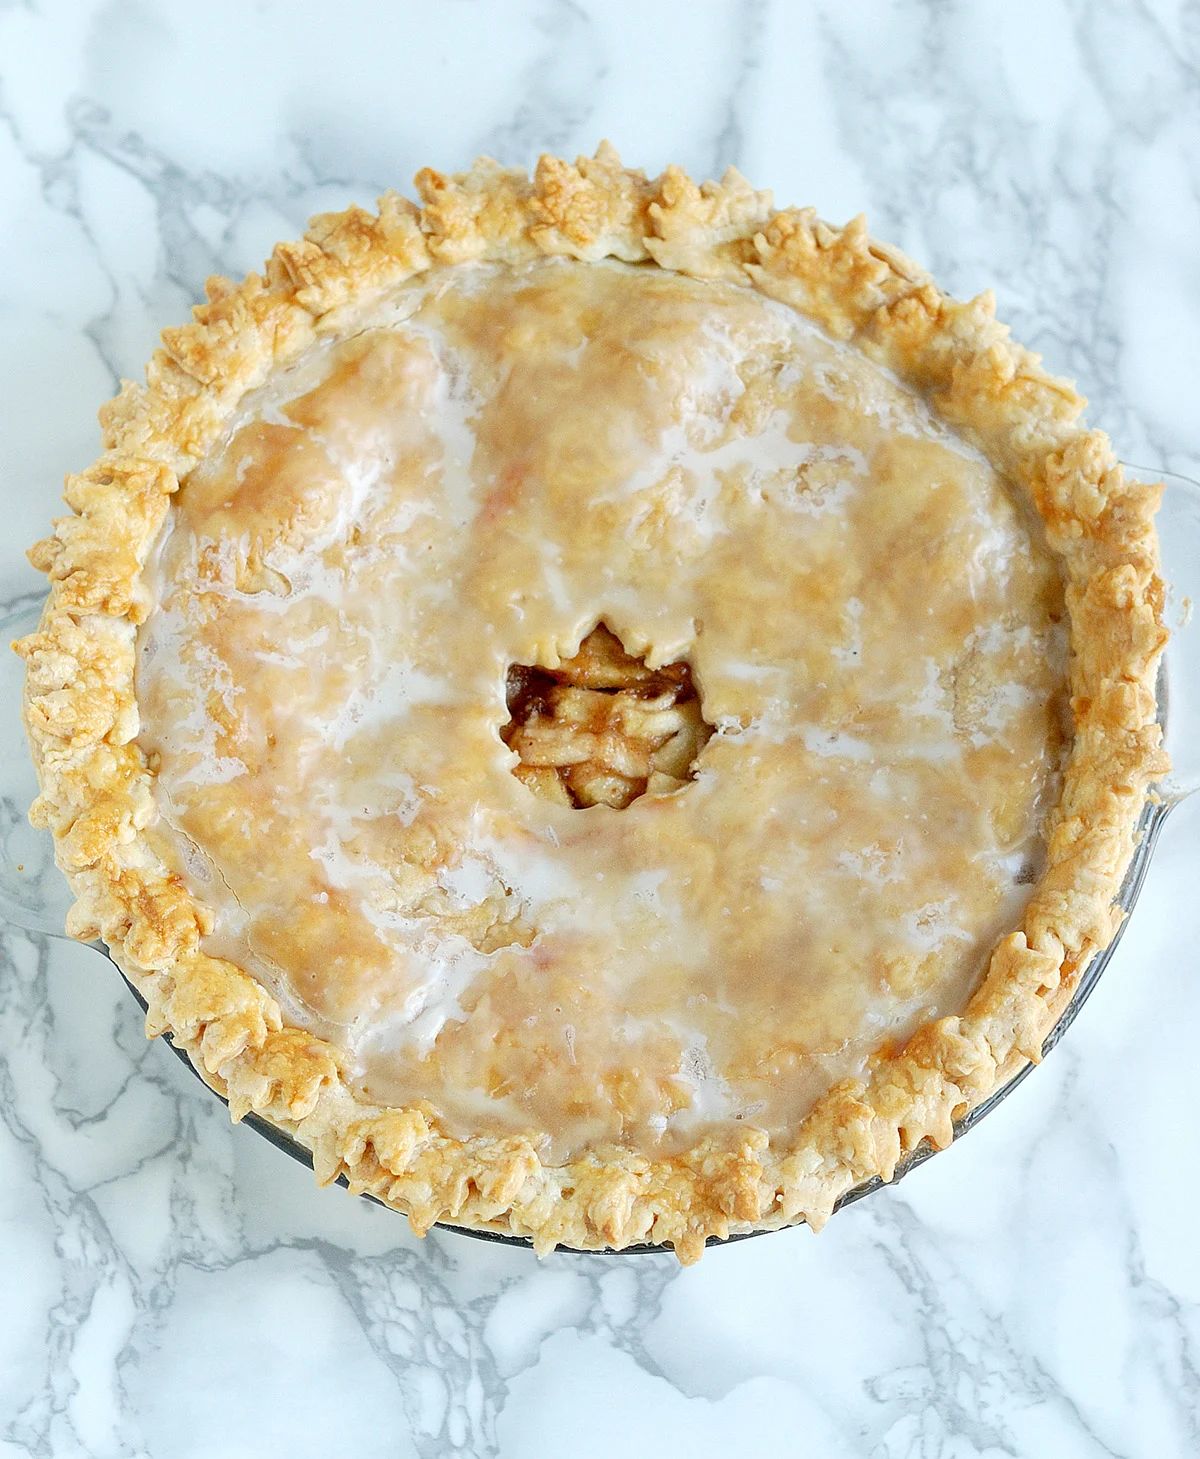
Glazed Maple Apple Pie is the perfect fall dessert. Get a double dose of maple with your apples; in the filling and in the glaze. The pretty maple leaf border is a special finishing touch.
Why you’ll love this Maple Apple Pie
Pie, pie, pie. I can’t get enough pie!
The only thing better than a perfect All American Apple Pie is an all American apple pie made with real maple syrup, and the only thing better than an all American apple pie made with maple syrup is an all American apple pie made with maple syrup and topped with a crackly thin maple glaze.
Ingredients
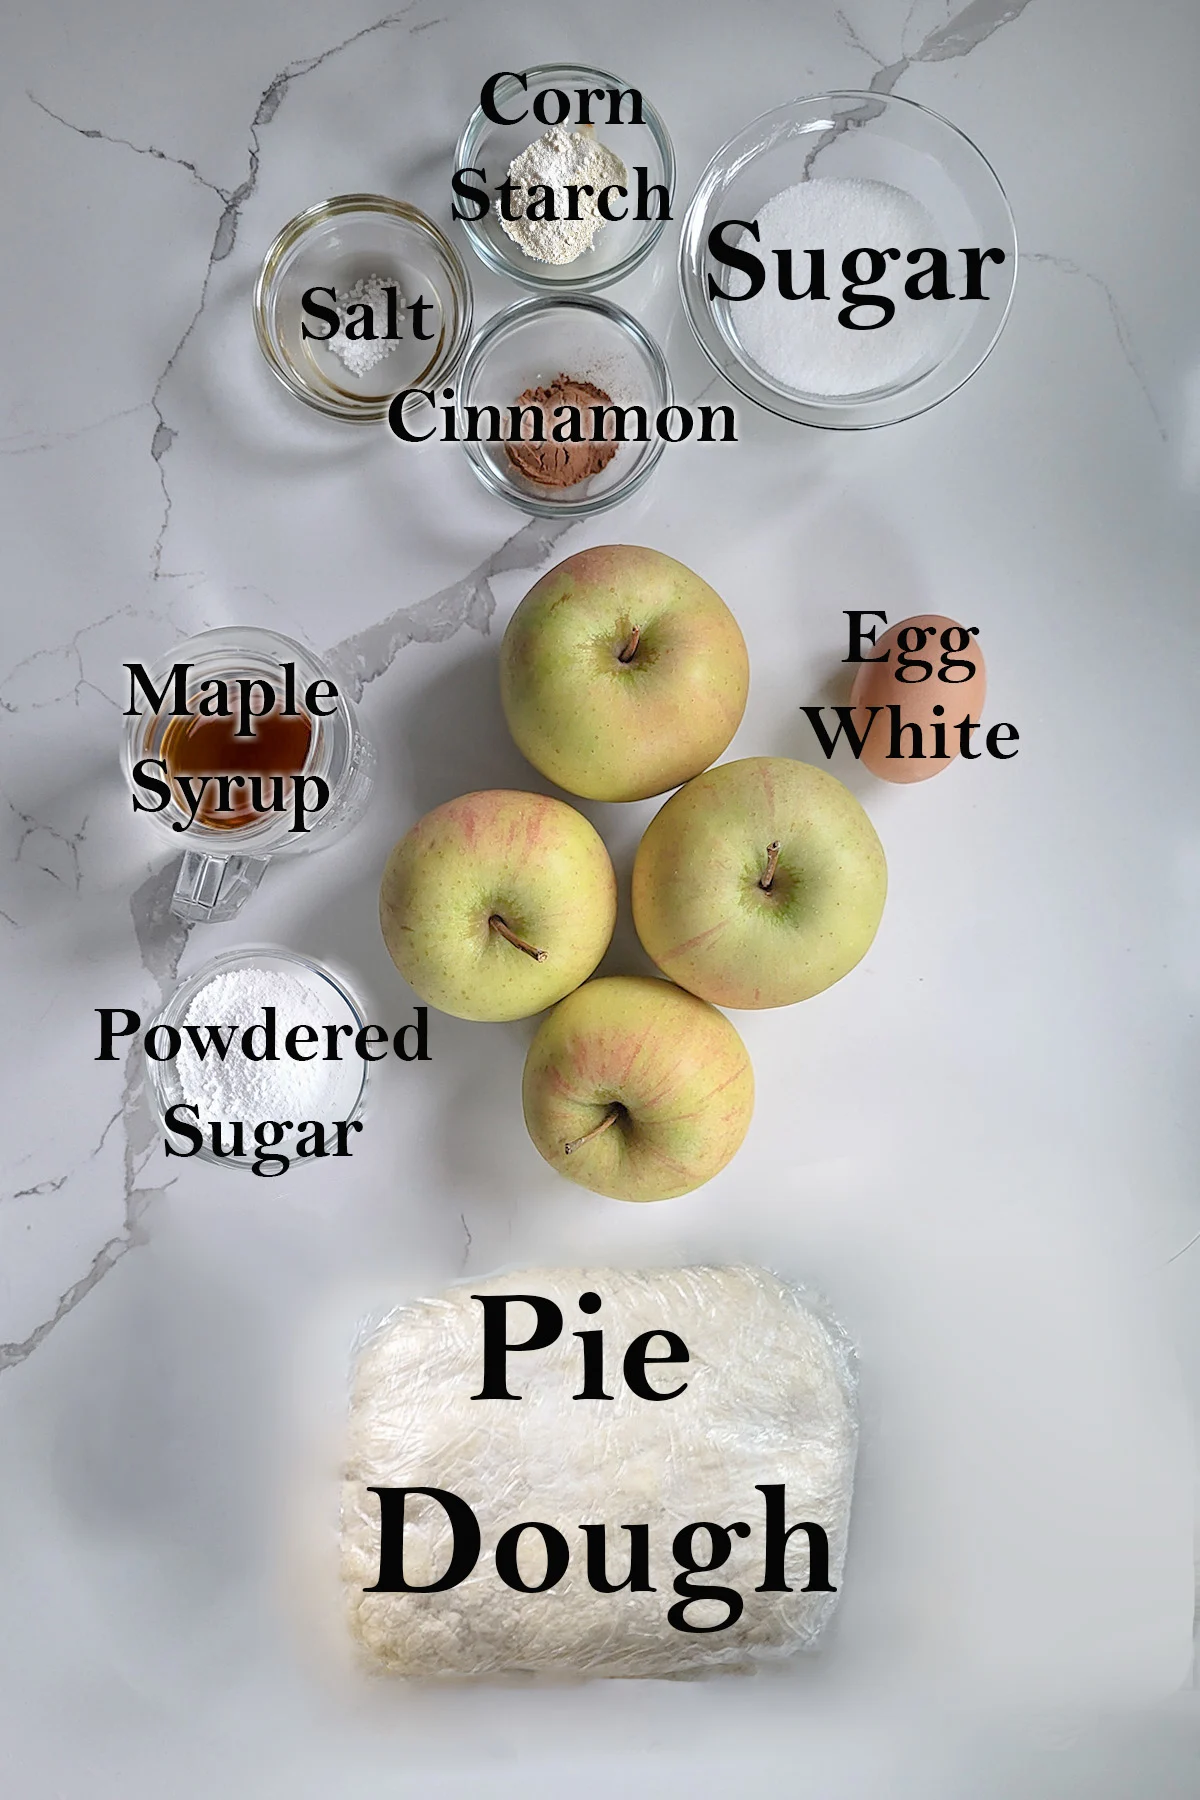
Ingredient Notes
- Pie Dough – Use the linked recipe in this post or use your favorite flaky pie dough. Store bought is fine if that’s your preference.
- Apples – A firm apple that doesn’t fall apart when baked works best. Granny Smith is a good option that is widely available. Depending on the type of apple you’re using, you may want to add just a smidge of lemon juice to the filling to spark the flavor.
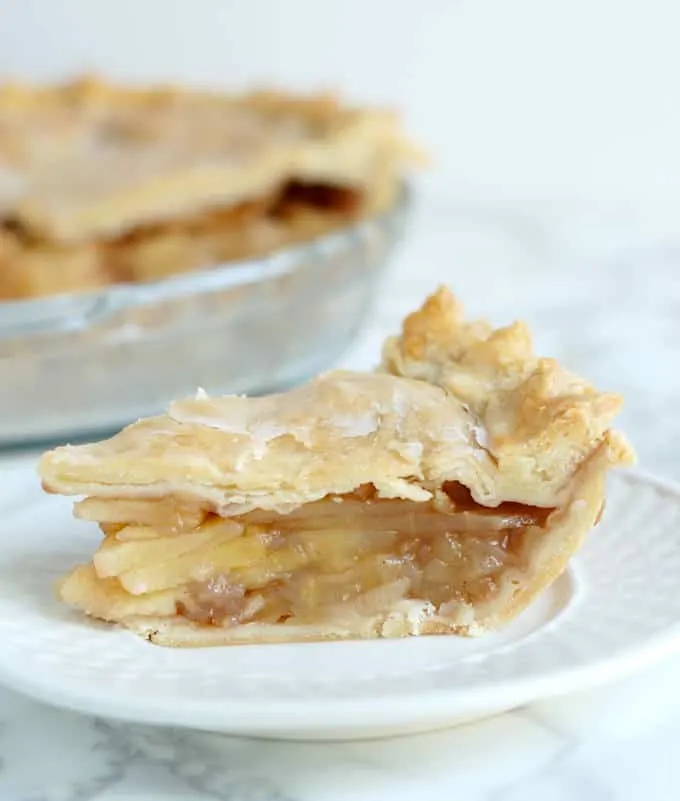
- Corn Starch – This recipe uses just enough starch to thicken the juices without making it pasty. You want the fruit to be juicy under the flaky crust but you also need the slice to hold together on the plate.
- Maple Syrup – Yes, use real maple syrup since nothing else tastes the same.
- Salt – Don’t skip that little pinch of salt in the filling, it does wake up the flavors without leaving a salty taste.
How to make Maple Glazed Apple Pie
Here’s what the recipe process looks like at each stage. Refer to the recipe card below for measurements and exact instructions.
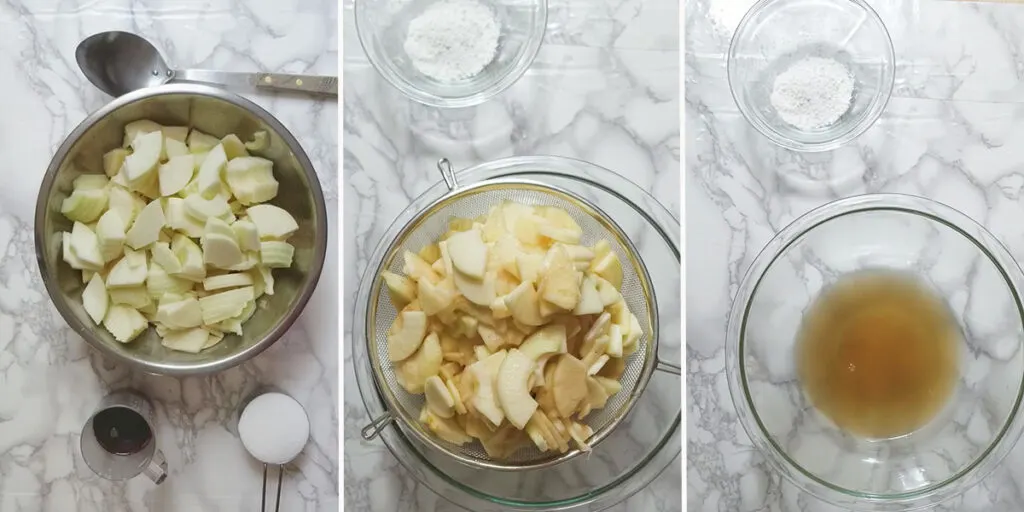
- Combine the apples, maple syrup and sugar in a large bowl and set it aside for 2-3 hours.
- Drain the apples, reserving the juice
- Combine 1/4 cup of the juice with cornstarch.
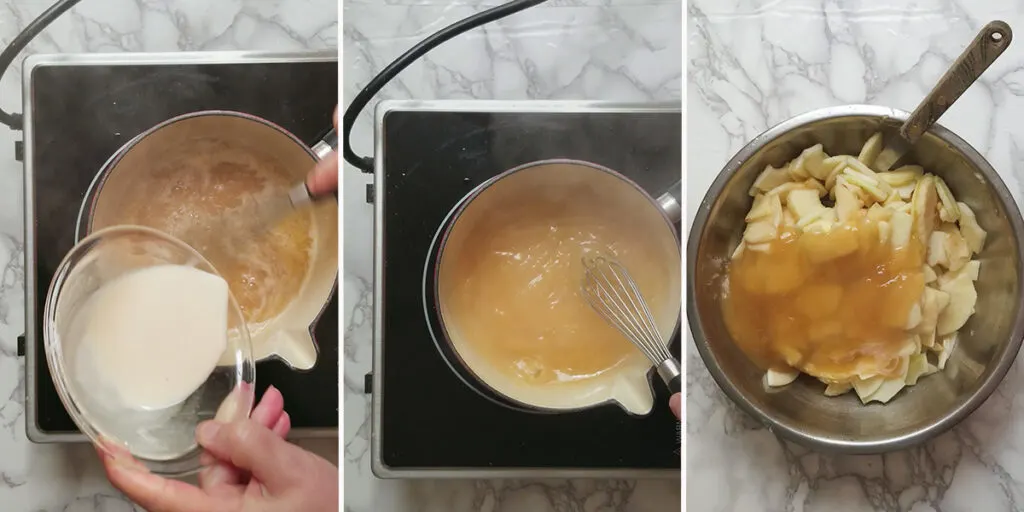
- Bring the rest of the juice to a boil. Whisk the cornstarch slurry into the juice.
- Cook until the juice thickens and becomes translucent.
- Toss the thickened juice with the apples.
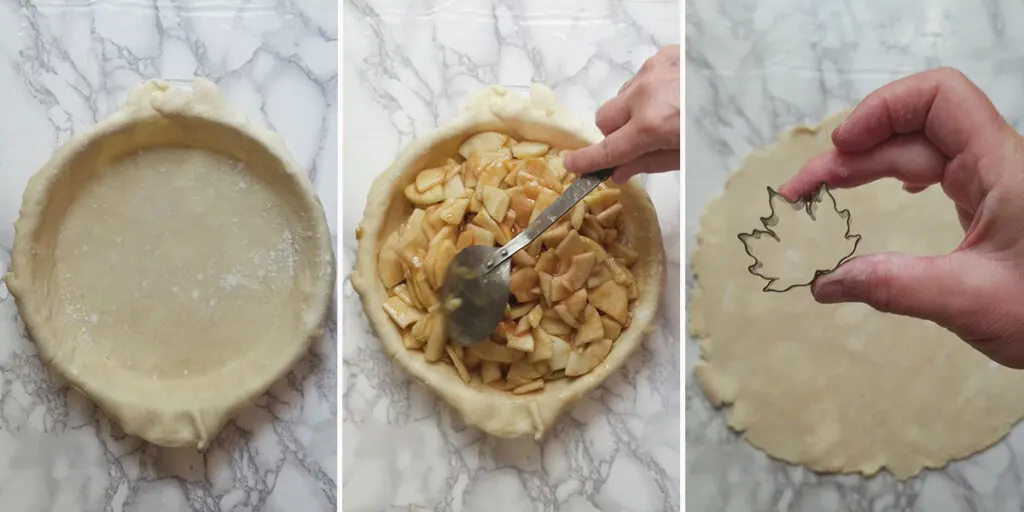
- Line a deep dish pie plate with your favorite flakey pie dough.
- Pour the apples into the pie shell.
- Roll the top crust. You can use a maple leaf cutter to cut a vent hole for a nice finish. Otherwise, just cut an “X” in the top of the pie to make a vent hole.
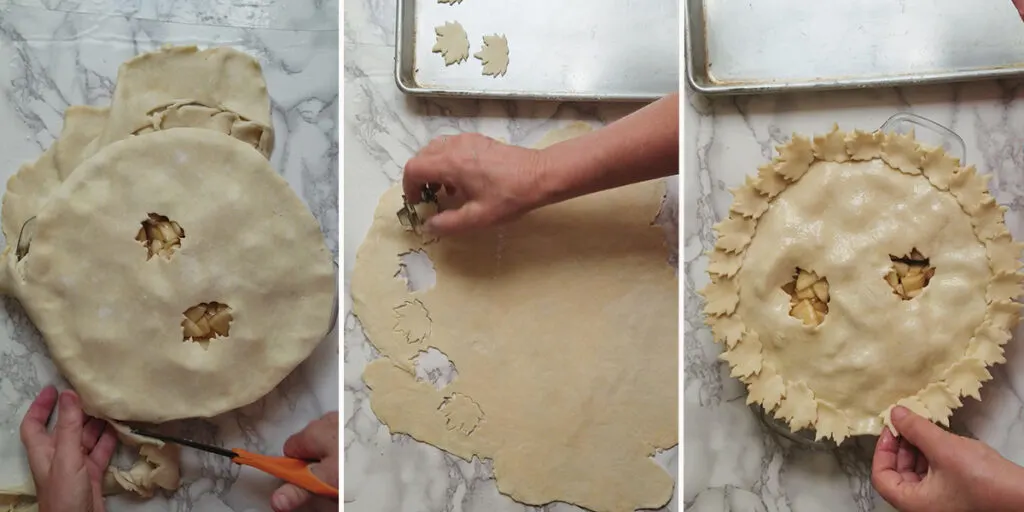
- Trim the excess dough from the pie.
- If you have a leaf cutter, cut leaves from the dough scraps to decorate the border.
- Brush the crust with egg white and attached the leaves the to edge. Otherwise, use a fork or your fingers to crimp the pie crust. Bake the pie until the juices in the center are bubbling.
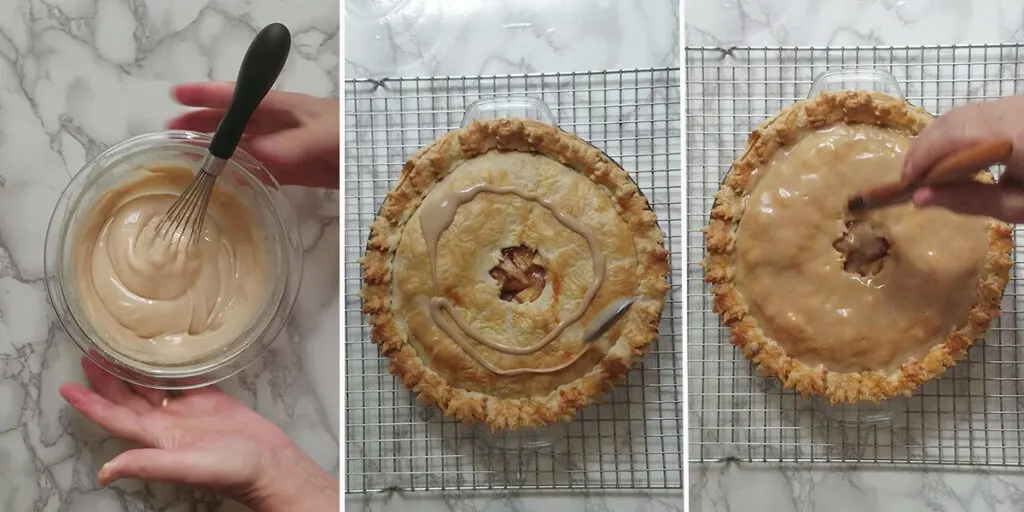
- While the pie bakes combine the maple syrup and powdered sugar to make the glaze.
- Drizzle the glaze over the warm pie.
- Brush the glaze over the pie, leaving the leaf border clear. Allow extra glaze to go into the vent hole.
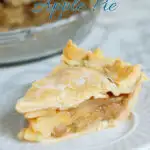
- Let the pie cool for at least 3 hours before slicing.
Pastry Chef tips for making great Apple Pie with Science!
Macerating the fruit is an important step for three reasons;
- To reduce boil overs.
- To allow pre-cooking of the starch and,
- To help the fruit maintain its shape while baking.
Because the sugar draws excess water from the fruit the amount of boil over during baking is reduced. Once the juice is drawn out of the fruit you can pre-cook it with the corn starch to ensure that the starch will be fully activated (under cooking the starch could result in a runny pie filling).
When fruits and vegetables are heated (e.g., baked in pie) the cell walls weaken and the water contained in the plant leaks out. The fruit or vegetable looses its structure and becomes mushy.
When uncooked fruit is tossed with sugar, the sugar is drawn into the fruit and reinforces the cell walls, allowing the fruit to maintain it’s shape while baking.
No mushy pie filling! It’s like magic, except that it’s science.
More apple recipes like this
- Apple Dumplings
- Apple Pot Pie
- Apple Fritter Donuts
- French Apple Tart
- Apple Frangipane Tart
- Apple Cobbler
- Dutch Apple Tart
- Apple Walnut Linzer Tart
More Pie Recipes
- Cranberry Crumb Pie
- Perfect Blueberry Pie
- Lemon Meringue Pie
- Vanilla Pear Pie
- Pumpkin Mousse Pie
- Chocolate Mousse Pie
- Pina Colada Pie
Watch the recipe video to see how-to make Glazed Maple Apple Pie.
If you love this recipe as much as I do, I’d really appreciate a star rating and a quick comment. Ratings and comments help my recipes show in search results. Thanks!
Glazed Maple Apple Pie
Video
Ingredients
- 1 Recipe Perfect Pie Crust
- 3 pounds apples (peeled, cored, sliced to ¼" )
- 4 oz granulated sugar (½ cup)
- 2 oz real maple syrup (¼ cup)
- ⅛ teaspoon salt
- 2 tablespoons cornstarch
- 1 teaspoon ground cinnamon
- 1 egg white
Maple Glaze
- 2 oz confectioner’s sugar (½ cup)
- 2 oz maple syrup (¼ cup)
Instructions
- Combine 3 pounds apples (sliced) with 4 oz granulated sugar, 2 oz real maple syrup and ⅛ teaspoon salt. Set aside to macerate for at least 2 hours and as long as 8 hours.
- Roll ½ the pie dough and fit into a 9 deep-dish pie plate. Roll the other ½ of the dough to a 12" circle. Sprinkle the circle with flour, fold in half then fold again. Wrap the folded dough in plastic and set into the dough lined pie plate. Set the pie plate into the refrigerator while you make the filling.
- Preheat the oven to 350 °F. If you have a baking steel or stone place that in the oven to preheat.
- Drain the apples, save the juice. Combine ¼ cup of the juice with 2 tablespoons cornstarch. Heat the remaining juice on medium high until it begins to boil. Reduce the heat to low and whisk in the corn starch slurry. Return to a boil, whisking constantly, until the juices are thickened and become translucent. Immediately toss the juices and1 teaspoon ground cinnamon with the apple slices.
- Remove the pie plate from the refrigerator. Pour the apples into the pie plate. Unfold the dough round for the top crust. Use a small maple leaf cutter to cut a steam hole in the middle of the crust (save the cut leaf). Brush the edges of the bottom crust with egg white. Lay the top crust over the filling with the vent hole centered on the pie. Pinch the two crusts together to seal. Trim the excess dough so it's flush with the edge of the pie plate.
- Gather the dough scraps and re-roll. Use the maple leaf cutter to cut as many leaves as you can. Brush the entire top crust of the pie with egg white. Arrange the cut leaves around the edge of the pie to form a pretty border, using the egg white to stick them together then brush the tops of the leaves with egg white.
- Place the pie a sheet tray and bake on the bottom rack of the oven (directly onto the baking steel/stone if using). Bake until the crust is golden brown, the juices in the center of the pie are bubbling and the fruit in the middle of the pie is tender, about 1 hour.
- Combine 2 oz confectioner’s sugar and 2 oz maple syrup in a small bowl and whisk until smooth. It should be the texture of thick cream or crepe batter
- Remove the pie from the oven and allow to cool about 10 minutes. Drizzle the glaze over the top crust of the pie (not the border). Use a pastry brush to distribute the glaze evenly over the pie right up to, but not on, the decorative border. Any excess glaze can drip into the steam vent.
- Allow to cool completely before serving, at least 3-4 hours. The glaze will set as the pie cools
Would you like to save this recipe?


As an Amazon Associate and member of other affiliate programs, I earn from qualifying purchases.
Hello Eileen, most pie recipes call for a very hot oven, 400 -425 degrees for fifteen minutes and then turn down to 350 for 45 minutes. In fact many bakers I know bake the pie at 400 for 45 minutes. I am wondering why you advise 350 for the full hour or 325 for convection ( I have a convection oven) I am eager to try this recipe!
I am replying to my own post….I made the pie today and two very experienced pie bakers degreed it one of the best pies they ever ate! I baked it using your temperatures and time set on regular bake ( not convection) the pie was a marvel. Three eighty year olds and two mid sixties made it disappear leaving just a tiny piece for my husband. Your pie crust recipe is amazing as well and you are correct that patience is a key ingredient in making delicious flaky pie crust…We all go too fast these days! I usually use lard and butter .as that’s a common mix in Canada but I like your method of lard in first and then the butter. I chilled it over night. My SIL is a great pie maker and alway makes pie crust when she has a few minutes to spare and stashes it in the freezer for future baking. … don’t worry about my husband I have enough pastry for a few butter tarts tomorrow!
Sorry, I never saw this comment yesterday. Glad the pie turned out well.
I make mini or individual desserts for parties. Would this recipe work for individual pies? If so, how much should I reduce the baking time.
Thank you
Donna
Yes, I’ve done this recipe in mini individual serving pie pans. The problem with small pies is that they’re not in the oven long enough for the apples to bake through. When I make mini pies I precook the filling. You can follow the recipe as instructed, but instead of draining the apples and mixing 1/4 cup of the juice with the starch. Just put the apples and all of the juice into a pan. Cook the apples until they are crisp tender. Then add the corn starch and cooks until the juices thicken. Allow the filling to cool then assemble the pies. Since the filling is already cooked you just need to bake the individuals pies long enough to bake the crust.
Hi Eileen! I have lots of questions. I love your recipes and especially this recipe. It taste so sumptuous and the flavor is just perfect. I actually compared this recipe to another recipe made by a well known bakery in the D.C. area and your recipe was the winner in my family hands down! In fact, with the other recipe, the filling boiled over and made a mess. Not so sure why, but I am so happy I found a perfect apple pie recipe here.
Now, for the crust…I never tried making a homemade crust until yesterday and I love your recipe. But I am a novice. I was pleased with the single blind crust for my pumpkin pie, it looked and tasted delicious. However, I noticed the next morning there was was a little water formation on top of the pie. I had allowed the pie to cool after baking and then wrapped in aluminum foil that evening and placed in refrigerator. What would cause the water to form on top? I also had difficulty when making the double crust. The filling for the pie was fine, however,the top crust edges began falling down once I placed it in the oven. So, I tried it again, and still the edges of the top crust drooped down as if melting. The crust also taste just a little gummy or doughy. I used buttermilk instead of water. So, my questions are: what caused the water formation on the pumpkin pie? What caused the top crust edges to droop and fall? What makes the crust taste doughy? Lastly,what is the positive differences in your apple pie recipe and the other listed above? I am trying to understand the science of it all.
Thanks for your help!
Kay
Hi Kay – I’ll try to answer all your questions. I believe the water formation on the top of the pumpkin pie was simply condensation. Even if it was cooled to room temperature before going in the refrigerator, it will continue to cool and since it was covered it would form some condensation. In the future I would let the pie completely chill before covering. Even then you might get some condensation. I don’t think it’s a big deal to leave it uncovered if the condensation bothers you. Which crust recipe did you use, mine? Replacing the water with buttermilk would make a big difference. Buttermilk is acidic so it will tenderize the crust. There are also milk solids, a little fat and other things in buttermilk that are not in water. The crust would droop and fall because it was so tender with the addition of buttermilk and I think that would also make it taste doughy. The section of the post titled “Pie Science” explains why I macerate the fruit for the filling and how this prevents boil overs and mushy fruit. Hope this answers all your questions. I’m planning a whole series of posts about ingredients and mixing technique for pie dough (similar to my Cake Batter series). It will take some time to put together, but keep an eye out for it.
Thank you for answering my questions. I will try your crust recipe again…but this time without the buttermilk. But I must say, my family loved the pie filling and crust irregardless of the droopy edges. Thanks again for your incredibly delicious recipes!
Sure.
Hi Eileen! I truly enjoy this website. I want to make an apple pie without the maple glaze. Do you have a recipe for that or do I simply follow this recipe but leave out the ingredients for the maple glaze when preparing the pie. Thank you so much!
Yes, you can make this pie and just skip the step where you add the maple glaze. If you aren’t going to glaze the pie you can sprinkle the top crust with a little granulated sugar after you brush it with the egg white before you put it in the oven. I like the bit of crunch the sugar adds to the top crust.
Thanks Eileen! Excellent idea regarding sprinkling the sugar. Can’t wait to try this one!