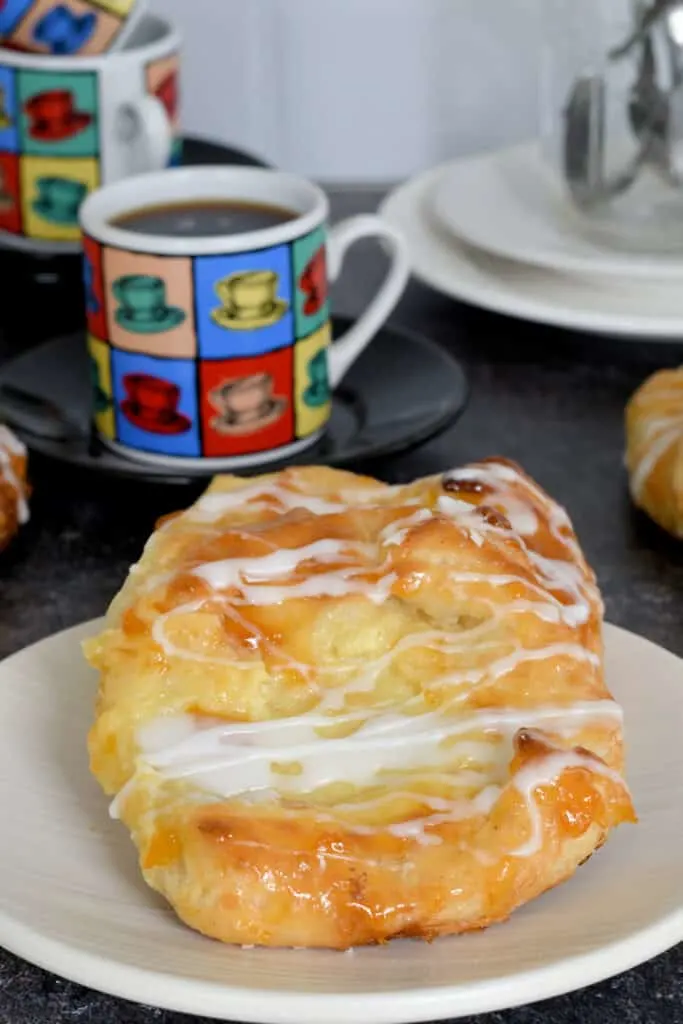
Glazed Cheese Danish


These beautiful Cheese Danish are made with real Danish pastry dough and a vanilla cheesecake filling. You can let the Danish pastry rise in the refrigerator overnight and bake it first thing in the morning.

You’ll find lots of Danish recipes that use puff pastry dough or even phyllo dough as a shortcut.
Those are not bad options and, honestly, if you don’t want to make your own dough go ahead and make this recipe with pre-made puff pastry. I am not the food police!
But, I will say that true Danish pastry is made with a special type of dough, and I think it’s worth the effort to make it yourself.
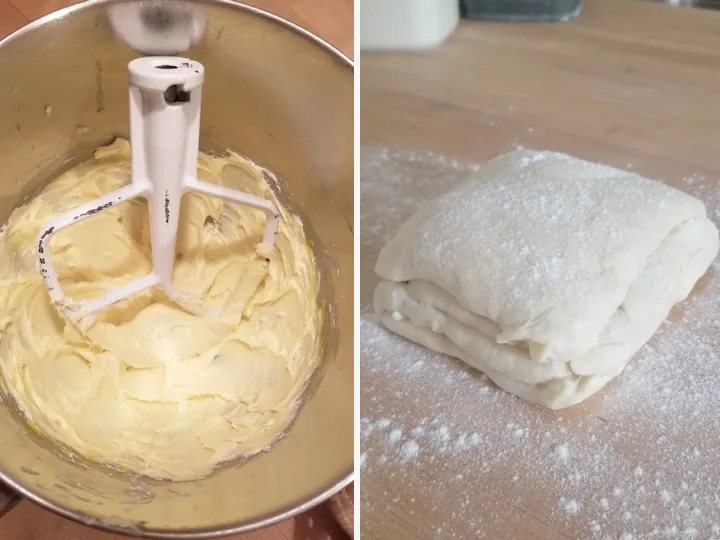
Like puff pastry, Kougin Amann and croissants, Danish dough is laminated (layered with butter).
The addition of yeast, sugar, milk and an egg yields a rich, slightly cakey dough that is the perfect wrapping for a sweet cheese filling.
You can use either a Quick Danish Pastry Dough or Sourdough Danish Pastry to make these Cheese Danish.
Here, I show you how to make individual Danish pastries. If you want to use this cheese filling to make a braided Danish, you can see photos in this post for Apple Danish Braid.
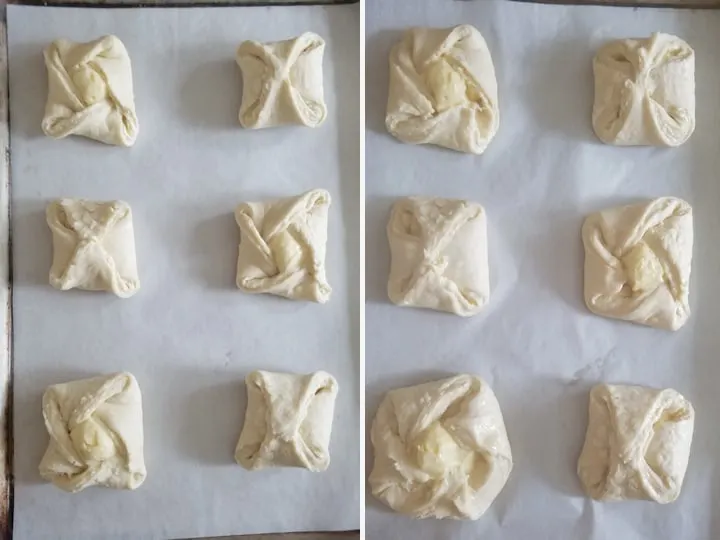
Scroll through the process photos to see how to make Cheese Danish from scratch:

A timeline for making homemade Cheese Danish
- The Danish pastry dough can made be early in the morning of day 1 (for yeasted dough, not sourdough), 1-2 days before, or up to several weeks before and frozen. If the dough is frozen, defrost in the refrigerator overnight.
- Early on day 1, make the cheese filling and refrigerate until chilled. The filling will firm up when chilled which makes it easier to assemble the pastries. The filling can be made up to 2 days ahead.
- Roll the dough and assemble the Danish late in the afternoon or early in the evening of day 1. Wrap the Danish on the sheet pans and refrigerate overnight.
- First thing in the morning on day 2, take the Danish out of the refrigerator. The dough should have risen during the night. The Danish will not double in size but should look puffy and lighter.
- Preheat the oven while the Danish comes to room temperature.
- Bake the Danish and cool to room temperature. It’s tempting to eat the Danish warm, but the flaky pastry tastes better when cooled.
- To make and bake the Danish in one day, you can skip the overnight refrigeration step. Have the dough made at least a day ahead. As soon as the Danish are assembled cover the trays and leave them 1 1/2 – 2 hours at room temperature to rise (the rise will take longer if you’re using Sourdough Danish Pastry).
- The Danish are best the day they are baked. Leftovers (lol) can be frozen.
I think you’ll like these other breakfast and brunch treats: Bear Claws, Sourdough Croissants, New York Bagels, Onion & Poppyseed Bialys, Banana Coffee Cake and French Crullers (made from Pate a Choux pastry).

If you love this recipe as much as I do, I’d really appreciate a star rating and a quick comment. Ratings and comments help my recipes show in search results. Thanks!

Cheese Danish Recipe
Ingredients
Cheese Filling
- 2 oz butter (room temperature)
- 3 oz granulated sugar (⅓ cup)
- 1 teaspoon vanilla extract
- ½ teaspoon finely grated lemon zest
- ½ teaspoon lemon juice
- ⅛ teaspoon table salt
- 4 oz cream cheese (room temperature)
- 1 large egg yolk
Assembly
- 1 recipe Danish Dough
- OR
- 1 recipe Sourdough Danish
- 1 large egg for egg wash
- ¼ cup apricot preserves
- 2-3 teaspoons milk
- 2 oz confectioner’s sugar (½ cup)
Instructions
Make the Cheese Filling
- Cream 2 oz butter with 3 oz granulated sugar, 1 teaspoon vanilla extract, ½ teaspoon finely grated lemon zest,½ teaspoon lemon juice,⅛ teaspoon table salt⅛ teaspoon table salt until smooth. Scrape the bowl thoroughly. Add 4 oz cream cheese and mix until smooth. Scrape the bowl thoroughly. Add 1 large egg yolk mix just until combined. Refrigerate the filling until ready to assemble the Danish. The filling can be made up to 2 days in advance.
Assembly:
- Line two half sheet pans with parchment paper.
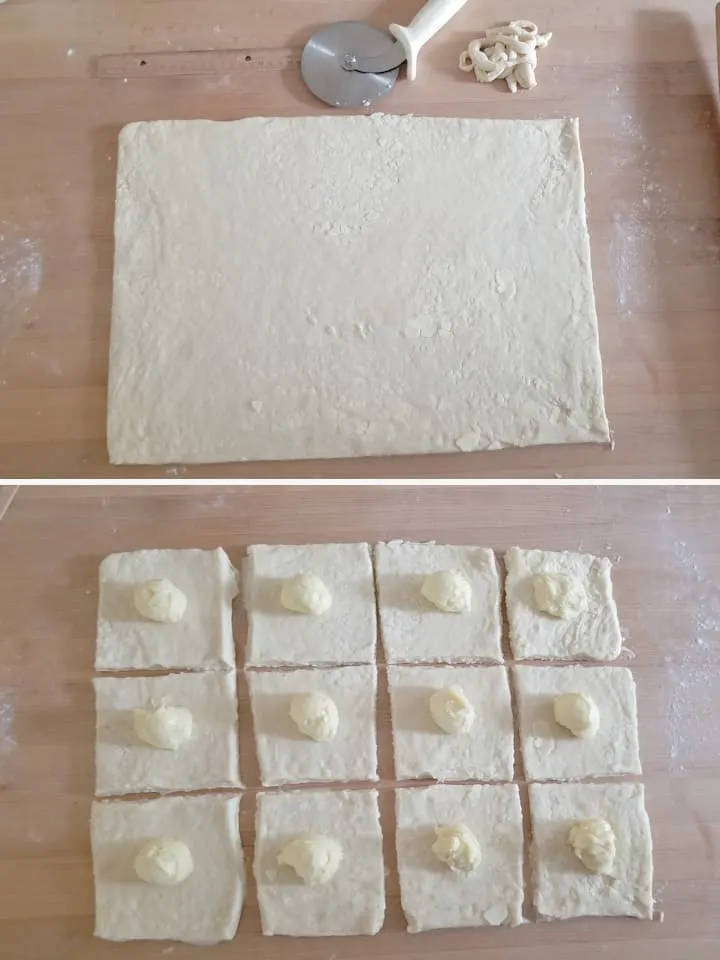
- Turn the dough out onto a lightly floured surface. Roll the dough to a 12” x 16” rectangle.
- Use a pizza cutter or sharp knife to cut the dough into twelve 4" squares. Put a generous tablespoon of filling into the middle of each square. You should use all the filling between the 12 pastries.
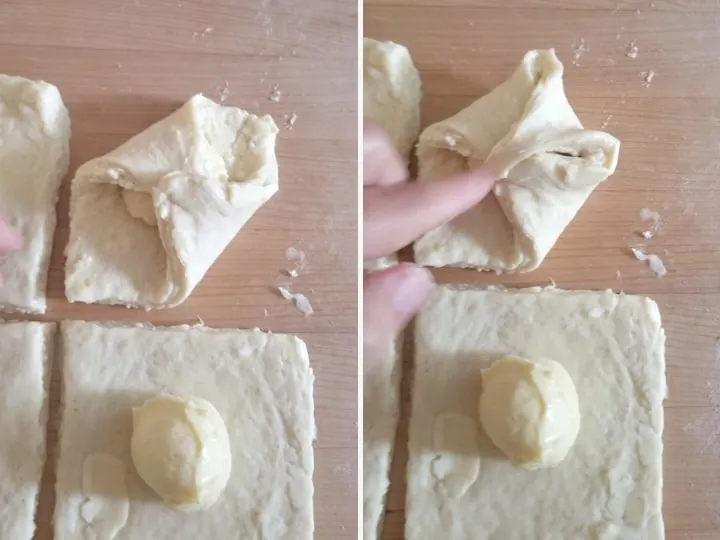
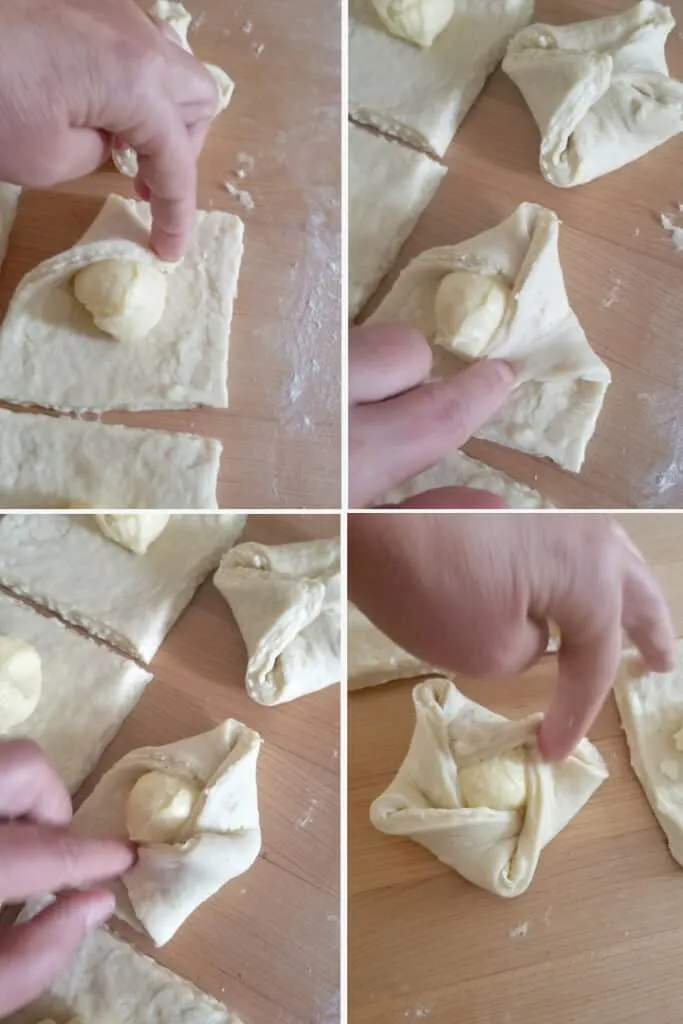
- Fold a corner of a square over the filling with the point in the middle. Fold the corner at the opposite side over the first corner. Now fold in the other two points to meet over the first two. You should have a little Danish package. Alternately, fold each point at an angle over the filling and touching the next side of the square to form more of a pinwheel shape (see photos). Place the Danish on the prepared baking sheets.
- Cover the pans with plastic wrap and set aside to rise for 1 1/2 – 2 hours, or refrigerate overnight. The rise time will vary based on the temperature of the dough and whether you use yeasted Danish dough or sourdough Danish. The dough should look lighter and a little puffy but won’t double in size. While the dough is rising, preheat the oven to 375 °F.
- Brush each Danish with egg wash. Bake in the middle rack of the oven until the dough is golden brown, about 15 minutes. As soon as the Danish comes out of the oven, brush with the apricot preserves. Cool for 10 minutes.
- Stir the milk into the confectioner’s sugar. The glaze should have the texture of pancake batter. Add more sugar if it’s too loose or more milk if it’s too thick. Use a fork or whisk to drizzle the glaze over the Danish.
- Serve at room temperature.
Would you like to save this recipe?


As an Amazon Associate and member of other affiliate programs, I earn from qualifying purchases.

Great recipe but how do you stop the danish opening up as it rises? I shaped them but all puffed open either in the rise or in the oven.
Which shape did you make? At any point if your dough seems like it’s springing back you can give it a rest. You can also use egg wash to “glue” the danish. Also, honestly, I often have some of them open up, as is noted in the post.
I just made these with the sourdough Danish dough. I was not very confident in my ability to make these because I normally make bread or muffins with my starter.
All of the “work” for the dough and to make these is 100% worth it. The end result is nothing short of delectable. The dough is so flakey and inused raspberry preserves. So delicious with the lemon in the cream cheese
I highly recommend this recipe, and I could have eaten every one
Thus is a great recipe and my go to on Sunday morning I’ve made these so many times I felt I had to leave a comment