Classic Puff Pastry

Let’s learn how to make Classic Puff Pastry, the queen of all doughs. Though the process does take some time, if you can use a rolling pin, you can make this essential recipe.
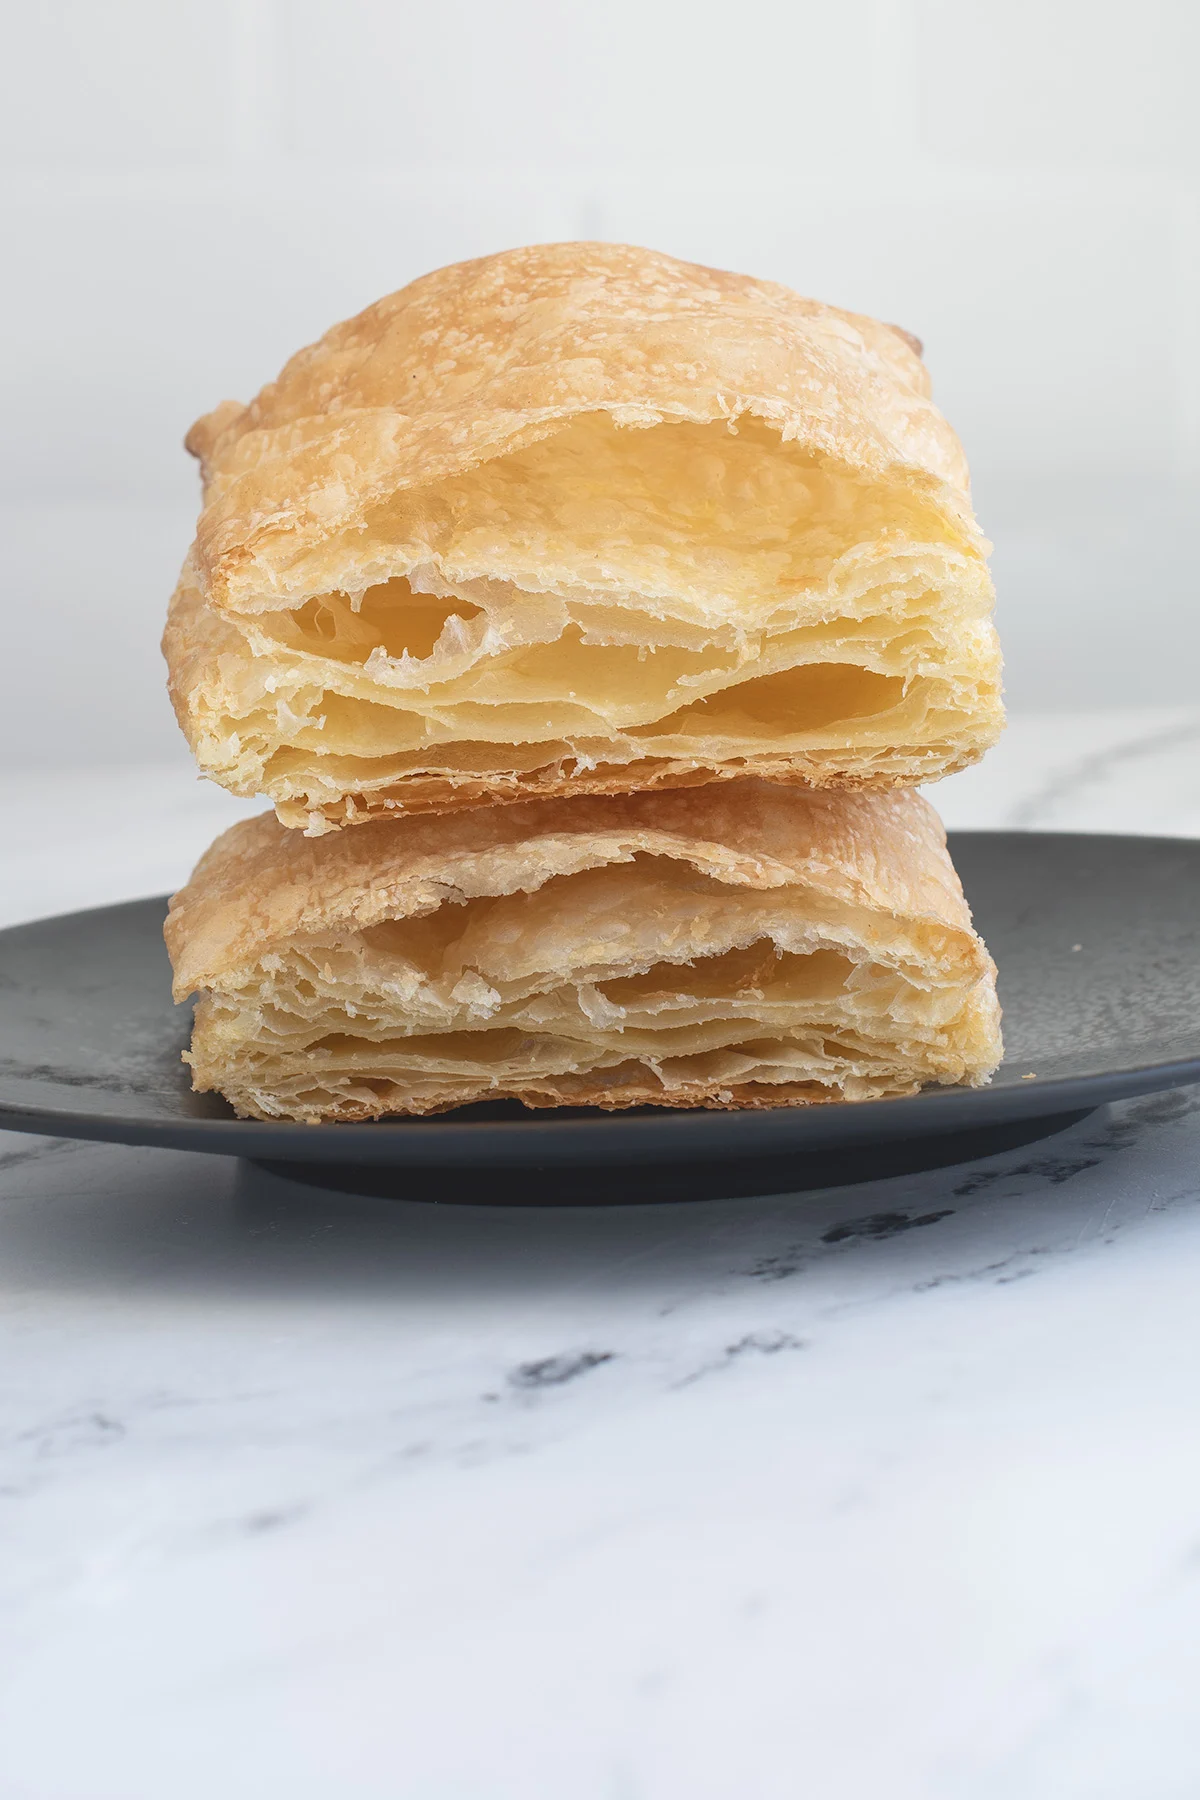
Table of contents
What is puff pastry?
Puff Pastry is a so-called “laminated” dough.
What is a laminated dough?
Take a big block of solid butter and wrap it with pastry dough. Then roll, fold, roll, fold the dough over and over, creating hundreds of super-thin layers of dough separated by super-thin layers of butter. Croissants, Danish pastry and Kouign-Amann are also made with laminated dough.
When puff pastry dough goes into the oven, the butter melts, preventing the layers of dough from sticking together. The steam causes the layers to rise as they bake.
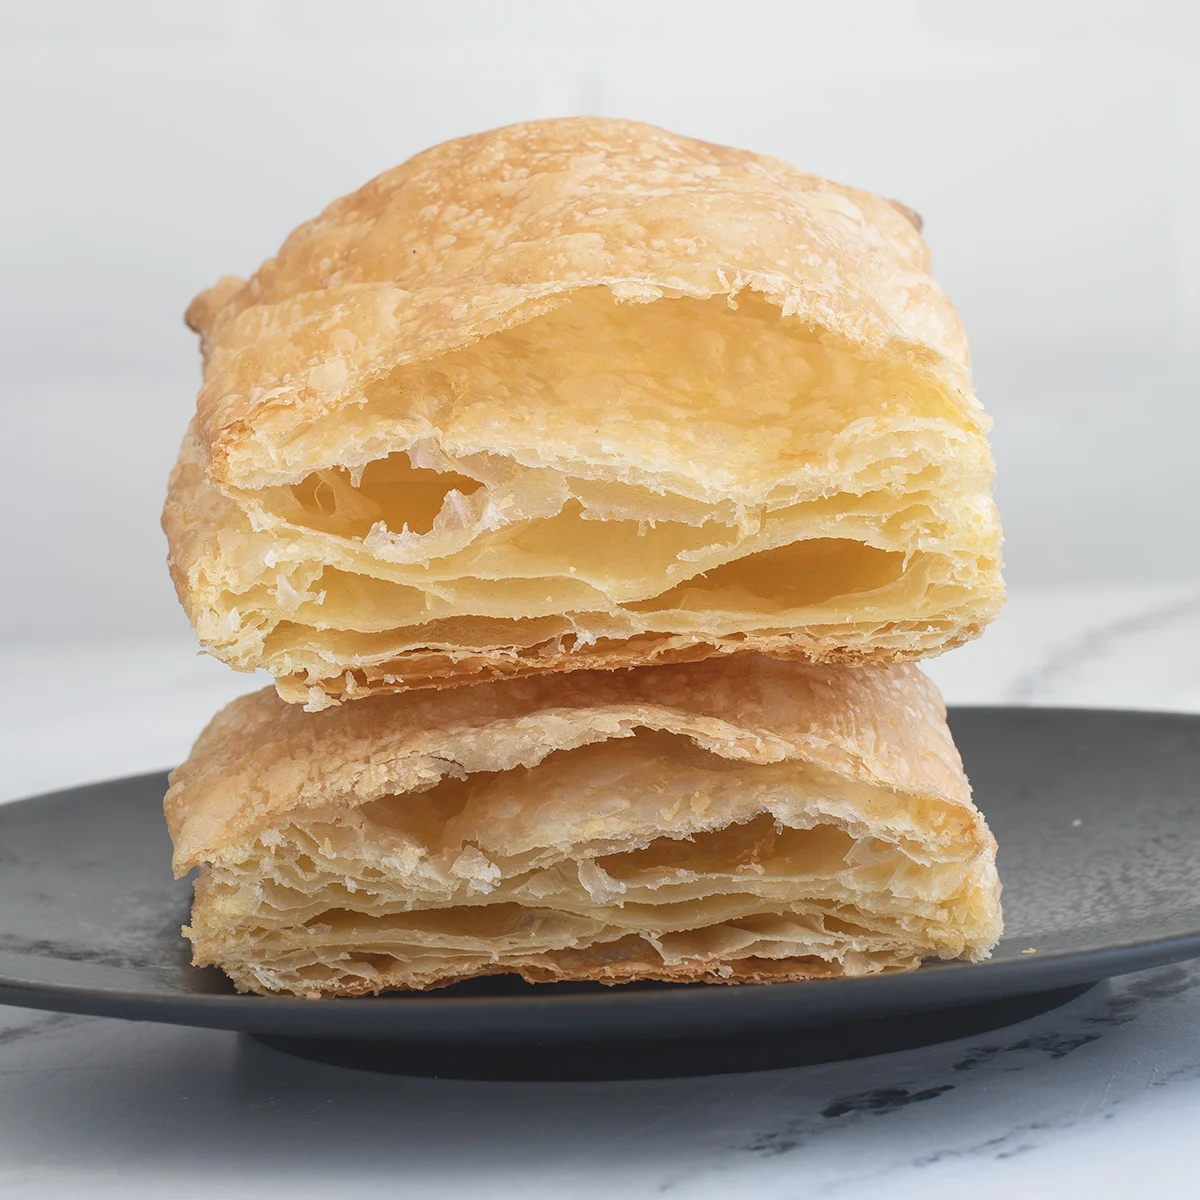
What you end up with is a super-light, crisp and flaky pastry that has exactly 729 layers and about 100000001 uses.
Watch the video and scroll through the detailed process photos to see how to roll and fold the dough. Then just take your time without rushing the process and you’ll have great results.
Ingredients
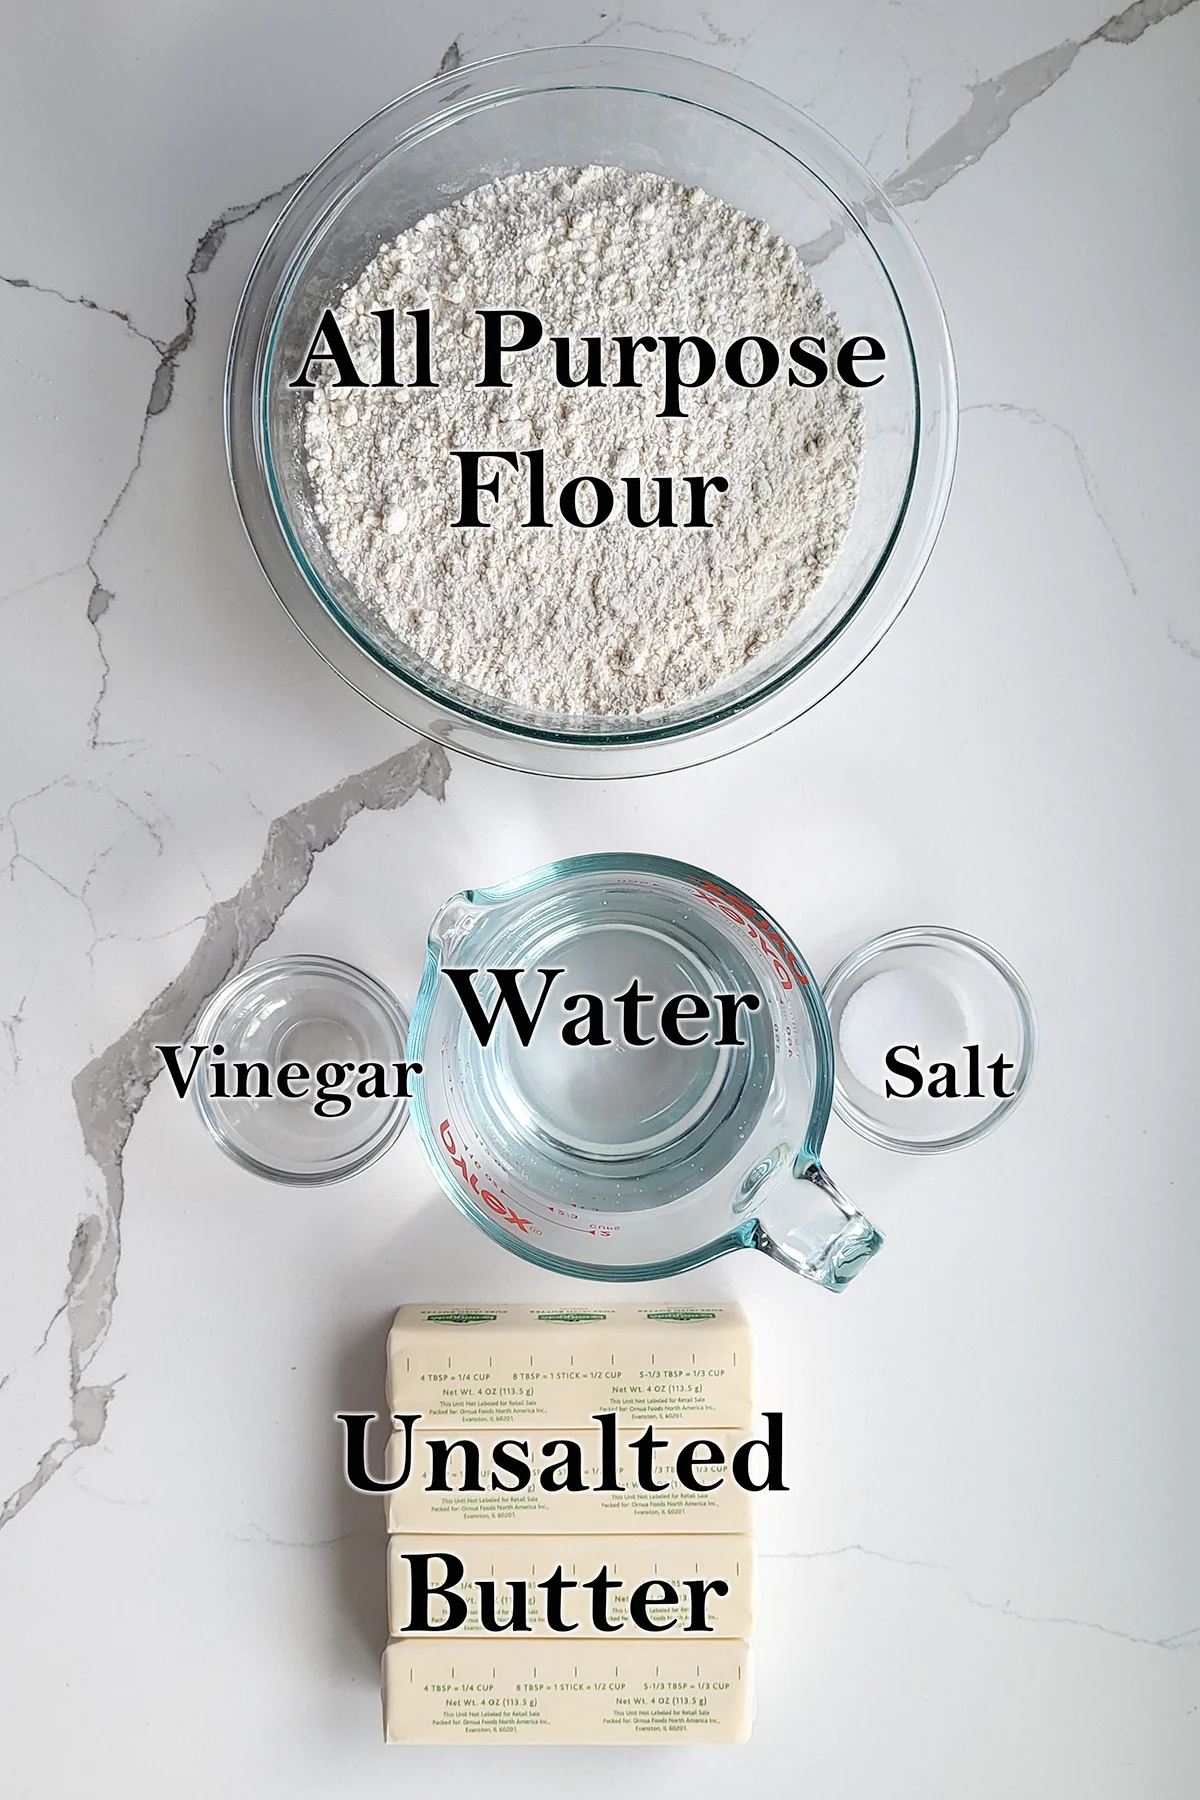
Ingredient Notes
- All Purpose Flour – Medium protein all purpose flour makes a dough with a good balance of strength and tenderness.
- Unsalted Butter – Unsalted butter allows you to control the amount of salt in the dough. For this recipe I prefer to use European style butter for it’s soft and flexible texture.
- Vinegar – The acidity in the vinegar helps tenderize the dough and makes it easier to roll.
How to make Classic Puff Pastry
Here’s what the recipe process looks like at each stage. Refer to the recipe card below for measurements and exact instructions.
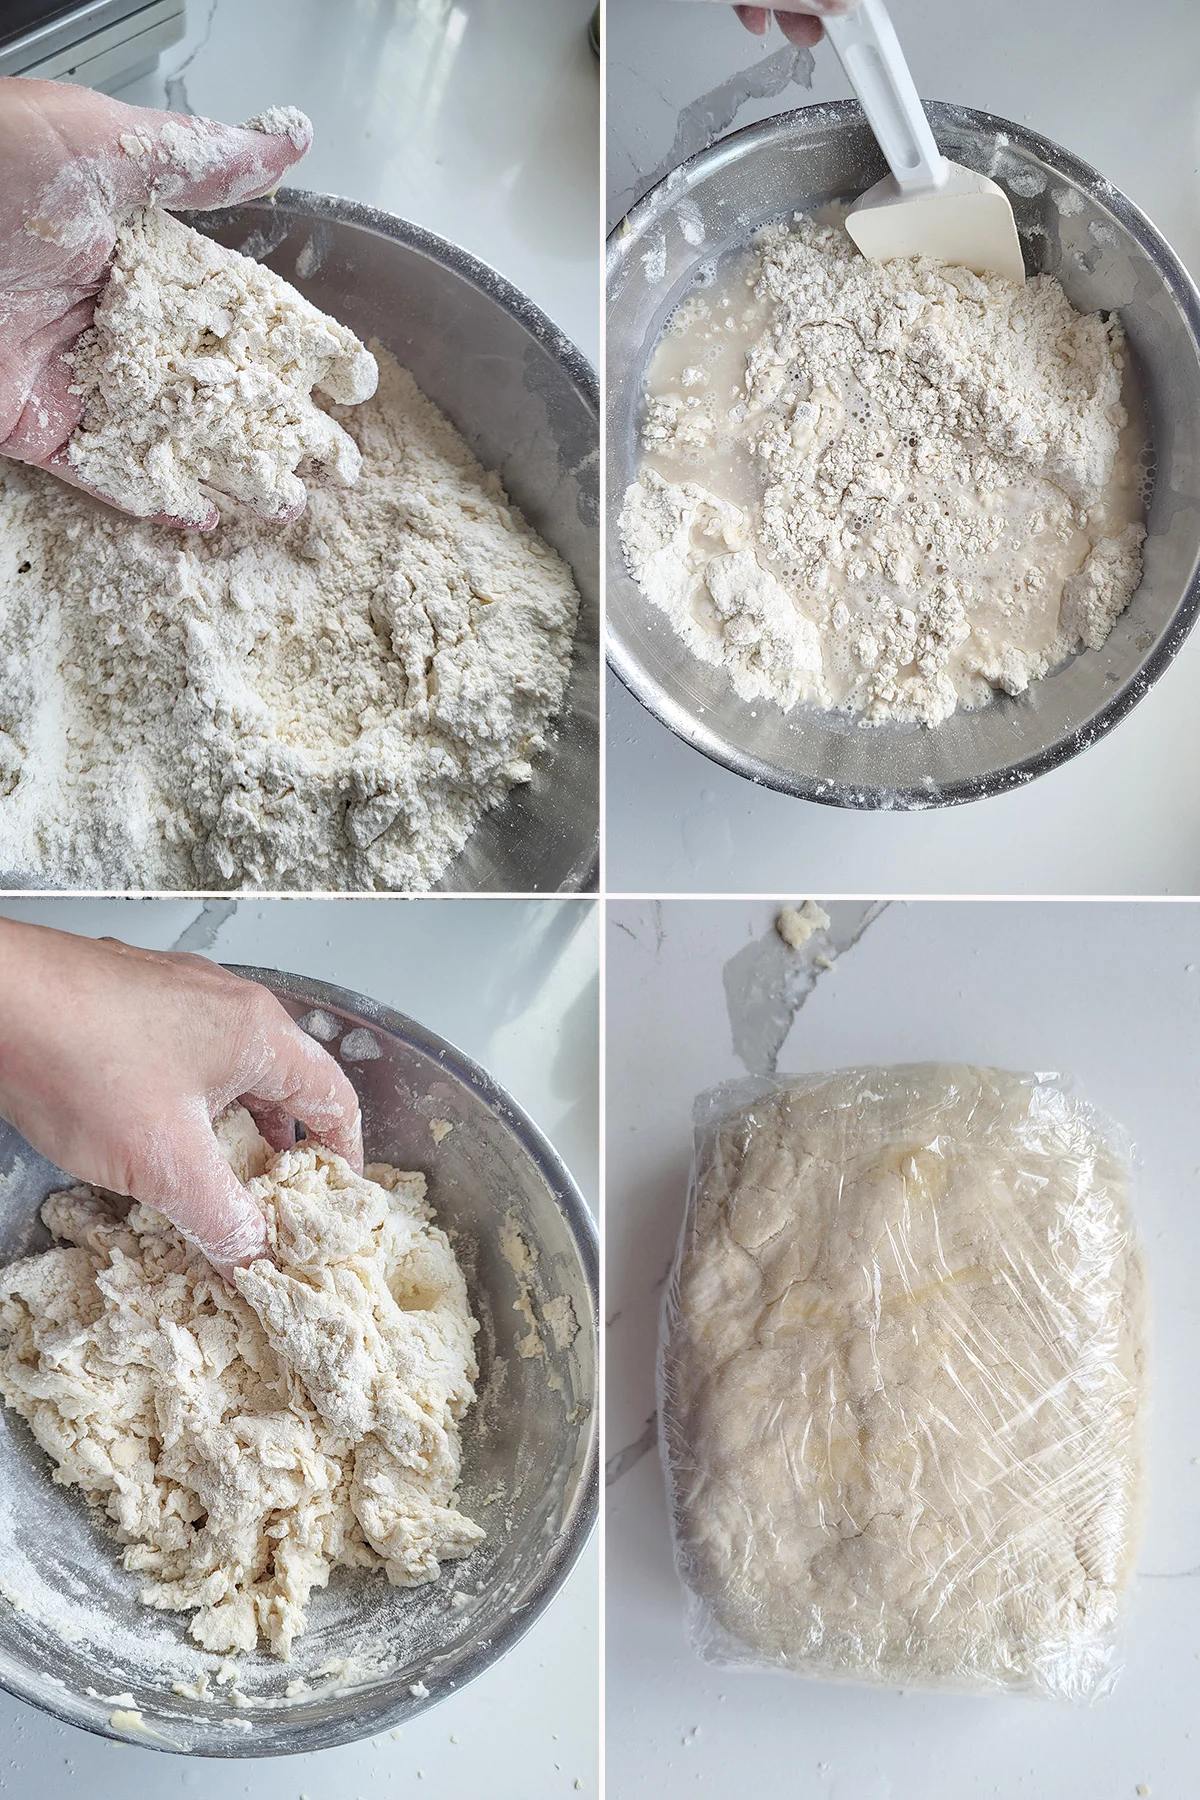
- Work 2 ounces of the butter into the flour.
- Add the water and stir until almost combined
- Finish kneading the dough by hand.
- Wrap the dough and refrigerate for at least 30 minutes.
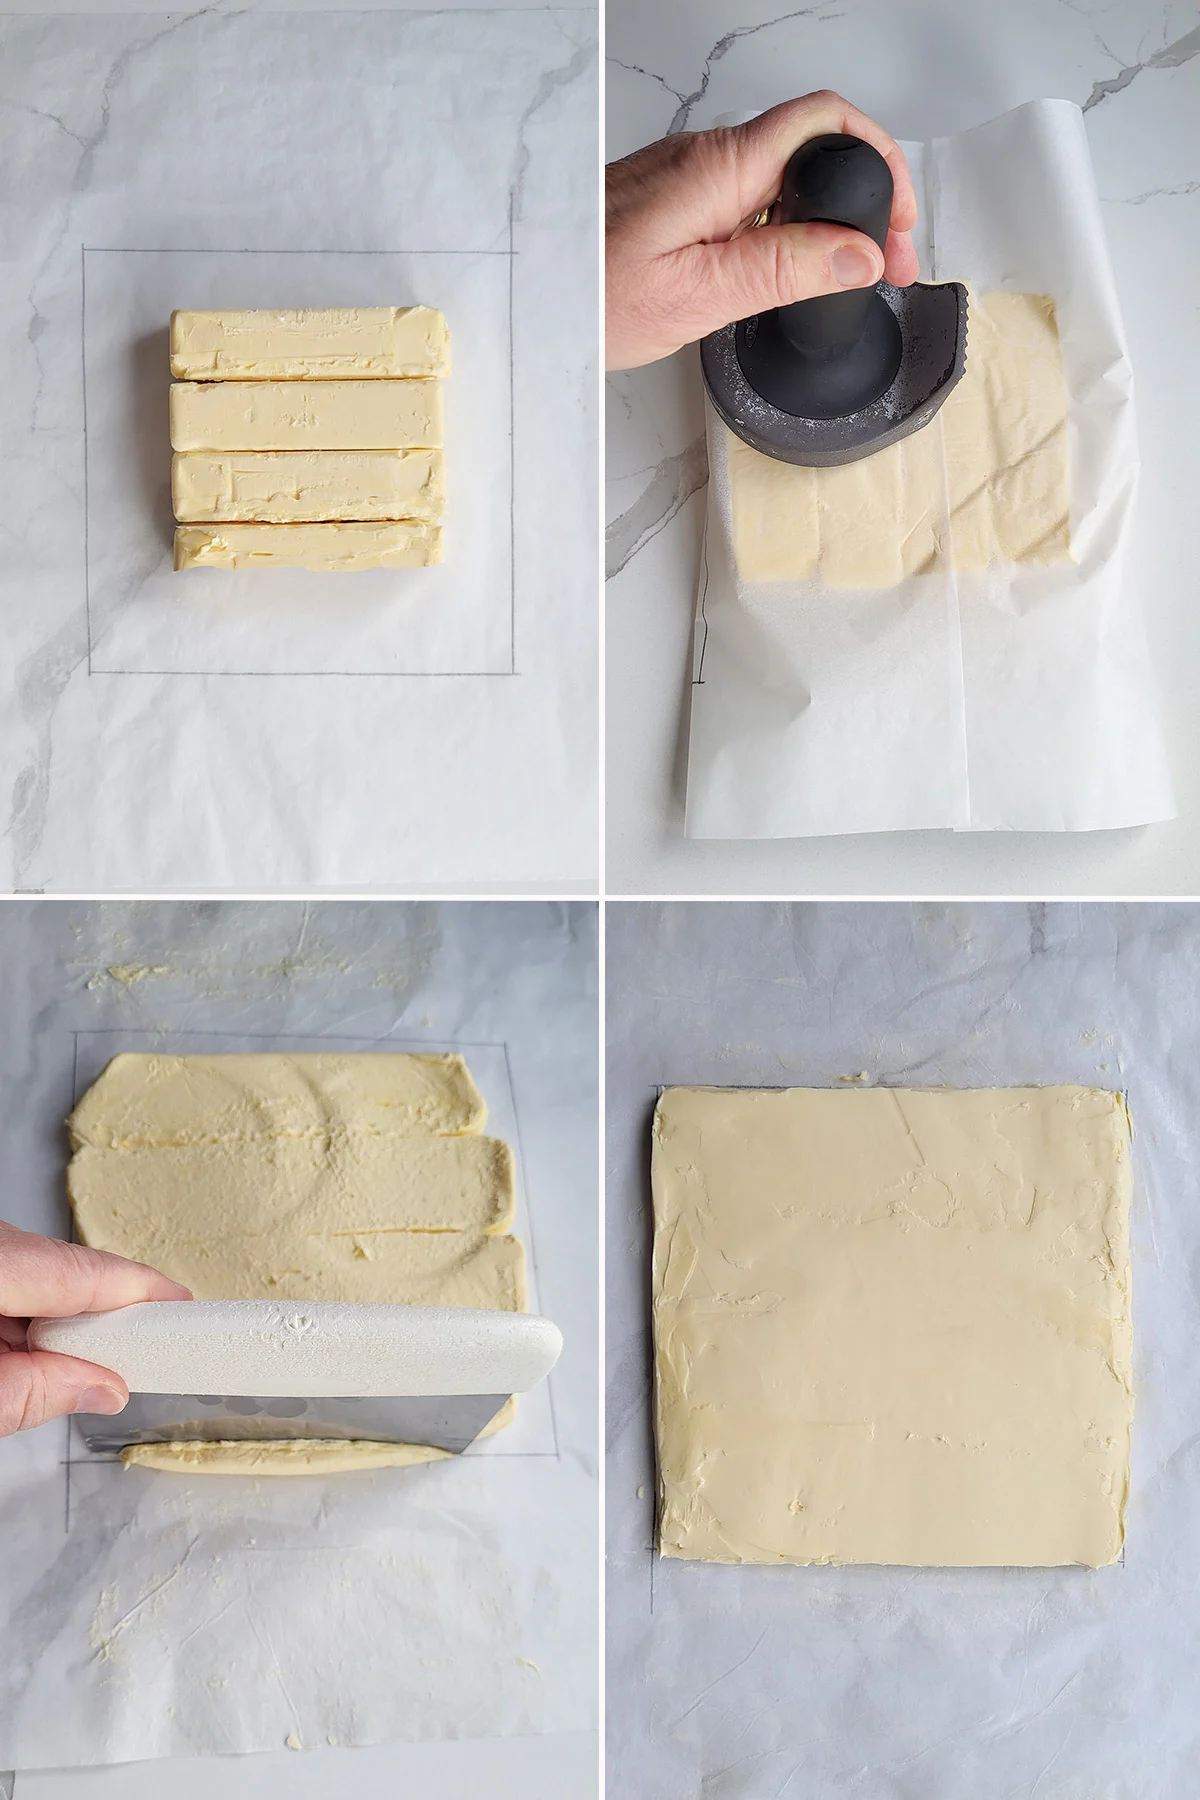
- Draw an 8″ square in the center of a piece of parchment and place the butter in the square.
- Fold the paper over the butter and use a heavy object to pound the butter to an even layer that fills the square.
- Unfold the paper and rearrange the butter as you go.
- Wrap the butter in the paper and refrigerate for at least 30 minutes before proceeding.
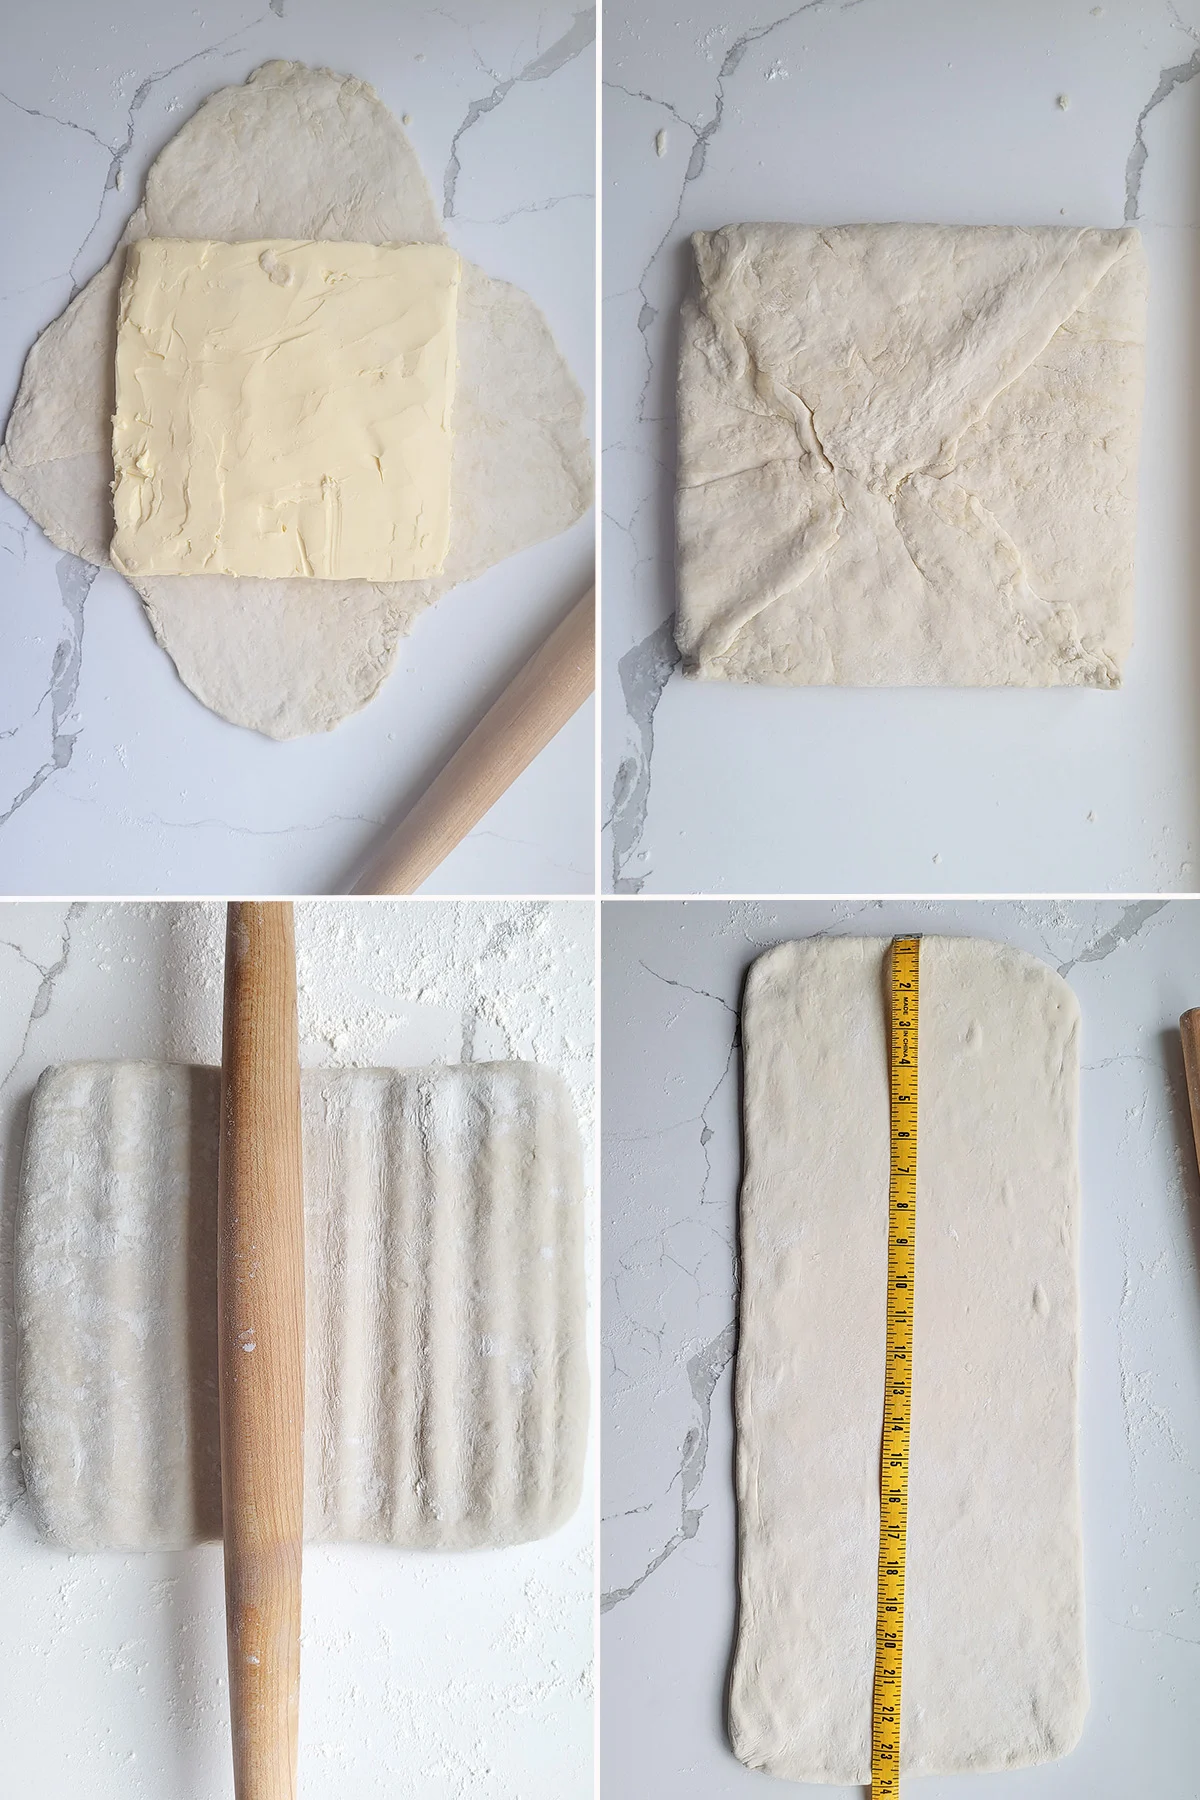
- Roll the dough to a square with a “flap” coming out on each side. Set the butter in the center.
- Fold the flaps over to encase the butter and pinch the seams closed.
- Flip the dough over then use the rolling pin to slowly press the dough to begin the rolling process.
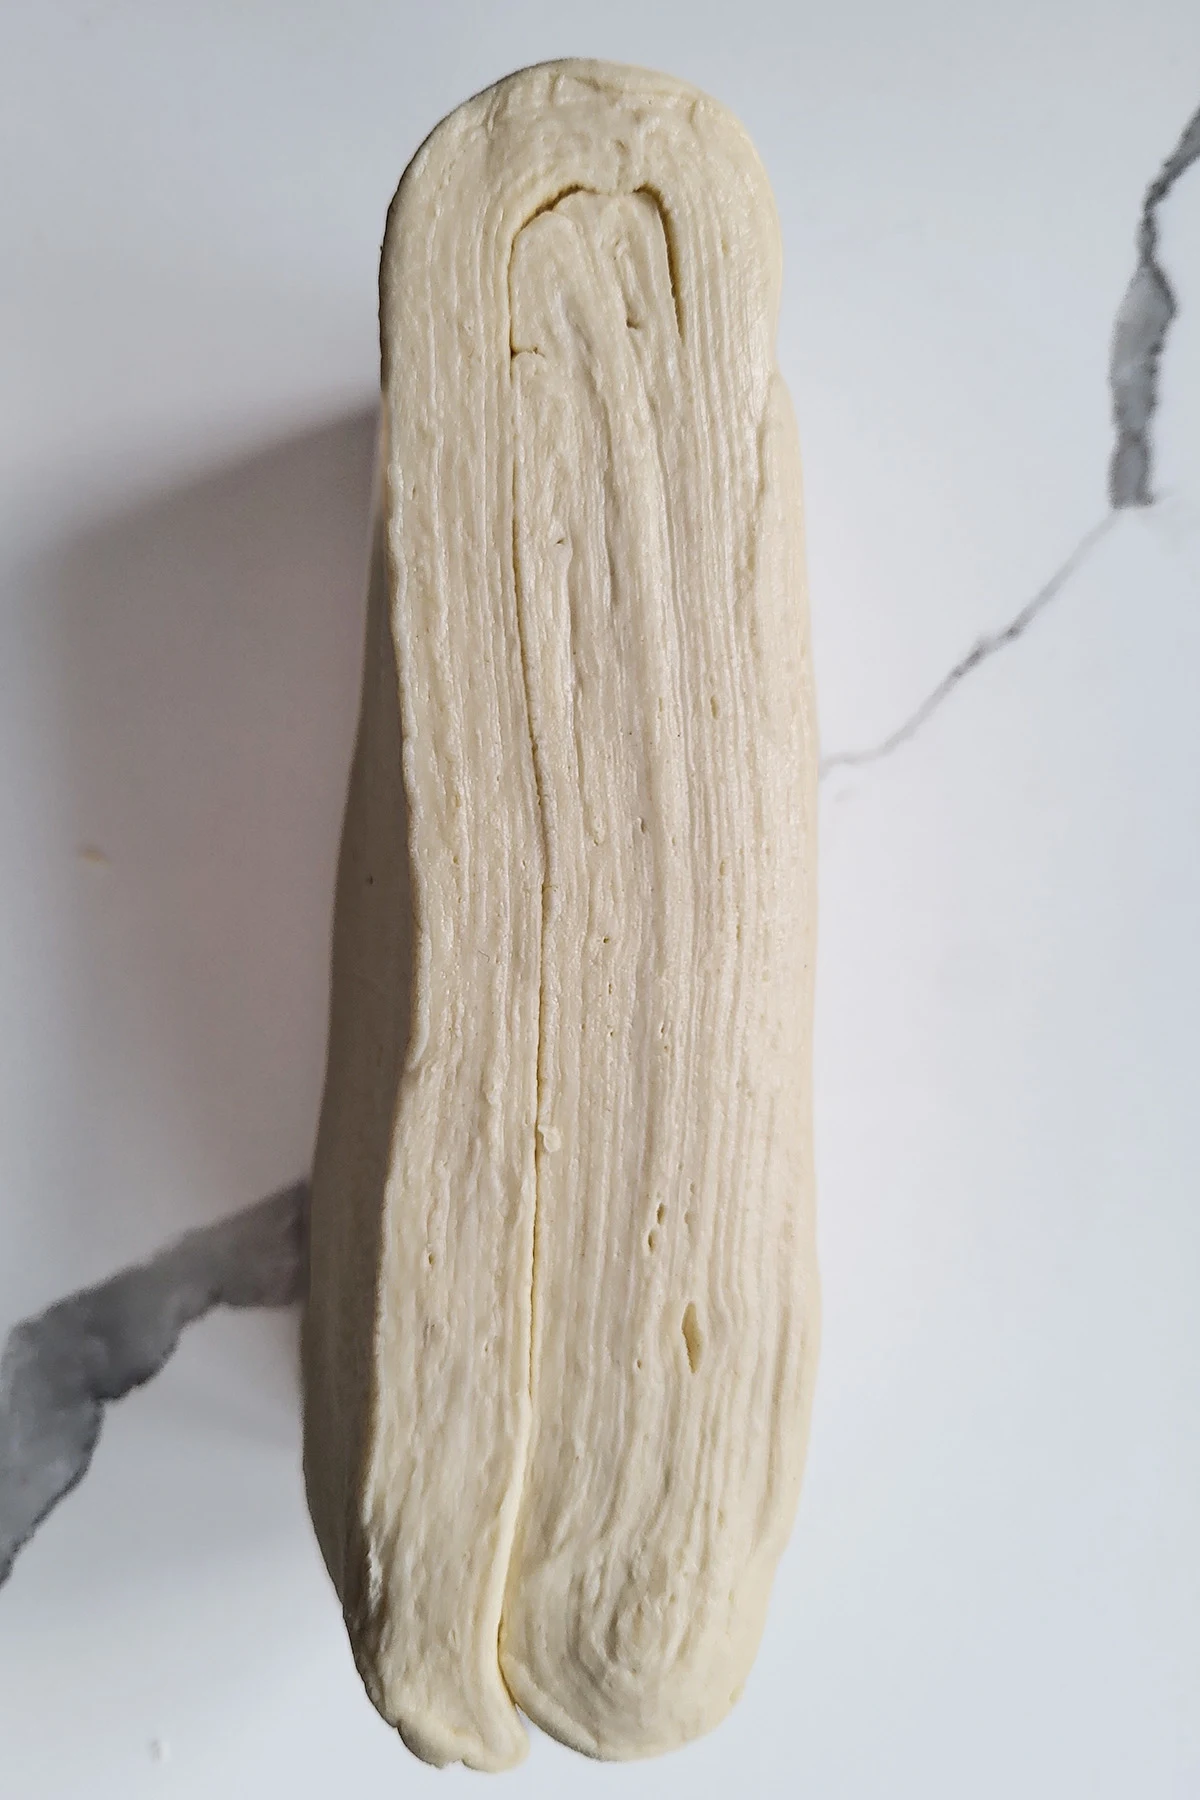
- Slowly and steadily roll the dough to an 8″x24″ rectangle.
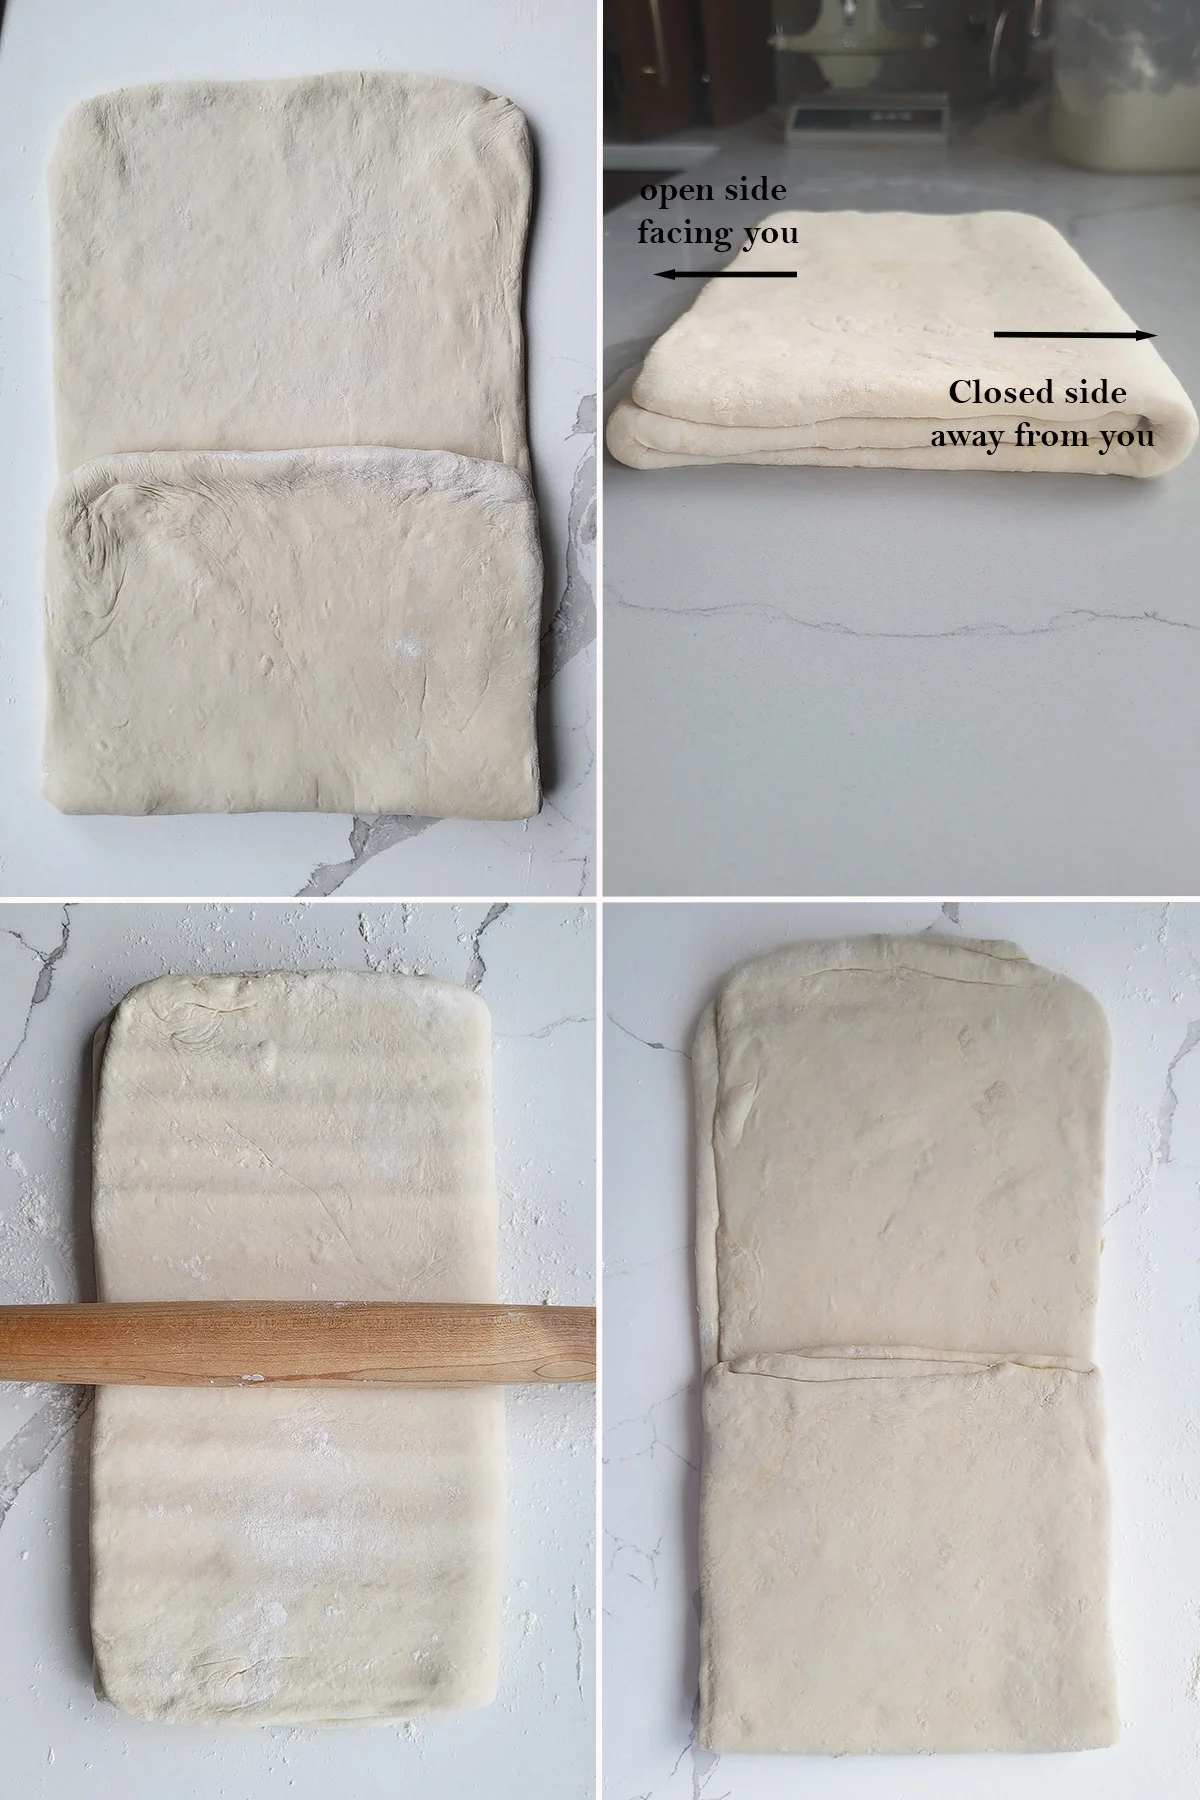
- Fold the dough into 3rds, like a letter. This is your first “turn”.
- Flip the dough so the open side is facing you and the closed side is opposite.
- Roll the dough to an 8″x24″ rectangle.
- Fold the dough like a letter. This is your second “turn”.
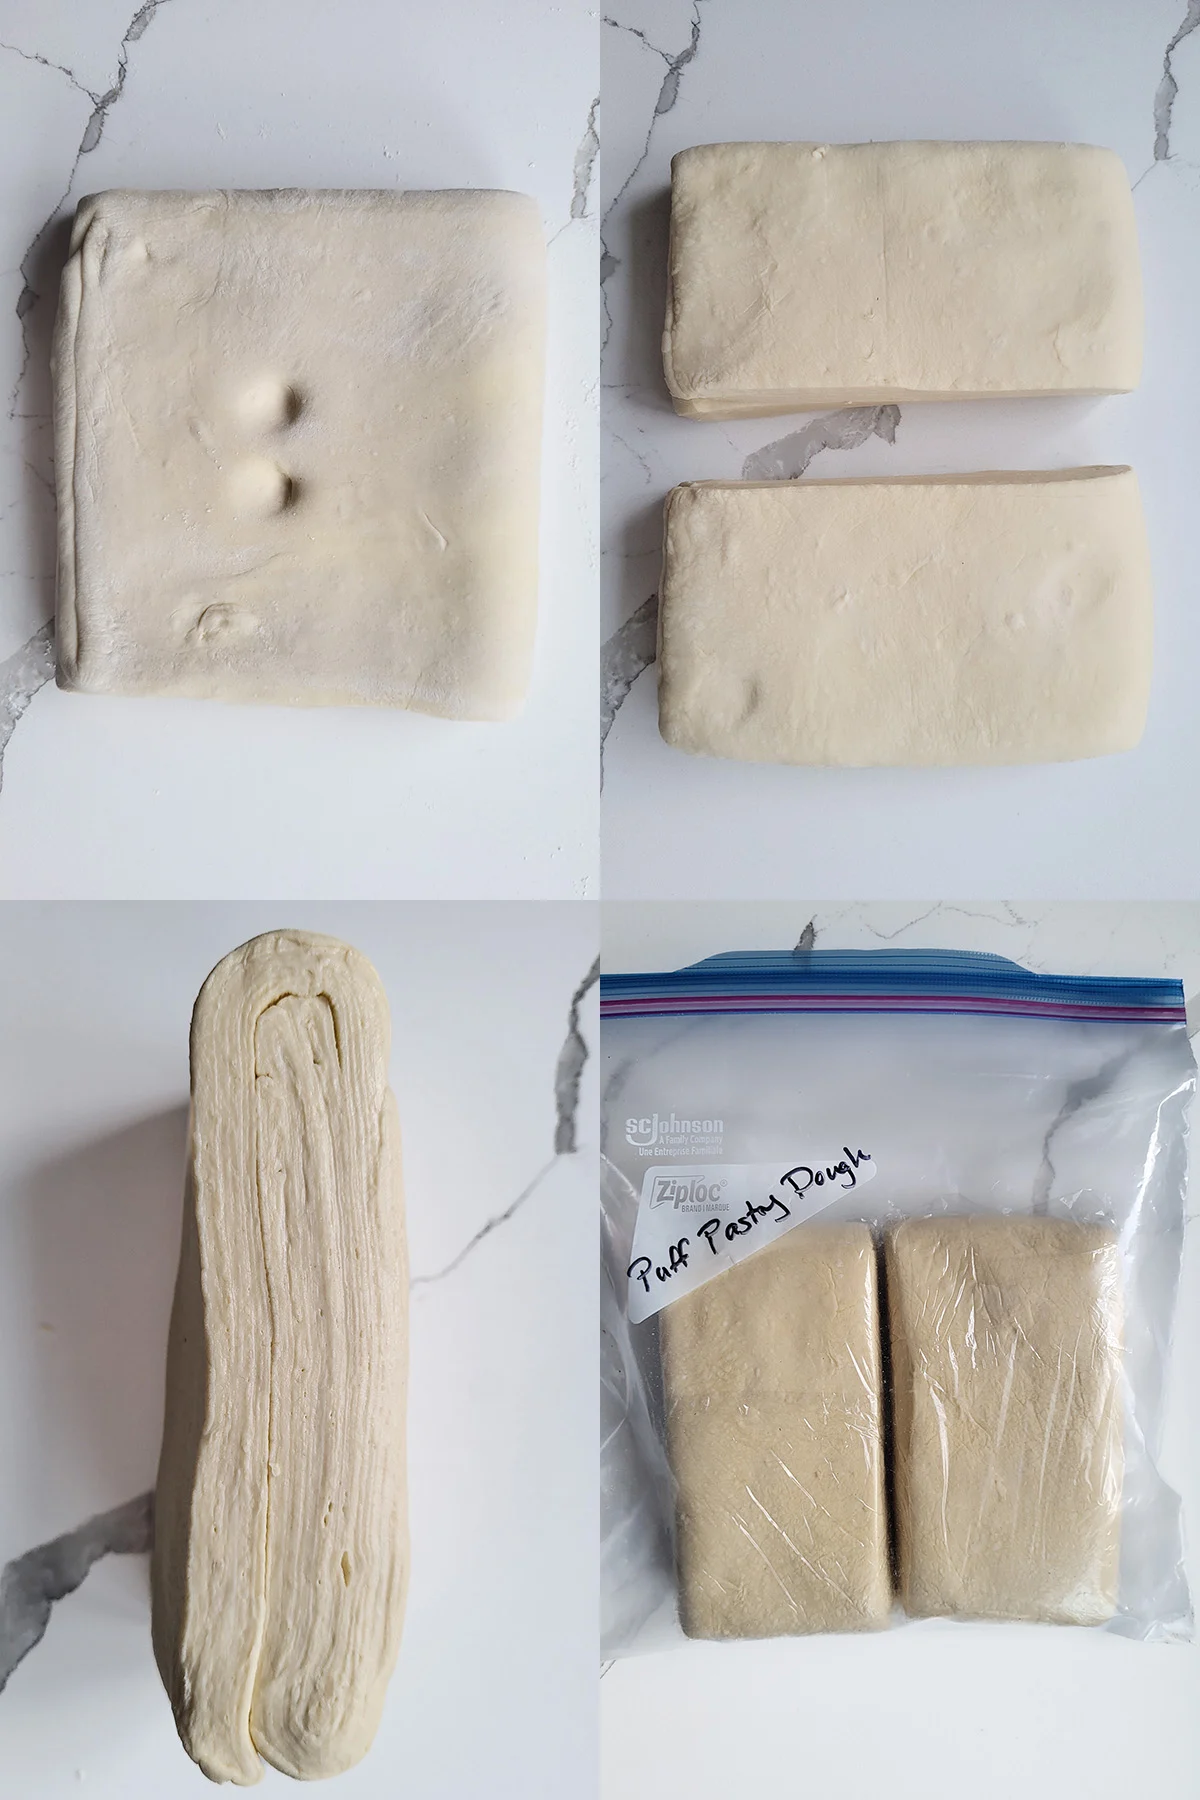
- Make indentations in the dough to keep track of the number of turns completed. Refrigerate the dough for 1 hour between turns. Make a total of 6 turns. After the 6th turn refrigerate the dough for 2 hours.
- After a 2 hour rest the dough is ready to use or to store for later.
- After 6 turns the dough has over 700 distinct layers.
- To store the dough wrap each half in plastic. Store them in the refrigerator for 2-3 days or in the freezer for up to 3 months.
Pastry Chef tips for making Puff Pastry from scratch
- At all times the butter must stay cold. Any time you feel the butter may be getting too soft put the dough in the refrigerator for 30 minutes to cool it down.
- If you find that the dough is springing back as you try to roll, give it a 15-20 minute rest in the refrigerator before continuing.
- Split the completed dough in half to a more manageable size for rolling or storage.
- This recipe yield is equal to about 4 sheets of pre-made, frozen puff pastry dough.
Storage
You can store puff pastry dough for 2-3 days in the refrigerator or in the freezer for up to 3 months. The dough can be frozen before or after rolling.
How to use Puff Pastry
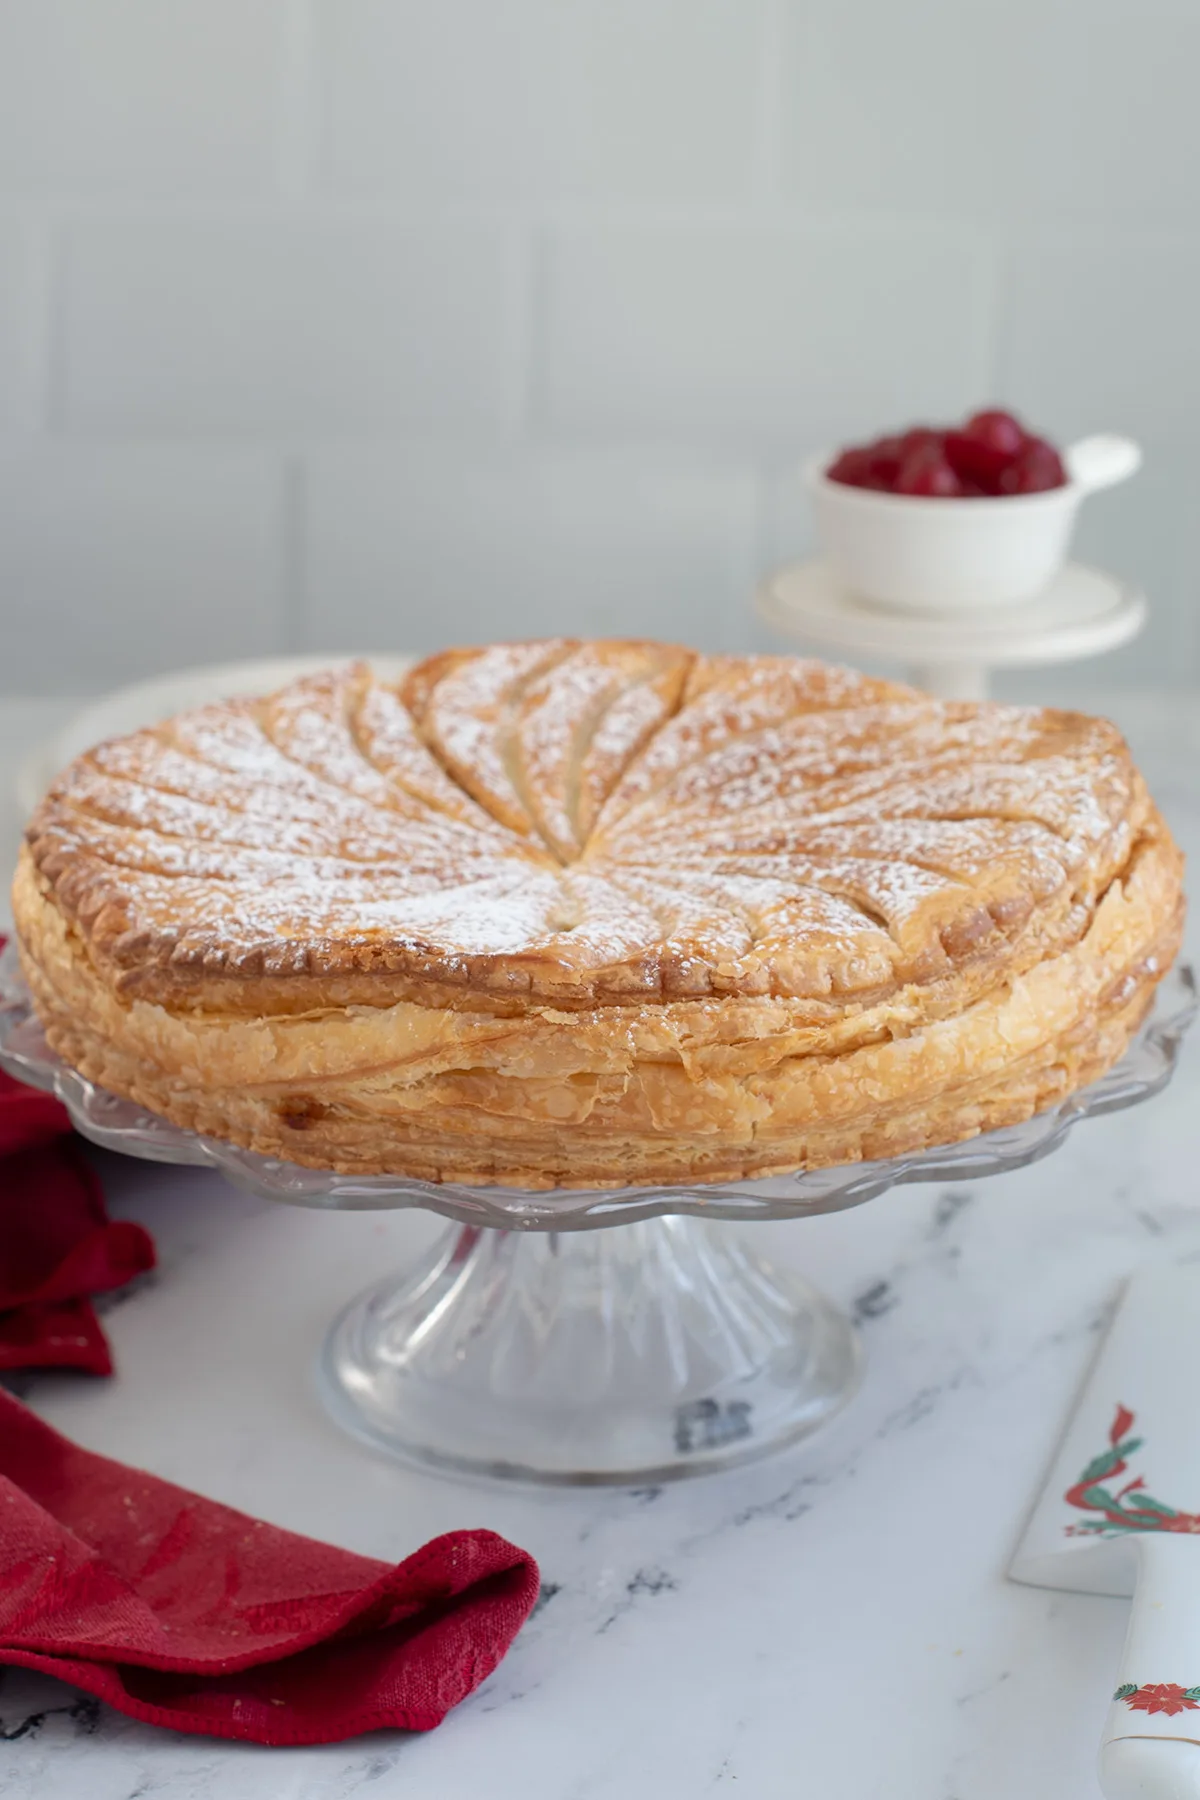
- Make a classic Galette des Rois (aka Pithivier)
- Top an Apple Pot Pie
- Fill baked puff pastry sheets with Pastry Cream and top with Fondant Icing to make a classic Napoleon
- Use it as the base for a Tarte Tatin
- Use it to make a Strudel instead of using Phyllo dough
If you love this recipe as much as I do, please consider leaving a 5-star review.

Classic Puff Pastry
Video
Ingredients
- 8 oz cold water (1 cups)
- 1 tablespoon white vinegar
- 1 ½ teaspoons table salt
- 16 oz all purpose flour (3 ¼ cups, see note)
- 16 oz unsalted butter (preferably European style butter)
Instructions
- Mix together 8 oz cold water, 1 tablespoon white vinegar and 1 ½ teaspoons table salt. Stir to dissolve the salt. Place 16 oz all purpose flour into a large mixing bowl. Cut 2 oz of the butter into small cubes and use your fingers to work the butter into the flour. Pour the water over the flour and use a silicone spatula or wooden spoon to mix until most of the water is absorbed.
- Still working in the bowl, gently squeeze the dough until it comes together. Knead just a few times to form the dough into a ball, wrap in plastic and refrigerate at least 30 minutes.
- Draw an 8" square in the center of a 12"x16" piece of parchment paper. Flip the paper over and line the remaining butter in the middle of the square.
- Fold the parchment over the butter to form a packet. Use a rolling pin or other heavy object (I use the flat side of a meat tenderizer) to flatten the butter to fill the 8"x 8" square. You can lift the paper if it sticks. Trim and rearrange the edges of the butter as needed to make a neat square. Fold the butter into the parchment and place in the refrigerator.
- Remove the dough from the refrigerator. Roll the dough to a 10" square. Once you have a square, roll from each of the four sides to form a 3" flap of the dough, leaving the center thicker than the flaps. You should end up with a square with a "flap" coming out from each side.
- Unwrap the butter and place it in the middle of the square. Fold the flaps so they overlap and enclose the butter, tucking in the corners as necessary. You should now have an 8" square of dough with the butter enclosed. Flip the dough over so the seam side is down.
- Use the rolling pin to gently press on the square to flatten it. Roll the dough to a 8" x 24" rectangle. Take your time to roll gently and evenly so the butter stays in the dough.
- The long side of the rectangle should be facing you. Brush off the excess flour. Fold the right ⅓ of the dough towards the middle then fold the left ⅓ of dough over enclosing it like a letter. This is the first "turn".
- Spin the dough so the closed edge is on the top side and the flap edge is facing you. Roll the dough again to an 8"x24" rectangle. Brush off the excess flour and again fold the dough like a letter. This is the second "turn". Use your fingers to make 2 indentations in the dough. This helps keep track of how many turns you have completed.
- Wrap the dough and set it on a sheet pan. Refrigerate at least 60 minutes.
- Remove the dough from the refrigerator and do another turn exactly like the first 2. Make 3 indentations in the dough, wrap and refrigerate at least 60 minutes.
- Continue rolling, folding and refrigerating the dough until you've done 6 turns.
- Split the dough into 2 equal portions. Wrap the dough and refrigerate at least 1-2 hours, preferably overnight, before using. The dough is now ready to be used in any recipe. Unused dough can be frozen for up to 3 months. Defrost before using.
Would you like to save this recipe?


As an Amazon Associate and member of other affiliate programs, I earn from qualifying purchases.
where is the link to your video please? i would like to watch it.
If you’re running an ad blocker the video won’t run. If you turn off your ad blocker you should see the video player.
Hi this recipe looks amazing but I was just wondering, I’ve had a look at some other traditional puff pastry recipes and it seems you have to refrigerate the dough for an odd 2 hours after the butter has been incorporated. Is there a reason you don’t refrigerate it here?
Also, is this similar to a “cheat rough puff pastry” or is this a traditional puff pastry method that would be used in bakeries? Thank you so much!
p.s can’t wait to try this recipe out!
You do need to refrigerate the dough at the end before using in a recipe. The recipe does call for you to refrigerate between “turns”. The main reason for refrigerating is to keep the butter from melting out and also to rest the dough if it’s gets too springy. You can use your judgement if you need to rest or chill the dough. In the warmer months the dough will probably need more chilling. In a cool kitchen during the cooler months I can often get away with doing 2 turns between chilling. Rough puff pastry is different in that usually the butter is worked directly into the flour rather than making a butter packet.
Good day,how are you ? I recently tried the pastries and I am very pleased with the results. Thank You
Sounds good! I would love to try this but there is an ad covering up half of the recipe. Hope you’re making good money off this.
How rude! Do you think I should spend weeks developing, testing, photographing and writing about this recipe and then make no money? Should I work for free to give you free content?
Hi, there…I’ve been making pretty good puff pastry for a while and your recipe certainly fits the bill! My question: is there a way to avoid the pâte from widening out when rolling? It’s fine for the first couple of turns but gets progressively wider. Don’t want to fold it over itself as it likely would not incorporate and I wouldn’t want to ruin the layering. Any suggestions would be greatly appreciated! Thanks, mac
By “widening” do you mean that if you’re trying to roll an 8″x24″ rectangle the dough goes wider than 8″? Are you rolling wide-ways? In other words, in the direction you want the longer side of the rectangle?