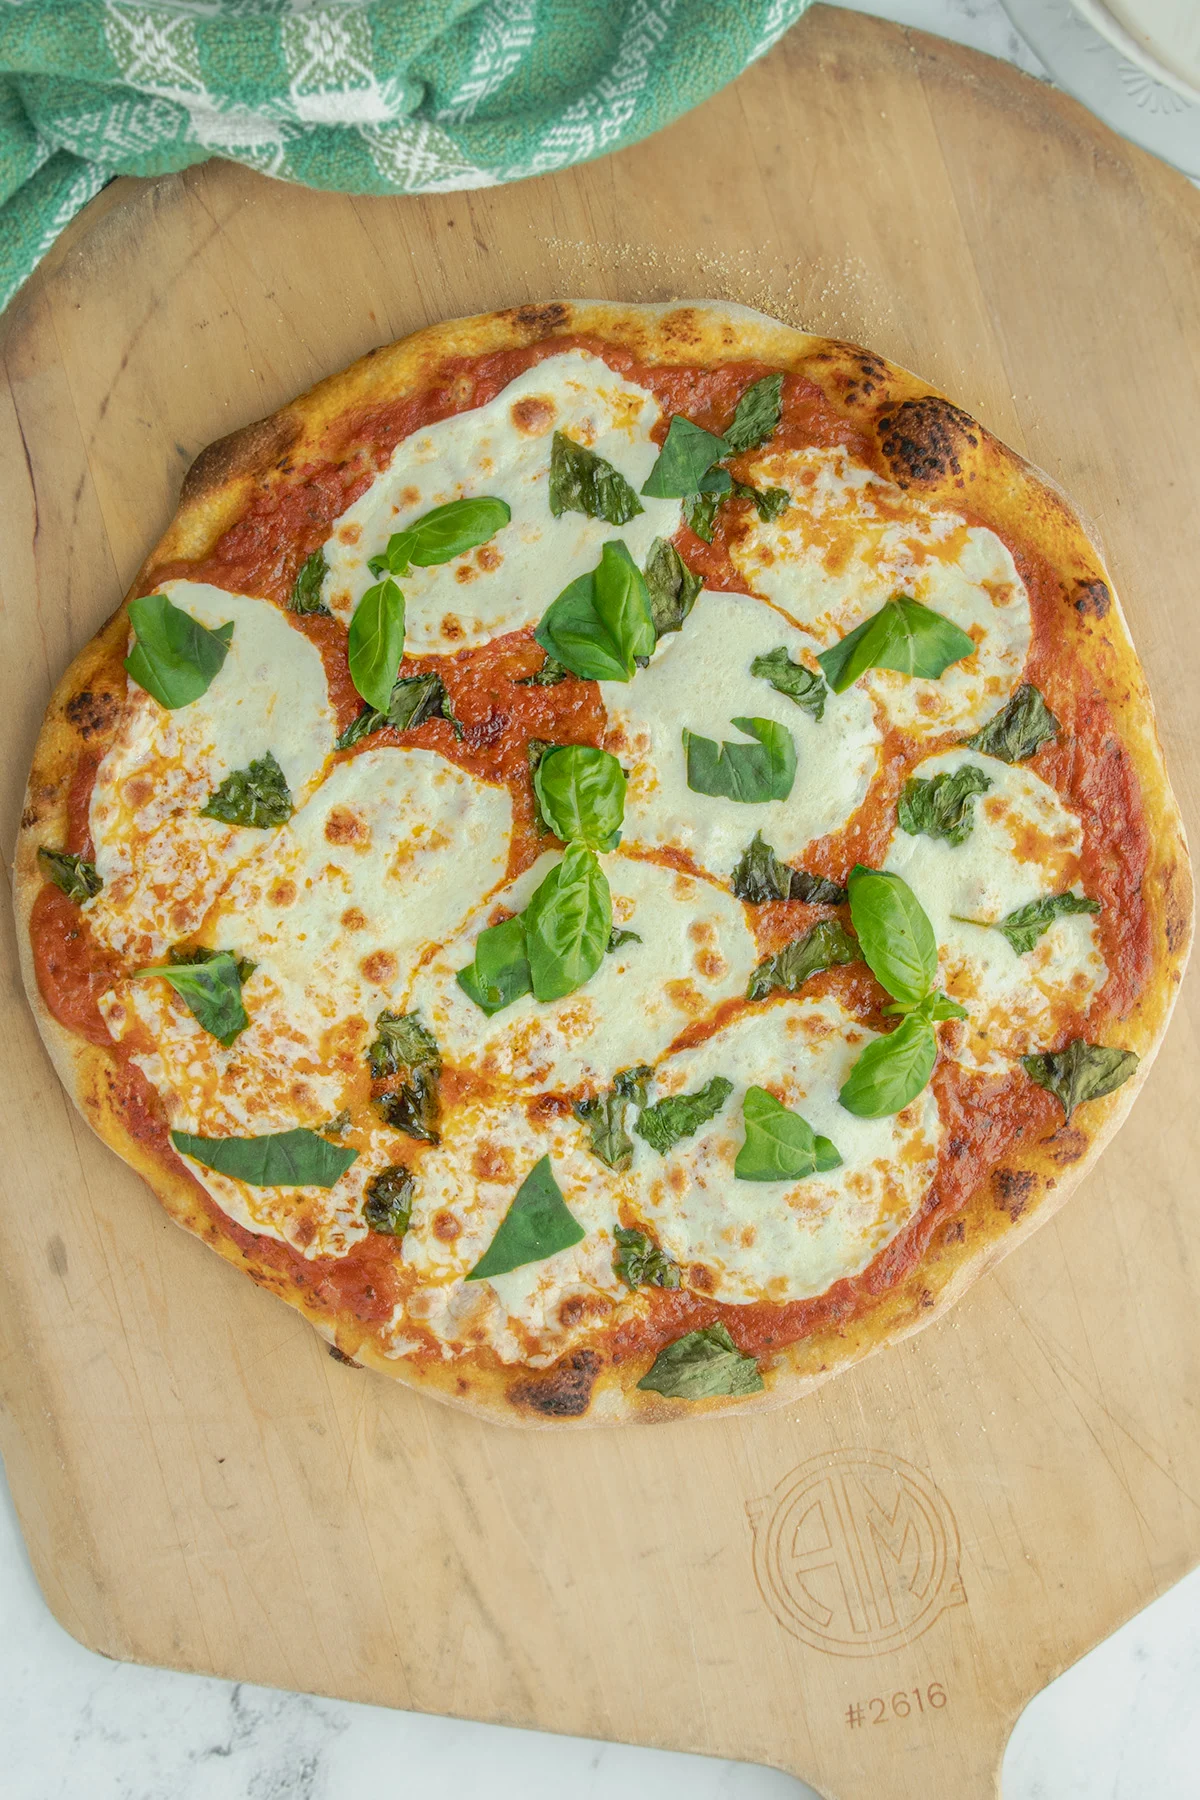
Sourdough Pizza Crust


Sourdough Pizza Crust makes everyone’s favorite food even better. It takes several hours to make the dough, but the vast majority of the time is hands-off.
If you still need to make your sourdough starter, go ahead and use this recipe for Easy Pizza Dough in the meantime.
You can learn How to Make a Sourdough Starter for next time. Then I can show you how to Feed and Maintain Sourdough Starter.
An overview of this recipe is also available as a web story.
Now, for those of you who are ready to make the best pizza of your life, lets see how to do it.
Recipe Ingredients
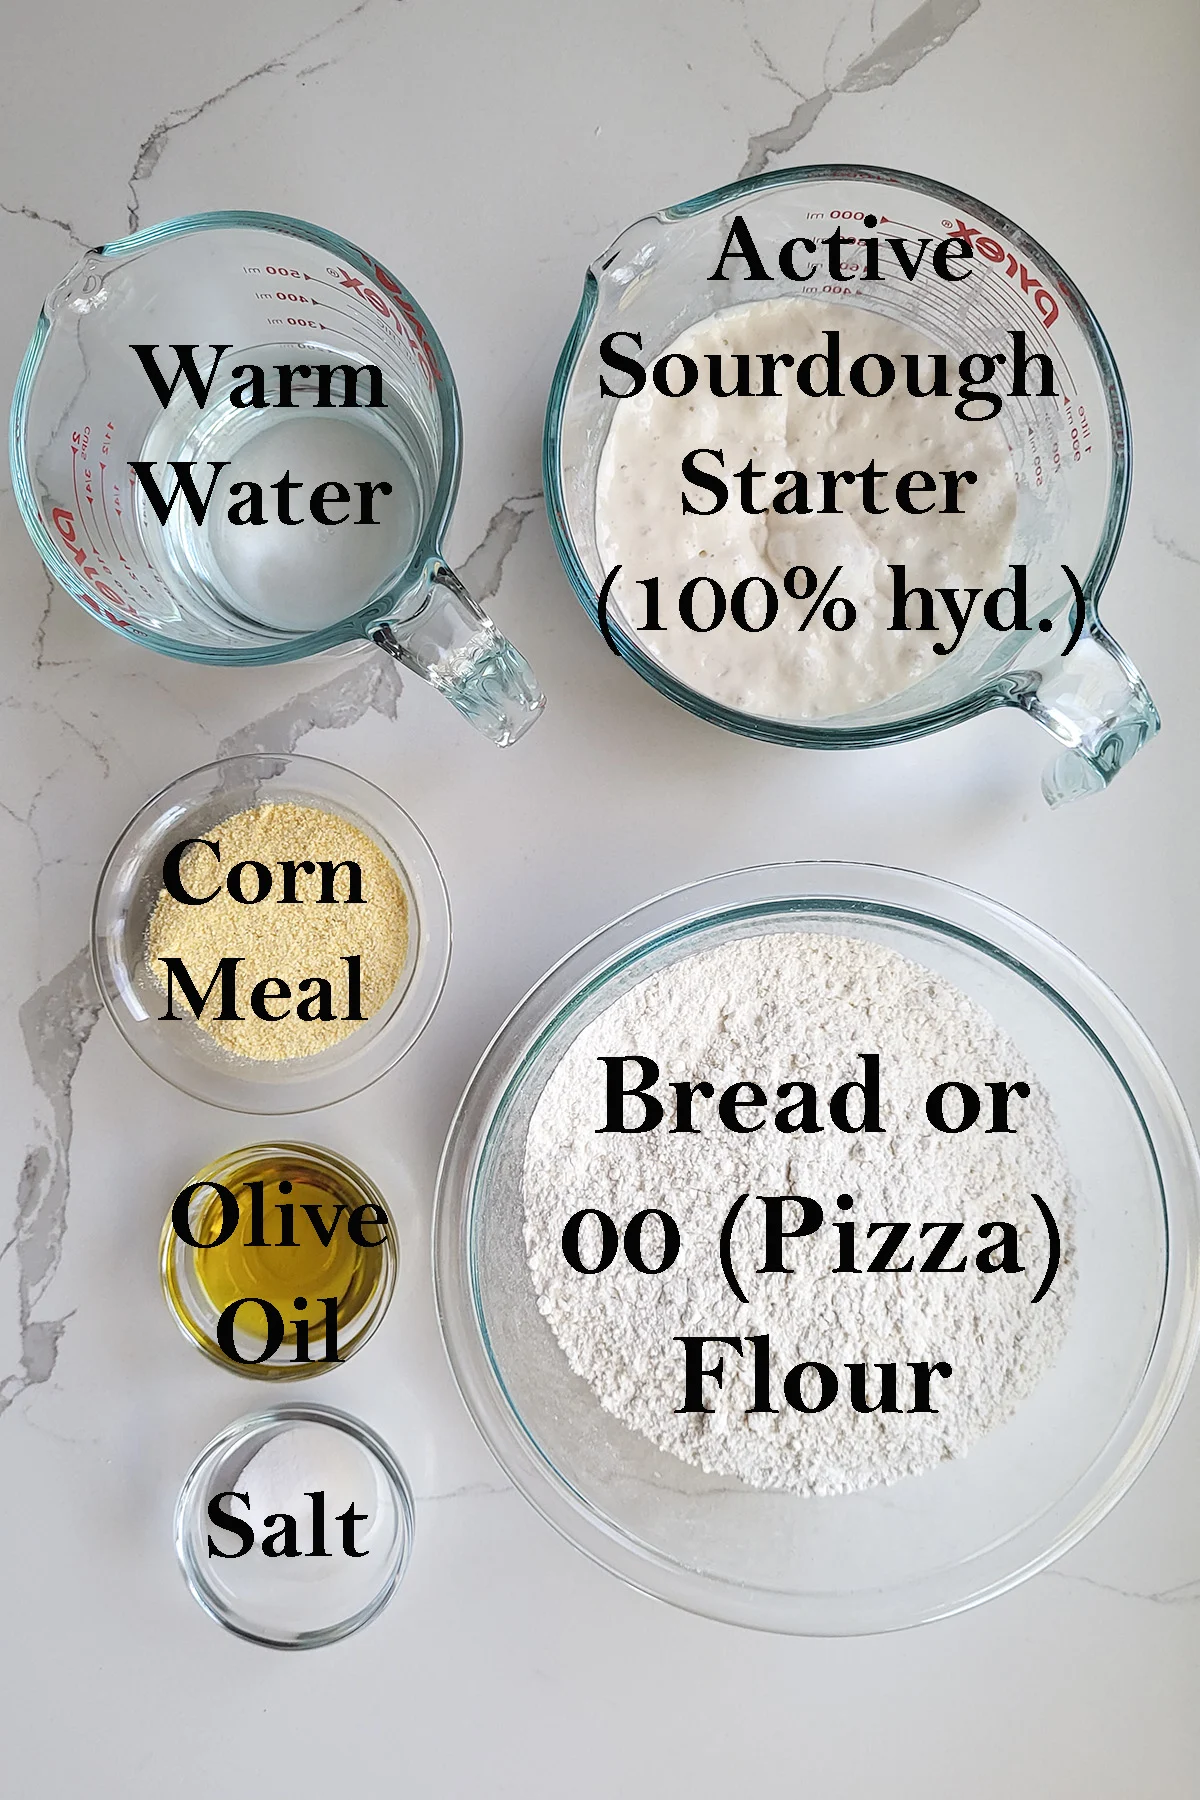
- Active sourdough starter (100% hydration)
- Warm water
- Unbleached Bread flour (see Tips and Tricks below for alternate flour options)
- Salt
- Olive oil
- Cornmeal
How to make the best Sourdough Pizza Crust:
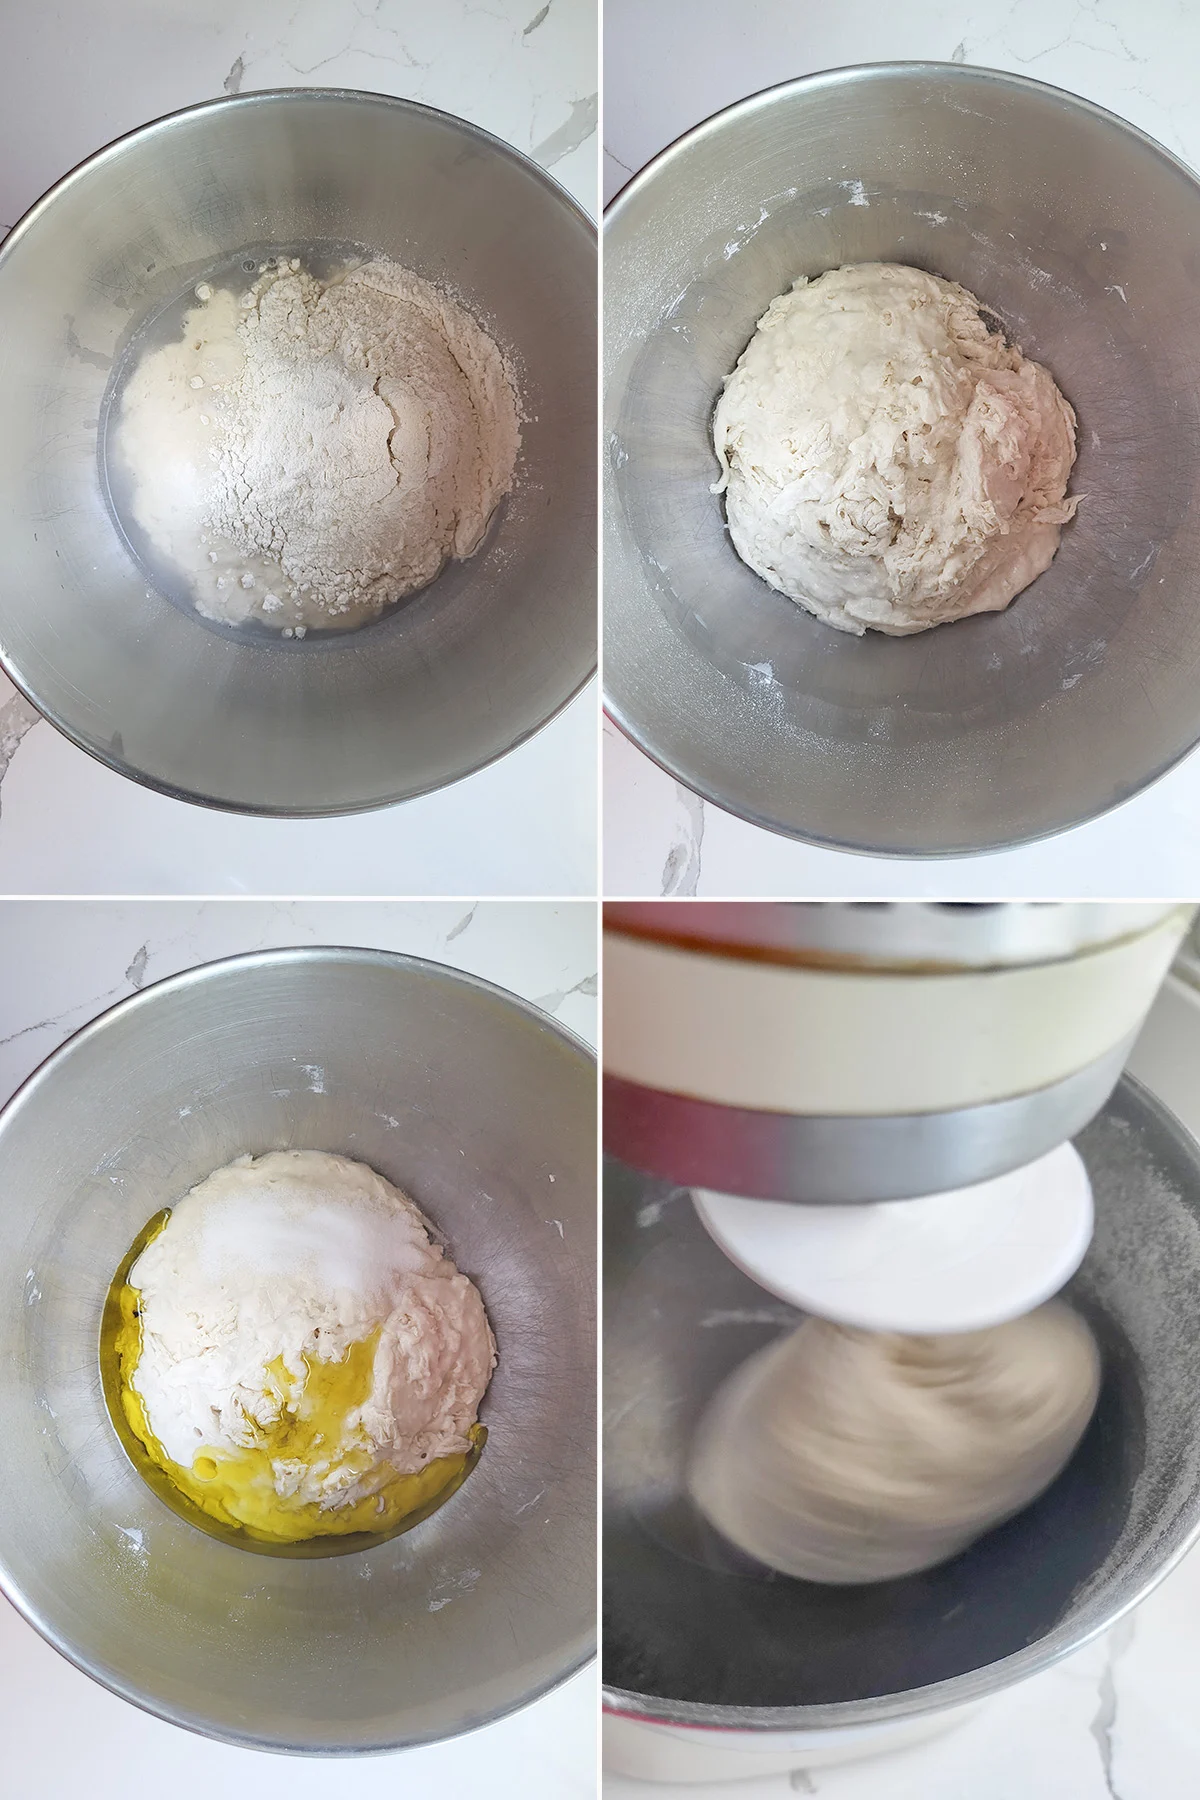
- Start with an active starter. Add the water and some of the flour to make a sponge.
- Allow the sponge to rest for 30-60 minutes before mixing the dough.
- Add olive oil, salt and the rest of the flour to the dough.
- Knead with the dough hook for 5 minutes. The dough should gather on the hook and clear the sides of the bowl. Alternately, mix and knead the dough by hand.
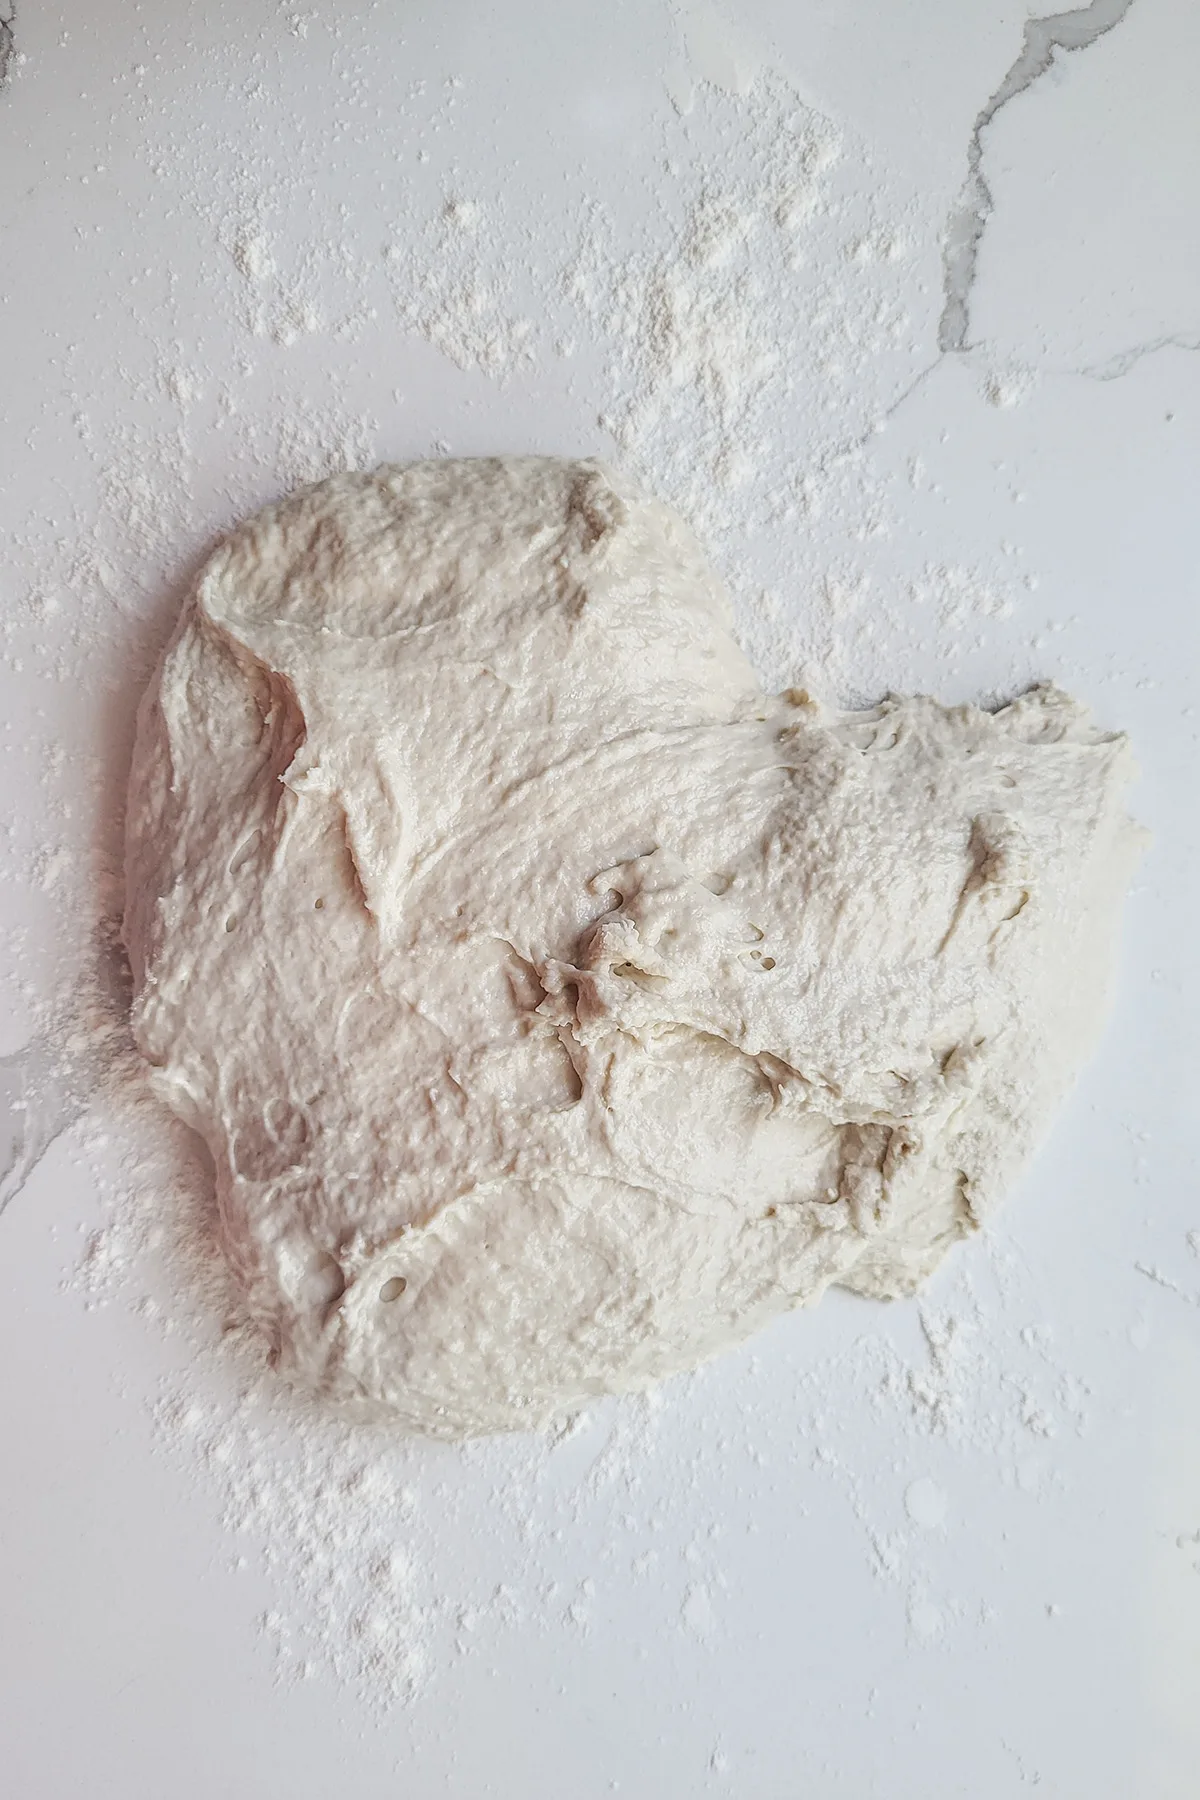
- The dough will be quite sticky right after it’s mixed.
- The dough will become more elastic and cohesive over the 3-5 hours of fermentation.
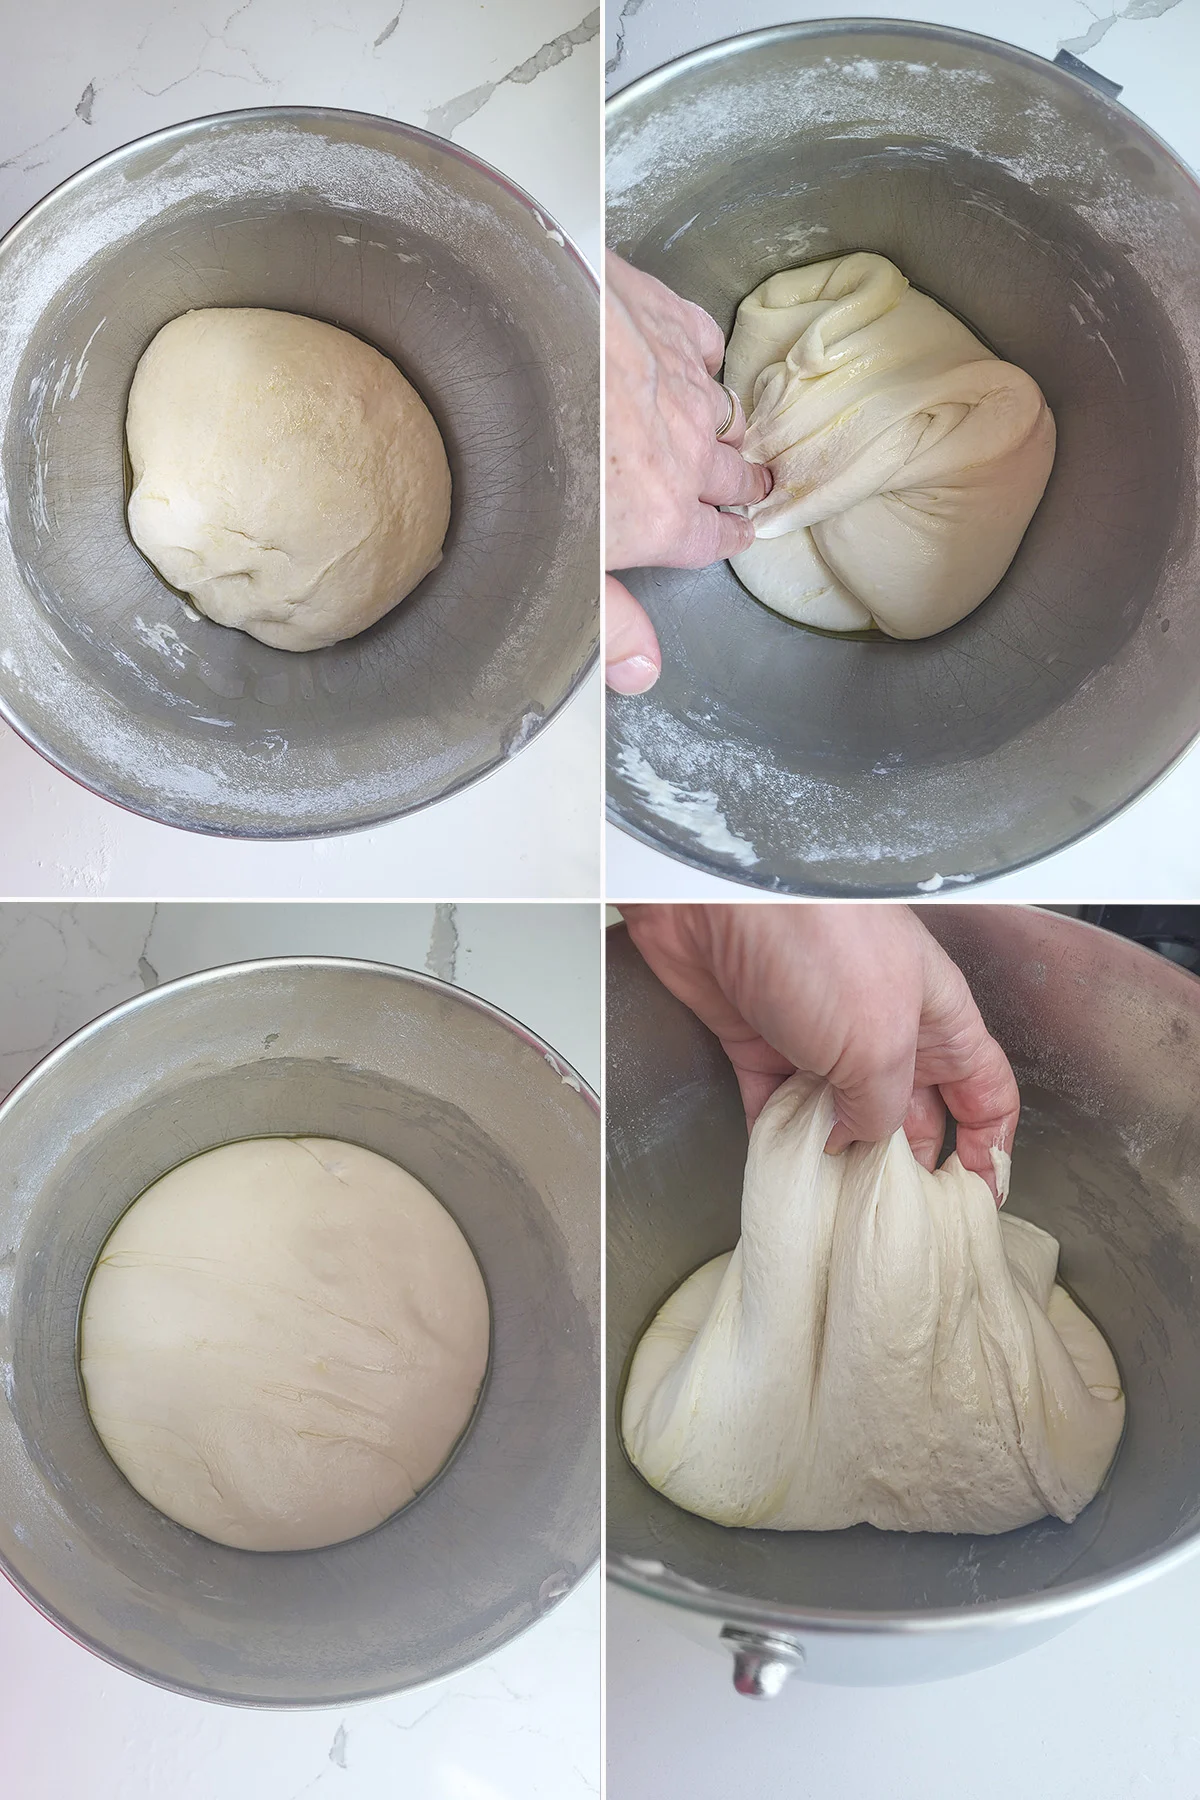
- Over 3-4 hours of fermentation the dough will become lighter and more elastic.
- Every hour of so stretch and fold the dough to redistribute the yeast and aerate the dough.
- After fermentation the dough should be aerated and elastic. It’s ready to shape or the dough can be refrigerated for up to 2 days before using.
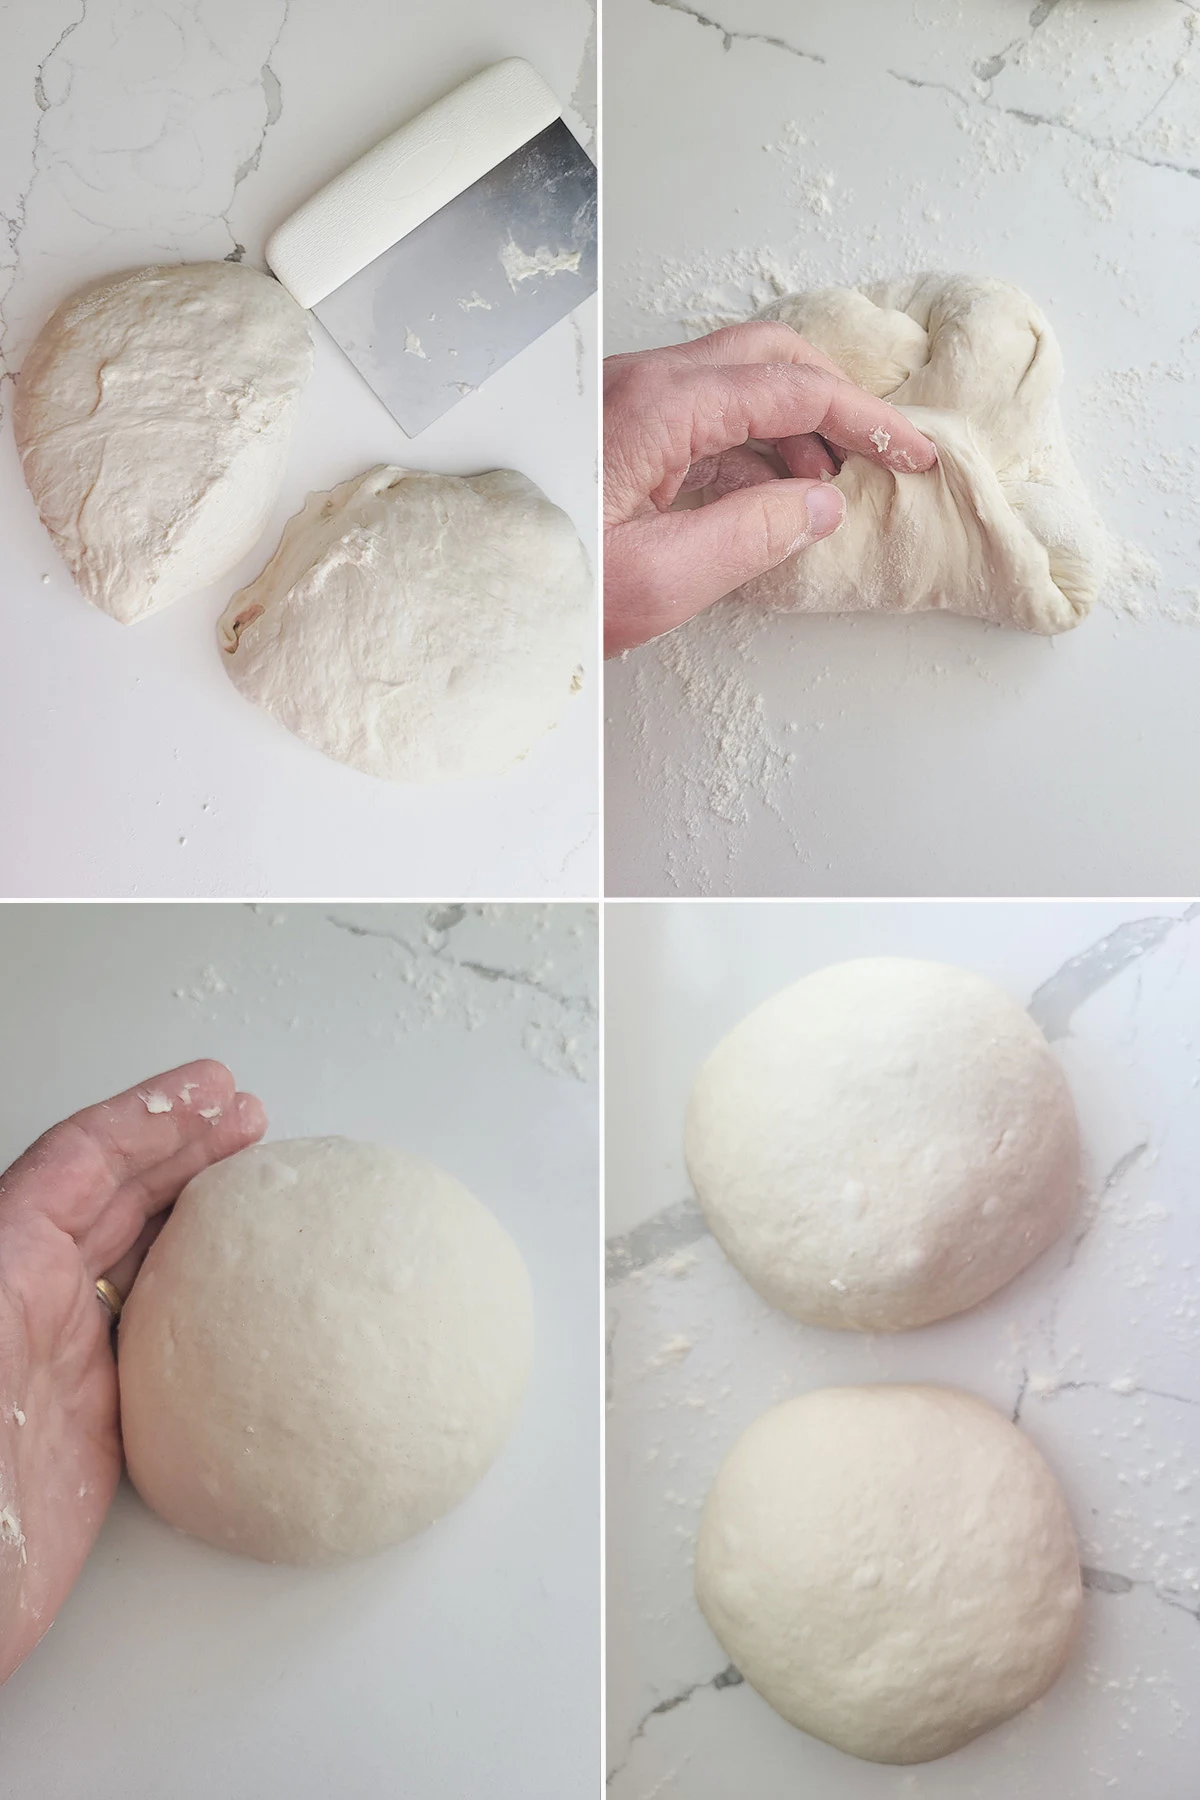
- Divide the dough into two equal portions
- Fold piece of dough onto itself for form a small packet.
- Flip the dough over and form the dough into a tight ball.
- Let the dough balls rest for at least 10 minutes and up to 30 minutes before shaping.
- Once the dough is ready, visit this post to see exactly how to shape pizza dough by hand.
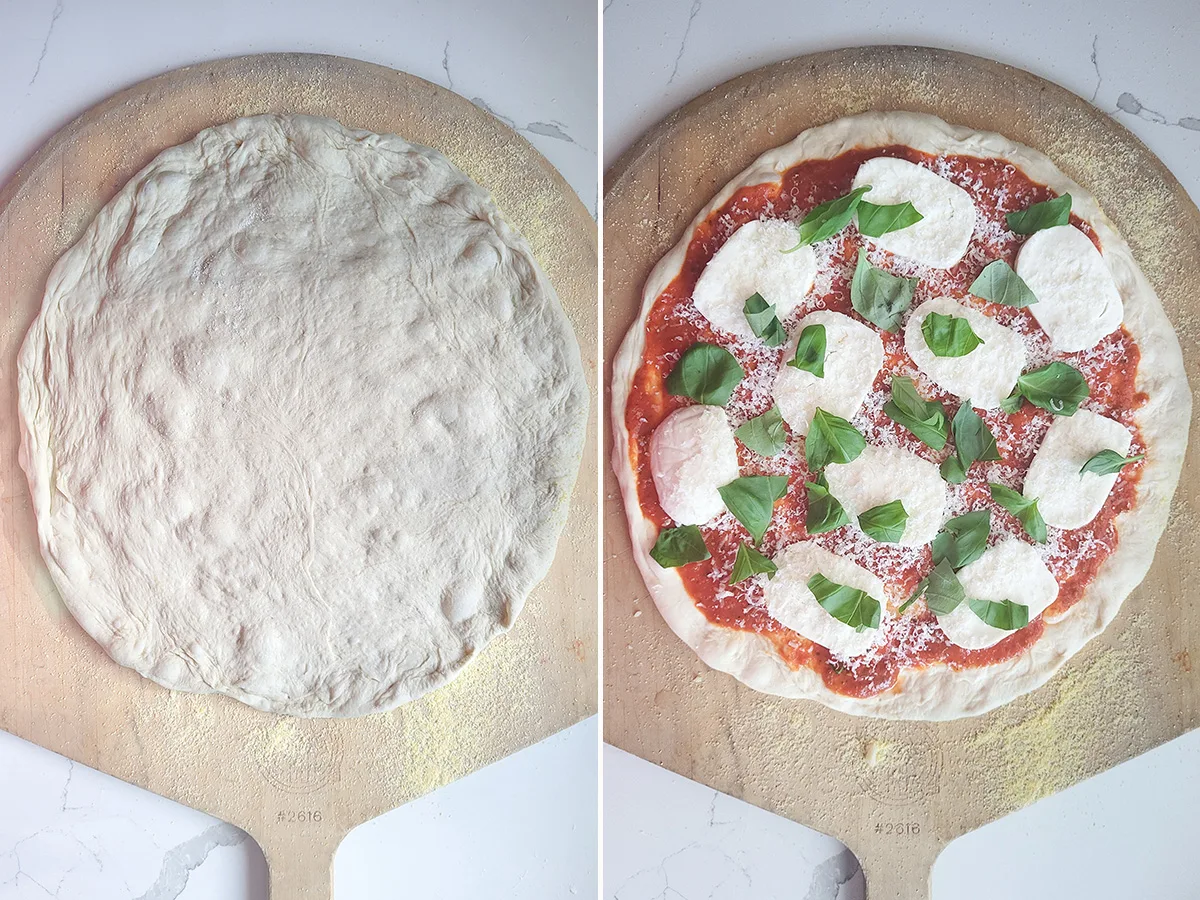
- Place the dough onto a wooden pizza peel or the back of a sheet pan heavily dusted with cornmeal. The cornmeal will act as ball-bearings so you can slide the pizza. You’re now ready to top and bake (or grill) your pizza.
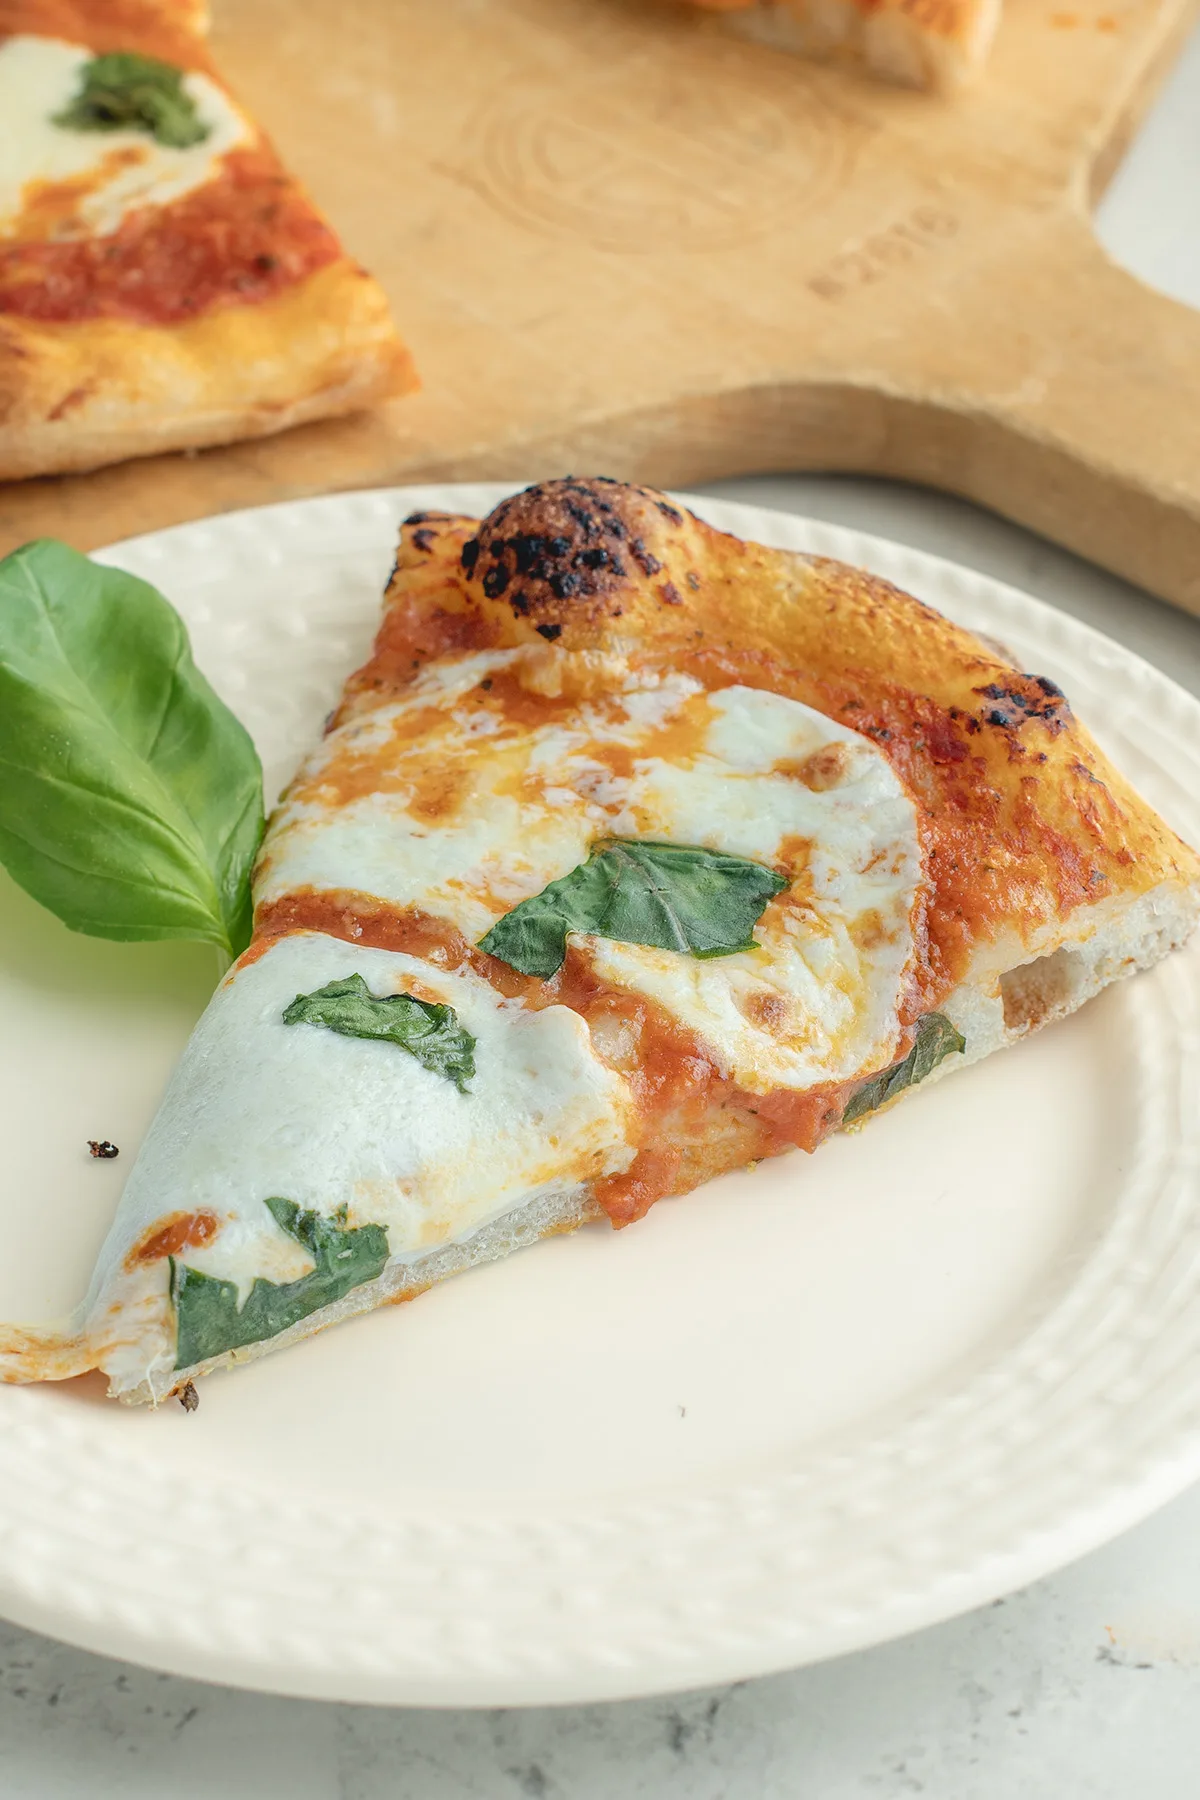
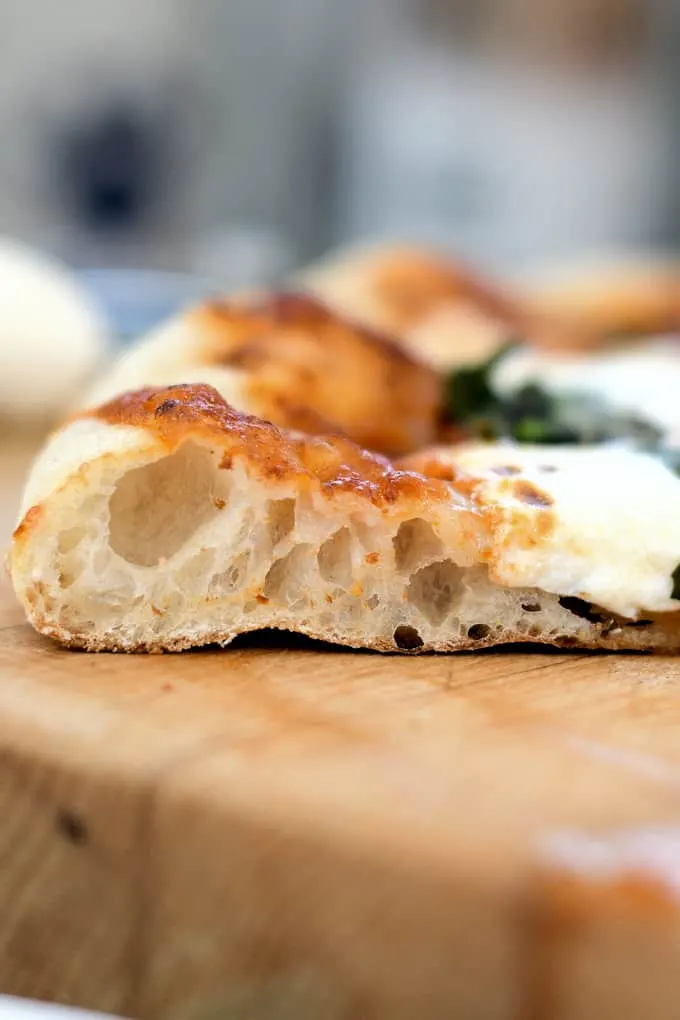
- You can bake your sourdough pizza dough in a very hot oven, or you can grill your pizza over charcoal for the best pizza in the world. The lightly charred crust is a thing of beauty!
Recipe Tips and Tricks
- Make sure your starter is fed and very active before mixing the dough.
- This sourdough pizza dough recipe was developed using a 100% hydration starter. You’ll need to adjust the water or flour if your starter is not 100%.
- This recipe was developed using unbleached bread flour. The recipe also works well with semolina or 00 pizza flour.
- If you want to work ahead, you can make the dough, allow it to ferment and then refrigerate for up 2 days. Take the dough out of the refrigerator and go right ahead and shape the pies.
A timeline for making Sourdough Pizza Crust from scratch:
- Feed your starter the day before or early in the morning of the day you want to make the dough. You want to make the dough with an active starter.
- Make the dough in the late morning or early afternoon. The entire process can take up to 5 hours so allow enough time if you plan to use the dough the same day it is made.
- The dough will ferment for about 3-5 hours over the course of the afternoon. The more active your starter is and the warmer the ambient temperature, the faster the dough will ferment. In cold months allow closer to 5 hours for fermentation.
- 30 minutes before you’re ready to bake (or grill!) the pizza, begin the process of shaping the dough.
Recipe FAQs
If you add too much flour or not enough water to the dough the pizza can bake up dry and bready. A wetter dough will make a lighter and crisper crust. Do not knock all the air out of the dough before shaping. If you vigorously knead the dough before shaping you’ll end up with lots of tiny air bubbles and a bready texture.
Yes. Sourdough pizza dough can be held in the refrigerator for up to 2 days or frozen for several weeks.
There is no need to “punch down” pizza dough. After the initial fermentation gently fold and stretch the dough to redistribute the yeast. By gently folding the dough you retain some of the air bubbles that formed during fermentation and your pizza will have a lighter and crisper crust.
I know you hate to throw away that sourdough discard. Check out these recipes that use sourdough discard.

Hey, since the grill (or oven) is still hot, why not try this light & luscious Dessert Pizza with fresh berries and Greek yogurt drizzle.
You can also use this dough to make Philly Cheesesteak Calzones or Breakfast Calzones with chorizo & eggs.
Can You Freeze Sourdough Pizza Dough?
Yes, you can freeze Sourdough Pizza Dough. Make sure your starter is very active so you have plentiful yeast in the dough. Bring the dough through the initial fermentation. Form it into a tight ball, wrap it in plastic and put it into a freezer bag.
If you love this recipe as much as I do, I’d really appreciate a star rating and a quick comment. Ratings and comments help my recipes show in search results. Thanks!

Sourdough Pizza Crust Recipe
Ingredients
- 8 oz active sourdough starter (1 cup, 100% hydration)
- 8 oz warm water (1 cup)
- 15 oz bread flour (3 cups, see note)
- 1 ½ teaspoons table salt
- 1 oz olive oil (2 tablespoons)
- cornmeal for dusting
Instructions
- Combine 8 oz active sourdough starter, 8 oz warm water and 10 oz (2 cups) of the flour. Mix on low speed with the paddle until the flour is incorporated. Cover the bowl and set aside for 30 -60 minutes.
- If using a stand mixer, change to the dough hook. With the mixer running on low, add 1 ½ teaspoons table salt, 1 oz olive oil and the remaining the flour. Mix on medium speed until the dough begins to clear the sides of the bowl and gathers on the hook. Increase the speed to medium-high and knead for 5 minutes. If mixing by hand add as much of the flour as you can using a spoon or spatula, then turn the dough out onto a floured surface to finish kneading in the rest of the flour.
- Dump the dough onto a floured surface and knead into a smooth ball. Place the dough into a lightly oiled bowl and turn it over to coat the surface. Cover the bowl and set aside at room temperature.
- After 30 minutes uncover the bowl, lift one side of the dough and fold it into the middle of the dough. Repeat with the other three sides of the dough then flip the dough over. You're basically turning the dough inside-out to redistribute the yeast and stretch the gluten. Cover the bowl and after 30 minutes repeat the procedure. Cover the bowl and after 60 minutes repeat the procedure again.
- Cover the bowl and set aside for another 60 minutes. By the end of 3 hours the dough should be lively, elastic and airy. If the dough is still sluggish give it another hour at room temperature. At this point you can refrigerate the dough for up to 2 days or you can go ahead and make the pizzas.
- Dump the dough onto a floured surface, do not knead. Using a bench scraper or sharp knife, cut the dough into 2 equal pieces. Form each piece into a tight ball by cupping the dough in the palms your hands and moving the dough in a circular motion. This is a soft dough so this step will help make forming and moving the pizza easier. Cover the dough and allow it to rest for 20 minutes. If the ball flattens right away and the dough still seems very soft, form the ball again and give it another 20 minutes.
- Meanwhile, preheat the oven to 500 °F. If you have a pizza stone preheat that too. You can also bake pizza on the grill.
- Using the tips of your fingers, gently flatten and press the dough into a disc. Use your fingers to stretch the dough into a 12-14” "round. You can also try to drape the dough over your two fists and pull from the edges to slowly enlarge it to a 12" round. Avoid using a rolling pin because you don't want to deflate all the air bubbles in the dough. Visit this page to see step by step photos of how to shape pizza dough by hand.
- Place each crust onto a wooden peel or pizza pan sprinkled heavily with corn meal. Proceed to top and bake/grill or as you like.
Would you like to save this recipe?


As an Amazon Associate and member of other affiliate programs, I earn from qualifying purchases.
I absolutely LOVE this recipe! Every time I make pizza my husband can’t stop telling me how good it is, as good as the pizza places in town
Been making this recipe for a few years now and love it. Have tried different flour combinations, and for our taste, have settled on 2 cups of bread and 1 cup of all purpose flour – have also discovered flour brand makes a huge difference – we stick with Bob’s Red Mill or King Arthur.
I agree about the flour brand. I use King Arthur bread flour. I’ve also had good results with this recipe using 00 Pizza flour and Semolina flour.
Can you use discard for this?
If you feed it first. You want to make the dough with active starter. The 30-60 minutes rest in the first step is not enough time to get discard active enough.