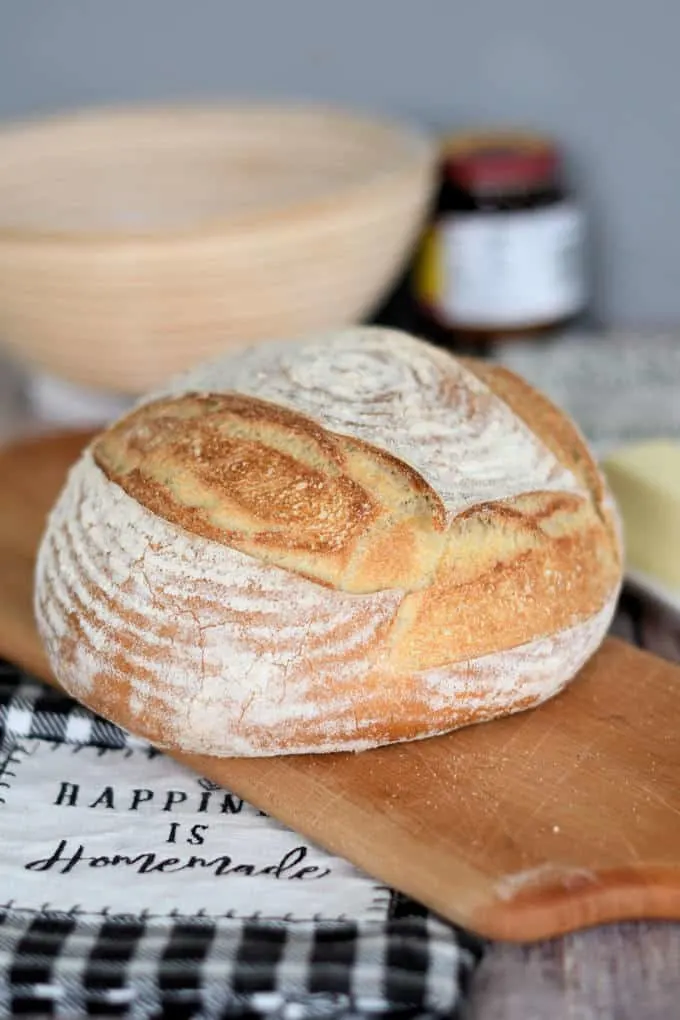
Crusty Semolina Bread
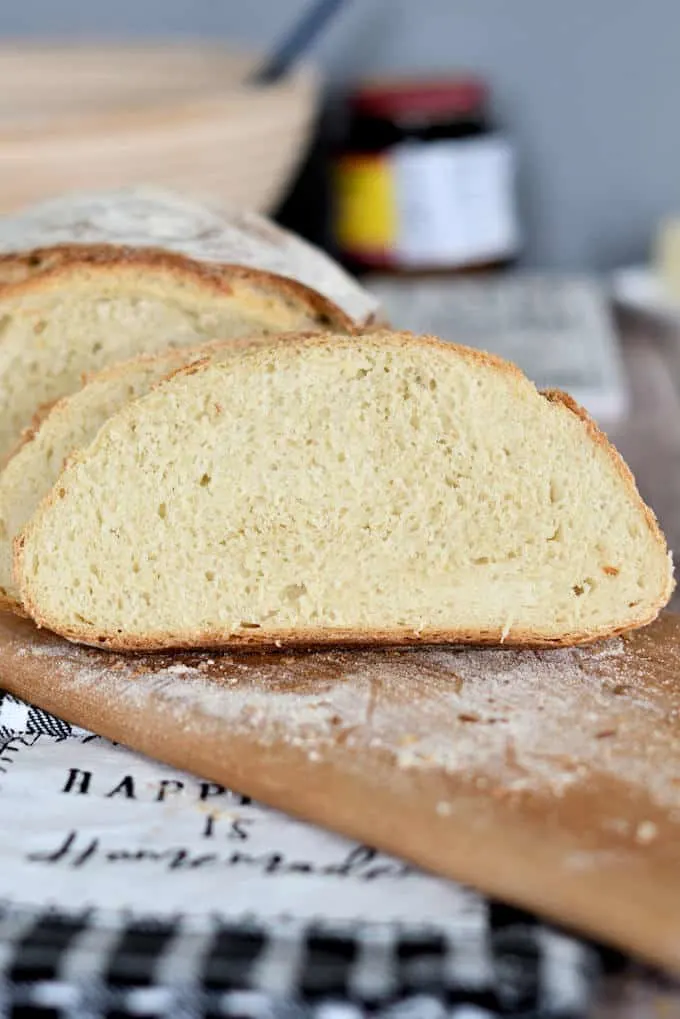
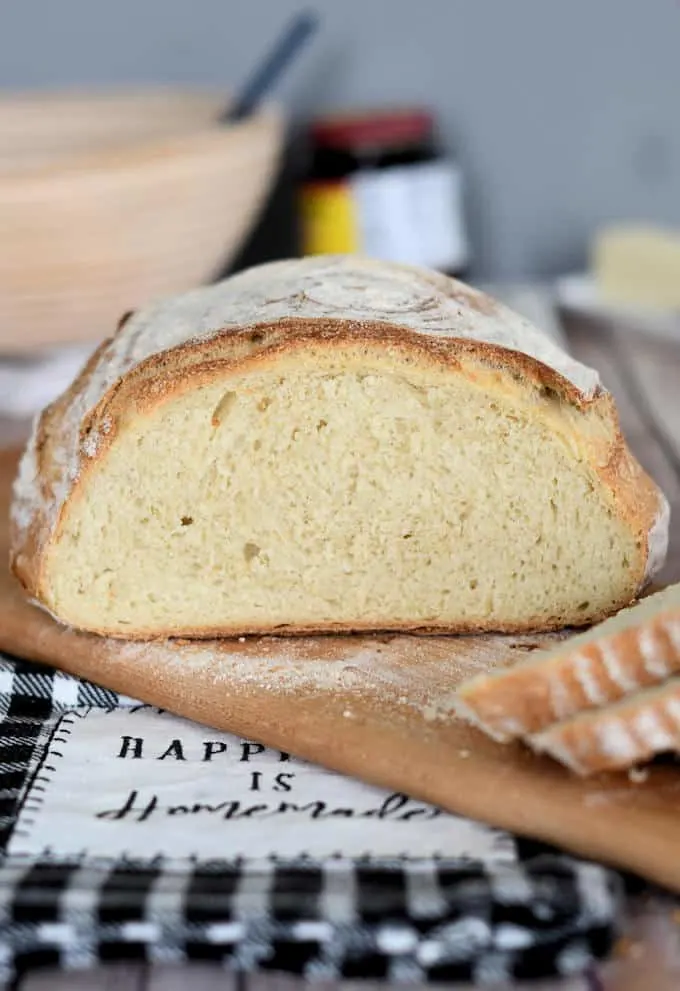
This Semolina Bread Recipe produces an artisan loaf with a crisp crust and light, chewy crumb. It is best baked in a Dutch oven, but the recipe is very flexible and adaptable.
What is semolina flour and is it good for baking bread?
Semolina flour is made from a different strain of wheat than all purpose or bread flour. Semolina is made from Durum, a high protein wheat.
Semolina is the flour used to make pasta. It has a slightly yellow color thanks to the high concentration of carotenoids in the wheat. The carotenoids also add subtle nuttiness that makes for a great tasting loaf of bread.
What does all this mean? High protein plus lovely yellow color plus delicious taste equals a flour is that is perfect for bread baking!
In the market you may see coarsely ground semolina or more finely ground flour labeled “durum” flour. As long as you’re using a product made from durum wheat you’ll make a nice loaf of bread.
If you love baking bread and want to understand the process a little better, take a look at comprehensive Bread Baking Guide. It covers the basics of mixing, kneading, proofing, and baking so you can get perfect results every time.
How to make Crusty Semolina Bread
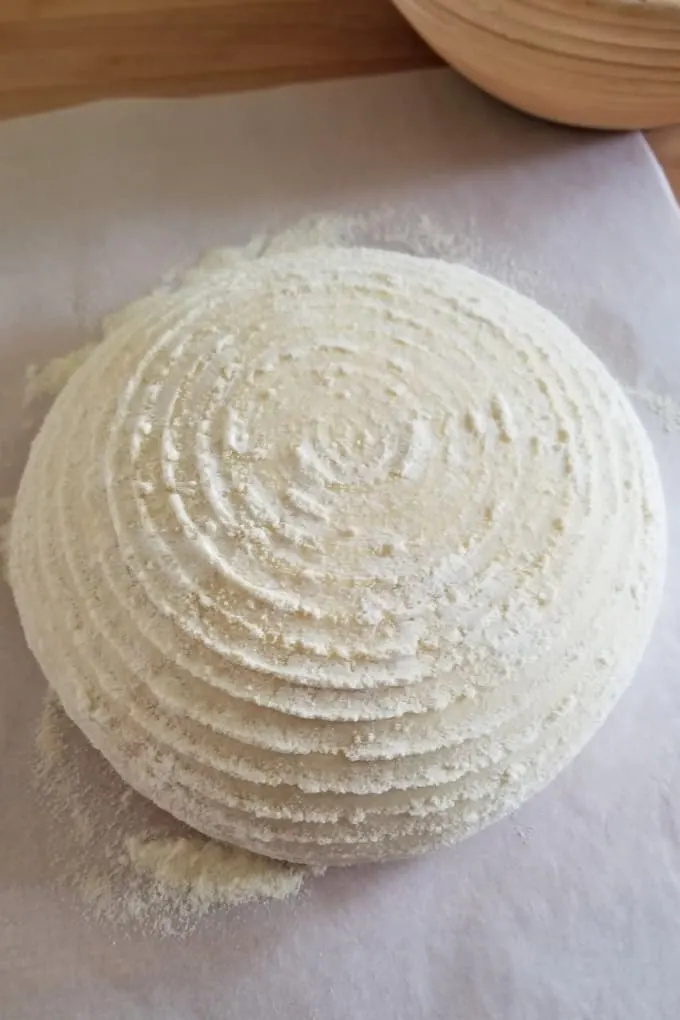
- Place the dough into a bread banneton heavily dusted with Semolina Flour and set it aside to rise for 1 1/2- 2 hours.
- If you don’t have a basket, place the dough on parchment paper or a sheet pan for rising.
- Flip the loaf onto a sheet of parchment and use the parchment to transfer the loaf to the pre-heated Dutch oven.
- Bake until golden brown and the interior reaches 200F.
Tips for making Semolina Bread:
- You can use either durum semolina or more finely ground durum flour. I made the bread with both with very good results.
- If you have one, use a proofing basket for pretty finish.
- If you have one, use a Dutch oven or other heavy, lidded pot for an extra crisp crust.
- If you don’t have a proofing basket you can proof the dough on a parchment lined sheet pan or on a wooden peel sprinkled with semolina or corn meal.
- If you don’t have a Dutch oven, bake the bread on preheated pizza stone, or on sheet pan.
If you’ve got a Sourdough Starter, try my recipe for Sourdough Semolina Bread.
You might also like these other easy bread recipes: Dutch Tiger Bread, Whole Grain Low Knead Bread, Soft White Sandwich Bread, Overnight Rye Bread, Milk & Honey Whole Wheat Bread and Honey Oatmeal Bread.
If you love this recipe as much as I do, I’d really appreciate a star rating and a quick comment. Ratings and comments help my recipes show in search results. Thanks!
Semolina Bread Recipe
Ingredients
- 12 oz warm water (1 ½ cups)
- 2 ¼ teaspoons dry yeast (1 packet)
- 11 ¼ oz unbleached all purpose flour (2 ¼ cups, see note)
- 6 ½ oz semolina flour (1 cup)
- 1 ½ teaspoons table salt
Instructions
- In a large mixing bowl or in the bowl of a stand mixer, combine 12 oz warm water, 2 ¼ teaspoons dry yeast and 2 cups of the all purpose flour. Mix with the paddle on low speed until it forms a thick batter. Cover the bowl and set aside for 30 minutes.
- If using a stand mixer, switch to the dough hook. Add 1 ½ teaspoons table salt and 6 ½ oz semolina flour and mix until the dough begins to form a ball around the hook. Add the remaining 1/4 cup of all purpose flour. If mixing by hand add the flour using a wooden spoon and/or a plastic bowl scraper. Knead the dough for 5 minutes until it is smooth and elastic.
- Place the dough into a lightly oiled bowl, turn once to coat the dough. Cover the bowl and set it aside at room temperature for 1 – 1 1/2 hours or until doubled in size. At this point you can cover the bowl tightly, refrigerate overnight and finish shaping and baking in the morning or continue to bake the same day.
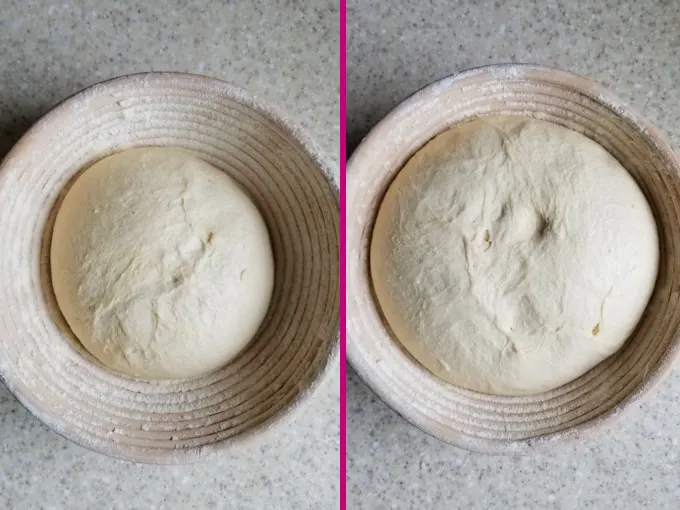
- Use the semolina/all purpose mix to dust a proofing basket or wooden peel. Turn the dough out onto a lightly floured surface. Knead 4-5 times, then use your cupped hands to form the dough into a smooth ball and place the dough, smooth side down, into the proofing basket. If you don’t have a proofing basket place the dough directly onto a sheet of parchment paper or on the wooden peel.
- Cover the dough and leave in a warm place until it's almost doubled in size and it springs back slowly when poked, about 1 hour depending on the room temperature and dough temperature. Meanwhile, preheat the oven to 425 °F. Place a Dutch oven with a lid into the oven to preheat.
- If the loaf is in a proofing basket, place a sheet of parchment over the dough and gently flip it over. Use a single edge razor or very sharp knife to cut a 1/4" deep X or square across the top of the loaf. Remove the preheated pan from the oven and remove the lid. Use the parchment to lift the loaf into the Dutch oven. If you don’t have a Dutch oven, slide the parchment paper onto a baking sheet or onto a preheated pizza stone.
- Replace the lid on the pot and slide it into the oven. Bake for 20 minutes. Remove the lid from the Dutch oven. The loaf should be well risen and just beginning to brown.
- Continue baking another 20 minutes until the loaf is nicely browned and beginning to crisp. Remove the pan from the oven. Use the parchment to lift the loaf out of the pan. Use the parchment to place the loaf directly onto the rack in the oven. Bake another 5-10 minutes until the loaf is deeply browned and very crisp. Total baking time is about 40-50 minutes. If you are baking directly on a pizza stone or sheet pan the baking time may be closer to 30 minutes.
- Cool completely on a wire rack before slicing.
Would you like to save this recipe?


As an Amazon Associate and member of other affiliate programs, I earn from qualifying purchases.
How do you keep your dough from deflating when you turn it over?
Which point of the process are you asking about? When it is turned out of the proofing basket? If your dough has good gluten development and it is not over-proofed it should easily turn out of the basket without deflating. If your loaf is deflating you may be over-proofing your dough. The dough is ready when you poke it and the dent slowly fills in. If the dent remains in the dough it is over proofed.
It was when I turned it out of the basket, I thought when you poked it the dent was supposed to remain! I’m trying it again this week so figures crossed.
Oh, I see. You want the dent to slowly spring back.