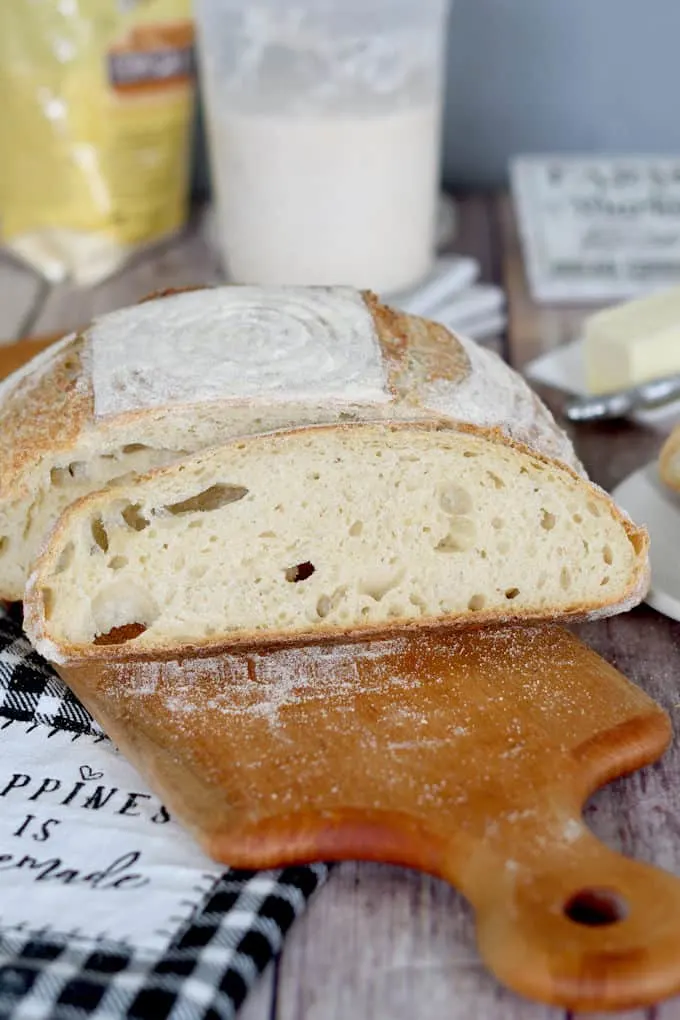
Sourdough Semolina Bread
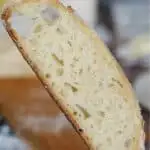
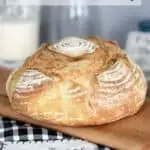
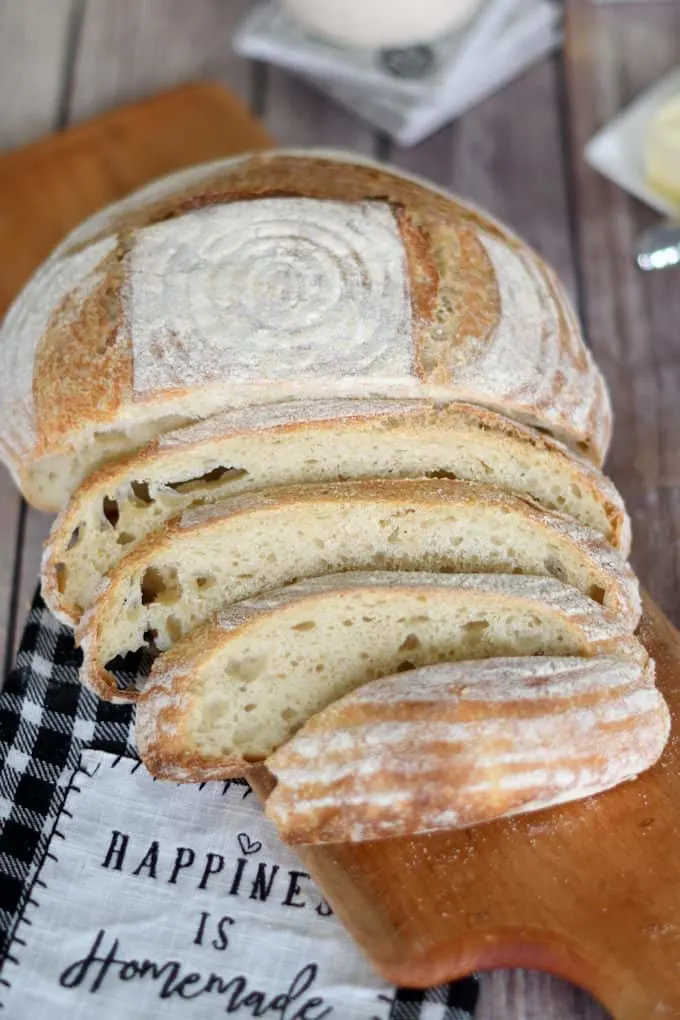
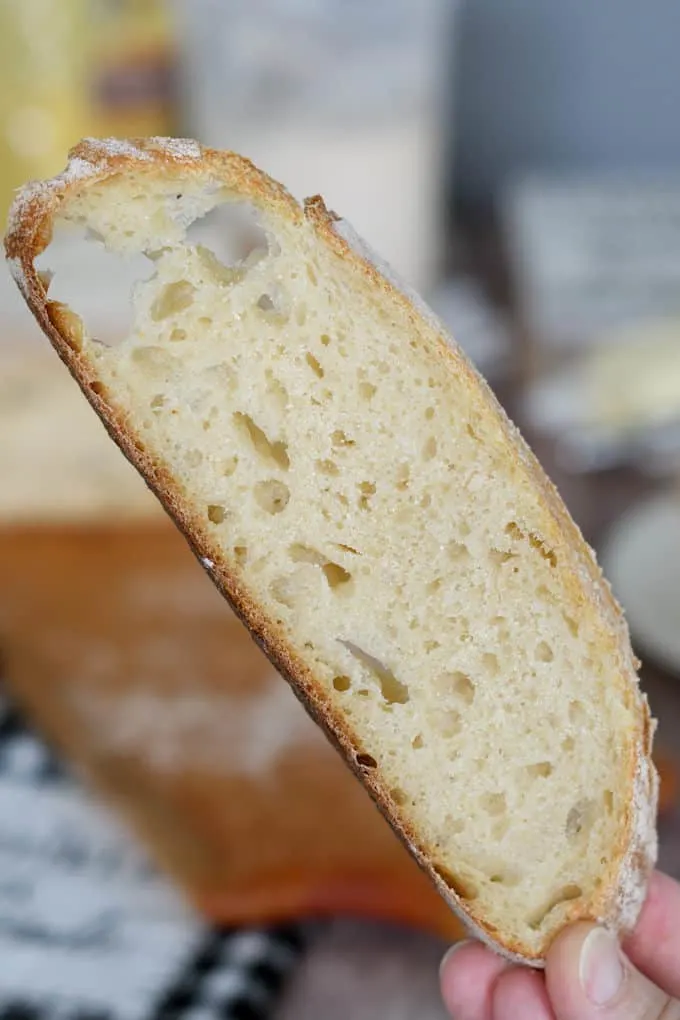
This Sourdough Semolina Bread Recipe produces an artisan loaf with a crisp crust and open, chewy crumb. It is best baked in a Dutch oven, but the recipe is very flexible and adaptable.
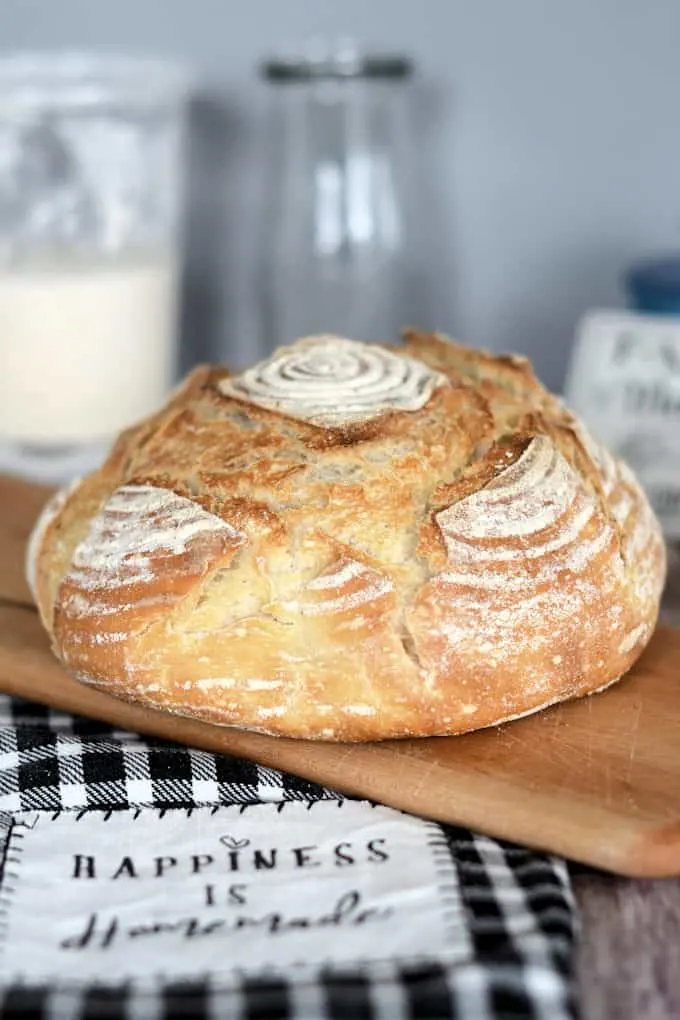
Table of contents
If you haven’t made a Sourdough Starter yet, try making this Crusty Semolina Bread made with commercial yeast while you’re waiting for your starter to mature.
Ingredient Notes
- Active sourdough starter (100% hydration): This recipe is written for a starter fed with equal weights of flour and water. The starter should be active and near its peak when mixed into the dough.
- Warm water: Slightly warm water helps kick-start fermentation, especially if your kitchen runs cool.
- Unbleached All-Purpose Flour: AP flour’s medium protein content works well with the higher protein durum flour.
- Semolina Flour: In the market you may see coarsely ground semolina or more finely ground flour labeled “durum” flour. As long as you’re using a product made from durum wheat you’ll make a nice loaf of bread. I used both with great success.
- Salt: Salt strengthens gluten and balances flavor.
About Semolina Flour in Bread
Semolina flour is made from a different strain of wheat than all purpose or bread flour. Semolina is made from Durum, a high protein wheat.
Semolina is the flour used to make pasta. It has a slightly yellow color thanks to the high concentration of carotenoids in the wheat. The carotenoids also add subtle nuttiness that makes for a great tasting loaf of bread.
What does all this mean? High protein plus lovely yellow color plus delicious taste equals a flour is that is perfect for bread baking!
Process Photos
Here’s what the recipe process looks like at each stage. Refer to the recipe card below for measurements and exact instructions.
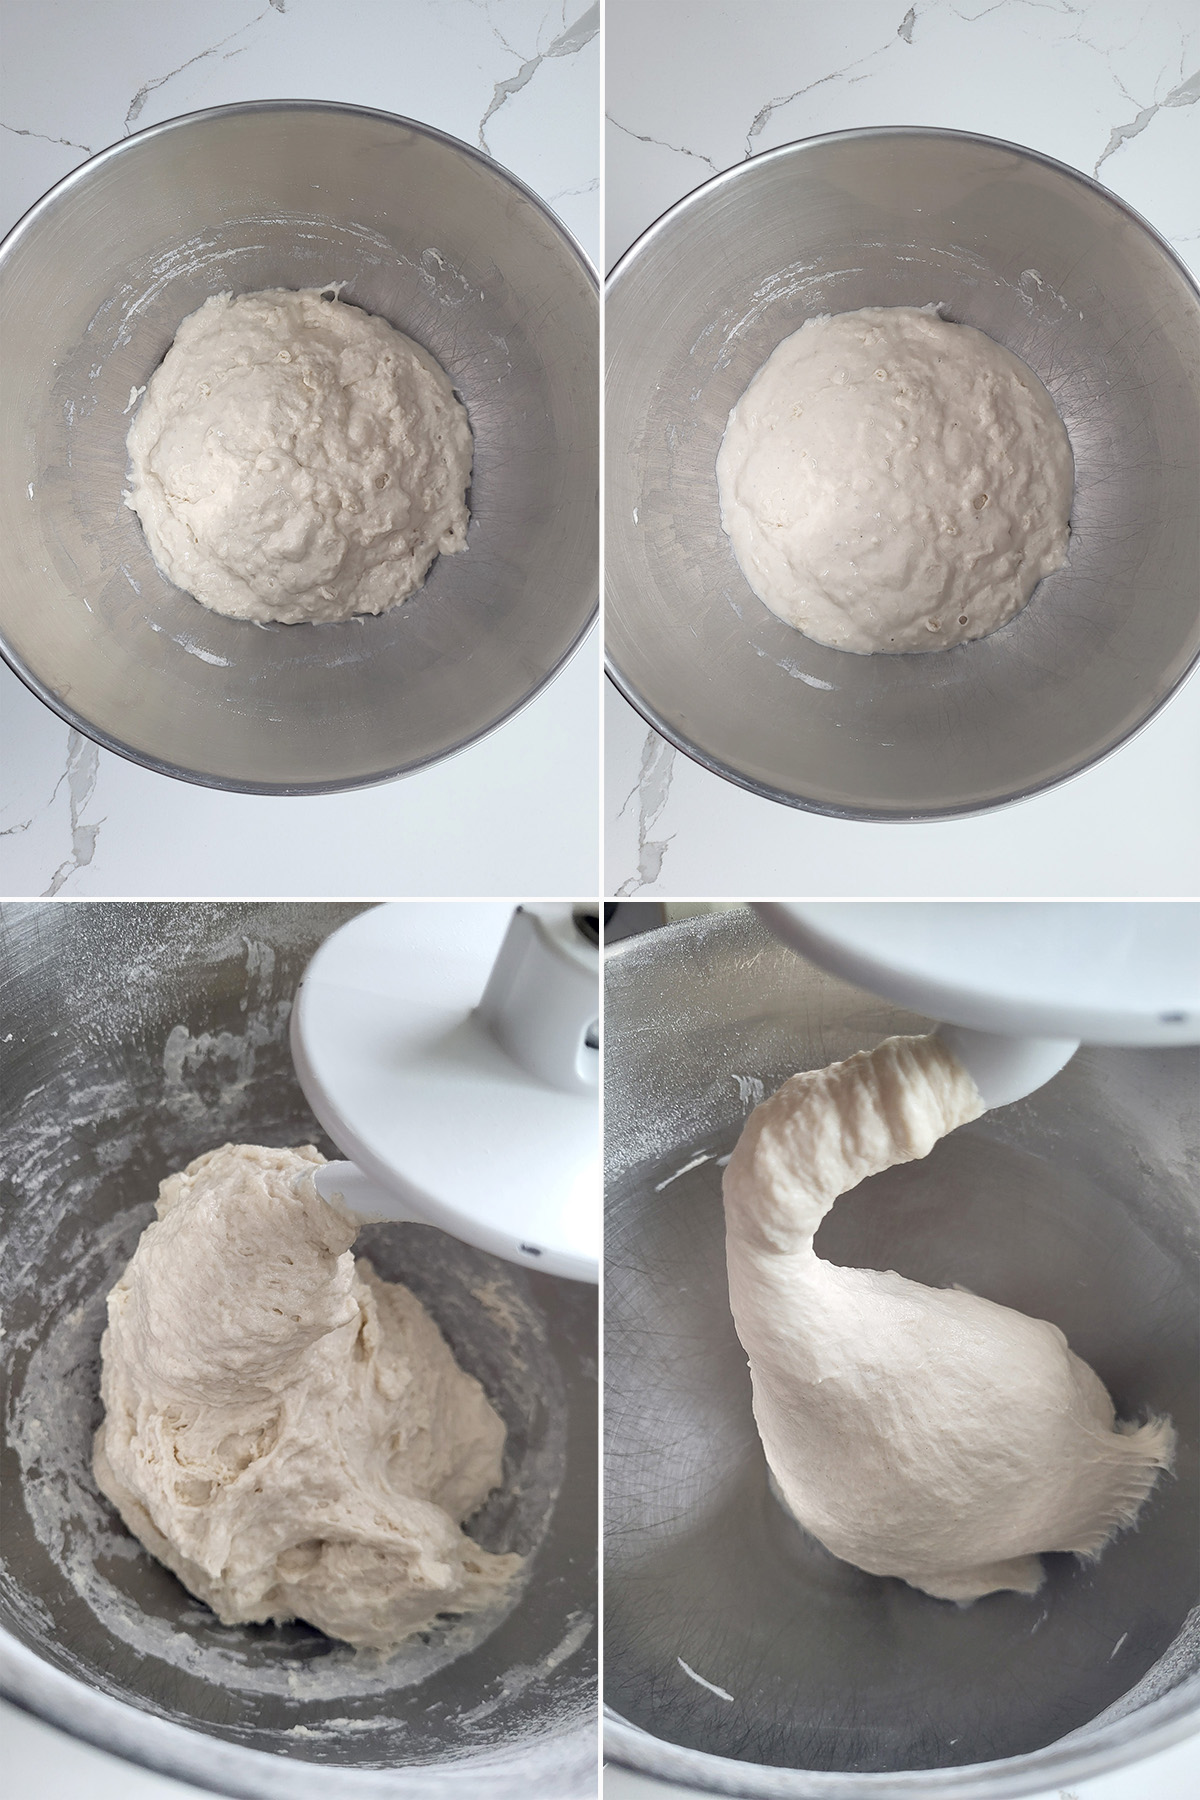
- The dough can be mixed by hand or on a stand mixer. For the autolyse, mix the starter, water, and a portion of the flour, then set it aside.
- Add the salt and remaining flour. If kneading in a mixer, the dough should clear the sides of the bowl.
- The dough will start out quite sticky but will become more cohesive as fermentation progresses. This transformation happens gradually—don’t worry if the dough still feels sticky early on.
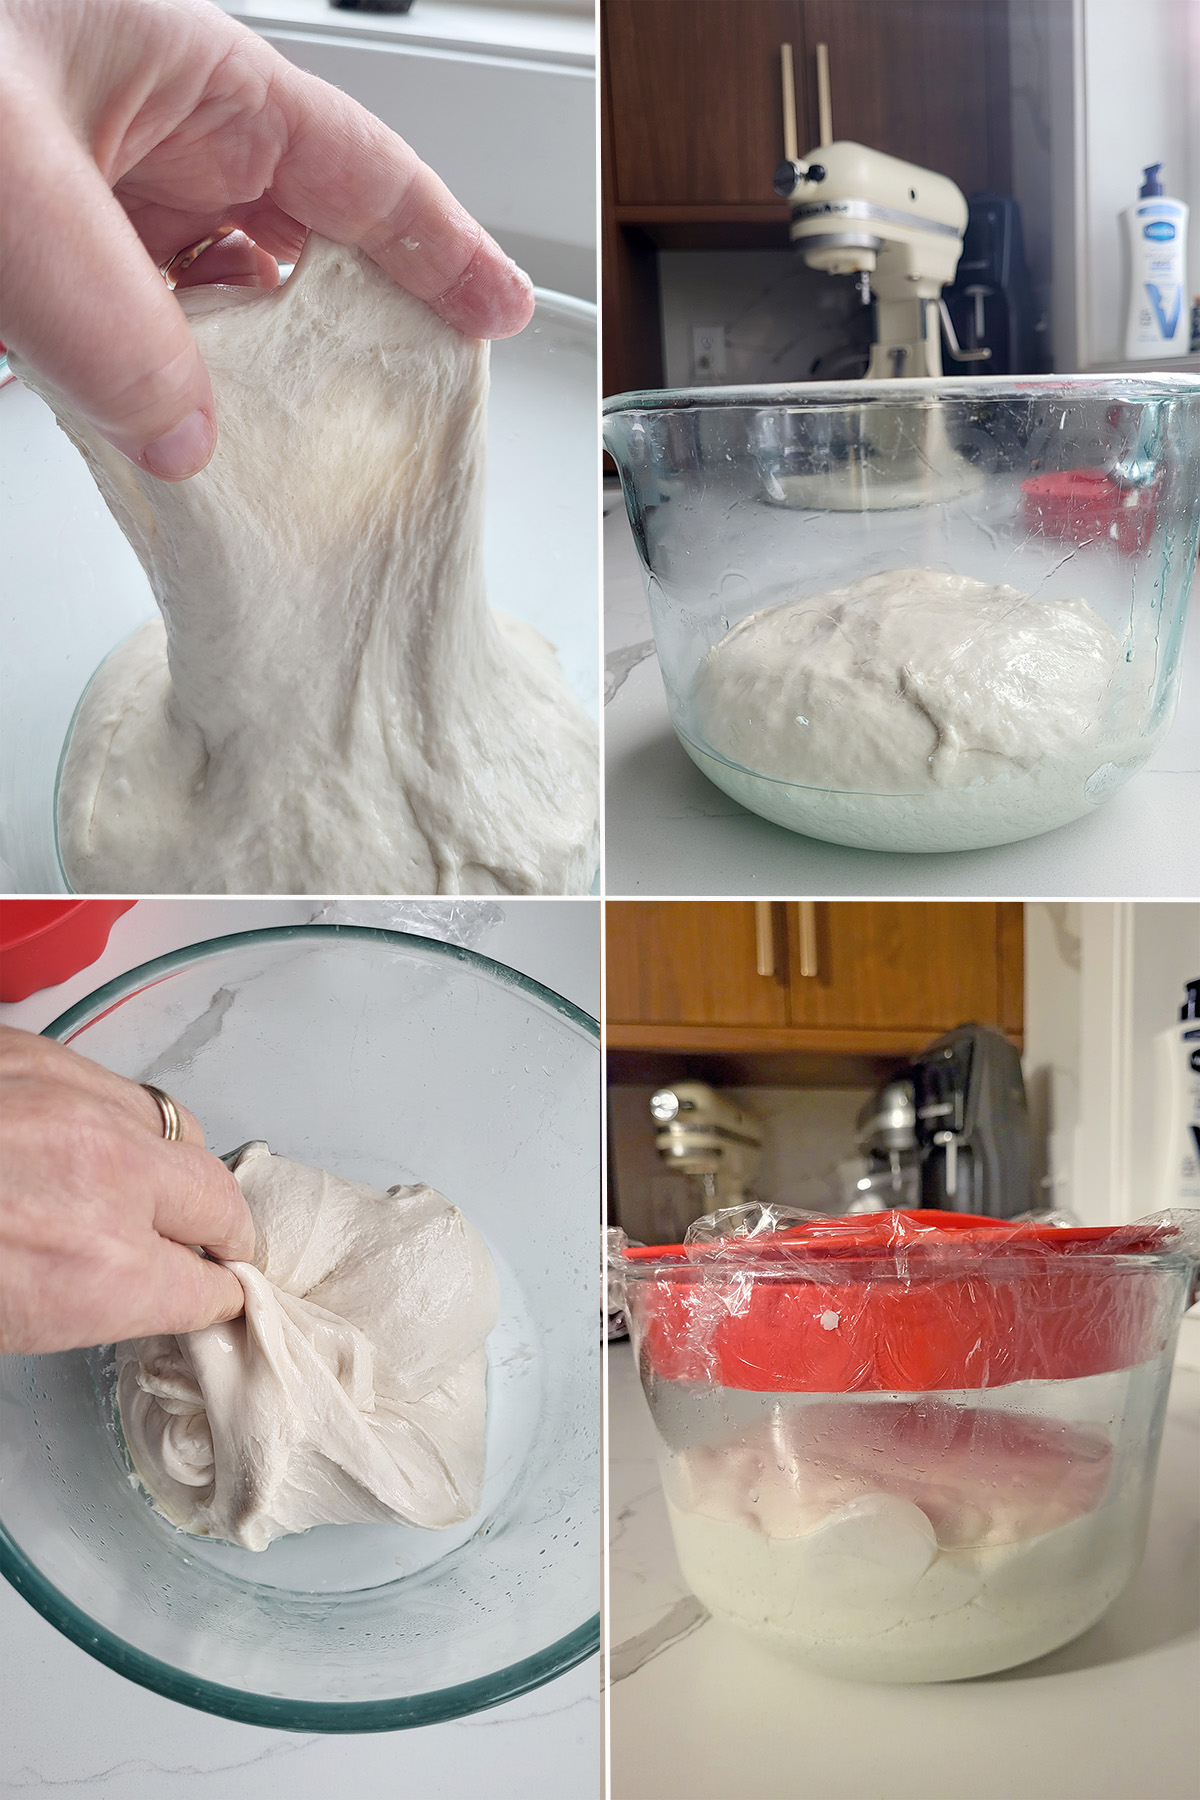
- The dough should show signs of gluten development, such as stretching without tearing.
- Set the dough aside for bulk fermentation, about 3–5 hours. Stretch and fold the dough hourly during this time. The dough will become livelier and more aerated as it ferments.
- After bulk fermentation, cover the bowl and transfer it to the refrigerator.
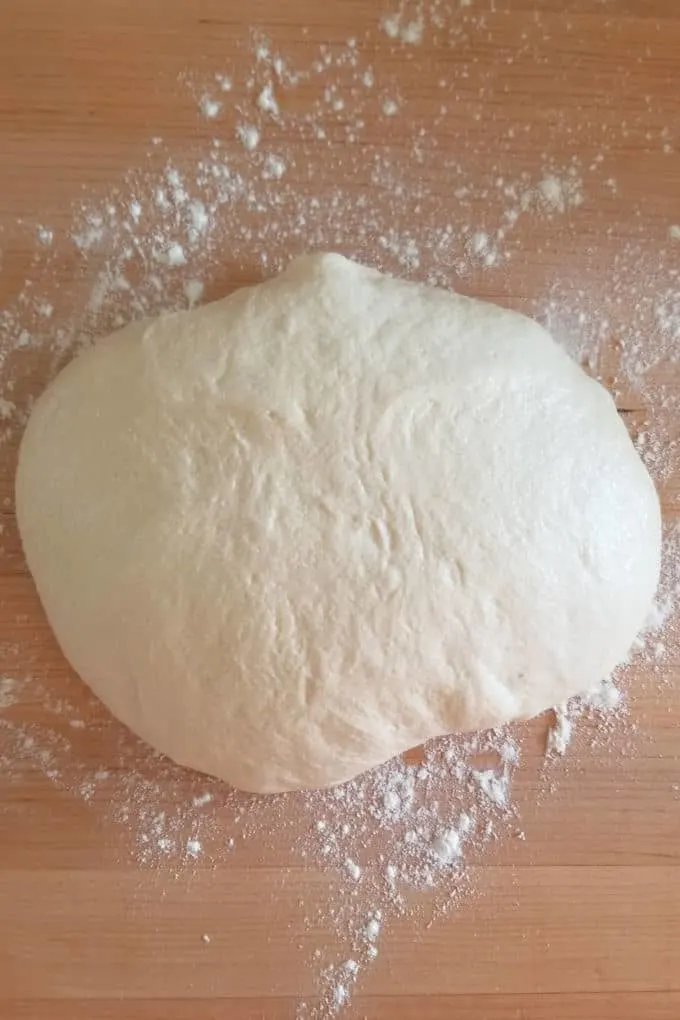
- After a night in the refrigerator, the dough is ready for shaping
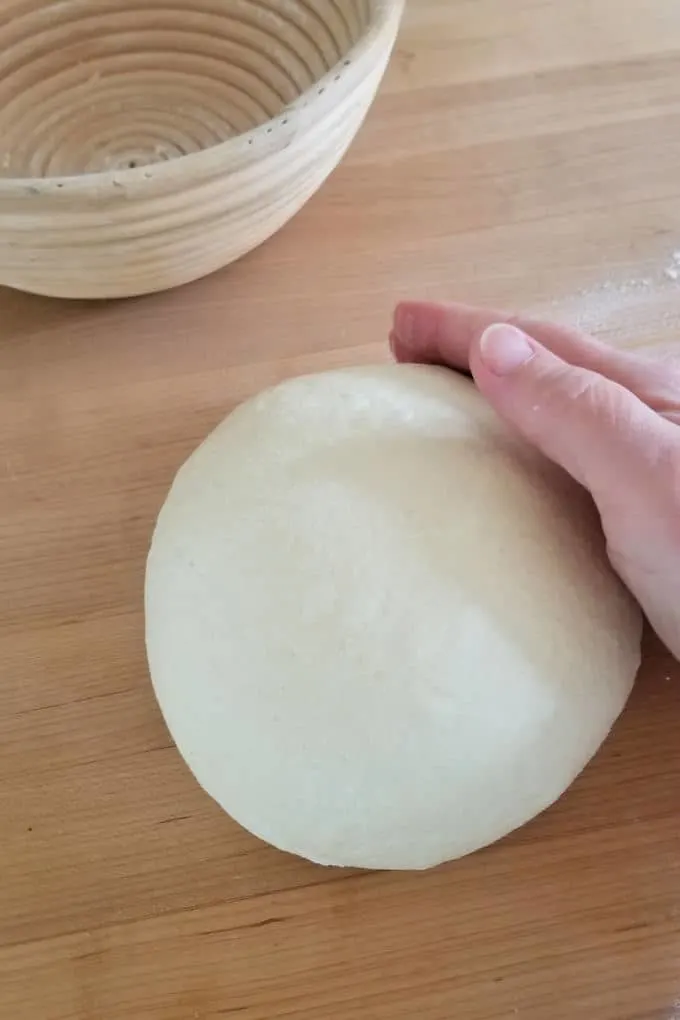
- Use your cupped hands to form the dough into a round ball (boule)
- Leave the bread to rise in the proofing basket or on a parchment lined baking sheet. If the bread in on a baking sheet, lightly sprinkle with semolina flour and cover with plastic wrap or a kitchen towel.
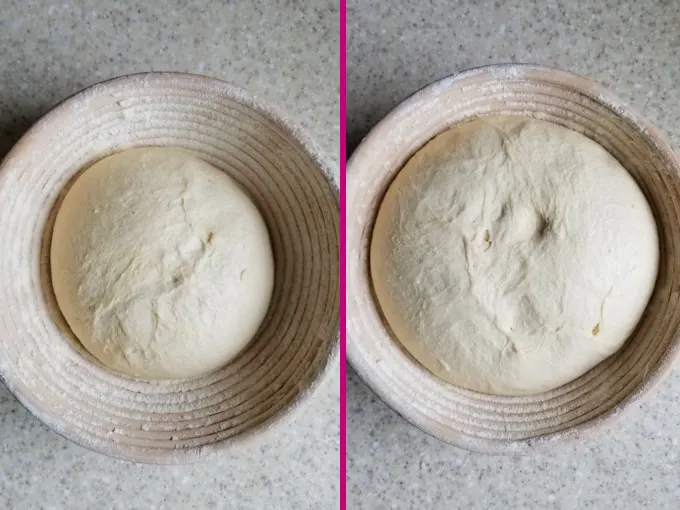
- The bread is ready when a a finger print slowly springs back.
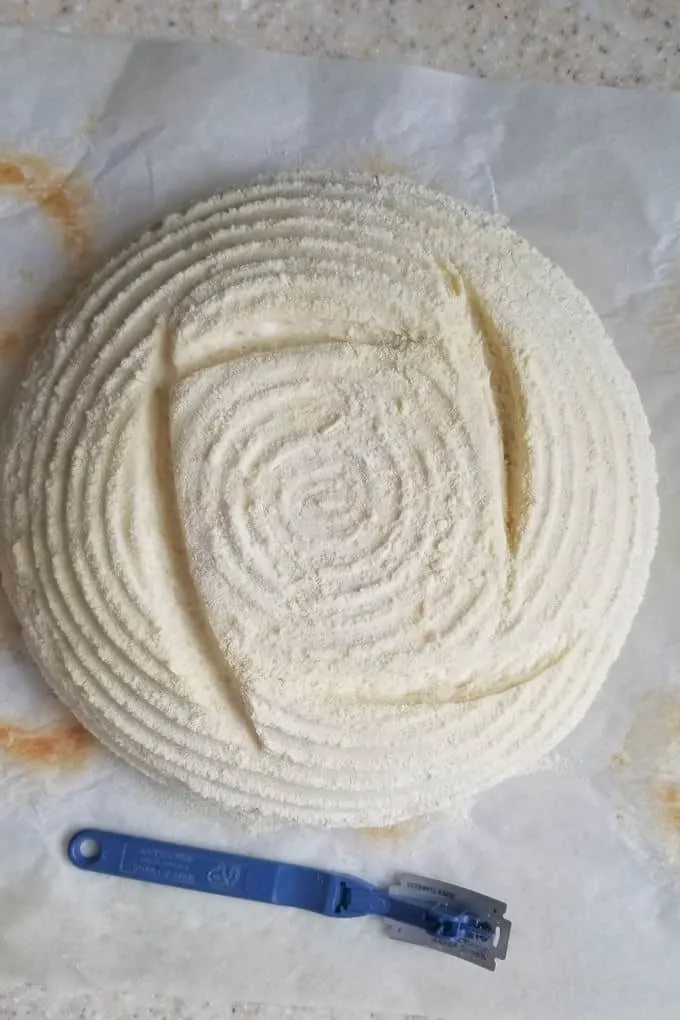
- Use a bread lame or a sharp knife to cut slashes in the top of the bread.
- In the oven, the bread will expand along the slashes instead of cracking.
A Baking Timeline for Sourdough Semolina Bread:
- If your starter needs feeding, do that the night before or early in the morning of the day you want to make the dough.
- Mix the dough in the afternoon, allow it to ferment for 3-6 hours then refrigerate over night. If you want to skip the cold fermentation, proceed with shaping and baking as soon as the bulk fermentation is complete.
- Take the dough out of the refrigerator first thing in the morning, shape the loaf and set it into the proofing basket or onto a sheet of parchment paper to rise.
- Leave the loaf to rise for 2-3 hours, or as long as is needed to almost double in size. Meanwhile, if using a Dutch oven or pizza stone for baking, place them in the oven to preheat.
- You should have fresh bread by lunch time.
I know you hate to throw away that sourdough discard. Check out these recipes that use sourdough discard.
If you love this recipe as much as I do, I’d really appreciate a star rating and a quick comment. Ratings and comments help my recipes show in search results. Thanks!
Sourdough Semolina Bread Recipe
Ingredients
- 8 oz active sourdough starter (1 cup, 100% hydration)
- 8 oz warm water (1 cup)
- 9 oz unbleached all purpose flour (1 ¾ cups, see note)
- 1 ½ teaspoons table salt
- 6 ½ oz semolina flour (1 cup)
Instructions
- Combine 8 oz active sourdough starter, 8 oz warm water and 7 ½ oz unbleached all purpose flour. Mix with the until it forms a thick batter. Cover the bowl and set aside for 30-60 minutes.
- If using a stand mixer, switch to the dough hook. Add 1 ½ teaspoons table salt6 ½ oz semolina flour and 1 ½ oz unbleached all purpose flour. Mix until combined and the dough begins to clear the sides of the bowl, about 5 minutes.If mixing by hand, stir with a wooden spoon or bowl scraper. The dough will be sticky and cannot be kneaded by hand—structure will develop through fermentation and folding.
- Place the dough into a lightly oiled bowl, turn once to coat the dough. Cover the bowl and set it aside at room temperature for bulk fermentation.
- After 30 minutes uncover the bowl, lift one side of the dough and fold it into the middle of the dough. Repeat with the other three sides of the dough then flip the dough over. You're basically turning the dough inside-out to redistribute the yeast. Cover the bowl and after 30 minutes repeat the procedure. Cover the bowl and after 60 minutes repeat the procedure again.
- Cover the bowl and after 60 minutes turn the dough one more time. By now the dough should be lively, elastic and airy. If the dough is still sluggish give it another hour or two at room temperature. Cover tightly and refrigerate overnight. If you want to skip the cold fermentation you can proceed with shaping and baking right after bulk fermentation is complete.
- Turn the cold dough out onto a lightly floured surface. Without kneading, fold each side into the center to form a compact package. Flip the dough and use cupped hands to shape it into a smooth ball. Cover lightly and rest for 20–30 minutes. If the dough spreads, reshape and rest again—this helps confirm the dough has enough strength to hold its shape.
- Uncover the dough and reshape the dough into a smooth ball. Combine the 2 tablespoons of semolina and all purpose flour and use that to dust the proofing basket. Place the dough, smooth side down, into the proofing basket. If you don't have a proofing basket set the dough directly onto a sheet of parchment paper or onto a wooden peel sprinkled with the semolina/ap mix.
- Cover the dough and leave in a warm place until it's almost doubled in size and it springs back slowly when poked, about 1 1/2-2 hours depending on the room temperature and dough temperature. Meanwhile, preheat the oven to 425 °F. Place a Dutch oven with a lid (or a pizza stone) into the oven to preheat.
- If the loaf is in a proofing basket, place a sheet of parchment over the dough and gently flip it over. Use a single edge razor or very sharp knife to cut a 1/4" deep X or square across the top of the loaf. Remove the preheated pan from the oven and remove the lid. Use the parchment to lift the loaf into the Dutch oven. If you don't have a Dutch oven, slide the parchment paper onto a baking sheet or slide the loaf onto the baking stone.
- Replace the lid on the pot and slide it into the oven. Bake for 20 minutes. Remove the lid from the Dutch oven. The loaf should be well risen and pale in color.
- Continue baking another 20 minutes until the loaf is nicely browned and beginning to crisp. Remove the pan from the oven. Use the parchment to lift the loaf out of the pan. Use the parchment to place the loaf directly onto the rack in the oven. Bake another 5-10 minutes until the loaf is deeply browned and very crisp. Total baking time is about 40-50 minutes. If you’re baking the bread on a sheet pan or baking stone the total baking time may be shorter.
- Cool completely on a wire rack before slicing.
Would you like to save this recipe?


As an Amazon Associate and member of other affiliate programs, I earn from qualifying purchases.
Excellent! All the sourdough bread recipes are amazing. Thank you. I started your recipes during covid, and I still use your baking technique, always.