Perfect Vanilla Butter Cake
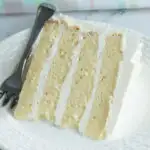
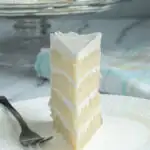
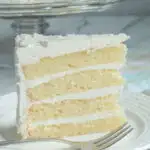
This is the only Vanilla Butter Cake recipe you’ll ever want or need. Mixing technique can make a big difference when making cake batter. Find out the best way to get a light and tender cake.
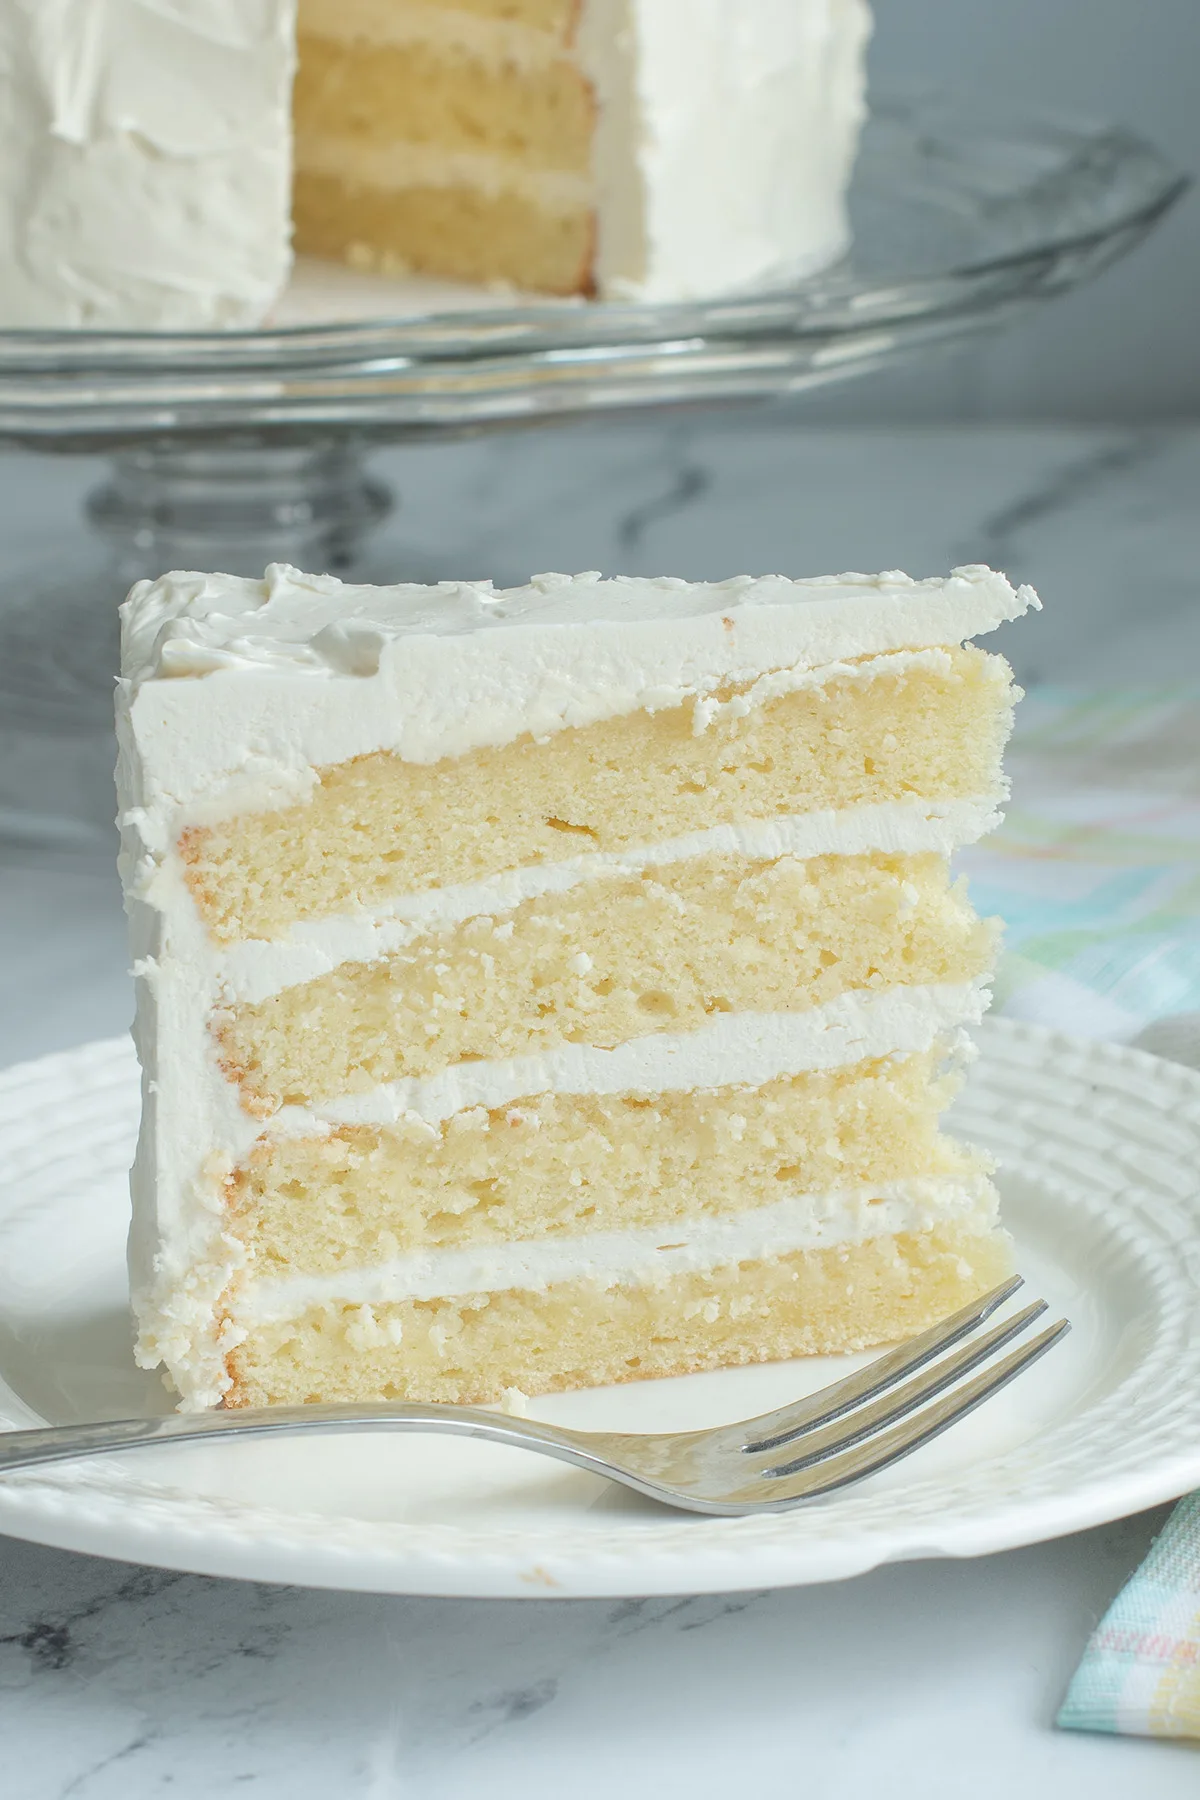
Table of contents
Why this is the best Vanilla Butter Cake Recipe
First of all this is a great recipe because it is a balanced recipe.
Professional bakers use the “Baker’s Percentage” to balance the ingredients in a recipe. With this knowledge I worked for months developing the best vanilla cake.
In fact, this exact recipe was the base for hundreds and hundreds of wedding cakes I sold when I had my wedding cake business.
You can find the percentages for this Vanilla Butter Cake recipe in this all-encompassing post describing how to create the best cake recipes.
Once you have a balanced recipe you need to think about mixing technique.
I make my butter cakes using the “reverse creaming” method of mixing. Reverse creaming makes a cake with a soft and tender crumb. You can see side by side comparisons of reverse and traditional creaming below.
Recipe Ingredients
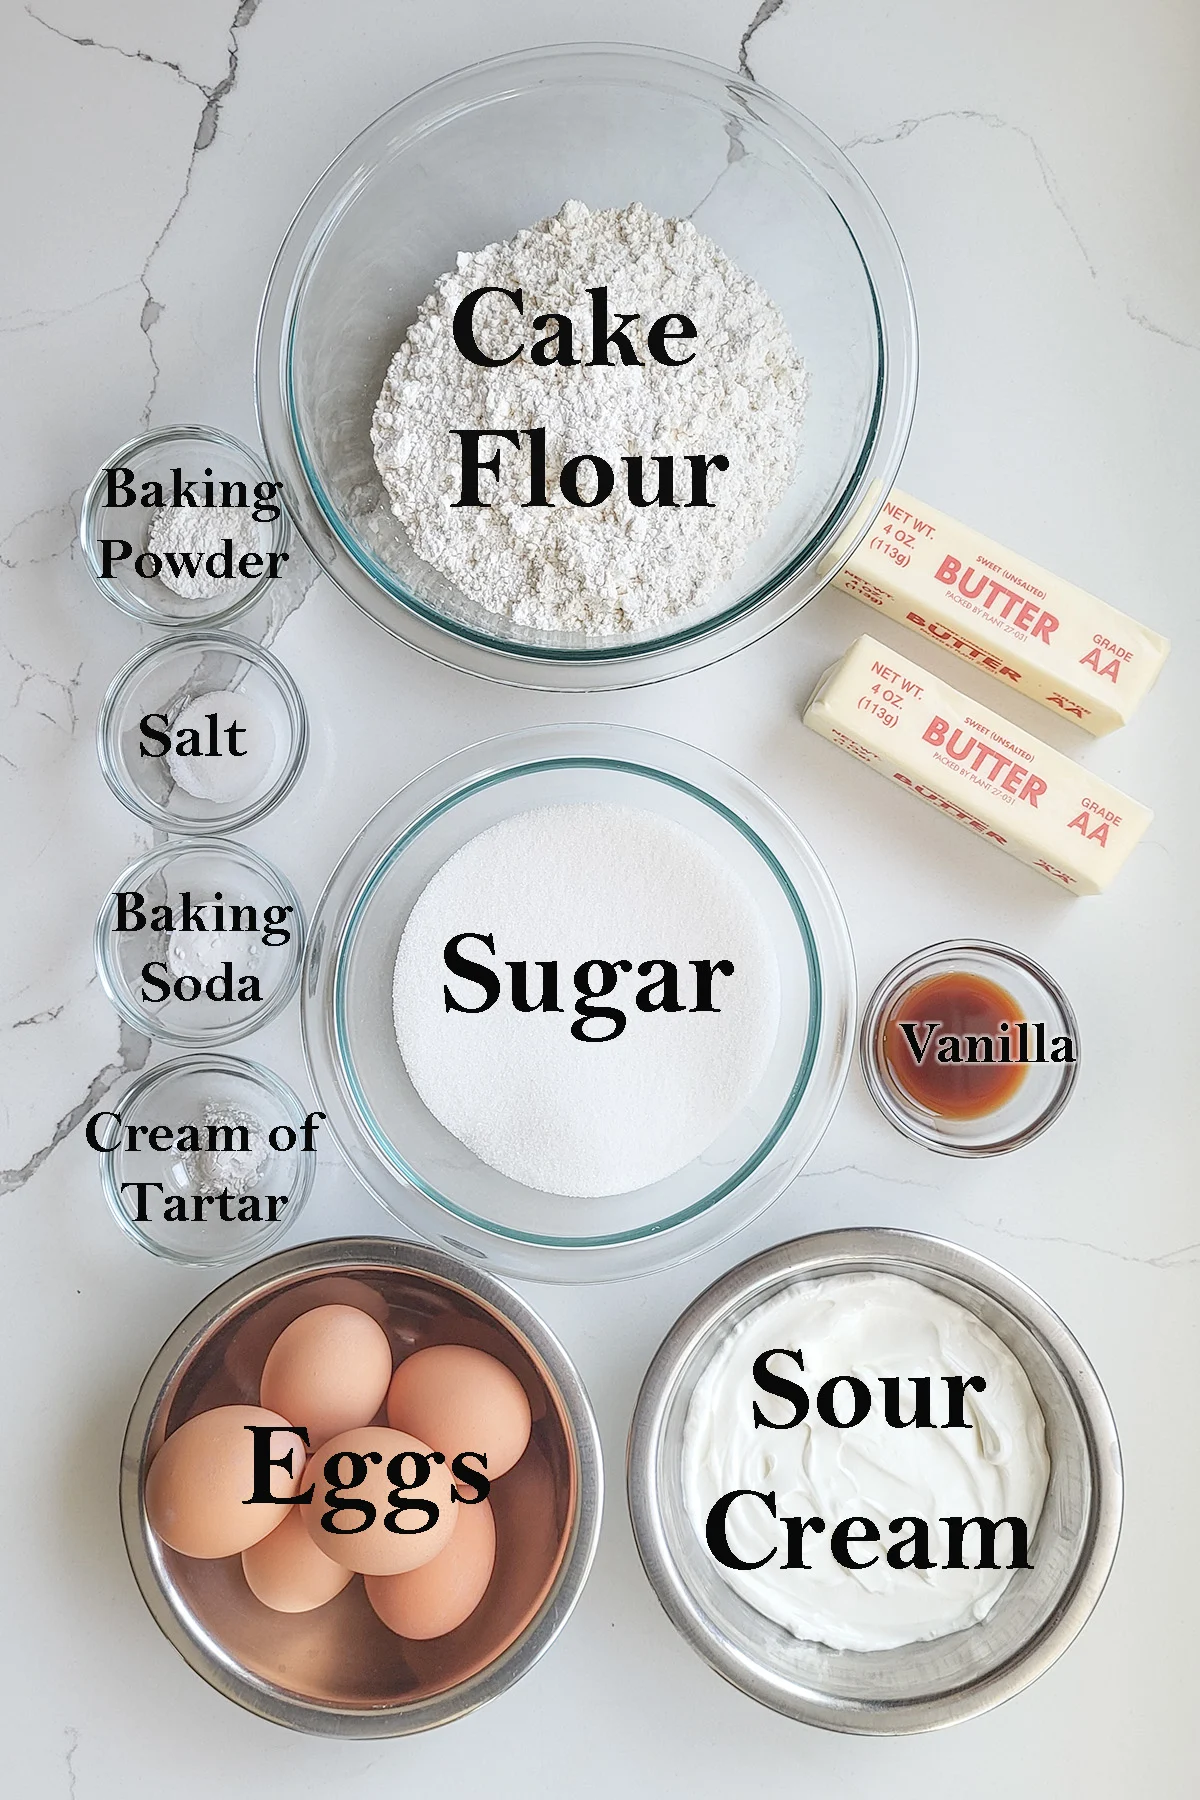
Ingredient Notes
- Cake Flour – Has a lower protein content than all purpose flour so it makes a softer cake. I prefer bleached cake flour. Bleached cake flour is acidic which tenderizes the cake and allows the batter to absorb more liquid for a moister cake.
- Sour Cream – Is used instead of milk as the “liquid” in this batter. Because sour cream is acidic it tenderizes the crumb of the cake and the added fat enriches the batter.
- Eggs – Extra egg yolks in the batter enriches the cake and emulsifies the batter for an even and soft crumb. The whites are whipped and folded into the batter for an extra light and soft cake crumb.
- Cream of Tatar – This acidic ingredient stabilizes the whipped egg whites and acidifies the batter for a softer crumb.
Process Photos
See the recipe card for detailed instructions and measurements.
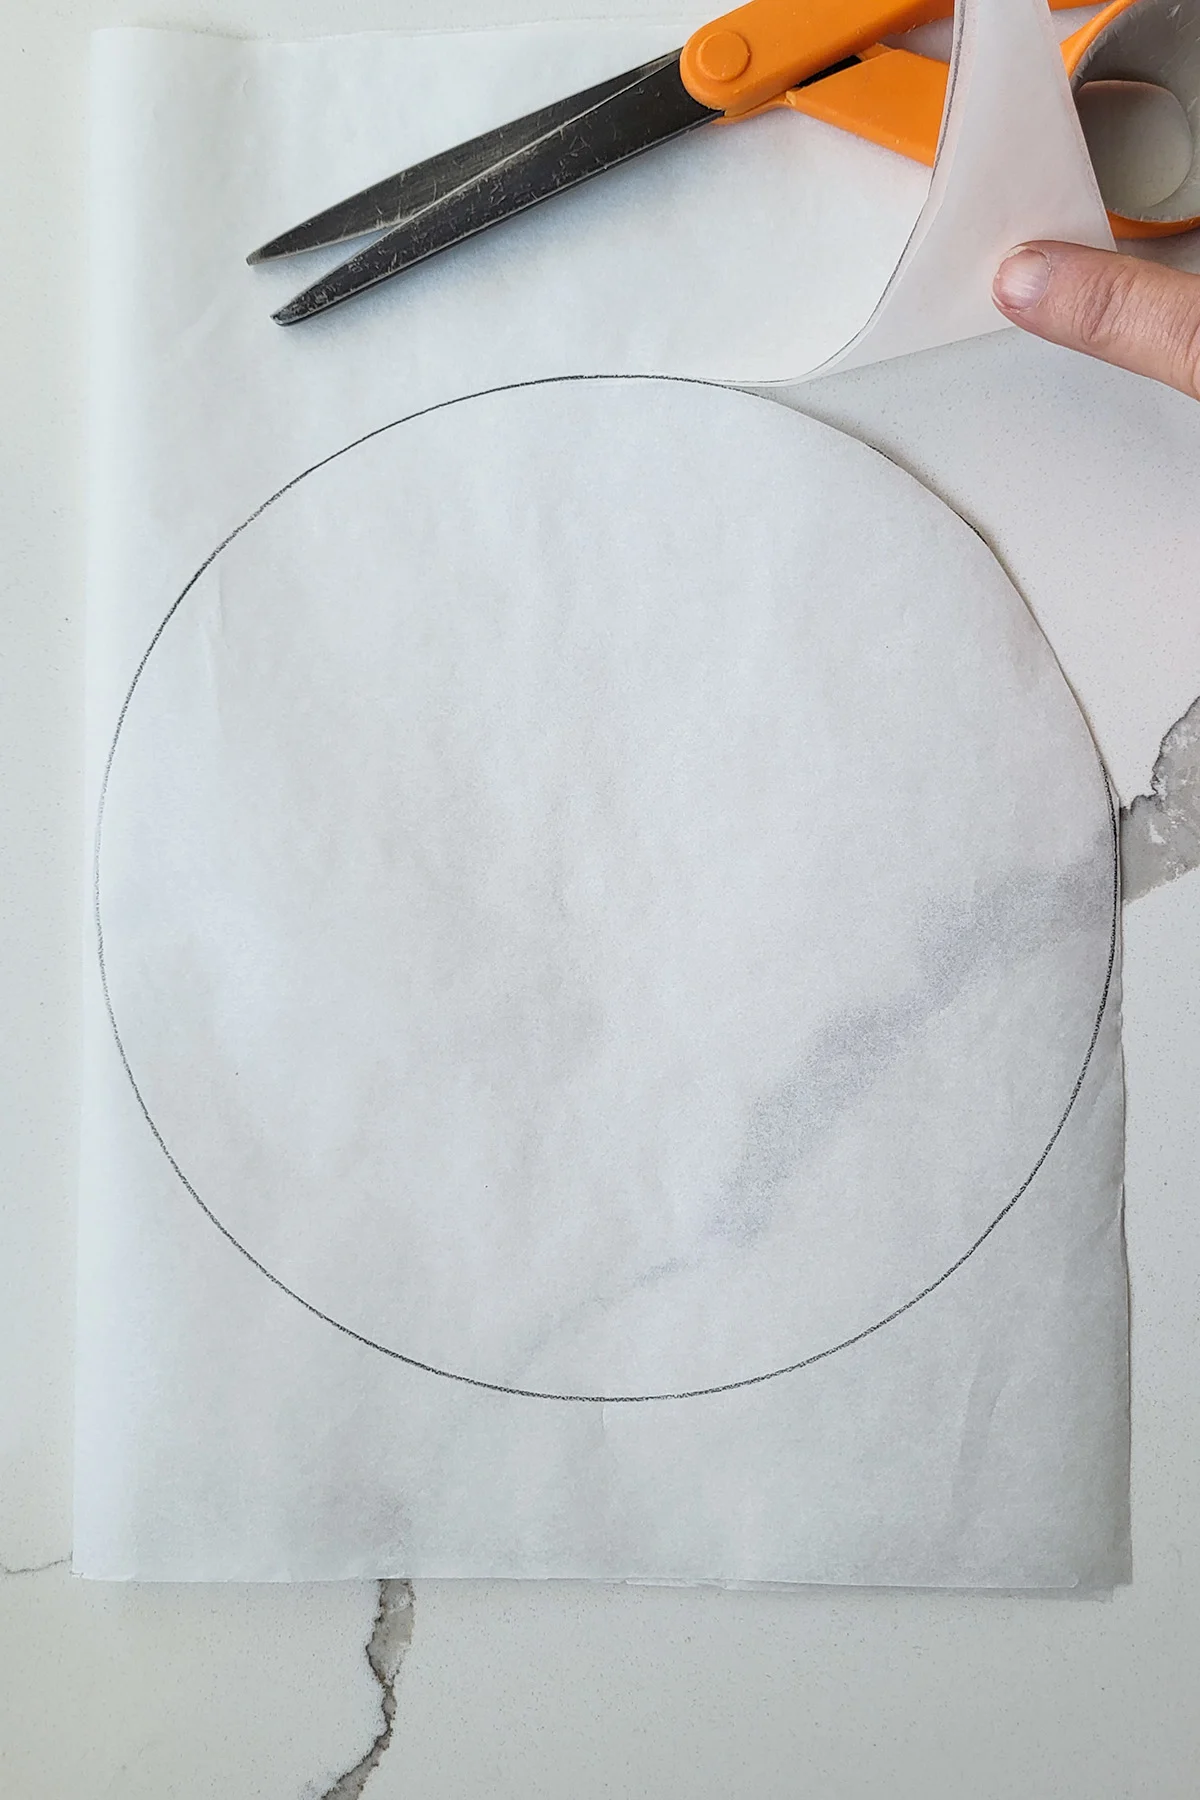
- Draw an 8″ circle on parchment paper using your cake pan as a guide. Cut out two circles and use them to line your cake pans.
- If you don’t have parchment paper butter and flour the bottom of the cake pan only, not the sides.
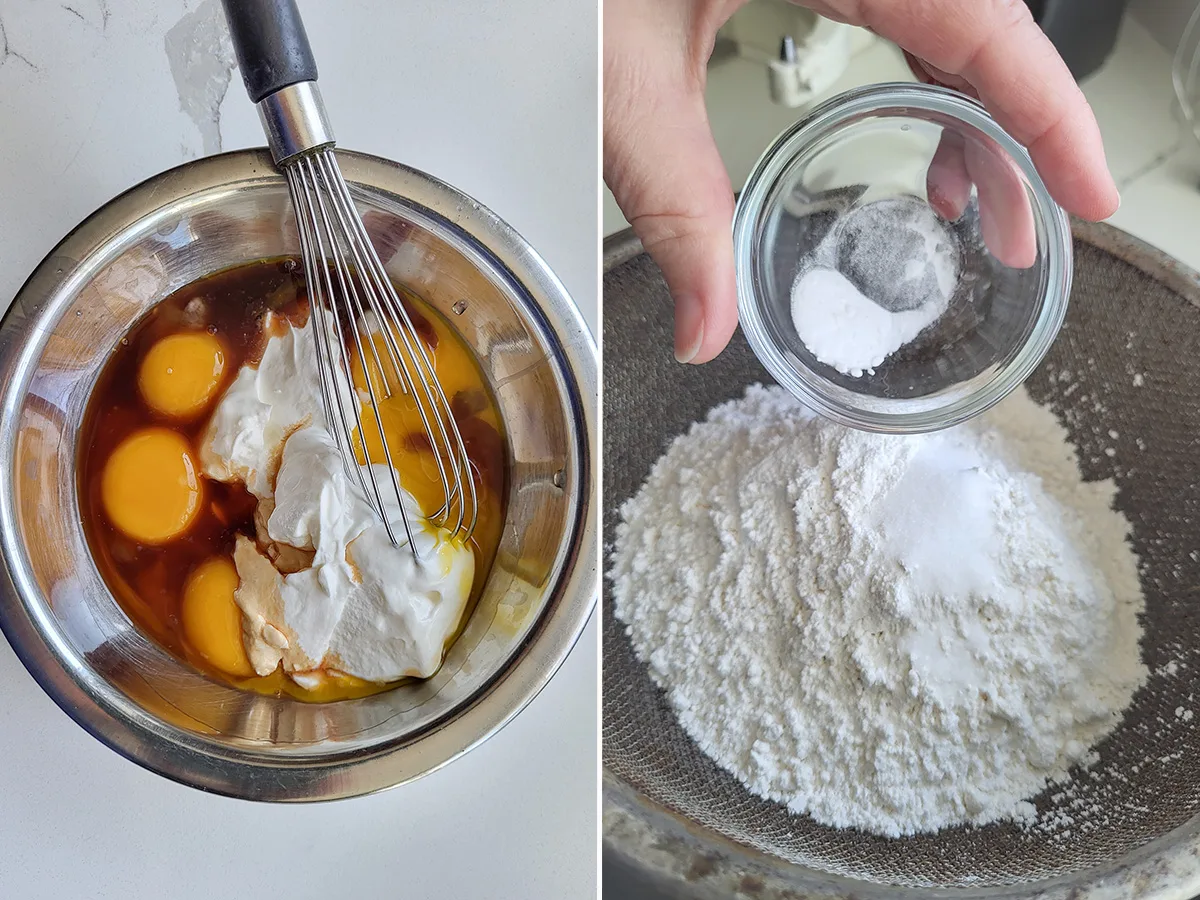
- In a small bowl whisk together the yolks, sour cream and vanilla.
- Sift the dry ingredients into a mixing bowl.
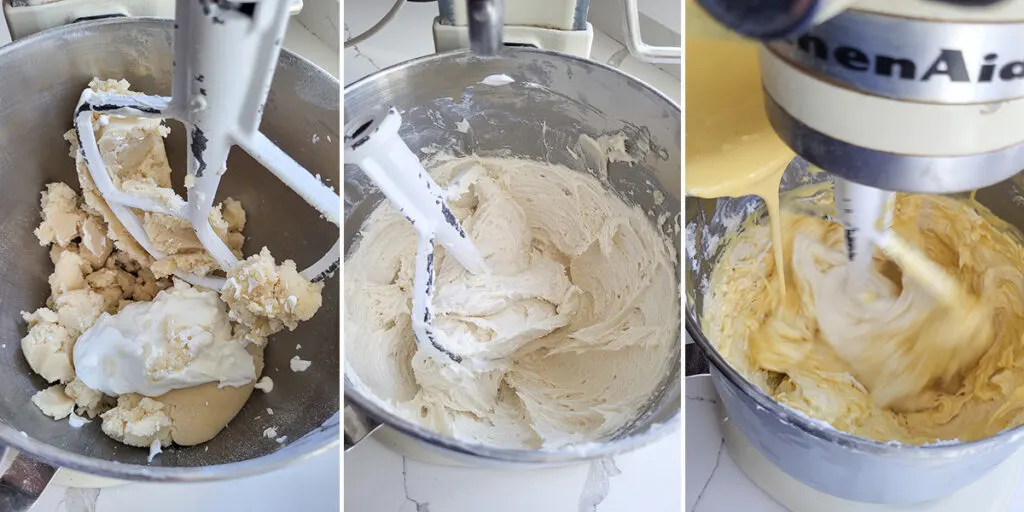
- Mix the dry ingredients on low speed and add the butter. Mix until it forms a thick paste. Add the reserved sour cream.
- Mix the batter on high speed until it is light and aerated. Scrape the bowl and beater.
- With the mixer running on low, add the yolk mixture. Mix until combined.
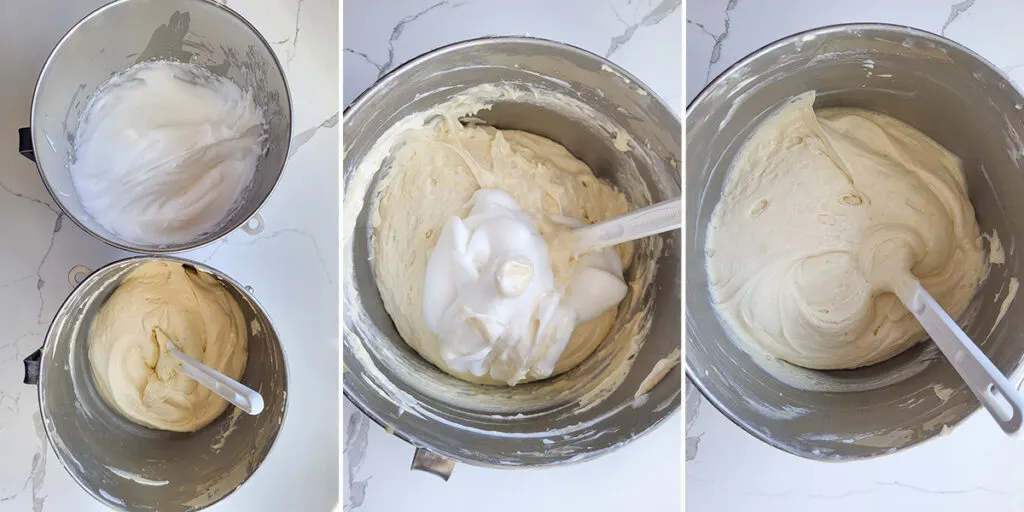
- Whip the whites with the cream of tarter and the remaining sugar. Do no overwhip the whites.
- Fold the whites into the batter in two batches.
- Fold just until there are no streaks of whites.
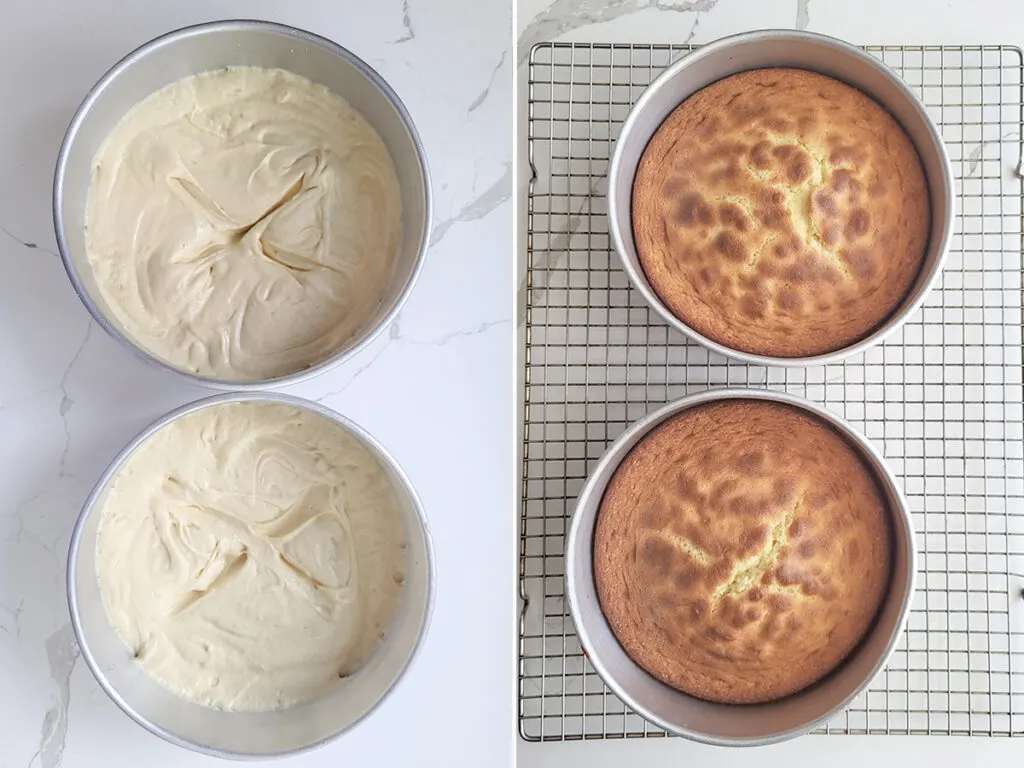
- Evenly divide the batter between the two pans. Smooth to even level then use the tip of your spatula to make an “X” in the center of each cake. This will help the cake rise more evenly in the oven.
- Bake until the center of the cake springs back when lightly pressed. Cool in the pan for 20 minutes then cool completely before icing.
What’s the difference between vanilla cake and yellow cake?
Most people use the terms “vanilla cake” and “yellow cake” interchangeably. Vanilla is the flavoring in the cake. The cake is yellow because of the eggs in the cake.
That being said, not all vanilla cakes are yellow cakes. If you eliminate the egg yolks in the cake and make white cake flavored with vanilla, it too is a vanilla cake.
Reverse Creaming vs. Traditional Creaming
Before posting this recipe I decided to do a quick kitchen experiment to back up my claims that reverse creaming is the way to go for this cake.
I used the same ingredients and mixed them with traditional creaming, reverse creaming and reverse creaming with the eggs separated and the whites whipped and folded in.
There were distinct differences between the three cakes.
- Cake 1 (traditional creaming method) had an open and regular crumb, but was not as tender as I would like and it had a slightly oily mouth-feel.
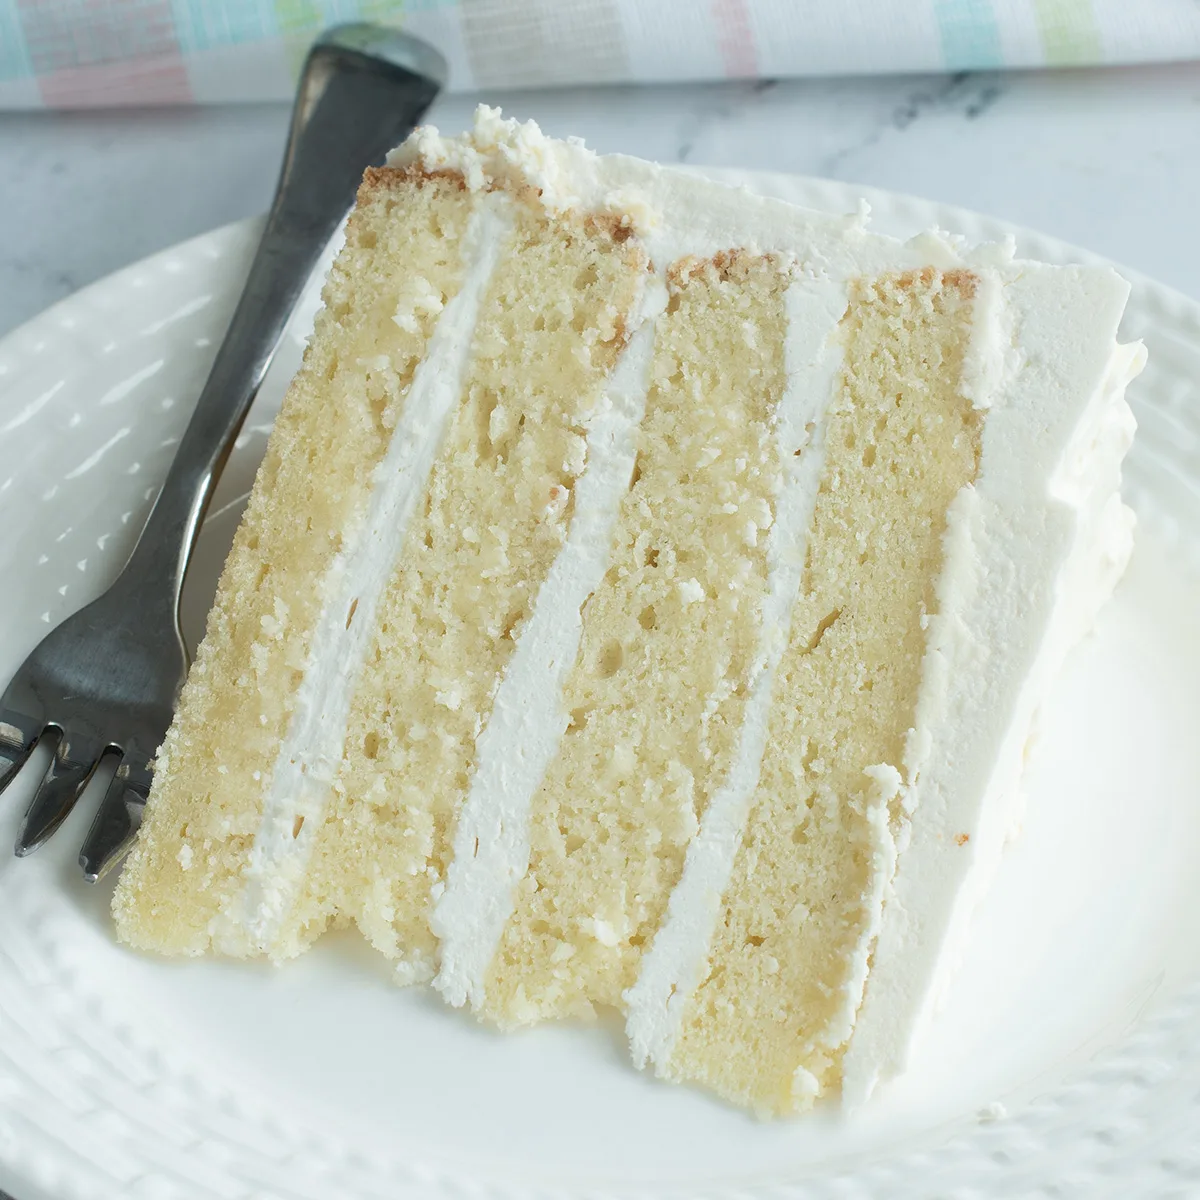
- Cake 2 (reverse creaming) was very tender, velvety and soft.
- Cake 3 (reverse method with whipped whites) had a slightly irregular but very tender crumb. It was not quite as velvety as cake 2, but it was lighter and quite tender. This was my favorite cake!
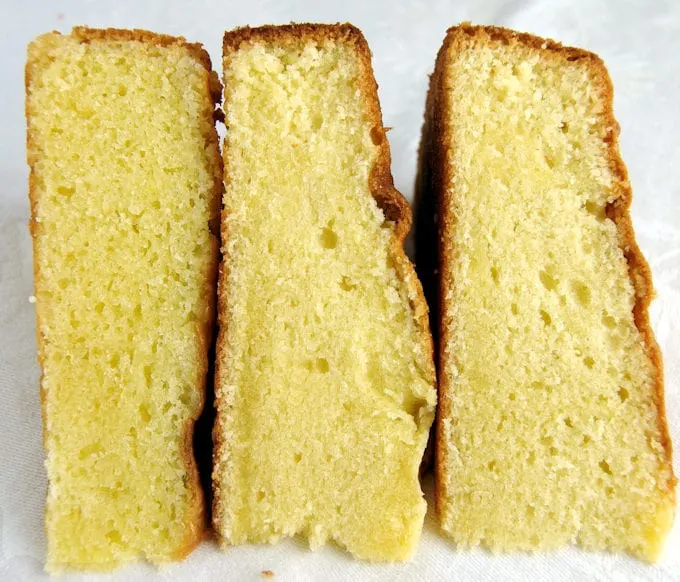
Three cakes with the exact same ingredients, but different mixing methods. Left=Traditional Method, Middle=Reverse Creaming, Right=Reverse with Whipped Whites
This is a really great all purpose yellow cake that is tender yet strong enough for stacking or carving. For more information about cake batter, visit the Baking School page.
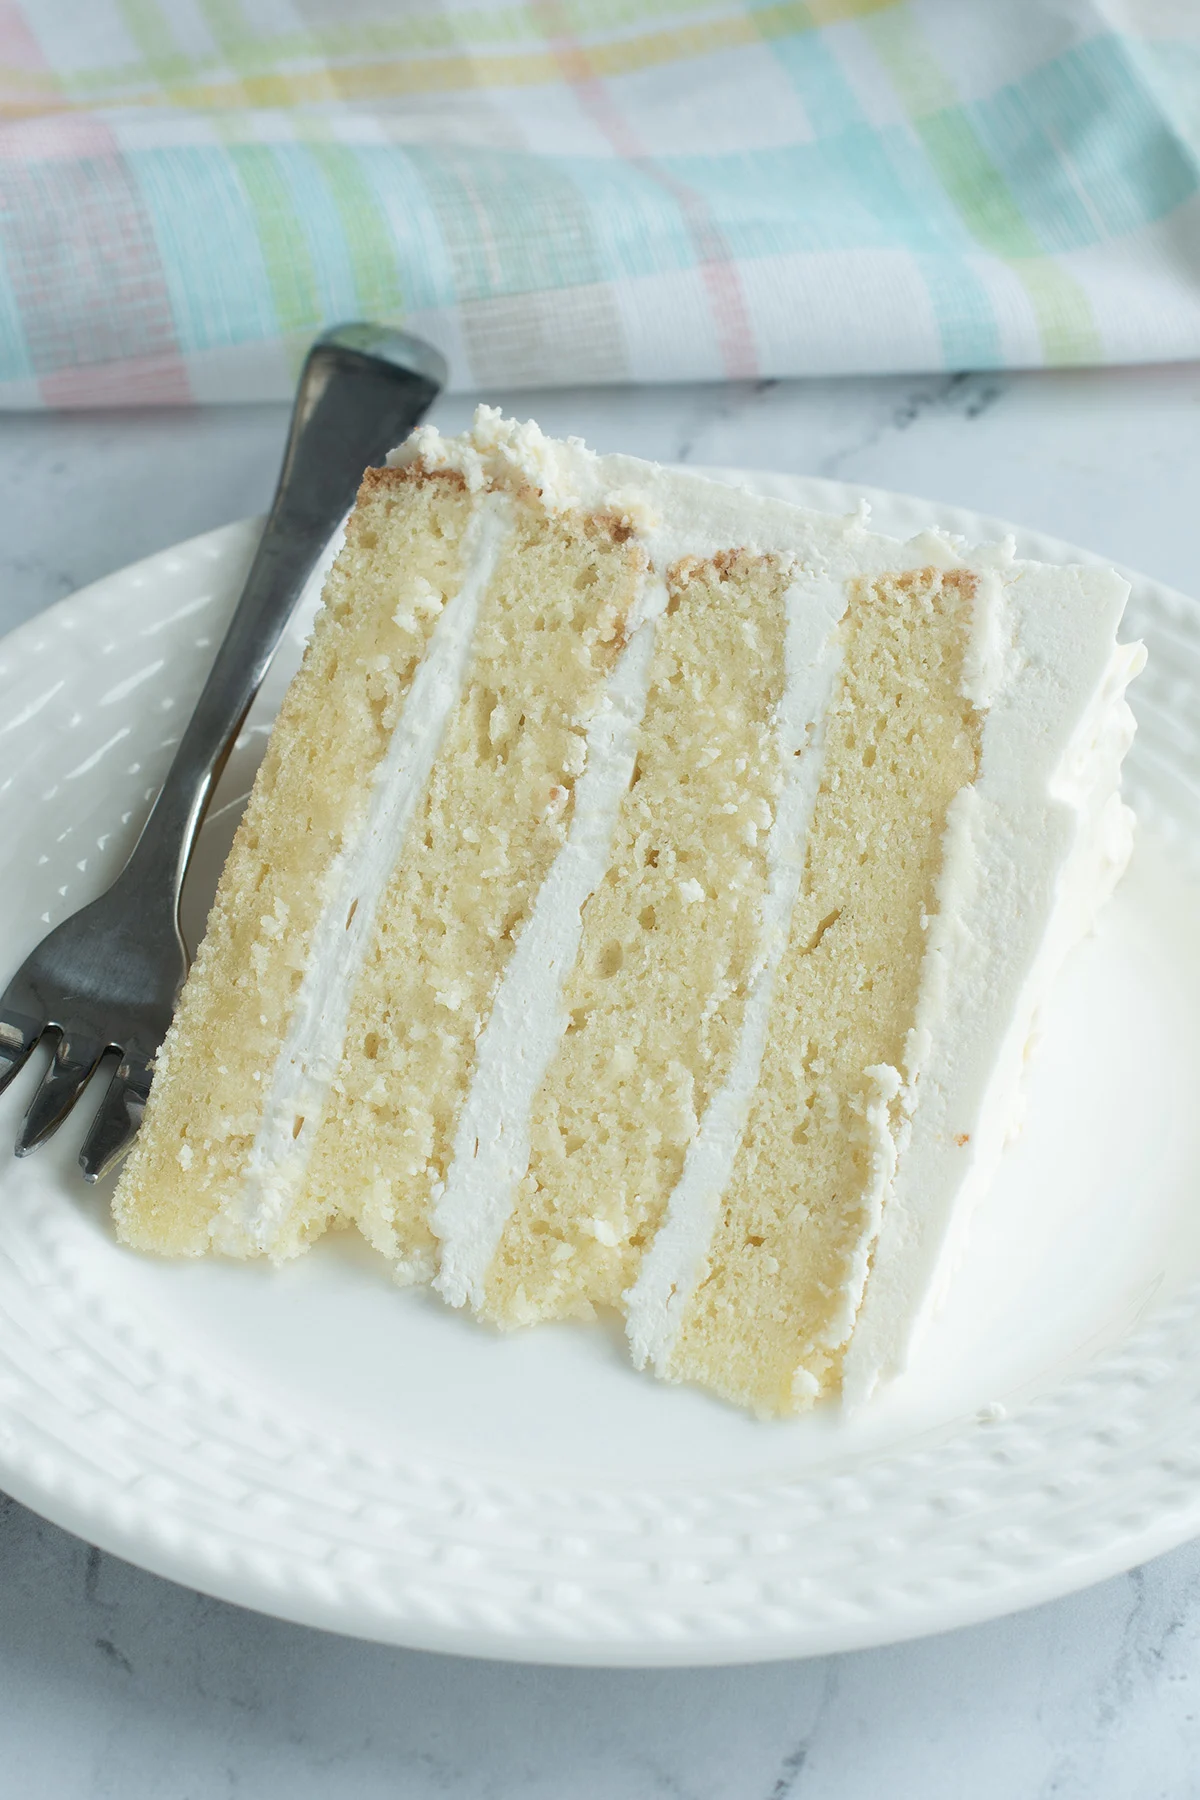
Frosting your Cake
I like this recipe filled and iced with Italian Meringue Buttercream or Swiss Meringue Buttercream.
American Buttercream is slightly sweeter than meringue buttercream and is also nice with this cake.
Storage
The uniced cake can be stored for 2-3 days at room temperature for up to 2 months in the freezer. Do not refrigerate the cake unless it is filled or iced with a perishable frosting.
More Cake Recipes
Now that you’ve made this recipe what should you do with all the extra egg whites? Check out this collection of recipes that use extra whites for some great ideas.
If you love this recipe as much as I do, please consider leaving a 5-star review.

Vanilla Butter Cake Recipe
Video
Ingredients
- 6 large egg yolks (room temperature)
- 8 ounces sour cream (1 cup, room temperature, divided)
- 1 tablespoon vanilla extract
- 12 ounces granulated sugar (1 ½ cups, divided)
- 9 ounces cake flour (2 cups, see note)
- ¾ teaspoon baking powder
- ¾ teaspoon salt
- ¼ teaspoon baking soda
- 8 ounces unsalted butter (room temperature)
- 3 large egg whites (room temperature)
- ¼ teaspoon cream of tarter
Instructions
- Preheat the oven to 350 °F. Line two 8"x3" round cake pans with a circle of parchment paper or butter and flour the bottom of the pans only, not the sides.
- Combine 6 large egg yolks, 1/2 the sour cream and 1 tablespoon vanilla extract in a small bowl, whisk to combine, set aside.
- Into a mixer bowl put 1 ¼ cups of the sugar, sift in 9 ounces cake flour, ¾ teaspoon baking powder, ¼ teaspoon baking soda and ¾ teaspoon salt. Mix on low speed for 10 seconds to distribute the leavening. Add 8 ounces unsalted butter to the flour mixture. Mix on low until the butter is incorporated and the batter looks like a paste. Add the other ½ of the sour cream to the flour and butter mixture. Increase the speed to medium and mix about 3 minutes until the batter lightens in texture. If you're using a hand mixer add another minute or two to the total time.
- Scrape the sides and bottom of the bowl. With the mixer on low, add ½ the egg yolk mixture. Mix until mostly incorporated. Scrape the sides and bottom of the bowl. Add the rest of the egg yolk mixture. Scrape the bowl and mix until incorporated.
- In another bowl, whip 3 large egg whites with ¼ teaspoon cream of tarter on medium high until they form soft peaks. Turn the mixer to medium low and slowly add the remaining ¼ cup of sugar. Turn the mixer to medium high and whip the whites to full peak. Fold the whites into the base in 2 parts, folding just until there are no streaks of egg whites.
- Divide the batter between the 2 pans and spread so it’s level.
- Bake until the center of the cake springs back when lightly pressed or a toothpick inserted into the middle of the cake comes out clean, about 25-30 minutes.
- Cool 10 minutes in the pan and then turn out onto a cooling rack. When fully cooled, wrap in plastic and refrigerate at least 3 hours or overnight before filling and assembling the cake with your favorite frosting.
Would you like to save this recipe?


As an Amazon Associate and member of other affiliate programs, I earn from qualifying purchases.
This is the perfect, simple dessert to have with my afternoon latte. I love when the simple things in life are so good.
Thanks, Gloria.
Thanks for such an informative post. I’ve used reverse creaming before but only when recipes specifically call for it. Do you think I can try the reverse creaming method with other cake recipes and get similar results? I have searched high and low for a good strawberry cake recipe that doesn’t rely on boxed mix and weird ingredients like jello. I finally found one that has a good flavor and decent texture, but I found the crumb wasn’t quite what I had hoped for. The cake was moist and fairly tender but had a very open, holey texture and I was hoping for something with a that is tender but still with a fairly fine crumb, if that makes sense. More like the reverse creaming with whipped whites in your pictures. Also, are there any pitfalls to be aware of when using the reverse creaming method? I’m making my daughter’s birthday cake on Saturday and would hate to screw it up! Here’s the recipe in question:
Hi Lindsay. I would say that any recipe that uses the “creaming” method could be made with the reverse creaming method. I looked at the recipe you want to use and it looks like a pretty balanced recipe. There is a fairly high percentage of liquid in the recipe with the eggs, strawberry puree and sour cream. If you add an emulsifier to the batter that will help the texture of the batter and the cake crumb. Egg yolks are great emulsifiers. You might want to try using 4 whole eggs plus 3 yolks instead of 5 whole eggs. You can still separate the whites and whip them as described in my recipe. There is a lot more information about cake batter in the Baking School section here at Baking Sense. If you review the Pound Cake Perfection class you’ll learn about the Baker’s Formula and about balanced cake recipes.
Thank you so much! I’ll let you know how it turns out. 🙂
I’ve been using this recipe with success, however, the last time I used it the tops were so sticky and I had a little accident with one layer after torting it – I made the mistake of laying the sticky side down and then it stuck to the foil where I laid it while I filled the other layers.
I’ve always torted this cake and the tops have never been this sticky. What do you think made it sticky? I have to make a wedding cake and would like to use this recipe again but would like to avoid the stickiness.
Hi Ana. If you refrigerate the cake before torting, the crust on the top can get a bit sticky. Especially if it was wrapped while still warm. What I do is unwrap the cake and peel off the sticky layer on top. Next time, if it sticks to the foil just put it in the refrigerator and let it get cold. Take it out and flip it over so the foil is on top. It should be easy to peel away the foil before flipping it back over. Since this cake gets firm when chilled (because of the butter) it’s super easy to handle when it’s cold. Also, I always use parchment paper instead of foil because it’s less sticky. Good luck and let me know if you have any other questions. Eileen
Hi thanks for your response. I froze the cake and the foil was just the outer layer that I happened to place the cake on after torting it. To freeze I wrap in plastic wrap and then again in foil.
Do you think I should let it cool completely before wrapping and freezing so it’s not as sticky?
I do think if you let the cake cool completely it will stick less. But I never mind when the outside sticks because I trim that off anyway. Personally, I don’t like the brown crusty part in the cake. When the outside sticks I just peel it off with the plastic wrap. Have you looked at this post? You can see detailed photos of how I trim and assemble the cake. Hope that helps.
Awesome – thank you!! Had never really thought of peeling that piece off – will test it out.
Hi Mrs. Coachman – If you’re trying to avoid separating the eggs I would recommend using 5 whole eggs instead of the 6 yolks and 3 whites listed in the recipe. Hope that helps. Let me know how it turns out.
Ok thanks so much!! I will let you know how it turns out I don’t mind the separating process I just noticed there was nothing about the egg amount for (the basic ) and the (reverse method without egg whites) I want to try all of them so will it be 6 whole eggs for the basic method as well? Last question! My favorite texture cake is something moist and velvety which method fits that description best?
The reason the original recipe has more yolks than whites is because the extra yolks give the cake more richness and a more tender crumb. You can use the same proportions and just not whip the whites or you can use all whole eggs (5). To me, I think reverse creaming with whipped whites give the most velvety texture. It’s the way I always mix my cakes. This week I will be publishing a series of “classes” all about cake batter. Each “class” will go into detail about the ingredients in the cake batter and how to change ingredients around to fix the texture of a cake.
O wow!!! Ok that’s sounds great I will be LOOKING out for that video you are so sweet to do that and thanks for the egg and texture tips
They are blog posts, not videos. Here’s a link to the first lesson.
Hello and thanks for taking the time to explain all that wonderful advice I have not used your recipe yet but I’m interested in the reverse method without the whipped egg whites I have a QUESTION regarding the amount of eggs would I just use 6 eggs? Or do I use 9 in replace of the 3 egg whites?