
All Butter Pie Crust (Extra Flaky)

This all butter pie crust is the one I reach for when I want the flakiest crust with rich, buttery flavor. The butter goes in at two stages: soft butter for tenderness, then cold slices for big, distinct flakes. The milk solids in the butter bake up a deep golden brown. It’s a little fussier to roll than my classic butter and shortening crust, so I baked them side by side to show you the difference. With a few pastry chef tips, it’s well worth the effort for your holiday pies.
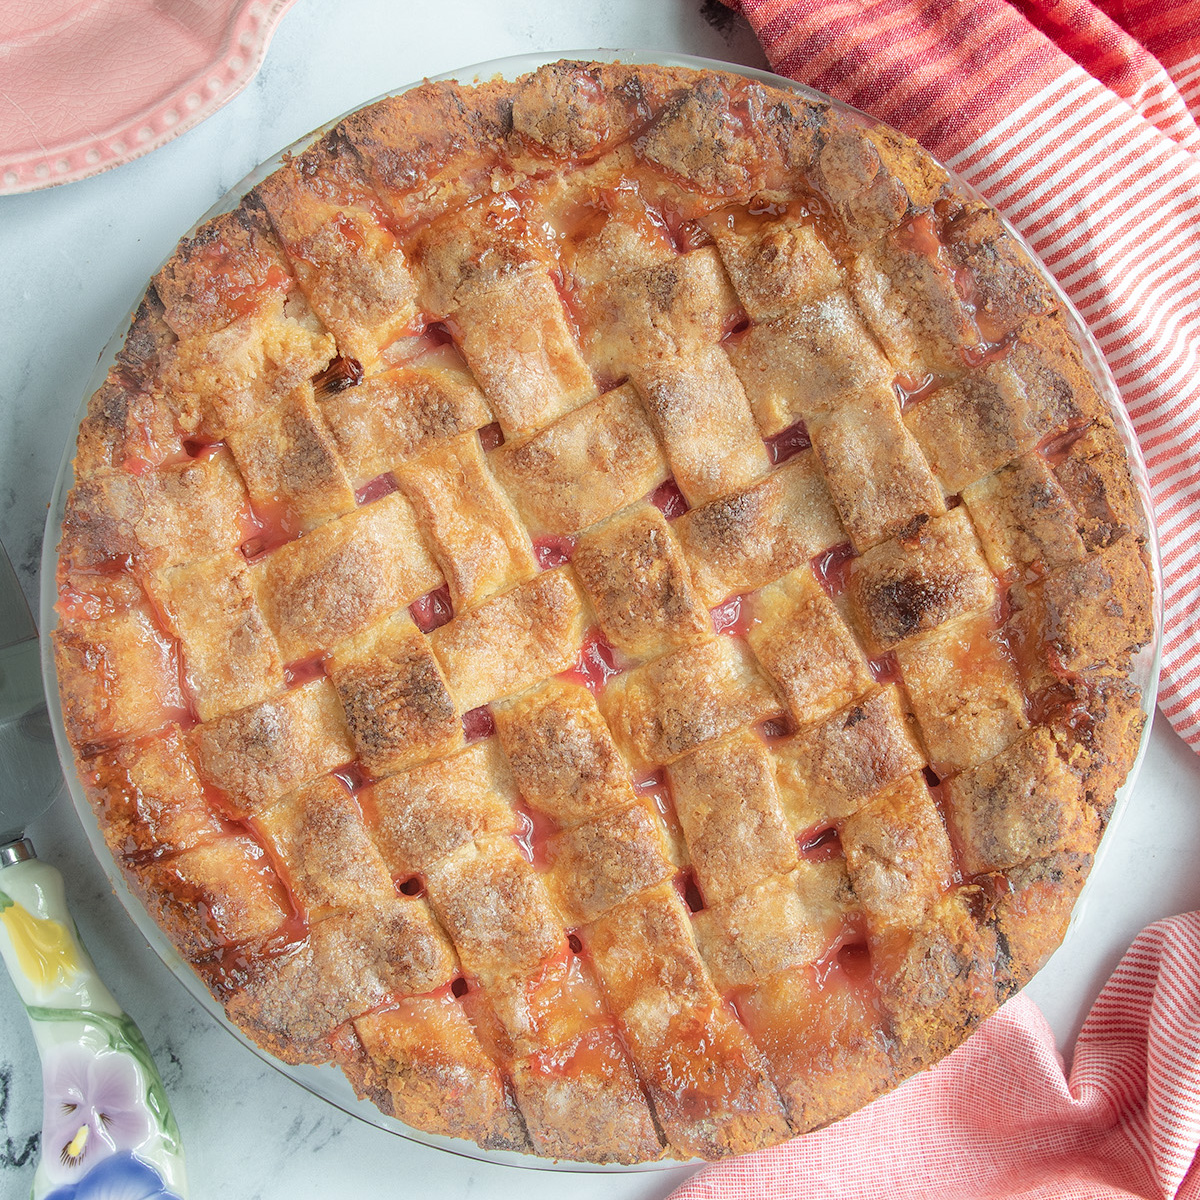
Table of contents
Why Make an All Butter Pie Crust?
My classic Homemade Pie Crust recipe uses two different types of flour and two different types of fat. It makes a crust that is tender and flaky and very easy to work with. That recipe is a great option when you want a versatile crust that rolls like a dream.
So why create another pie crust recipe when I’ve got a good one? Well, variety is the spice of life and the differences between my standard recipe and this all butter recipe are subtle but real.
Using just butter as the fat in this crust not only enhances the flavor, but it also improves browning, thanks to the milk solids in the butter. A crust made with all butter bakes up golden brown and delicious.
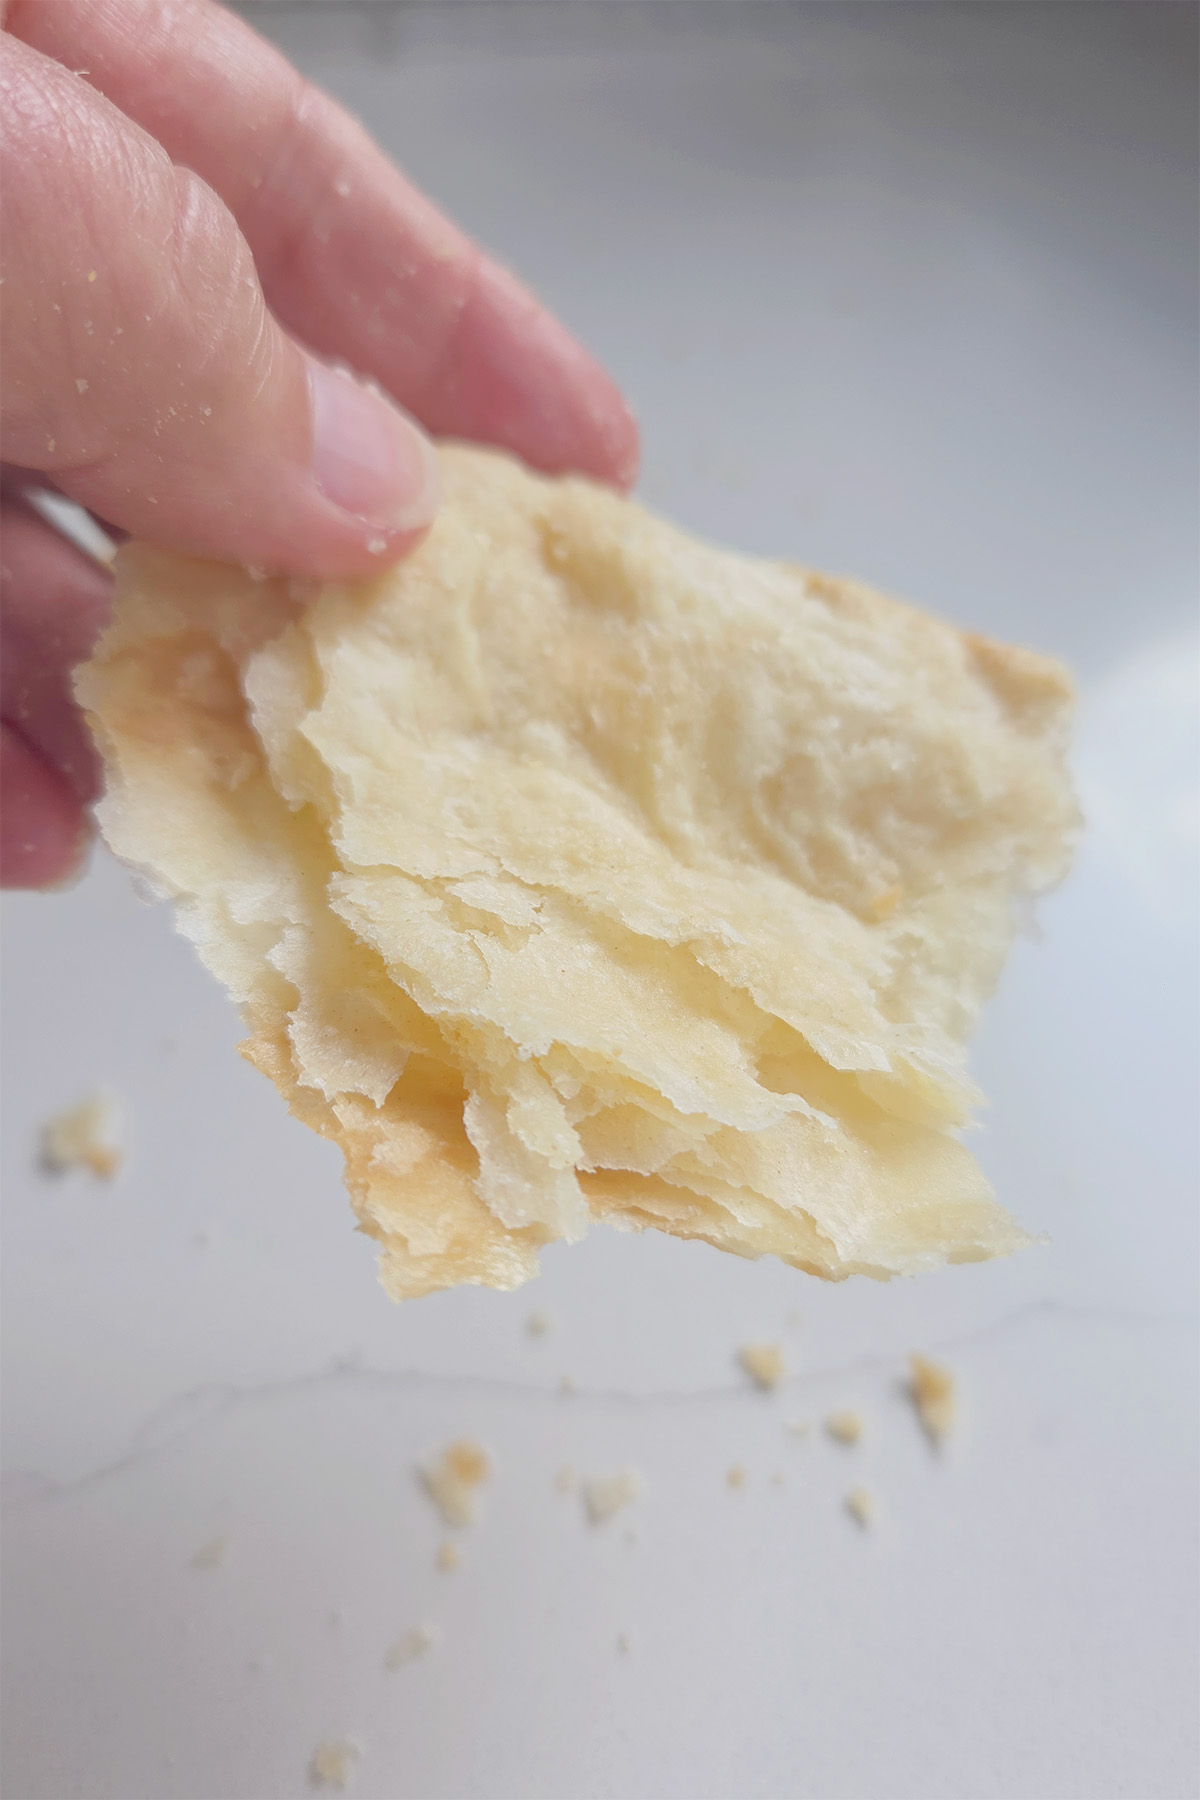
Butter is brittle when it’s cold, so as long as you prevent the butter from melting while you work with the dough, those brittle bits of butter form an ultra flaky crumb that is irresistible.
The brittle butter makes this crust a bit fussier to roll than my crust made with shortening and butter, but if you work slow and steady while rolling the payoff is worth it.
Ingredients
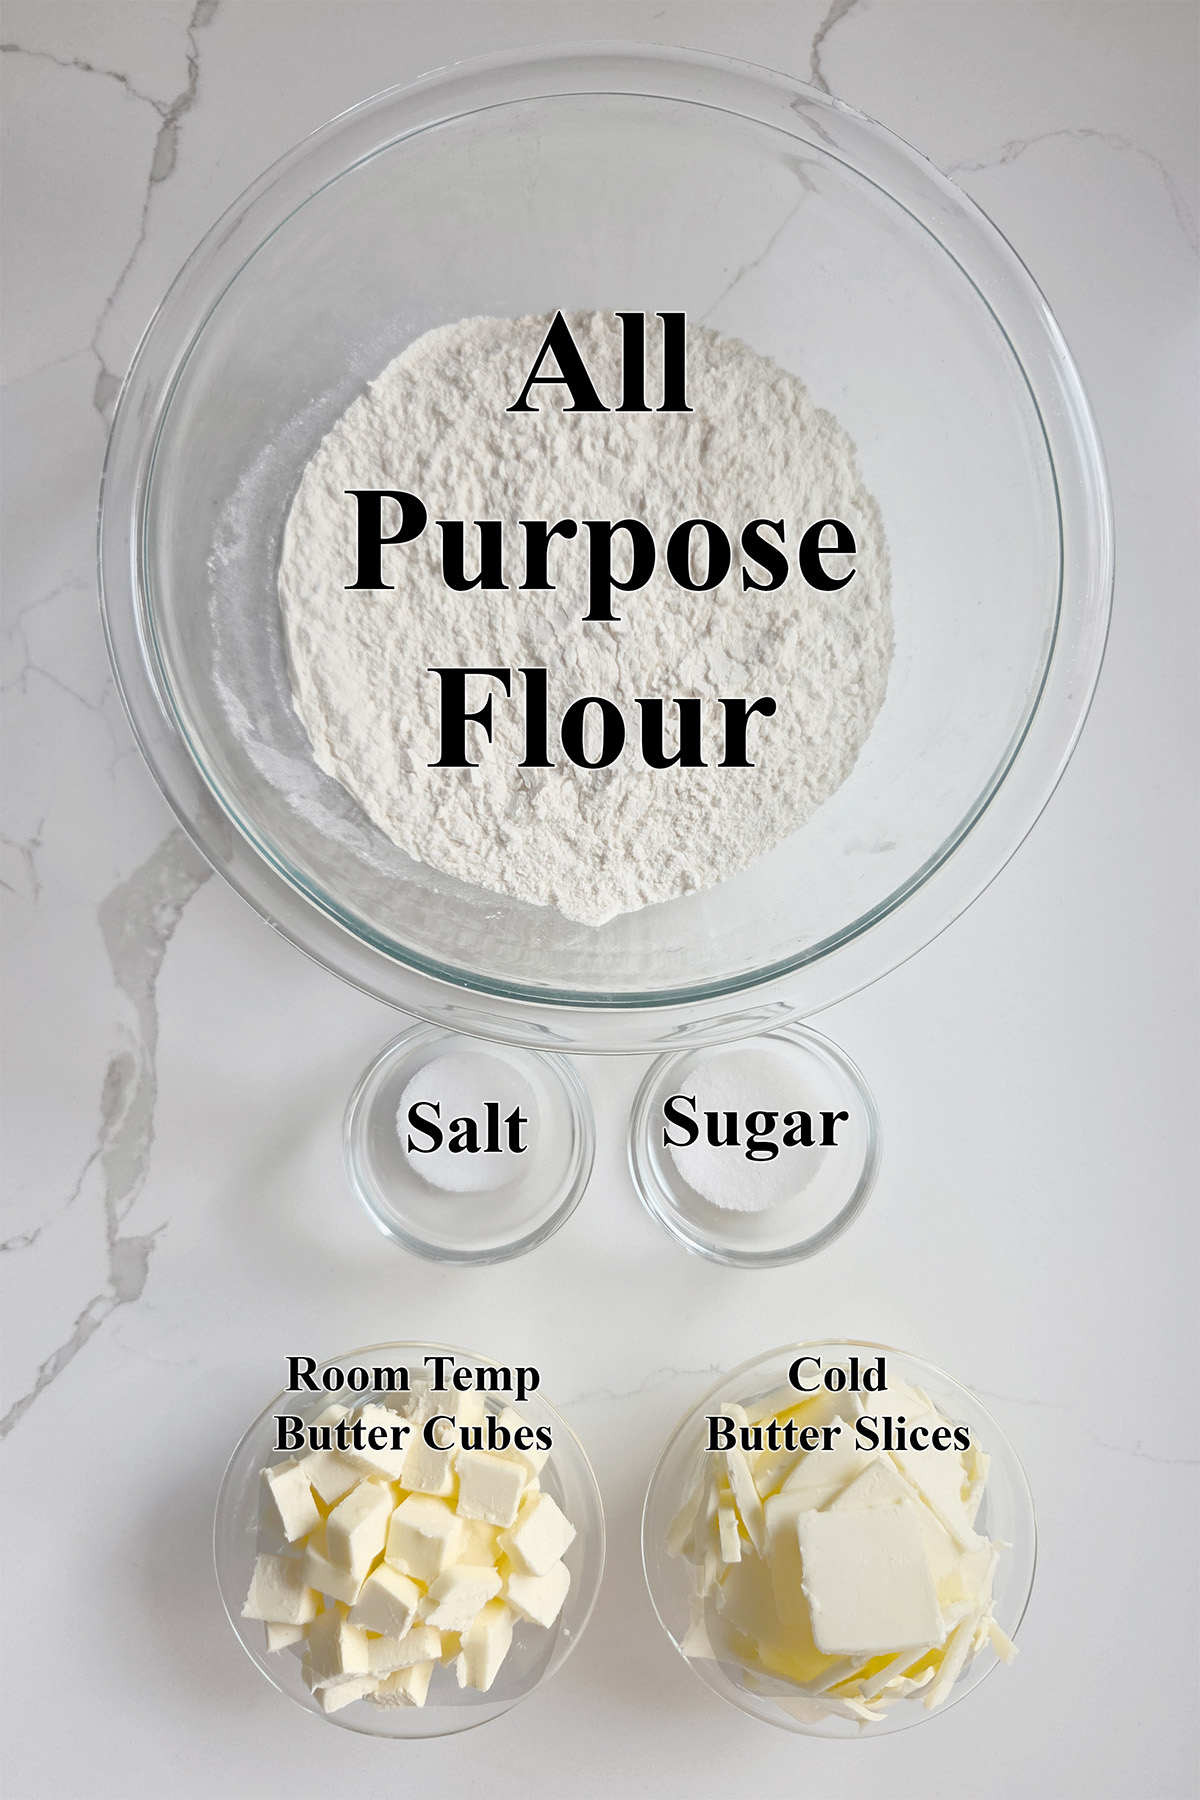
- Flour – This recipe uses medium protein all purpose flour. AP flour absorbs more water than pastry flour. Because this recipe uses all butter, the extra water in the butter (vs. shortening) is easily absorbed by the flour.
- Butter – Butter is the only fat in this recipe, but it is added in two stages at two different temperatures and textures. I don’t recommend skipping the two-stage steps. It really helps create the tender and flaky texture for this crust. I use American unsalted butter. If you use salted butter you should reduce the salt in the recipe to 1/2 teaspoon. If you use European style butter make sure to keep the dough very cold as that butter is softer even when chilled. Honestly, this is one time I prefer American butter for the brittle texture that helps keep it flaky.
Why Add the Butter in 2 Stages?
The room temperature butter is softer and readily mixes into the flour. Not only does this disperse butter evenly throughout the dough, the softer butter lightly coats the flour to moderate gluten formation. The brittle texture of cold butter means you can keep visible flakes of butter in the dough. Those visible flakes of butter melt in the oven and create layers. The result is a crust that is flavorful, tender and flaky.
How To Make All Butter Pie Crust by Hand
Here’s what the recipe process looks like at each stage. Refer to the recipe card below for measurements and exact instructions.
Working by hand is my favorite way to make pie dough. Hand mixing allows you to control the temperature and texture of the dough for the ultimate tender and flaky crust.
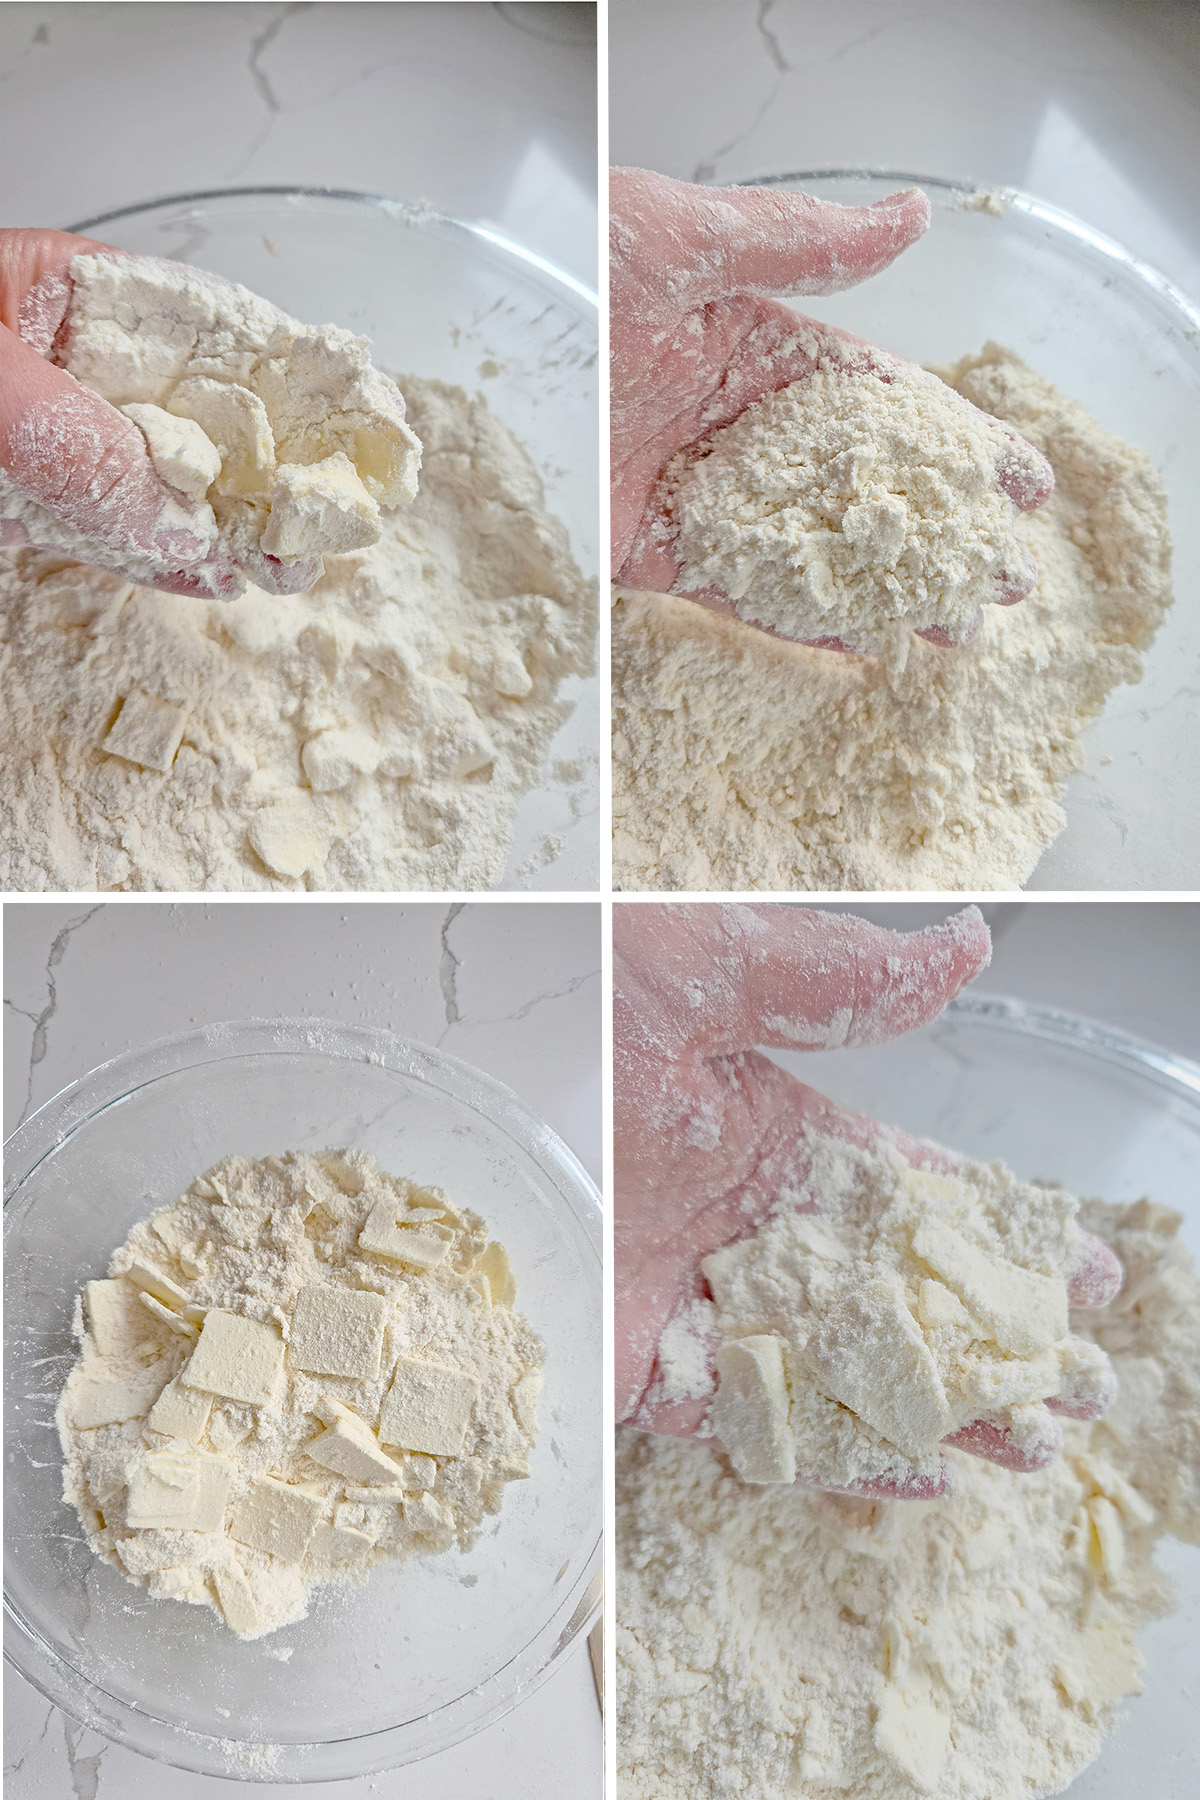
- Use your hands or a pastry blender to work the room temperature butter cubes into the flour.
- The mixture should look like coarse cornmeal.
- Toss the cold butter slices into the flour mixture.
- Toss the mixture to disperse the cold butter and lightly break up the slices. Don’t break them down completely. They should mostly stay intact.
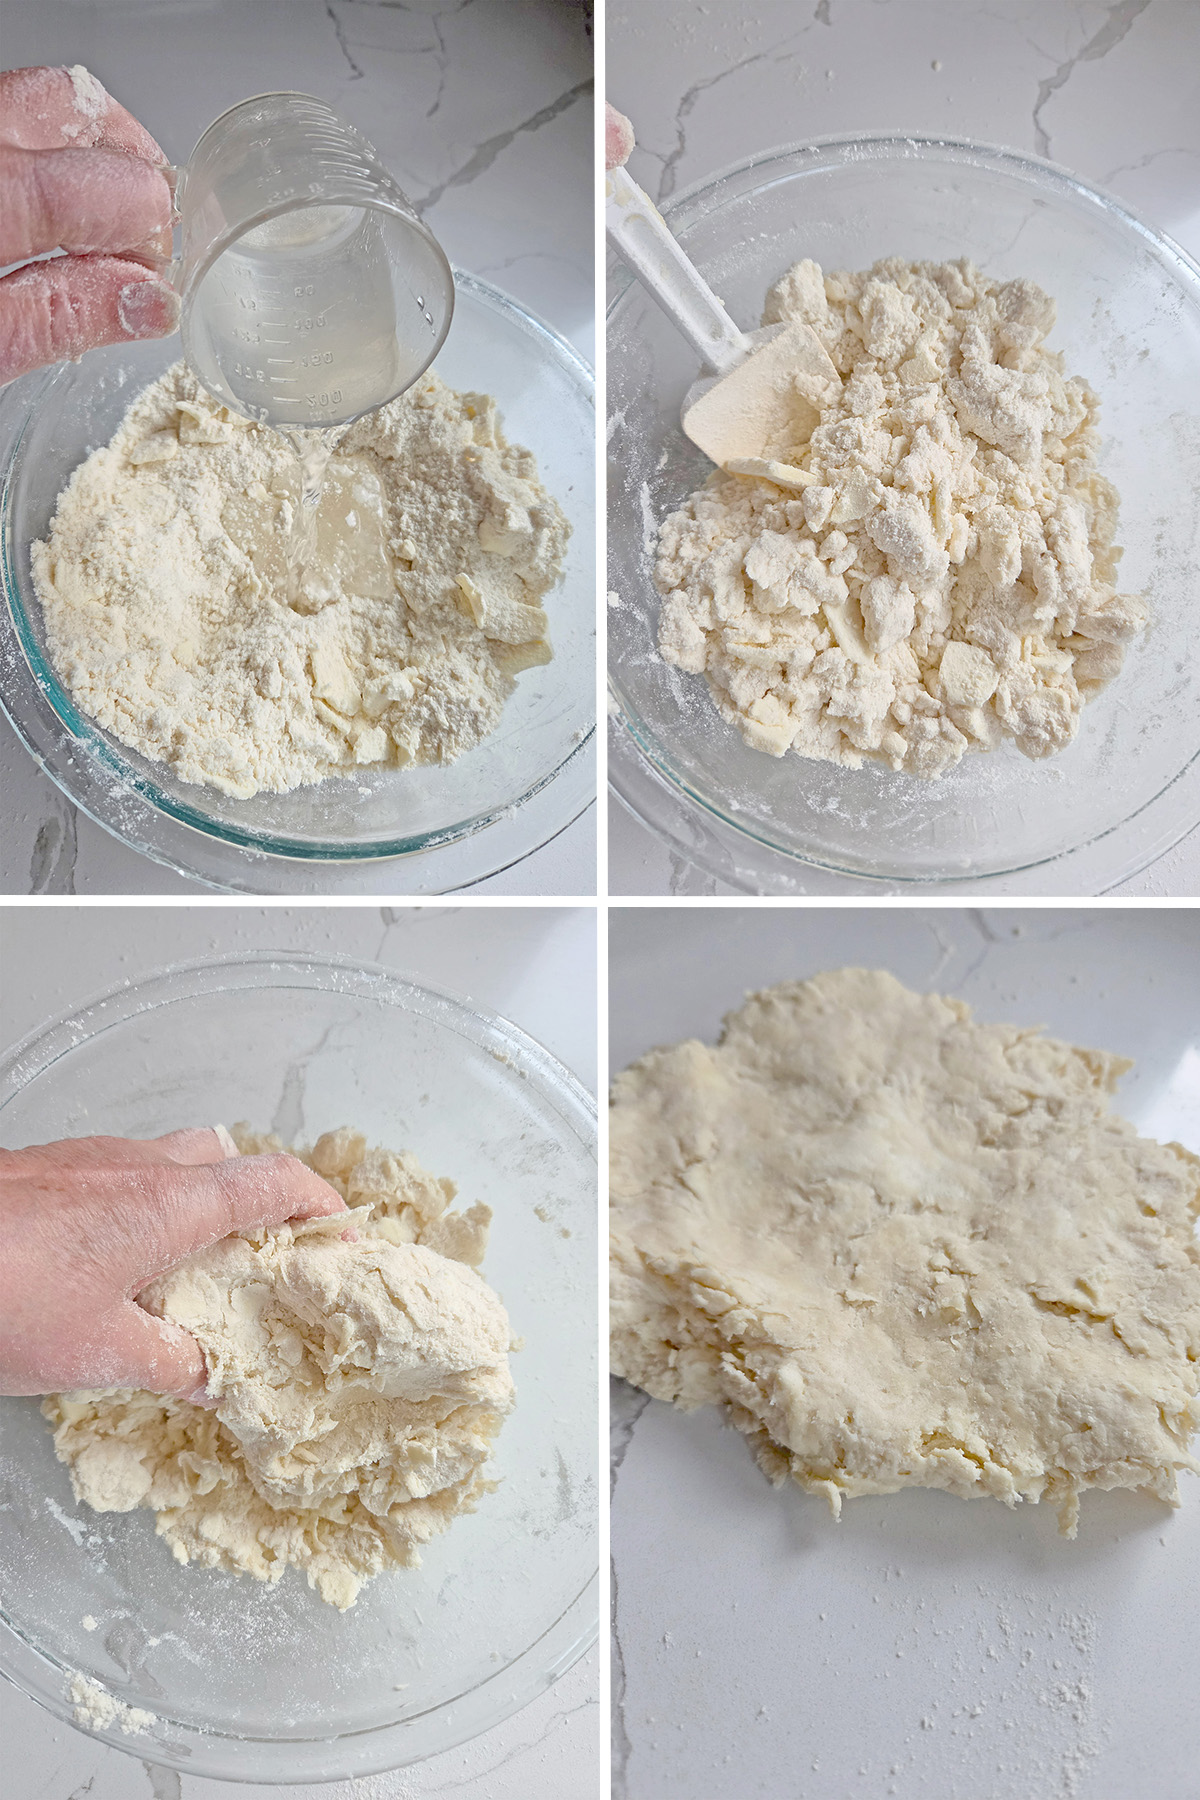
- Add ice cold water all at once.
- Use a spatula or your hand to lightly toss the water through the flour.
- Gather the dough together, picking up the bits of dry flour as you go. Don’t use a kneading motion, just grab the dough by handfuls and compress it together. If there’s a lot of dry flour leftover you can sprinkle another tablespoon of water over the dry spot. Continue until the dough comes together. It may be a bit shaggy at this point, that’s ok. The water will redistribute while the dough rests in the refrigerator.
- Turn the dough out onto a lightly floured surface and pat it to 1″ thick.
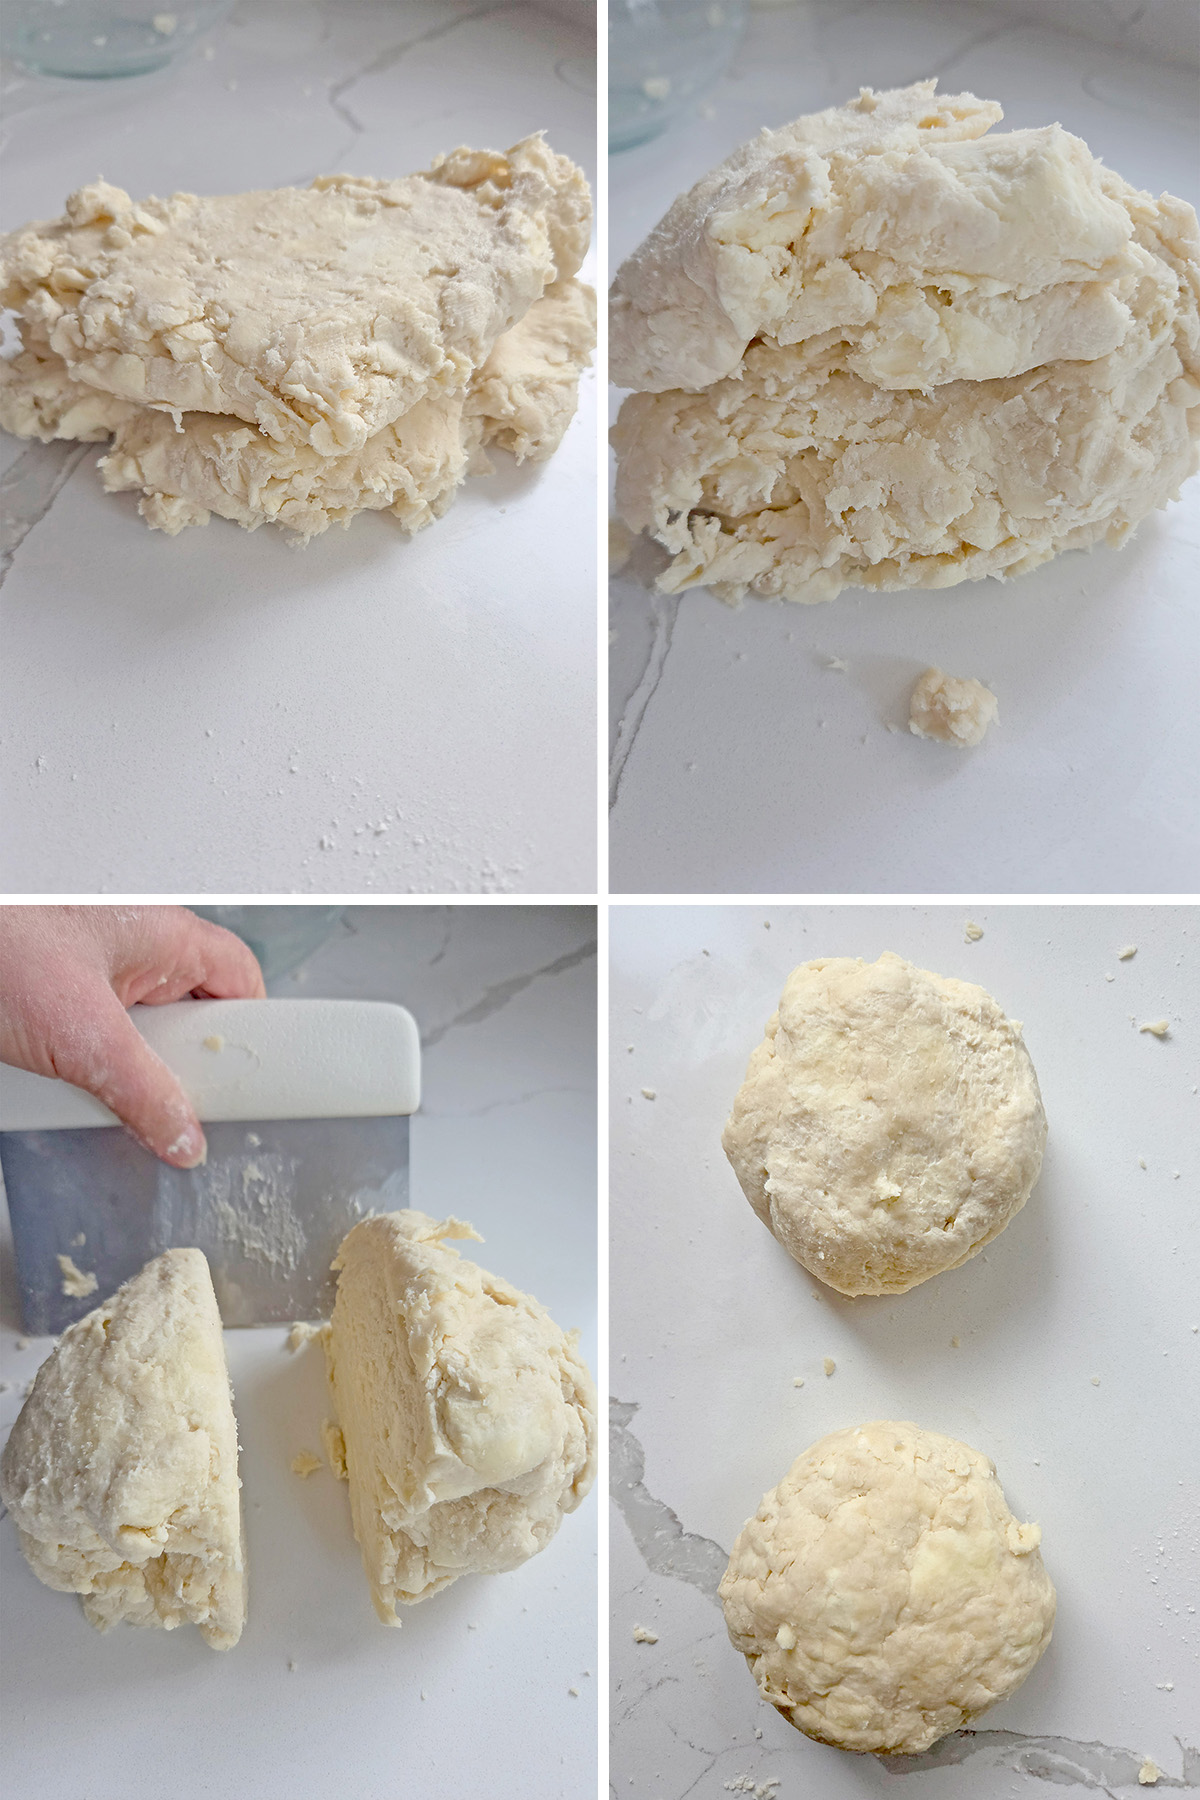
- Fold the dough in half.
- Fold the dough in half again.
- Divide the dough in half.
- Form each half into a disc. Place the dough into a plastic freezer bag or plastic wrap and refrigerate for at least 2 hours.
Pastry Chef Tip
You must be patient and let the dough rest after you mix and before you roll. A couple of hours in the refrigerator gives any dry bits of flour time to absorb water and keeps the butter cold. This transforms the dough from shaggy to cohesive. Let the dough rest 30 minutes after you roll it. Rolling works the gluten in the dough. If you bake it immediately it may shrink and crack in the oven.
Tips for Rolling an All Butter Pie Crust
Because butter is very brittle when it’s cold, an all butter crust can be a little fussier to roll than one that contains soft shortening. If you work too quickly the dough can crack. The key is to work slow and steady.
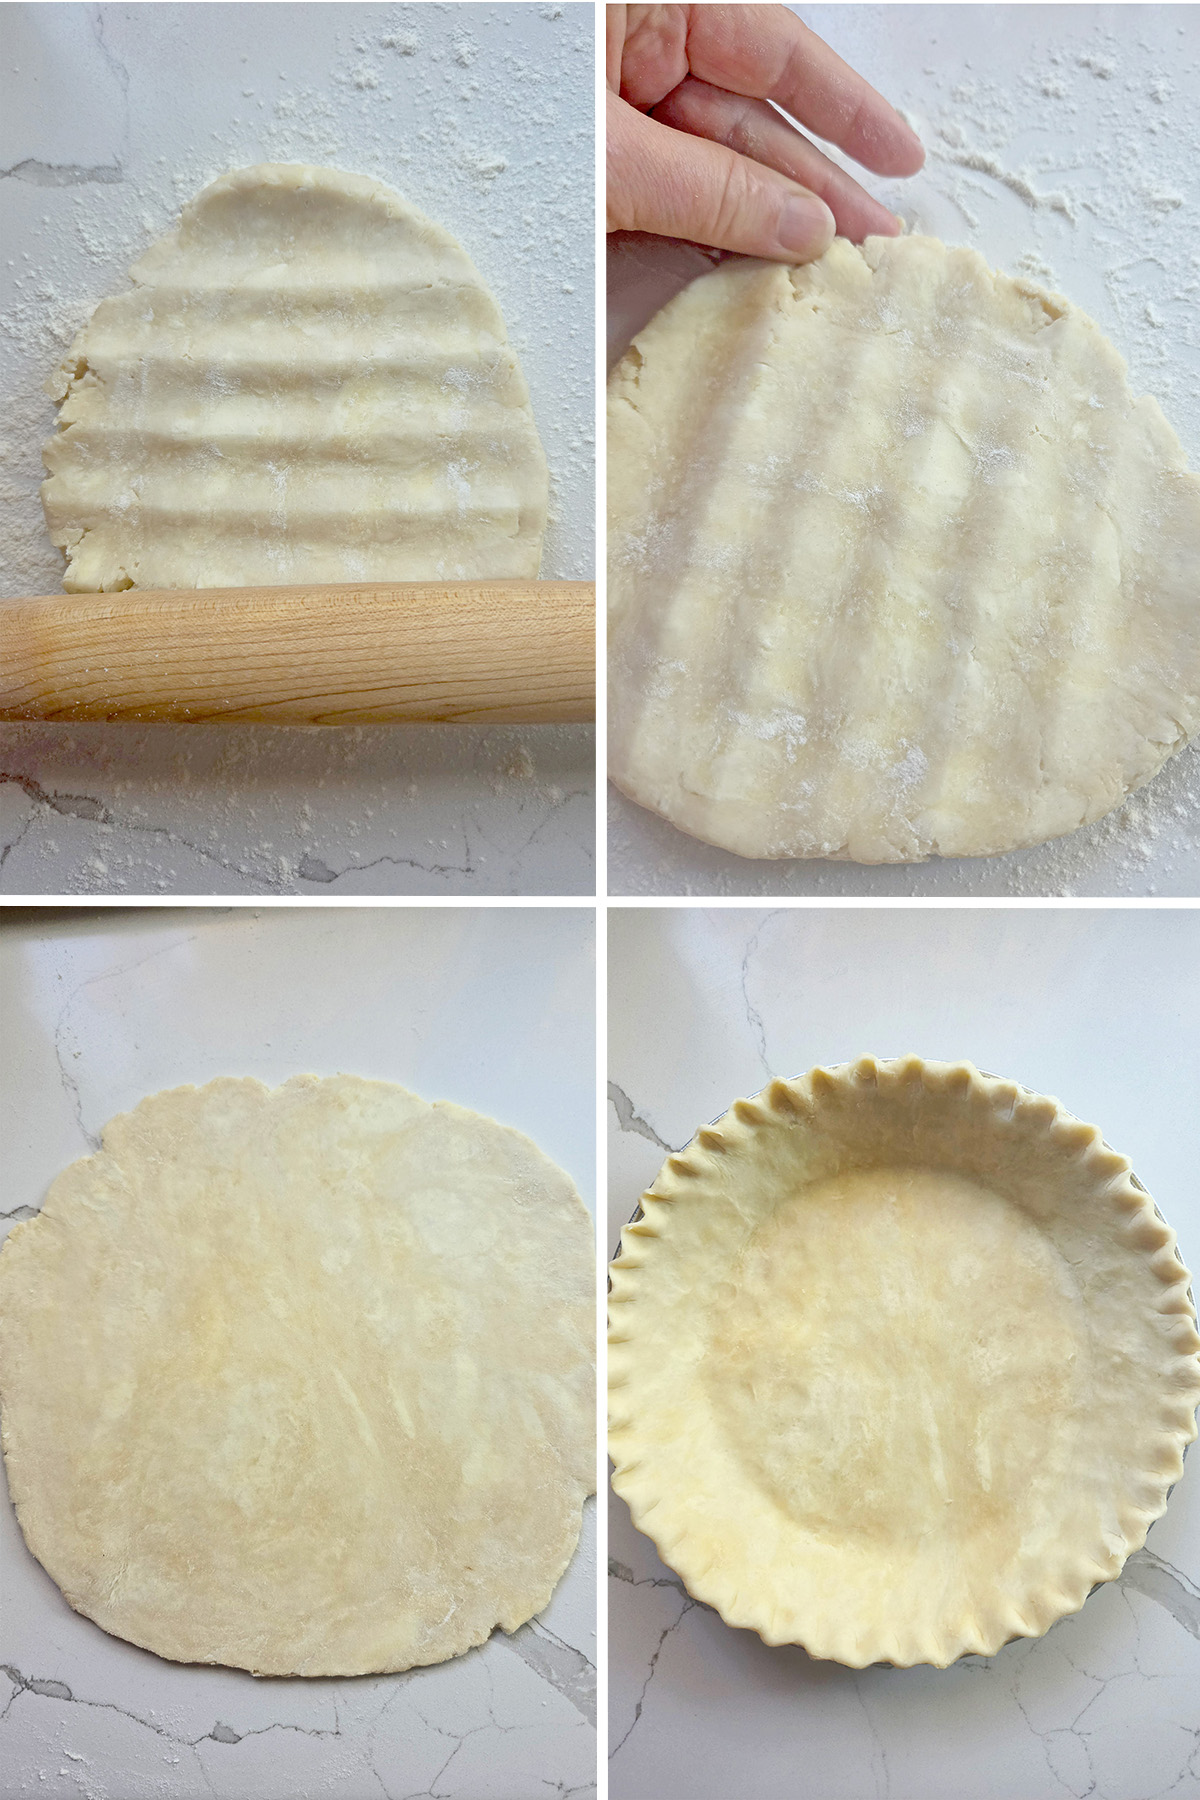
- Starting with cold dough, use your rolling pin to press over the surface of the dough to slowly soften it. Turn the dough and press in the other direction.
- Methodically roll from the center out, working your way around the circle of dough to keep an even thickness. If the edges begin to crack, gently pinch them back together. Regularly shift the dough around to make sure it’s not sticking to your work surface. Lightly flour the surface and dough as needed.
- At any point, if the butter starts to soften and melt transfer the dough to a sheet pan and refrigerate for a few minutes to firm up the butter.
- Roll until the dough is 1/8″-1/4″ thick then proceed according to your recipe.
Visit my Homemade Pie Crust post to see how to roll and blind bake a pie crust.
All Butter vs. Butter and Shortening Pie Crust
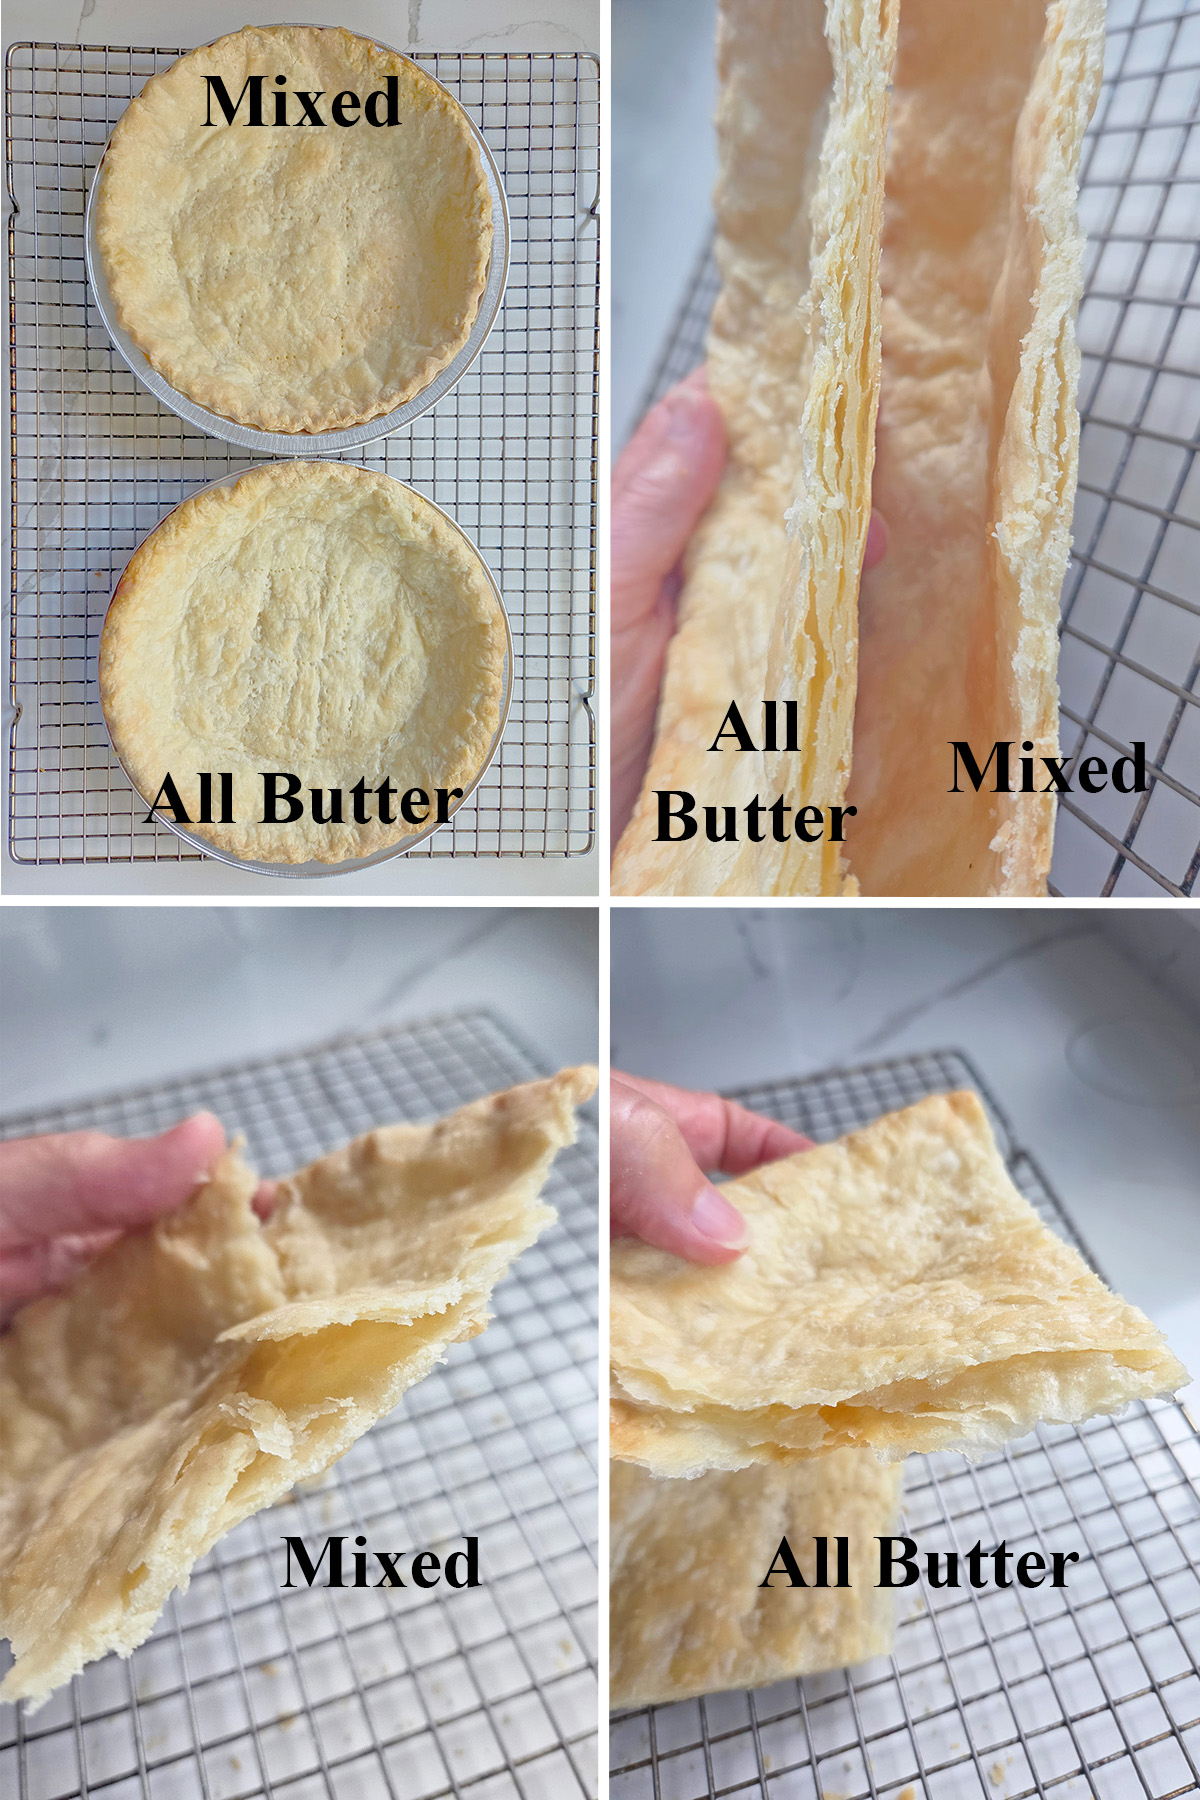
I mixed, rolled and baked my Shortening & Butter Pie Crust alongside this All Butter Pie Crust to compare the two recipes.
Flavor
Both crusts tasted great, but the all butter crust had a more complex flavor with discernible dairy note.
Texture
The crust made with a mixture of shortening and butter was a little more tender, almost melt-in-your-mouth. The all butter crust was a bit lighter. It had larger, more distinct flakes with a bit of chew.
Browning
It’s subtle in the photos, but the all butter crust baked with a more golden brown color than the shortening/butter crust. As I mentioned above, the milk solids and proteins in the butter contribute to this browning.
Both were nice but I make this dough for maximum flakiness and butter flavor, the classic for an easier, more adaptable dough. Ultimately, it’s a matter of your own taste and what ingredients you choose to use.
Make Ahead & Freezing
All butter pie dough is ideal for working ahead since it needs time to rest in the refrigerator before rolling. The dough can be held in the refrigerator up to 2 days or frozen up to 3 months. To freeze the dough, individually wrap each disc of dough then store the discs in a freezer bag. The double wrapping will prevent the dough from absorbing food odors in the freezer. Defrost in the wrapping before using.
Troubleshooting All Butter Pie Crust
Why did my pie crust shrink?
Most likely your dough was overworked at some point and didn’t get sufficient “resting” time. When you physically work pie dough in any way, the gluten in the dough tightens then it needs time to relax.
When you mix your dough don’t use a firm “kneading” motion to bring it together. Rather, grab the dough and compact it into clumps without overworking it. Kneading will strengthen the gluten and make it harder to roll without springing back. Once your dough is mixed it needs resting time before you attempt to roll it.
Rolling also works the gluten in the dough. If you roll your crust and don’t rest it before baking the dough can shrink as it bakes.
Why is my pie crust tough instead of flaky?
If you completely break down the slices of cold butter while mixing, your dough will not be as flaky as it could be. You need those visible bits of cold butter to separate the layers of dough into flakes.
Once you add the water to the dough avoid over kneading. The water reacts with the protein in the flour to form gluten. If you overwork the dough at this point you toughen the gluten. Also, vigorous handling can melt the butter bits that form the flakes.
Other Pie Crust Recipes
If you love this recipe as much as I do, I’d really appreciate a star rating and a quick comment. Ratings and comments help my recipes show in search results. Thanks!
All Butter Pie Crust Recipe
Ingredients
- 12 ½ oz all purpose flour (2 ½ cups, see note)
- 1 teaspoon salt
- 1 tablespoon granulated sugar
- 4 oz unsalted butter (room temperature, cubed, see note)
- 4 oz unsalted butter (very cold, sliced into ¼" slices)
- 4 oz ice cold water (½ cup, plus 1 T if needed)
Instructions
- In a large bowl, combine 12 ½ oz all purpose flour, 1 teaspoon salt and 1 tablespoon granulated sugar. Whisk together to mix the ingredients evenly.
- Use your hands to work the room temperature 4 oz unsalted butter cubes into the flour mixture until it resembles coarse corn meal. Work quickly to avoid completely melting the butter. Using a spatula, toss the cold 4 oz unsalted butter slices into the flour mixture. Don't break the butter down. There should be large flakes remaining.
- Pour 4 oz ice cold water onto the flour all at once and toss to combine. Use your hand to gather the dough (do not knead) until it comes together. If the dough isn't coming together and there is still dry flour in the bowl, sprinkle 1 more tablespoon of water onto the dry area and press until the dough comes together. At this point it may still look a little dry in spots. The water will redistribute in the dough as it rests. Pat the dough to 1" thick and fold it 2x to form layers. Divide the dough in 1/2 and form each half into a cohesive disc.
- Wrap the dough and refrigerate for at least 2 hours before using according to your recipe.
Would you like to save this recipe?



As an Amazon Associate and member of other affiliate programs, I earn from qualifying purchases.