Irish Apple Cake

Irish Apple Cake is a homey and tasty treat that can be baked in a cast iron skillet. The ingredients are simple so you can appreciate the true apple flavor.
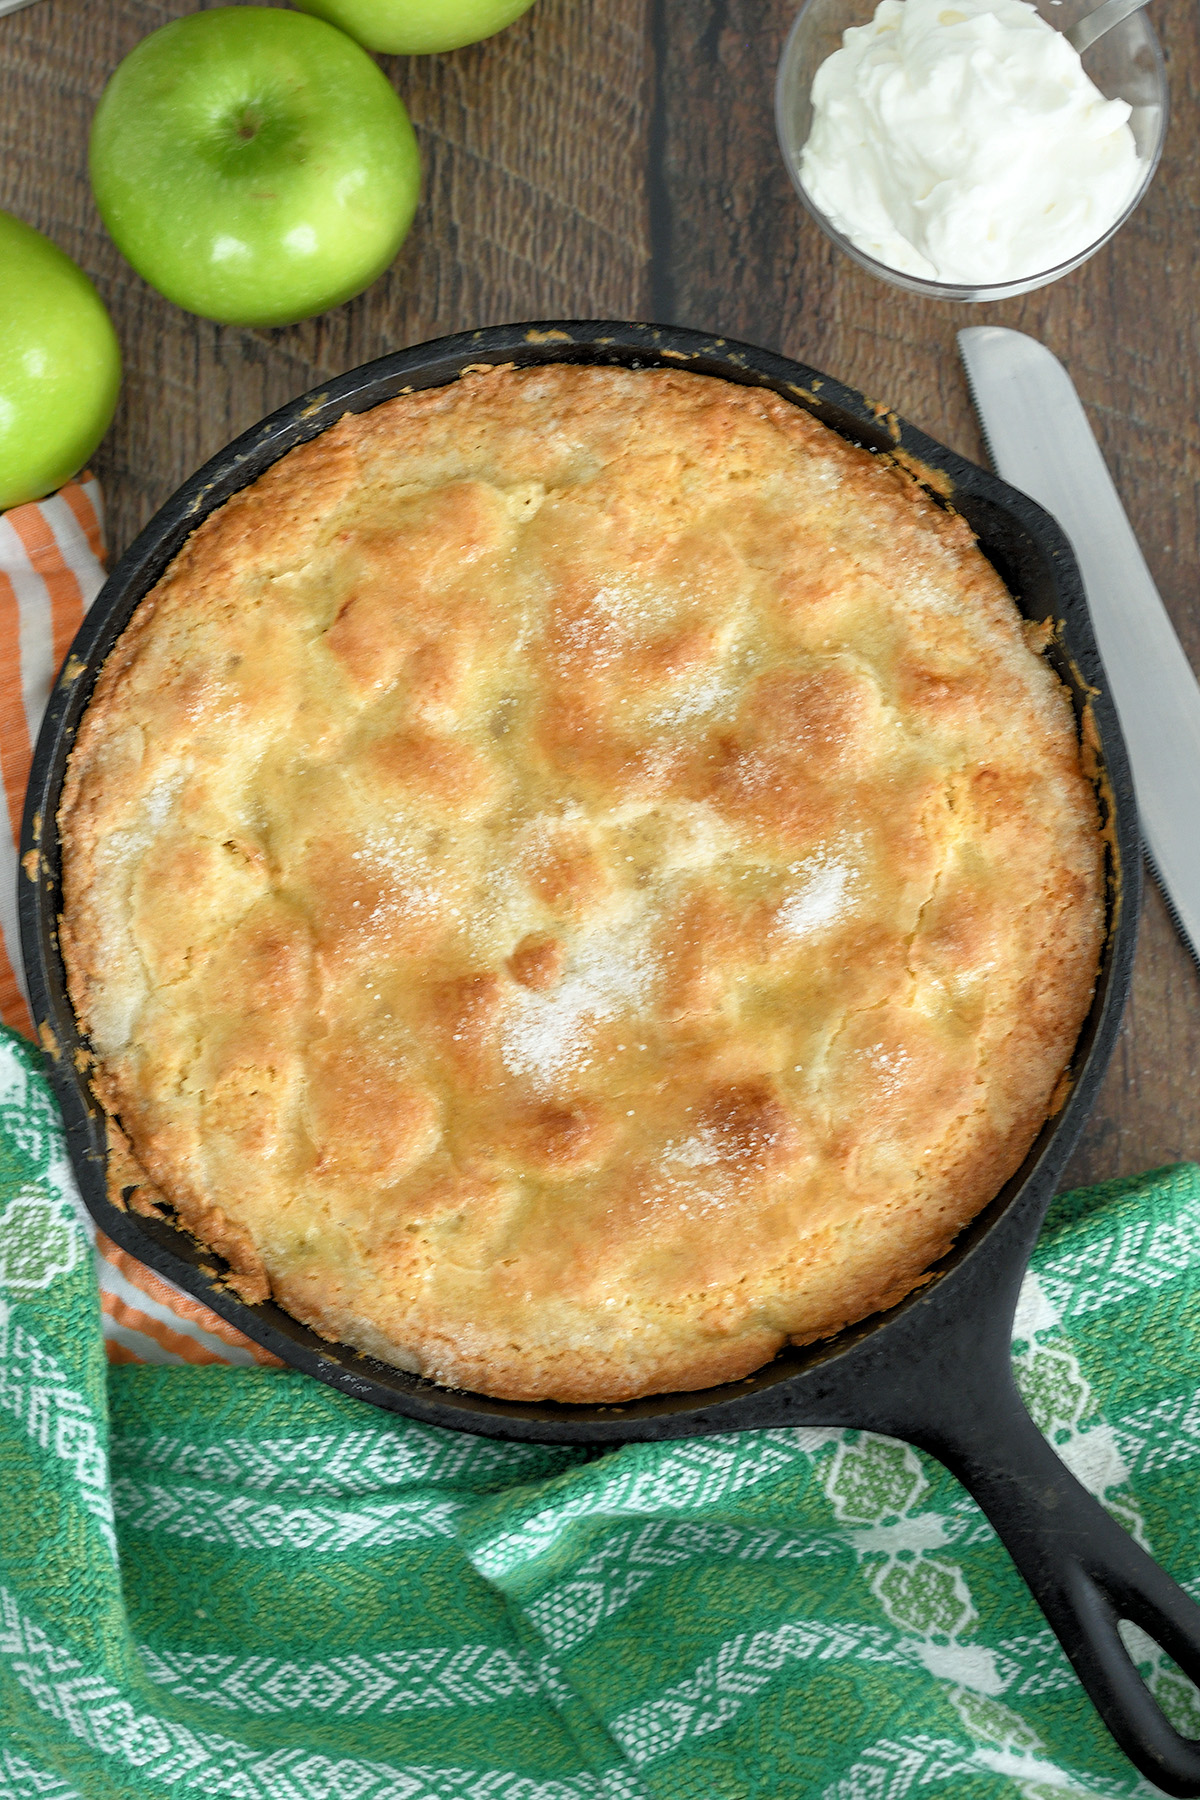
Table of contents
What is Authentic Irish Apple Cake?
In my research, the majority of recipes I found for Irish Apple Cake were something akin to an American Coffee Cake. A streusel topped cake studded with apples and served with custard sauce.
But I was intrigued by another type of recipe I found. These cakes were made with a thicker batter and seemed like a cross between a cake and a tart. Mmm, my happy place.
It was time to talk to the ultimate authority, my Irish mother. Frankly, mom has many wonderful qualities but cooking and baking are not among them. But her mother, my grandmother, was a wonderful baker.
I asked my mom to describe the type of apple cake my grandmother used to make. What she remembered was a cake much like the second type I found, the one between a cake and a tart.
After baking several test cakes, making adjustments with each batch, my mother finally declared the taste just right.
So yes, this is an authentic Irish Apple Cake according to Mary O’Sullivan of Limerick.
Ingredients

Ingredient Notes
- All Purpose Flour – Medium protein content AP flour is perfect for making a cake that is tender but has enough body to contain the apple filling.
- Butter – I use Irish butter for this recipe, but any brand of butter will work. Irish butter is softer than American butter so you may want to add bit of milk to soften the batter. The batter should be thick, but spreadable. If you use salted butter hold back some of the salt listed in the recipe then adjust the batter to taste.
- Apples – Use tart, firm baking apples for the best filling that doesn’t turn into applesauce. Granny Smith is a good basic baking apple.
The process for making Irish Apple Cake
Here’s what the recipe process looks like at each stage. Refer to the recipe card below for measurements and exact instructions.
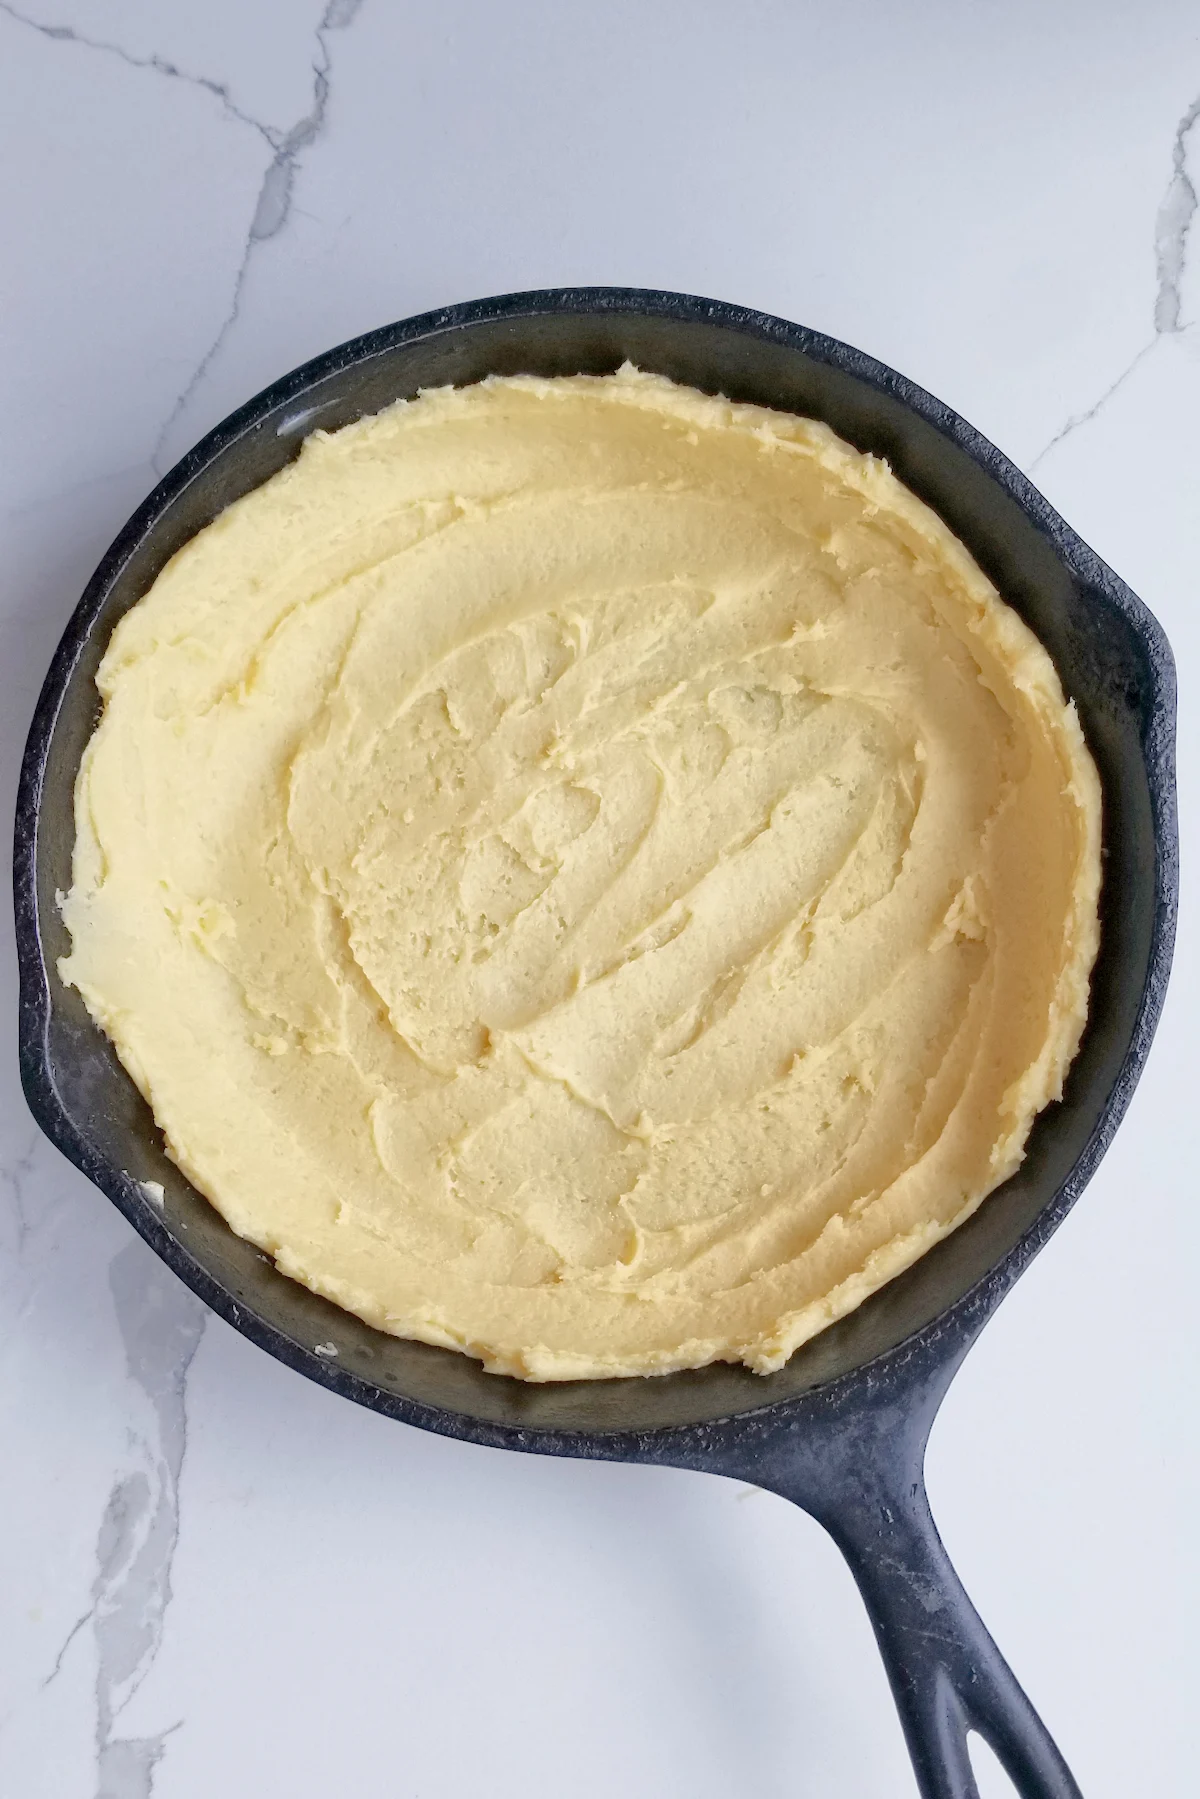
- Spread half the batter into a buttered cast iron skillet. If you don’t have a skillet you can use a pie plate or cake pan.
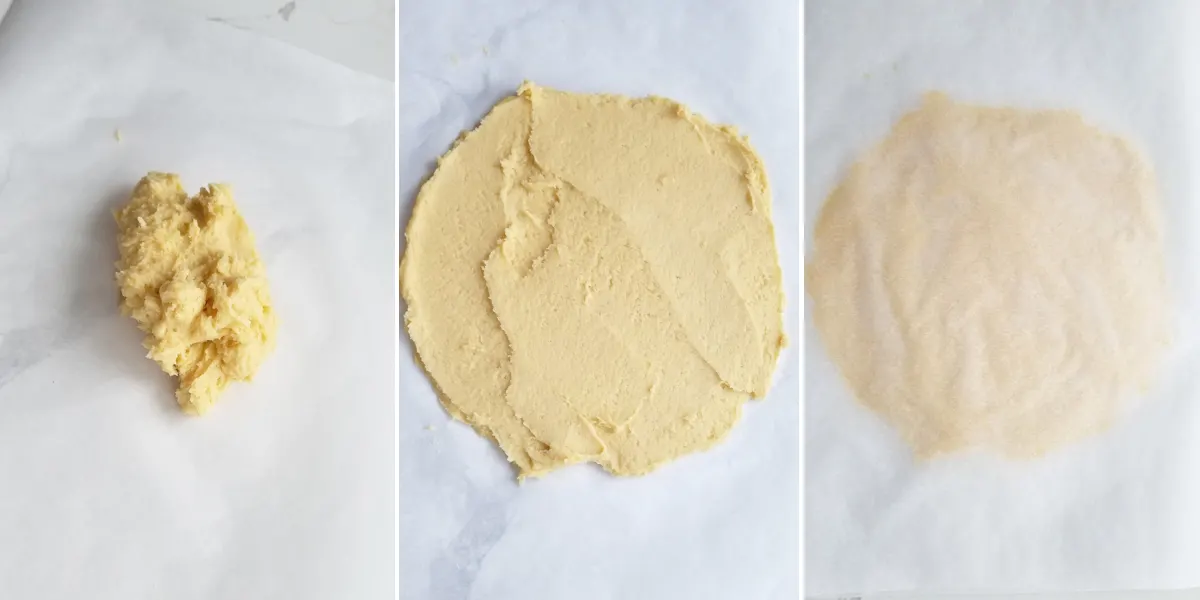
- Place the rest of the batter onto a sheet of parchment or wax paper.
- Spread the batter to a 9″ circle.
- Cover with another sheet of paper and chill.
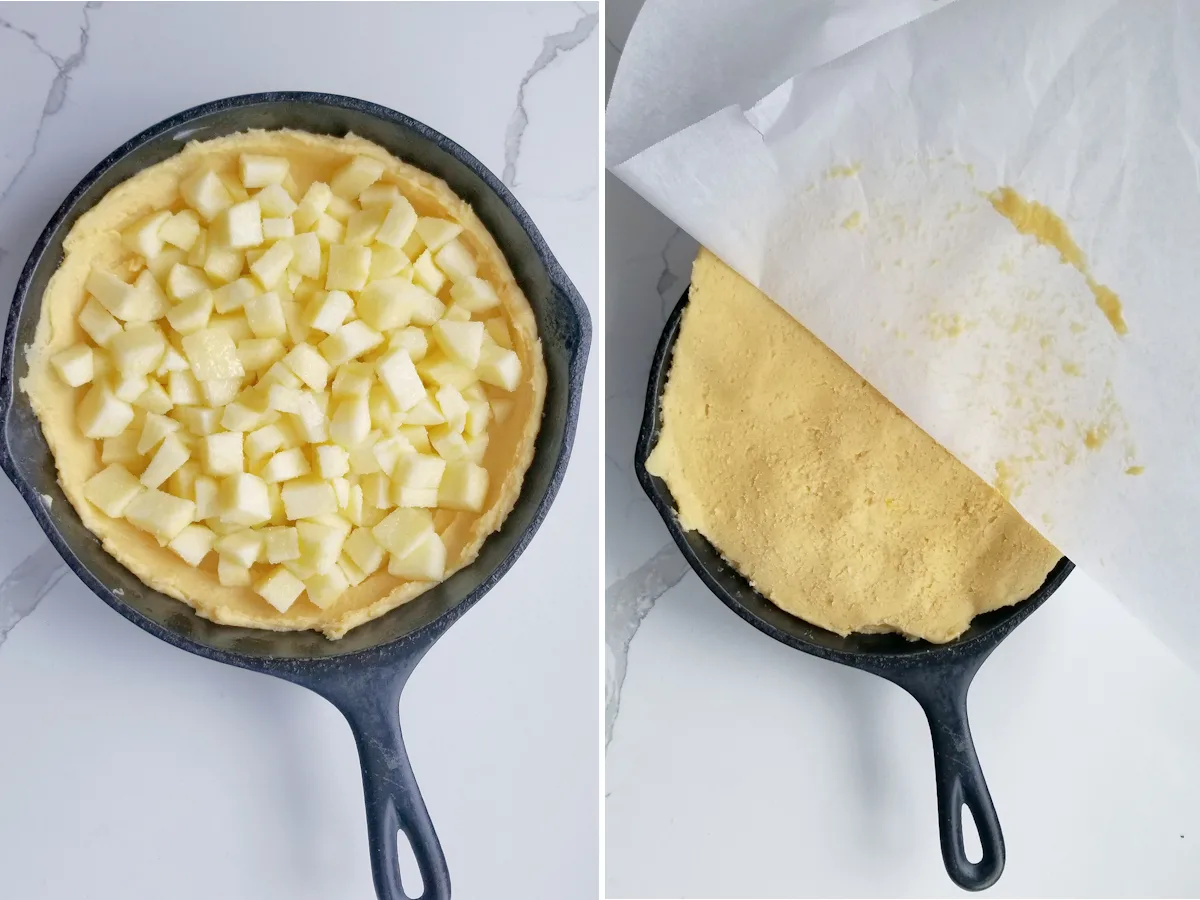
- Pour the prepared apples into the pan.
- Flip the chilled batter onto the apples and peel away the paper.
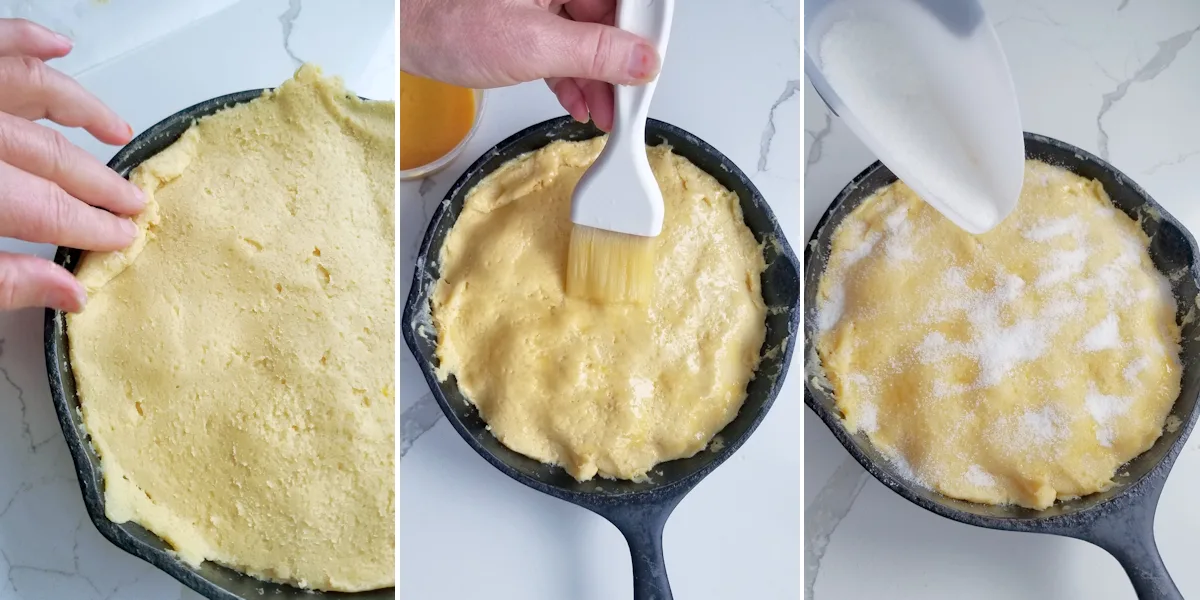
- Tuck the edges of the batter into the pan.
- Brush the cake with egg wash.
- Sprinkle the cake with sugar then bake.
Recipe Tips
- I used a well-seasoned cast iron skillet for a crunchy crust and crisp topping. If you don’t have a good skillet you can bake the cake in a 9″ pie plate or cake pan.
- Taste the apples before putting them into the pan. At this point you can adjust the sugar and lemon to your taste.
- The top layer must be well chilled before flipping it onto the cake. The colder the batter, the easier it is to remove the paper. Leave it in the freezer until you’re ready to put it on the cake.
- The cake comes together pretty quickly, but you can make the batter ahead of time. After mixing the batter, spread each half into parchment as described in the recipe. Chill until you’re ready to assemble the cake. Flip the bottom crust into the pan and tuck it into place. Continue the recipe as written.
Storage & Serving
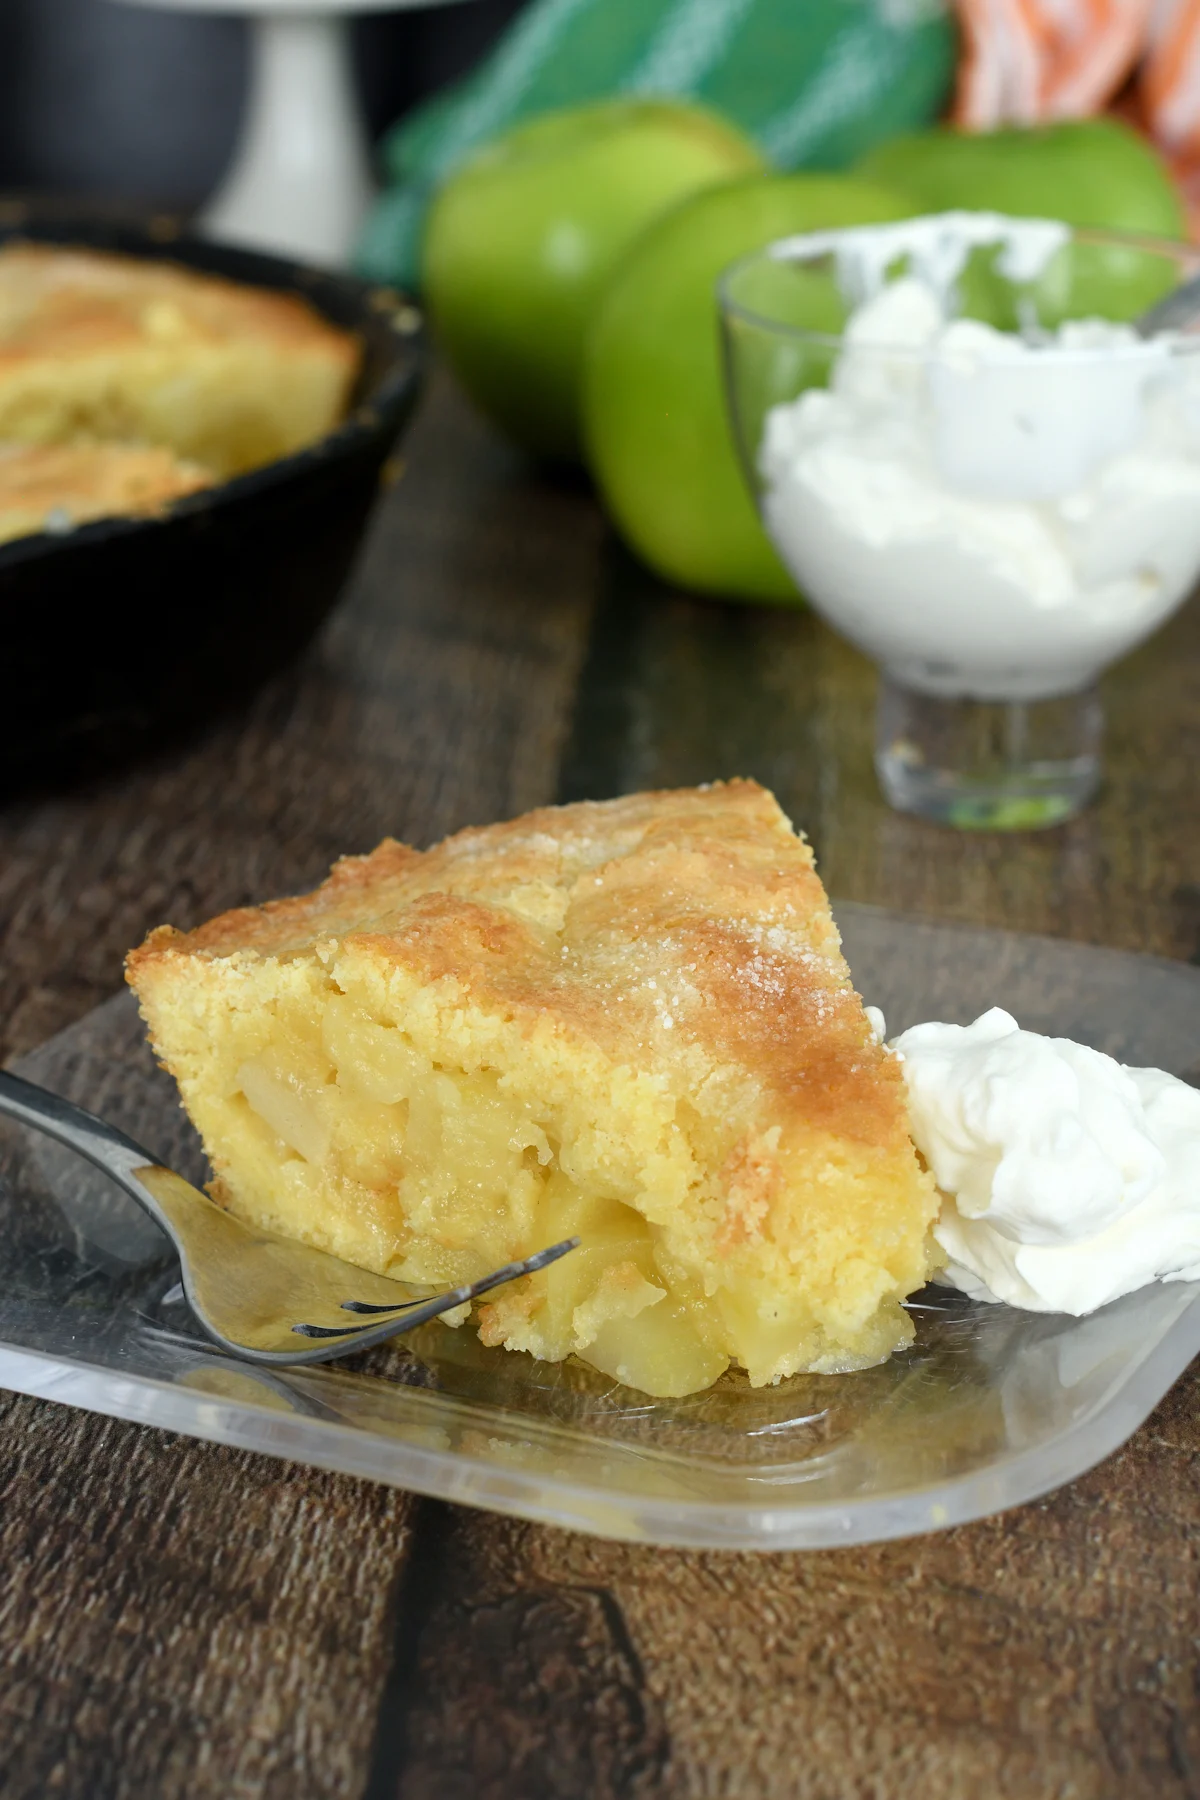
- The cake is divine while it’s still warm from the oven. But it’s also really tasty the next day when the juice from the apples permeates and moistens the cake.
- I highly recommend serving the cake with whipped cream or vanilla ice cream.
- The cake keeps at room temperature 2-3 days. After the first day I suggest removing the left over cake from the cast iron pan.
More Irish inspired recipes
- Irish Soda Bread
- Irish Brown Bread
- Baileys Pot de Creme
- Baileys Bundt Cakes
- Baileys Cheesecake
- Baileys Chocolate Macarons
- Guinness Fudge Cake
- Triple Guinness Cake
- Irish Tea Brack
- Irish Coffee Trifle
- Irish Potato Farls
If you love this recipe as much as I do, I’d really appreciate a star rating and a quick comment. Ratings and comments help my recipes show in search results. Thanks!
Irish Apple Cake Recipe
Ingredients
- 2 each eggs (room temperature)
- 1 each egg yolk (room temperature)
- 2 oz whole milk (¼ cup, room temperature)
- 1 teaspoon vanilla extract
- 7 ½ oz all purpose flour (1 ½ cups, see note)
- 4 oz granulated sugar (½ cup)
- ½ teaspoon baking powder
- ¼ teaspoon table salt
- 4 oz Irish Butter (room temperature)
Apple Filling
- 2 each baking apples
- 2 oz granulated sugar (¼ cup)
- 1 tablespoon lemon juice
Instructions
- Butter a 10" cast iron skillet (or 9" pie plate or cake pan). Preheat the oven to 350°F. Use the convection setting if you have one.
- In a small bowl whisk 1 egg for egg wash and set it aside. In another small bowl or measuring cup whisk together the other egg, the yolk, 2 oz whole milk and 1 teaspoon vanilla extract.
- In the bowl of a stand mixer or in a large mixing bowl whisk together 7 ½ oz all purpose flour, 4 oz granulated sugar, ½ teaspoon baking powder and ¼ teaspoon table salt. With the mixer running, add 4 oz Irish Butter a tablespoon at a time. Continue mixing until the butter is incorporated. With the mixer running, add the combined eggs and milk.
- Spread half the batter into the prepared skillet so that the batter comes about 1/2 way up the sides of the pan. On a sheet of parchment paper or wax paper, spread the rest of the batter into a 9" circle. Cover with another sheet of paper then slide it into the freezer while you prepare the apples.
- Peel, core and chop 2 each baking apples into 1/2" cubes. Toss the chopped apples with 2 oz granulated sugar and 1 tablespoon lemon juice. Taste the apples and adjust the flavor to your liking. Pour the apples into the pan and smooth them into an even layer.
- Remove the parchment wrapped batter from the freezer. Peel back the top layer of parchment then flip it over so the chilled batter is on top of the apples. Peel off the parchment. Tuck the sides of the batter into the pan to seal in the apples. Brush the top of the cake with egg wash, sprinkle generously with granulated sugar.
- Bake until the top of the cake is golden brown, the apples are tender and a toothpick or knife inserted into the cake comes out clean. Total baking time is about 40-45 minutes.
- Serve slightly warm with whipped cream. The cake keeps at room temperature for 2-3 days.
Would you like to save this recipe?


As an Amazon Associate and member of other affiliate programs, I earn from qualifying purchases.

I don’t understand the need to freeze a top layer of batter. Wouldn’t the apples be easy enough to push into batter?
You could do it that way if you’d like. The way I do it you have a distinct top and bottom with apples in the center. Almost like a pie but with cake batter. It’s the way my grandmother made it, so that’s how I make it. This French Apple Cake has the apples studded throughout.
Hello! Can use almond milk with this recipe? How about sugar in the raw instead of granulated sugar? Thank you!
Yes to both. Sugar in the raw is ground a little coarser than regular granulated sugar so you might want to give it a whirl in a blender or food processor to get it closer to the granulated sugar texture. A finer grind will blend into the batter more easily.
What. Great looking cake
Can’t wait to try – love a good apple cake!!
Made this and it was delicious. I didn’t have any of the issues that some people had. I wish I could post a picture of my finished cake!