Sourdough Hoagie Rolls


Sourdough Hoagie Rolls! Hoagie, hero, sub, grinder, whatever you call your sandwich, this is a great roll for building your masterpiece.

Table of contents
Why these are is the best Sourdough Hoagie Rolls
Whatever you call it, there is no doubt that the key to a great sandwich is the perfect long roll.
The perfect sourdough hoagie roll should have a thin, crisp crust and a light, soft, slightly chewy crumb. This recipe makes the perfect sourdough hoagie roll.
By the way, if you don’t have a sourdough starter, you can make Hoagie Rolls with commercial yeast.
How to make Sourdough Hoagie Rolls
Here’s what the recipe process looks like at each stage. Refer to the recipe card below for measurements and exact instructions.
- After mixing the dough. Set it aside for 3-5 hours at room temperature.
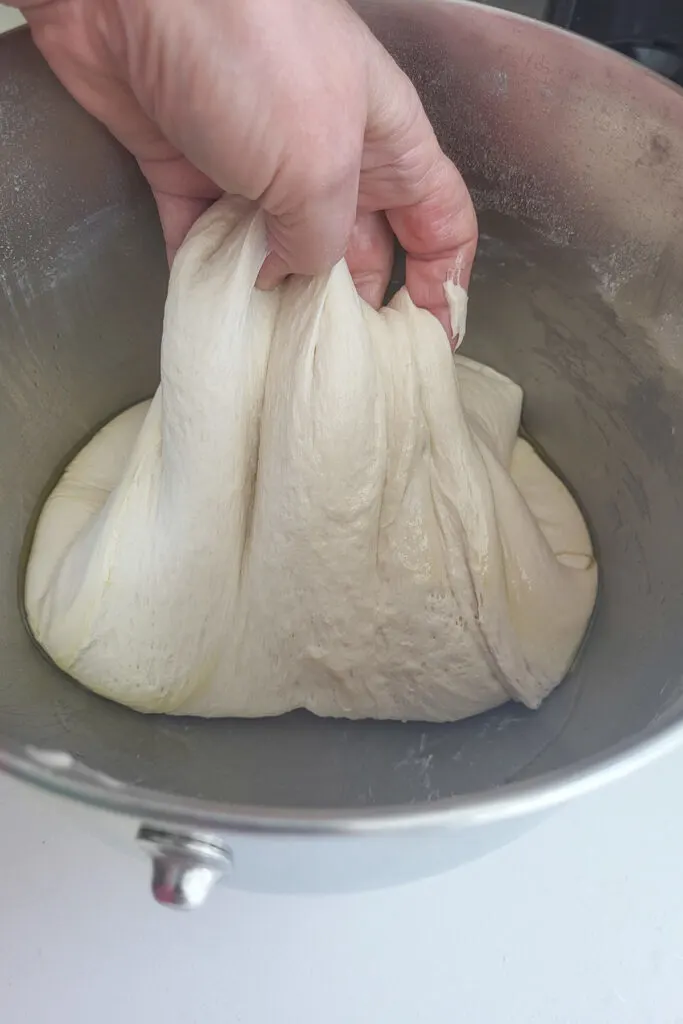
- Every hour fold the dough to aerate and develop the dough.
- After the initial fermentation at room temperature. Cover the bowl and refrigerate.
- Leave the dough to ferment overnight in the refrigerator.
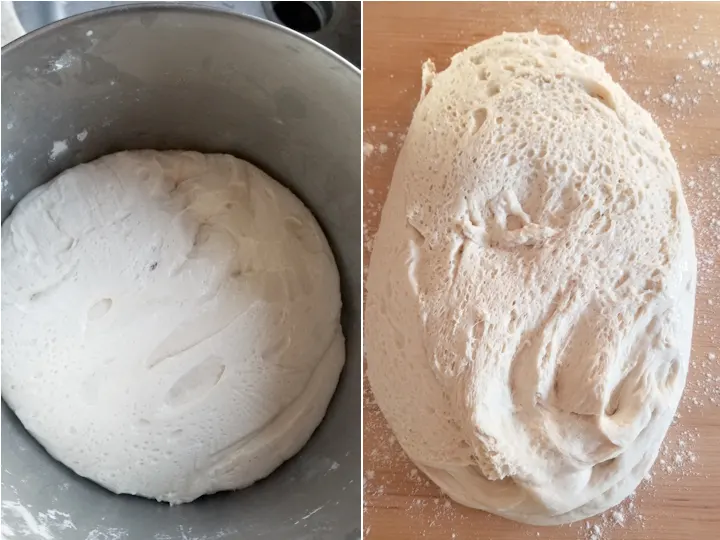
- In the morning the dough should be well-aerated and ready for shaping.
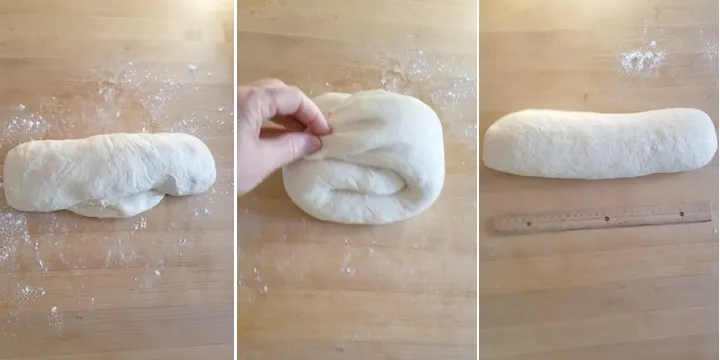
- Roll the dough to a 12″ log.
- Fold the two ends of the log towards the center.
- Roll the dough to a 12″ log again.
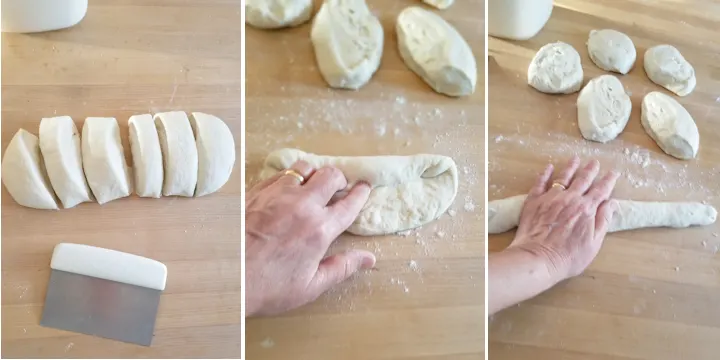
- Cut the dough into 6 pieces.
- Form each piece into an oval and roll the oval into a small log.
- Roll the dough to 10″ long.
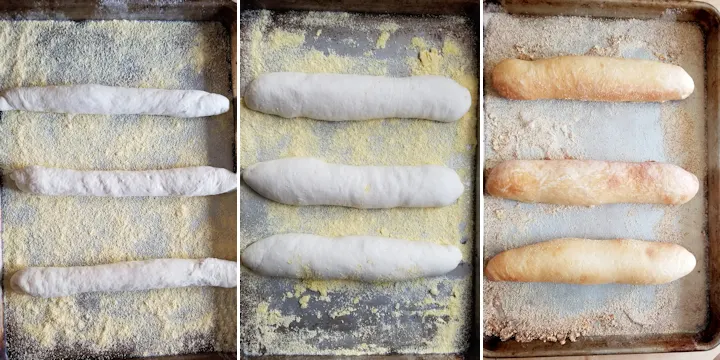
- Set the rolls onto a sheet pan to rise.
- Rise until doubled in size.
- Bake until golden brown.
A timeline for making Sourdough Hoagie Rolls:
- If your starter needs feeding, do that the night before or early in the morning of the day you want to make the dough.
- Mix the dough in the afternoon. Allow it to ferment at room temperature all day and refrigerate the dough in the evening before going to bed.
- The dough can stay in the refrigerator for 2-3 days at this point.
- Take the dough out first thing in the morning and shape the hoagie rolls.
- Leave them at room temperature to rise for 1 1/2- 2 hours.
- If you want to bake the same day, feed the starter the night before. Make the dough early in the morning and leave it to ferment until the afternoon. Form the rolls and leave them to rise, skipping the refrigeration step. Bake the hoagie rolls in time for dinner.
Storage
Sourdough Hoagie Rolls will keep at room temperature for 1-2 days but they’re best the day they are baked. Leftovers can be frozen for up to a month. Defrost and warm in a 200F oven to re-crisp the rolls.

I know you love a good sandwich, so I highly recommend my Sourdough White Sandwich Bread and my Sourdough Whole Wheat Bread. Sourdough Rye Bread is also the base for a great sandwich.
Since you’ve got your starter fed, peruse the entire list of My Best Sourdough Recipes. Have fun!
I know you hate to throw away that sourdough discard. Check out these recipes that use sourdough discard.
If you love this recipe as much as I do, I’d really appreciate a 5-star review.

Sourdough Hoagie Rolls
Video
Ingredients
- 8 oz Active Sourdough Starter (1 cup)
- 1 tablespoon granulated sugar
- 8 oz warm water (1 cup)
- 12 ½ oz unbleached all purpose flour (2 ½ cups, see note)
- 4 oz milk (½ cup, scalded and cooled to room temperature)
- 7 ½ oz unbleached bread flour (1 ½ cups)
- 2 teaspoons table salt
- cornmeal (for the sheet pans)
Instructions
- In a large mixing bowl or in the bowl of a stand mixer, combine 8 oz Active Sourdough Starter, 1 tablespoon granulated sugar and 8 oz warm water. Add 2 cups (10 oz) of the all purpose flour. Mix with the paddle on low speed until it forms a thick batter. Cover the bowl and set aside for 30 minutes.
- Add 4 oz milk, 7 ½ oz unbleached bread flour and 2 teaspoons table salt then mix to combine. If using a stand mixer, switch to the dough hook. With the mixer running, add the remaining all purpose flour. Knead the dough for 5 minutes until it is smooth and elastic. If mixing by hand add the flour using a wooden spoon and/or a plastic bowl scraper and knead by hand. Turn the dough out onto a floured surface and shape into a smooth ball.
- Transfer the dough to a lightly oiled bowl, turning once to coat the dough. Cover the bowl and set it aside at room temperature. After an hour, working from four corners of the dough (still in the bowl) use your hand to lift the top edge of the dough over into the middle of the dough. Repeat with the other 3 sides then flip the dough over. Every hour or so check on the progress of the dough by folding it over itself in the bowl. After about 3 hours the dough should be lively, elastic and airy. If the dough is still sluggish give it another hour or two at room temperature.
- Cover the bowl tightly, refrigerate overnight. At this point the dough can be held in the refrigerator for up to 2 days.
- In the morning, take the dough out of the refrigerator. Generously sprinkle 2 half sheet pans with corn meal.
- Turn the dough out onto a lightly floured surface. Without kneading, form the dough into a 12" log. Fold the two ends into the middle then roll back and forth to form a 12” log again. If at any point the dough springs back too much you can give it a 10 minutes rest then continue. Cut the log into 6 equal portions.
- On a lightly floured surface, pat a piece of dough into a 6” oval. Tightly roll the dough from the long side to form a 6" cylinder. Pinch the seam tightly. Using flat hands roll from the center out to form a 10” long roll. Let your hands go over each side to taper the ends of the roll. Set the roll onto one of the prepared pans. Continue forming the other rolls and place 3 on each pan.
- Cover the pans with a damp kitchen towel and set aside in a warm place to rise until doubled in volume (about 2-2 1/2 hours). The rising time will vary based on the temperature of the dough and the ambient temperature. Meanwhile, preheat the oven to 450 °F.
- To create steam in the oven, place a small pan onto the floor of the oven to preheat. If you have them, you can put lava rocks or whiskey rocks into the pan to preheat as well.
- When the rolls are ready to bake brush them lightly with milk. Place the trays in the oven. Pour a 1/4 cup of warm water into the preheated pan on the floor of the oven and immediately close the oven door.
- Bake until the rolls are golden brown, about 15-20 minutes. Turn the trays after 10 minutes to promote even browning. Cool completely on a wire rack before slicing.
Would you like to save this recipe?


As an Amazon Associate and member of other affiliate programs, I earn from qualifying purchases.

What other flour can be used to make those buns other than on purpose flour?
You could use all bread flour but you may want to use slightly less since bread flour will absorb more liquid than ap flour. You could also use whole wheat flour in place of ap flour for a wheat hoagie.
How about a mix with spelt flour and whole wheat?
I haven’t worked with Spelt flour since I try to use ingredients that are widely available. But it seems it should be no problem using it in this recipe. As far as the whole wheat it would keep it to a fairly small proportion to keep the rolls light.
I don’t have cornmeal to put on the pan, can I just use flour?
You could use parchment paper or flour.
This recipe is amazing! I will definitely bake again! I used my starter straight out of the fridge and it came out really well. I was worried about it a little. I find that the I like the bread to be a bit saltier. Is it wise to add more salt in the dough or will that mess up the recipe?
You could up the salt a smidge. But be careful. Too much salt could retard the yeast.
I have all-purpose flour but not bread flour. Can I used whole wheat for bread flour?
The bread flour is used to have more protein (gluten) in the dough. Whole wheat has less protein than bread flour and the whole grain can slightly weaken the gluten structure. You’d be better off using only ap flour. Because is has lower protein, ap flour doesn’t absorb quite as much liquid as bread flour does. So you’ll probably need to add a little more flour if you don’t use bread flour. I suggest you mix the dough as listed, then at the end if the dough is very wet sprinkle in more flour a tablespoon at a time.