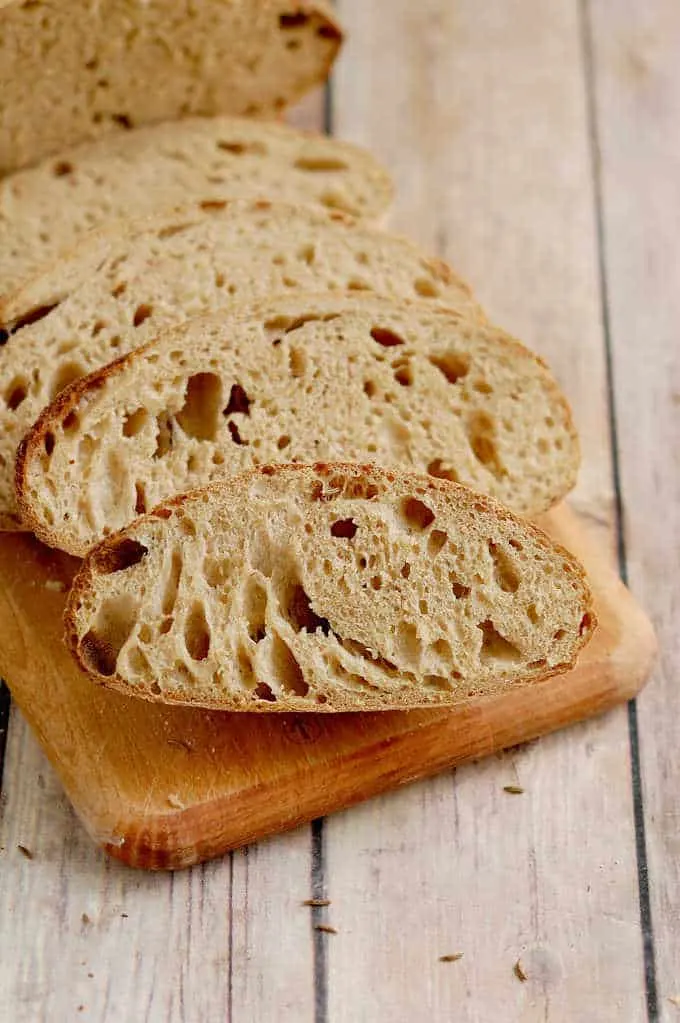
Sourdough Rye Bread
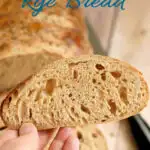
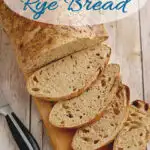
Sourdough Rye Bread has a complex flavor thanks to the sourdough starter, rye flour and a little dash of malt syrup. Start the night before to have fresh bread for lunch.
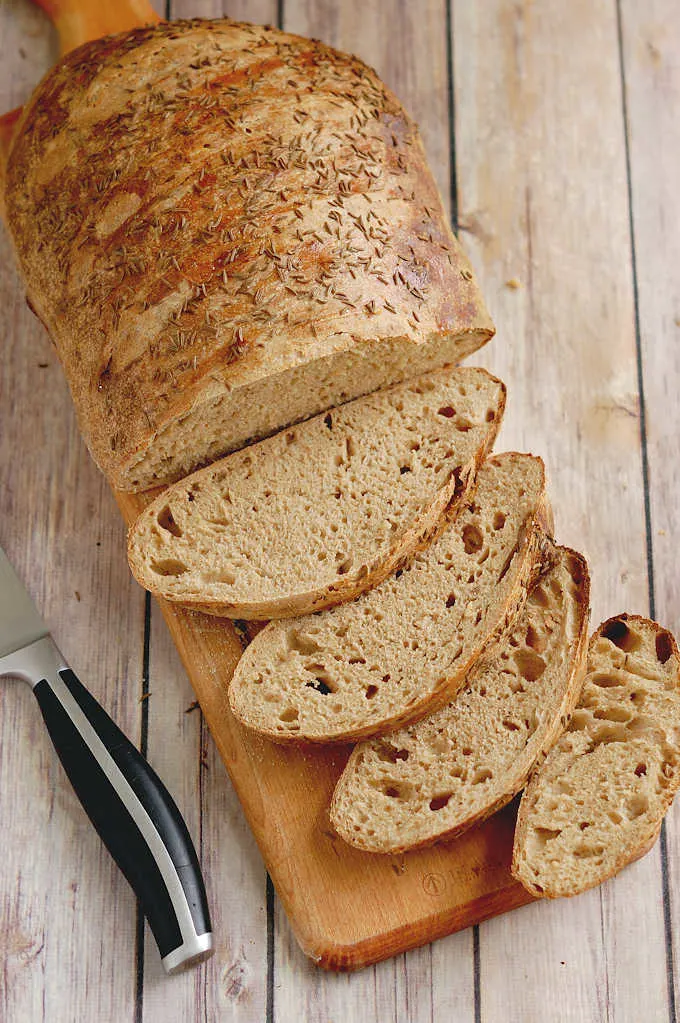
Table of contents
I grew up in central New Jersey (yes, there is such a place as central Jersey!) and being so close to New York it was easy to find a good deli and really great rye bread.
Where I live now, not so much. So, Sourdough Rye Bread is always homemade in our house. But it’s so easy to make overnight there’s no reason not to make it yourself.
This recipe takes more than 12 hours in total, but the vast majority of the time is hands-off.
Ingredients
Ingredient Notes
- Rye Flour does not have the gluten forming properties of wheat flour. Use any type of rye flour in this recipe, light, medium or whole grain. Stone ground rye flour has an especially nice flavor and texture.
- Bread Flour is a wheat flour with a high protein content. Higher protein means better gluten development.
- Sourdough Starter The recipe was developed using 100% hydration starter. You will need to adjust the liquid or flour in the recipe if you’re starter isn’t at 100% hydration.
- Barley Malt Syrup adds a bitter-sweet note which works very well with the flavor of rye flour. You can substitute honey or a combination or honey and molasses for the barley malt syrup.
- Caraway Seeds add the characteristic “rye bread” flavor, but they are optional.
How to make Sourdough Rye Bread
Here’s what the recipe process looks like at each stage. Refer to the recipe card below for measurements and exact instructions.
- Mix the starter with the water, rye flour and 1 cup of the bread flour.
- Set aside for 30-60 minutes to hydrate the flour and develop the gluten.
- The dough will start out soft and a little sticky.
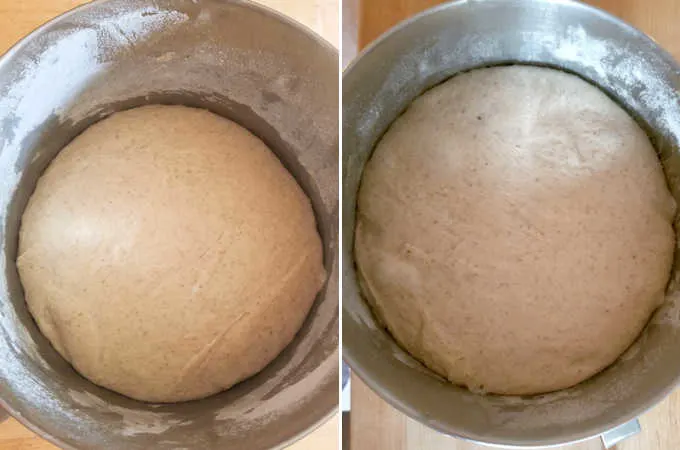
- Set the dough aside for 3-5 hours at room temperature for the initial fermentation.
- The texture will develop while the dough is fermenting.
- Every hour during fermentation. Fold the four sides of the dough over to the center and flip the douigh over. This redistributes the yeast and aerates the dough.
- With each hour of fermentation the dough will rise higher and become more elastic and “lively”.
- After the initial fermentation cover the bowl and refrigerate the dough overnight. You can skip the refrigeration step and bake the same day, but the dough does benefit from a long, cool, overnight rise.
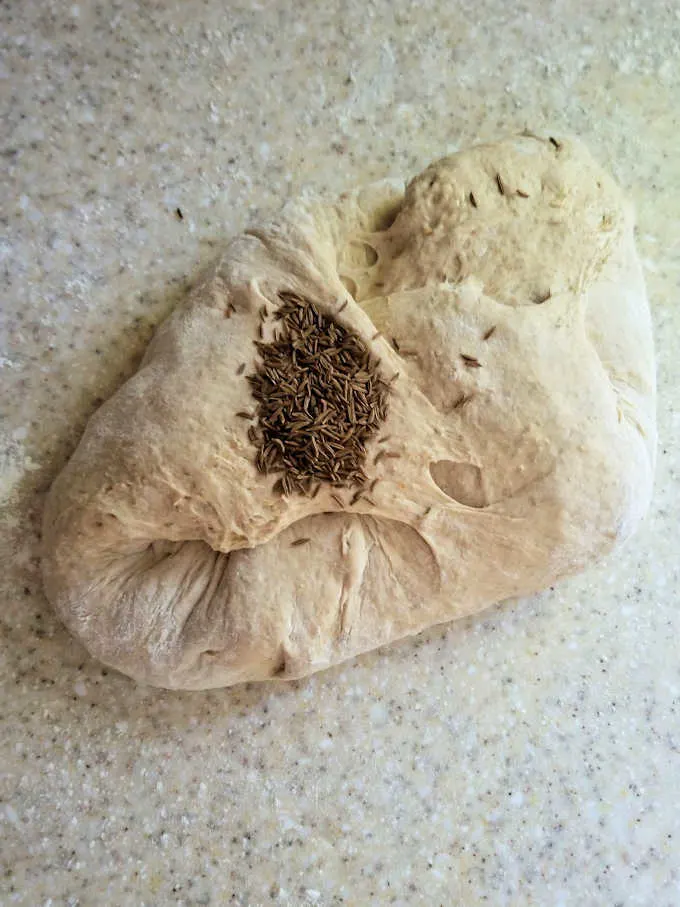
- In the morning, knead in the caraway seeds and shape the loaf.
- Set it aside to rise.
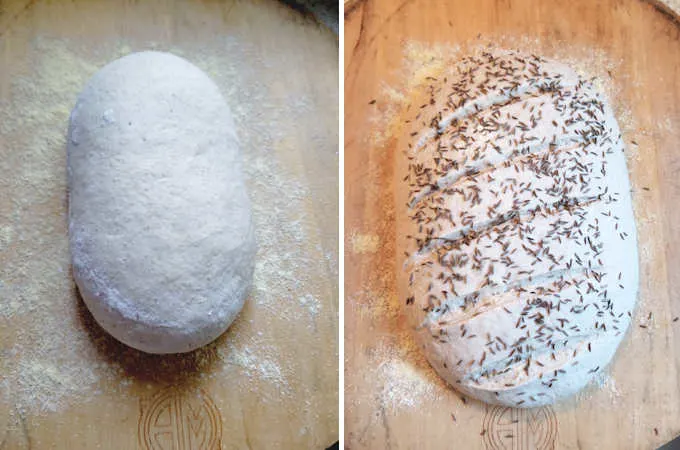
- When the loaf has almost doubled in volume, brush with egg wash, sprinkle with more caraway seeds.
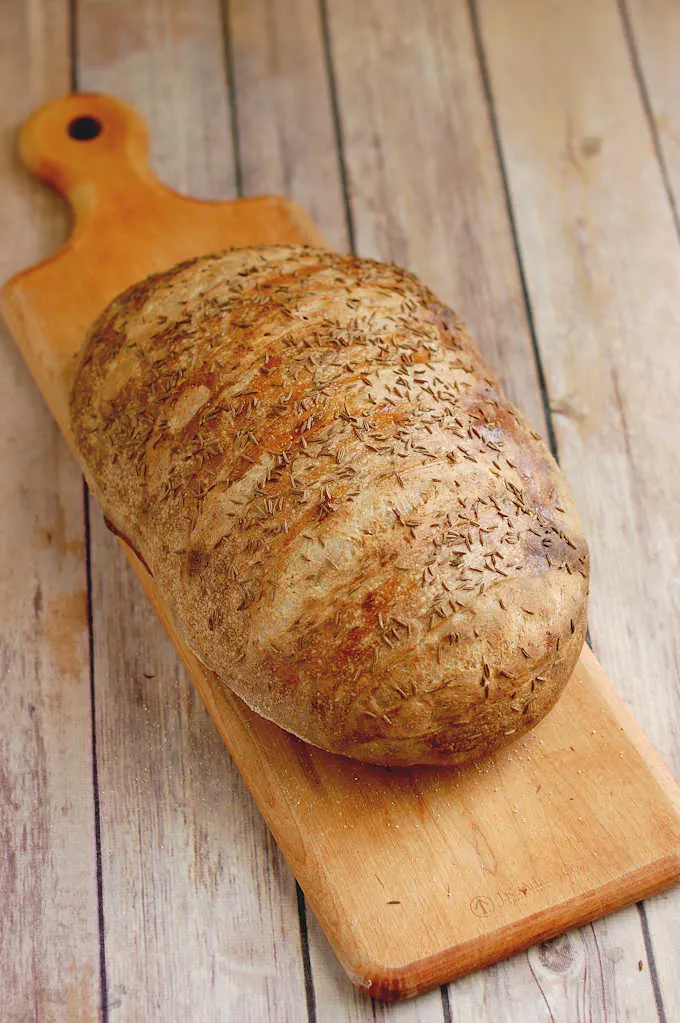
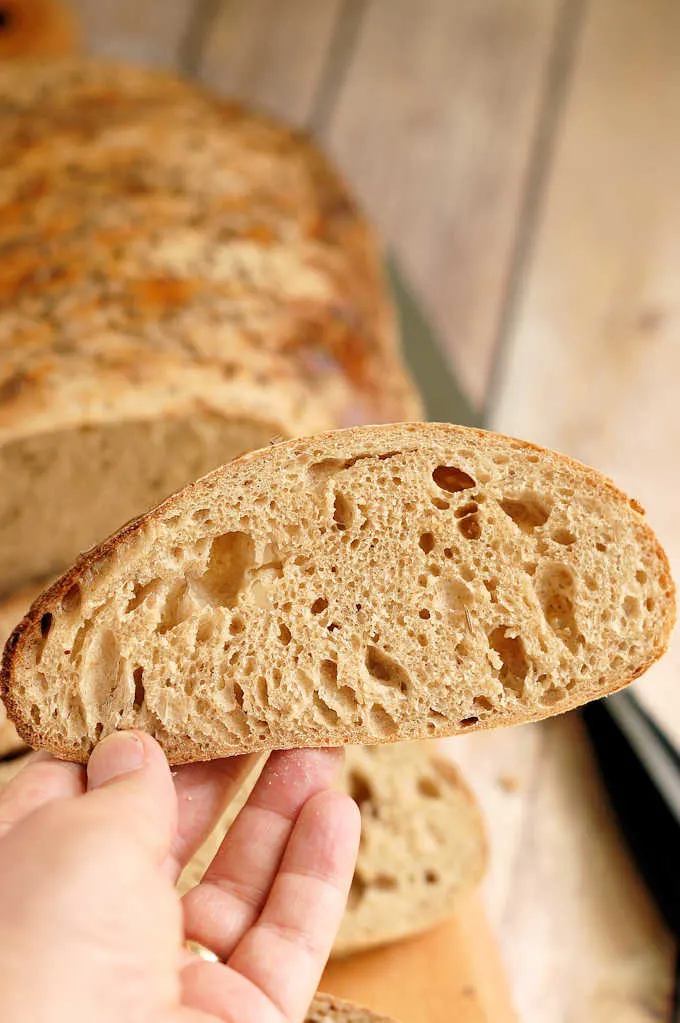
- Bake until the interior temperature is 200F. Cool completely before slicing.
A timeline for making Sourdough Rye Bread
- If your starter needs feeding, do that the night before or early in the morning of the day you want to make the dough.
- Mix the dough in the afternoon and refrigerate the dough in the evening before going to bed.
- Take the dough out first thing in the morning and shape the loaf.
- Leave the loaf at room temperature to rise for 1 1/2- 2 hours. You’ll have fresh bread by lunch time.
- To make and bake the dough in the same day, start the dough early in the morning and it should be ready to bake by late in the afternoon or early evening.
Recipe Tips for Sourdough Rye Bread
- For the best results, start mixing the dough when your starter is at it’s peak.
- The fermentation time for the dough will vary based on the ambient temperature of the room and the temperature of your dough. The dough will start out fairly dense. It should be quite aerated and elastic by the end of the 3 hour fermentation.
- If the dough is very cool and sluggish you can set the bowl over a bowl of warm water to warm it up a bit.
- The time for the final proof can also vary. The bread should be almost doubled in size and if you poke the dough the dent should slowly fill in. If the dough springs right back when poked it’s not quite ready.
Storage
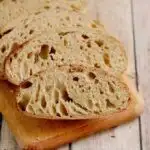
- Sourdough Rye Bread stays fresh at room temperature for 2-3 days.
- Slice and freeze for longer storage.
I know you hate to throw away that sourdough discard. Check out these recipes that use sourdough discard.
More Rye Recipes
- Overnight Rye Bread (made with commercial yeast)
- Sourdough Rye Crispbread
- Marble Rye Bread
- Rye Pie Dough
- Rye Bagels
- Rye & Malt Pretzel Rolls
If you love this recipe as much as I do, I’d really appreciate a 5-star review.
Sourdough Rye Bread Recipe
Ingredients
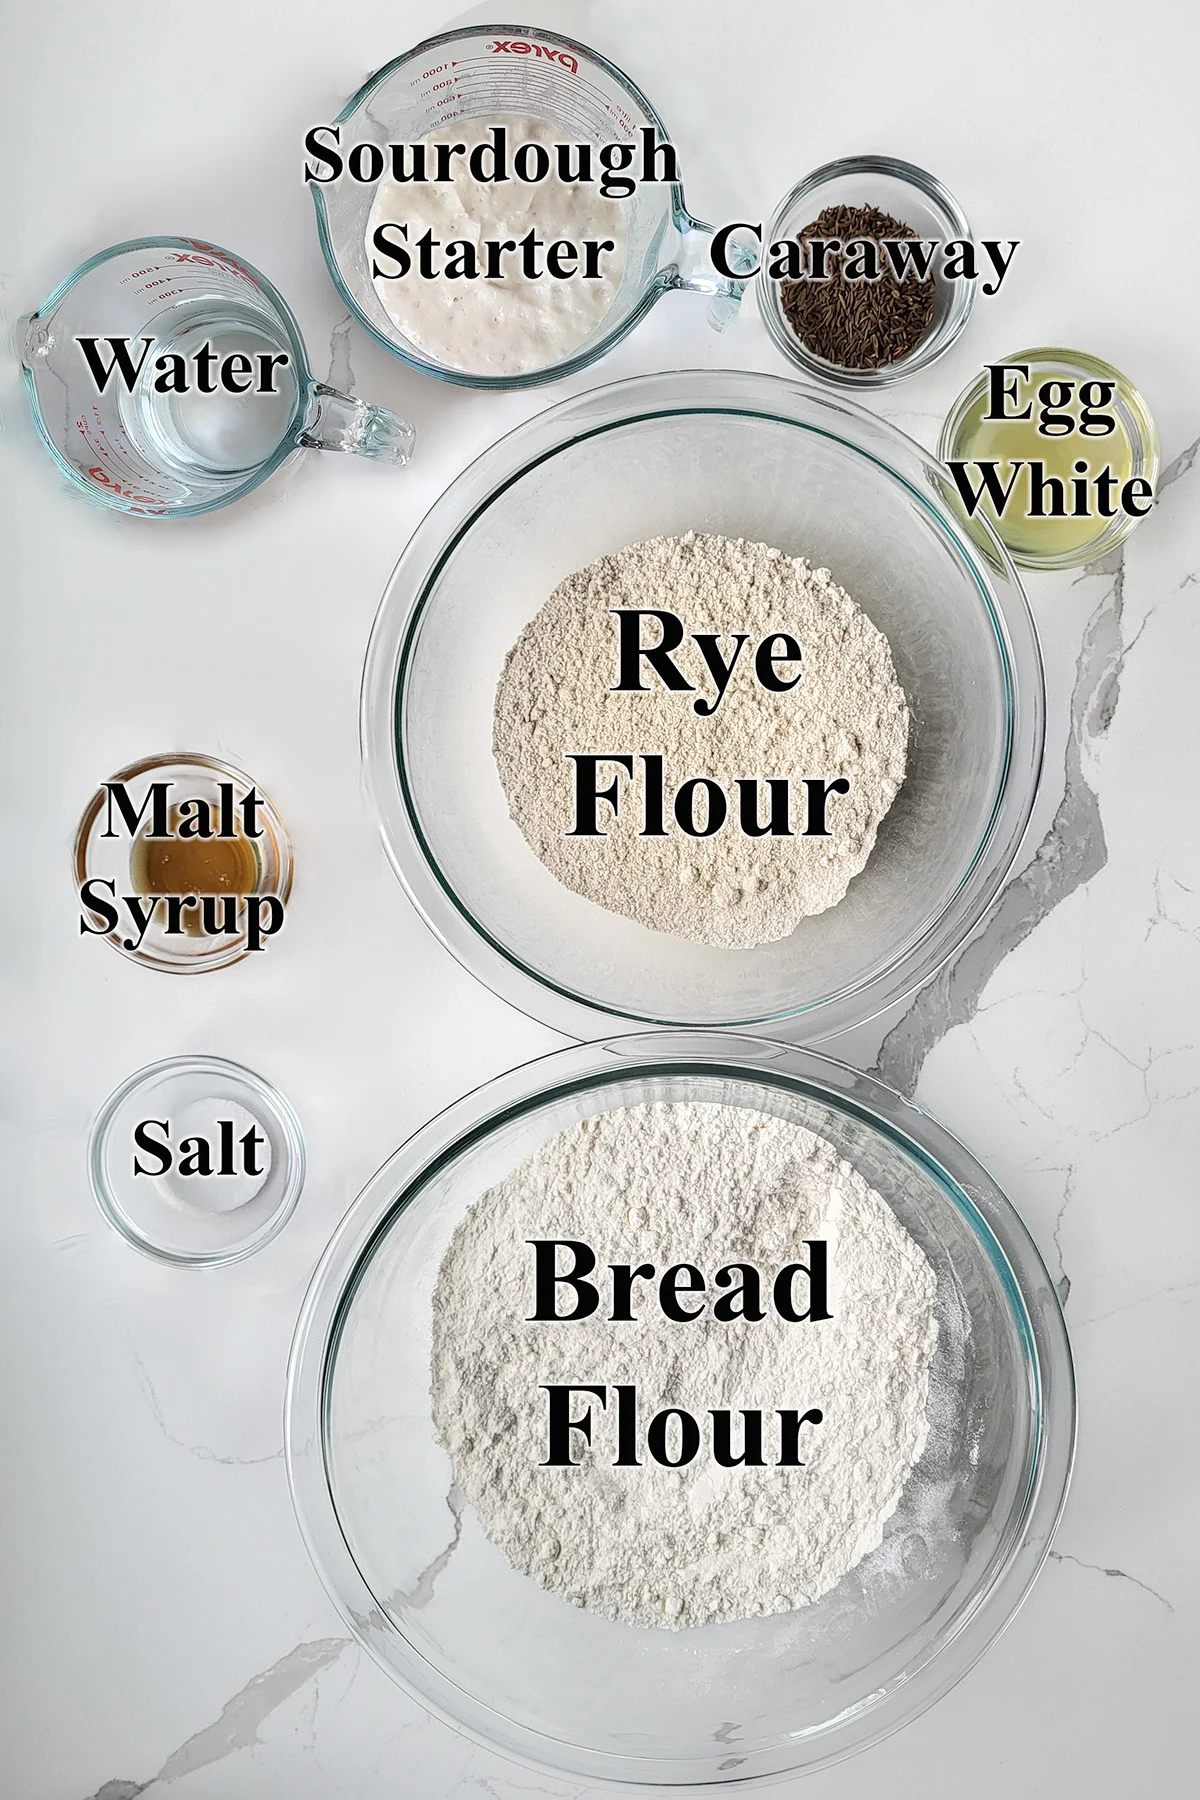
- 8 oz active sourdough starter (1 cup (100% hydration))
- 12 oz warm water (1 ½ cups)
- 5 oz rye flour (1 cup)
- 12 ½ oz bread flour (2 ½ cups, see note)
- 1 tablespoon malt syrup
- 2 teaspoons table salt
- 2 tablespoons caraway seeds
- 1 egg white
Instructions
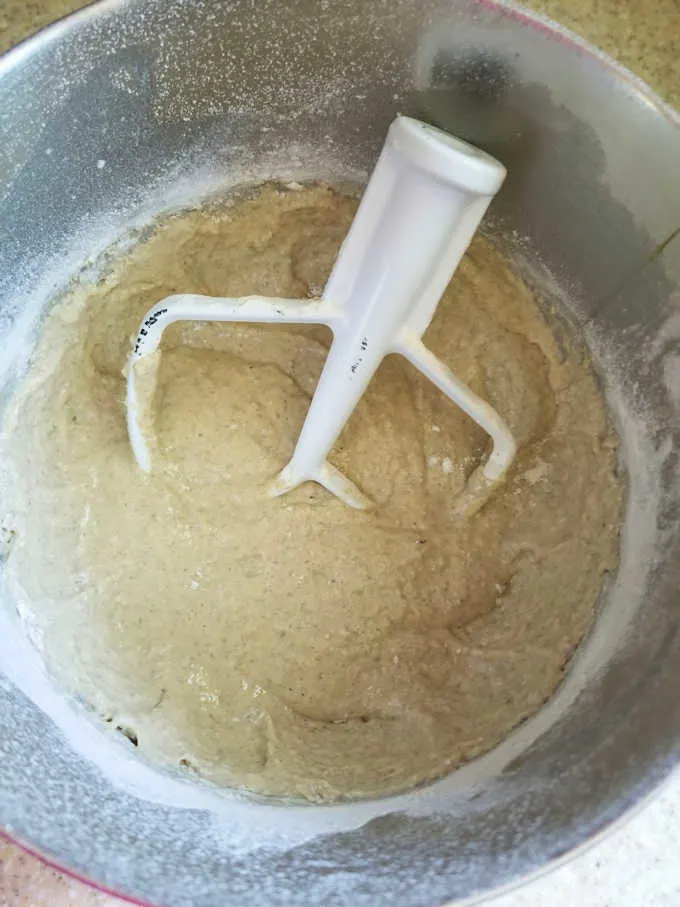
- Combine 8 oz active sourdough starter, 12 oz warm water, 5 oz rye flour and 1 cup (5 oz) of the bread flour. Mix with the paddle on low speed until it forms a thick batter. Cover the bowl and set aside for 30-60 minutes.
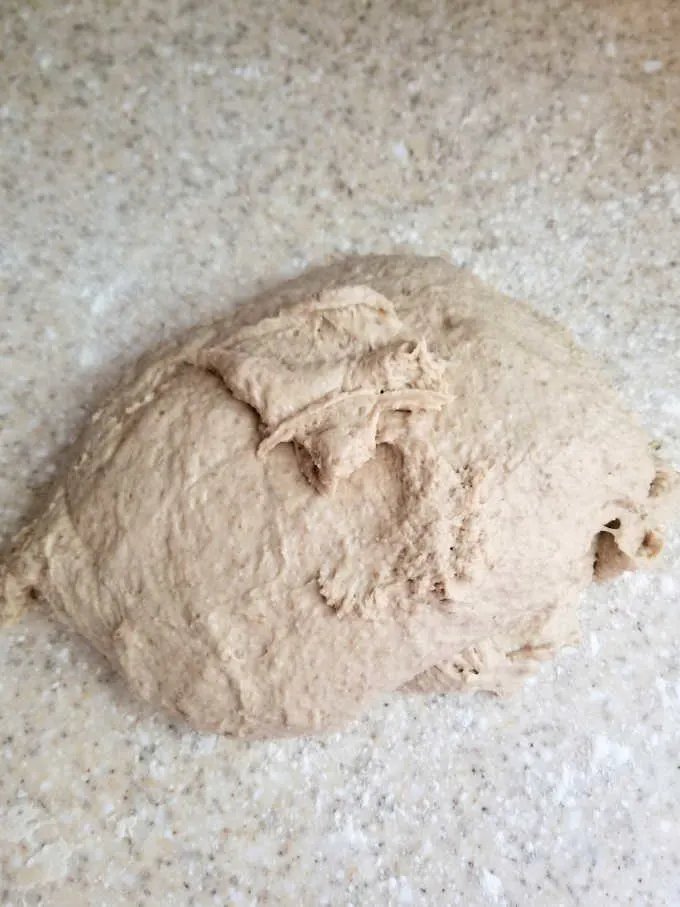
- If using a stand mixer, change to the dough hook. Add 1 tablespoon malt syrup, 2 teaspoons table salt and the rest of the bread flour. If the dough is still extremely sticky and does not clear the sides of the bowl, you can add up to ¼ cup more flour, a tablespoon at a time. If mixing by hand add as much of the bread flour as you can then turn the dough out onto a floured surface and finish kneading in the rest of the flour.
- Knead for 5 minutes on medium speed or until the dough clings to the hook and clears the sides of the bowl. Knead for 5 minutes by hand. Turn the dough out onto a lightly floured surface and knead into a smooth ball. Place the dough in a lightly oiled bowl, turn once to coat the dough. Cover the bowl and set it aside at room temperature.
- After 30 minutes uncover the bowl, lift one side of the dough and fold it into the middle of the dough. Repeat with the other three sides of the dough then flip the dough over. You’re basically turning the dough inside-out to redistribute the yeast. Cover the bowl and after 30 minutes repeat the procedure. Cover the bowl and after 60 minutes repeat the procedure again.
- Cover the bowl and after 60 minutes knead the dough, return it to the bowl. By now the dough should be lively, elastic and airy. If the dough is still sluggish give it another hour or two at room temperature. Cover tightly and refrigerate over night. If you want to bake the same day skip the refrigeration step and continue with the next step.
- Remove from refrigerator and dump the cold dough onto floured surface. Sprinkle the dough with 1 tablespoon caraway seeds and knead to distribute the seeds
- If you want two smaller loaves, divide the dough in half. Knead the dough into a smooth ball then taper two ends to form an oblong football shape. If baking in a Dutch oven form the dough into a round ball.
- Place on a wooden peel or sheet pan sprinkled liberally with corn meal. If you want to bake the bread in a Dutch oven place the dough onto a sheet of parchment paper. Cover with a damp kitchen towel and leave in a warm place until doubled in size and it springs back slowly when poked, about 1 ½ hours.
- Meanwhile, preheat the oven to 425 °F. If you have a baking stone preheat that in the oven. If you want to bake the bread in a Dutch oven or other heavy pot put that in the oven to preheat.
- Make 5 diagonal slashes in the dough with a single edge razor or very sharp knife. Brush dough with egg white and sprinkle with the other tablespoon of caraway seeds.
- Slide the dough onto the preheated stone or slide the sheet pan into the oven. The bread is ready when the internal temperature is 200 °F. Baking time is about 35 minutes.
- If using the Dutch oven to bake follow these directions: Remove the preheated pan from the oven and remove the lid. Use the parchment paper to lift the loaf into the Dutch oven. Replace the lid on the pot and slide it into the oven. Bake for 20 minutes. Remove the lid from the Dutch oven. The loaf should be well risen and pale in color. Continue baking another 20 minutes until the loaf is nicely browned and beginning to crisp. Remove the pan from the oven. Use the parchment to lift the loaf out of the pan. Use the parchment to place the loaf directly onto the rack in the oven. Bake another 5-10 minutes until the loaf is deeply browned and very crisp. Total baking time is about 40-50 minutes.
- Cool completely on a wire rack before slicing.
Would you like to save this recipe?


As an Amazon Associate and member of other affiliate programs, I earn from qualifying purchases.
Loved it! Turned out better then I expected. Will definitely be making it again!