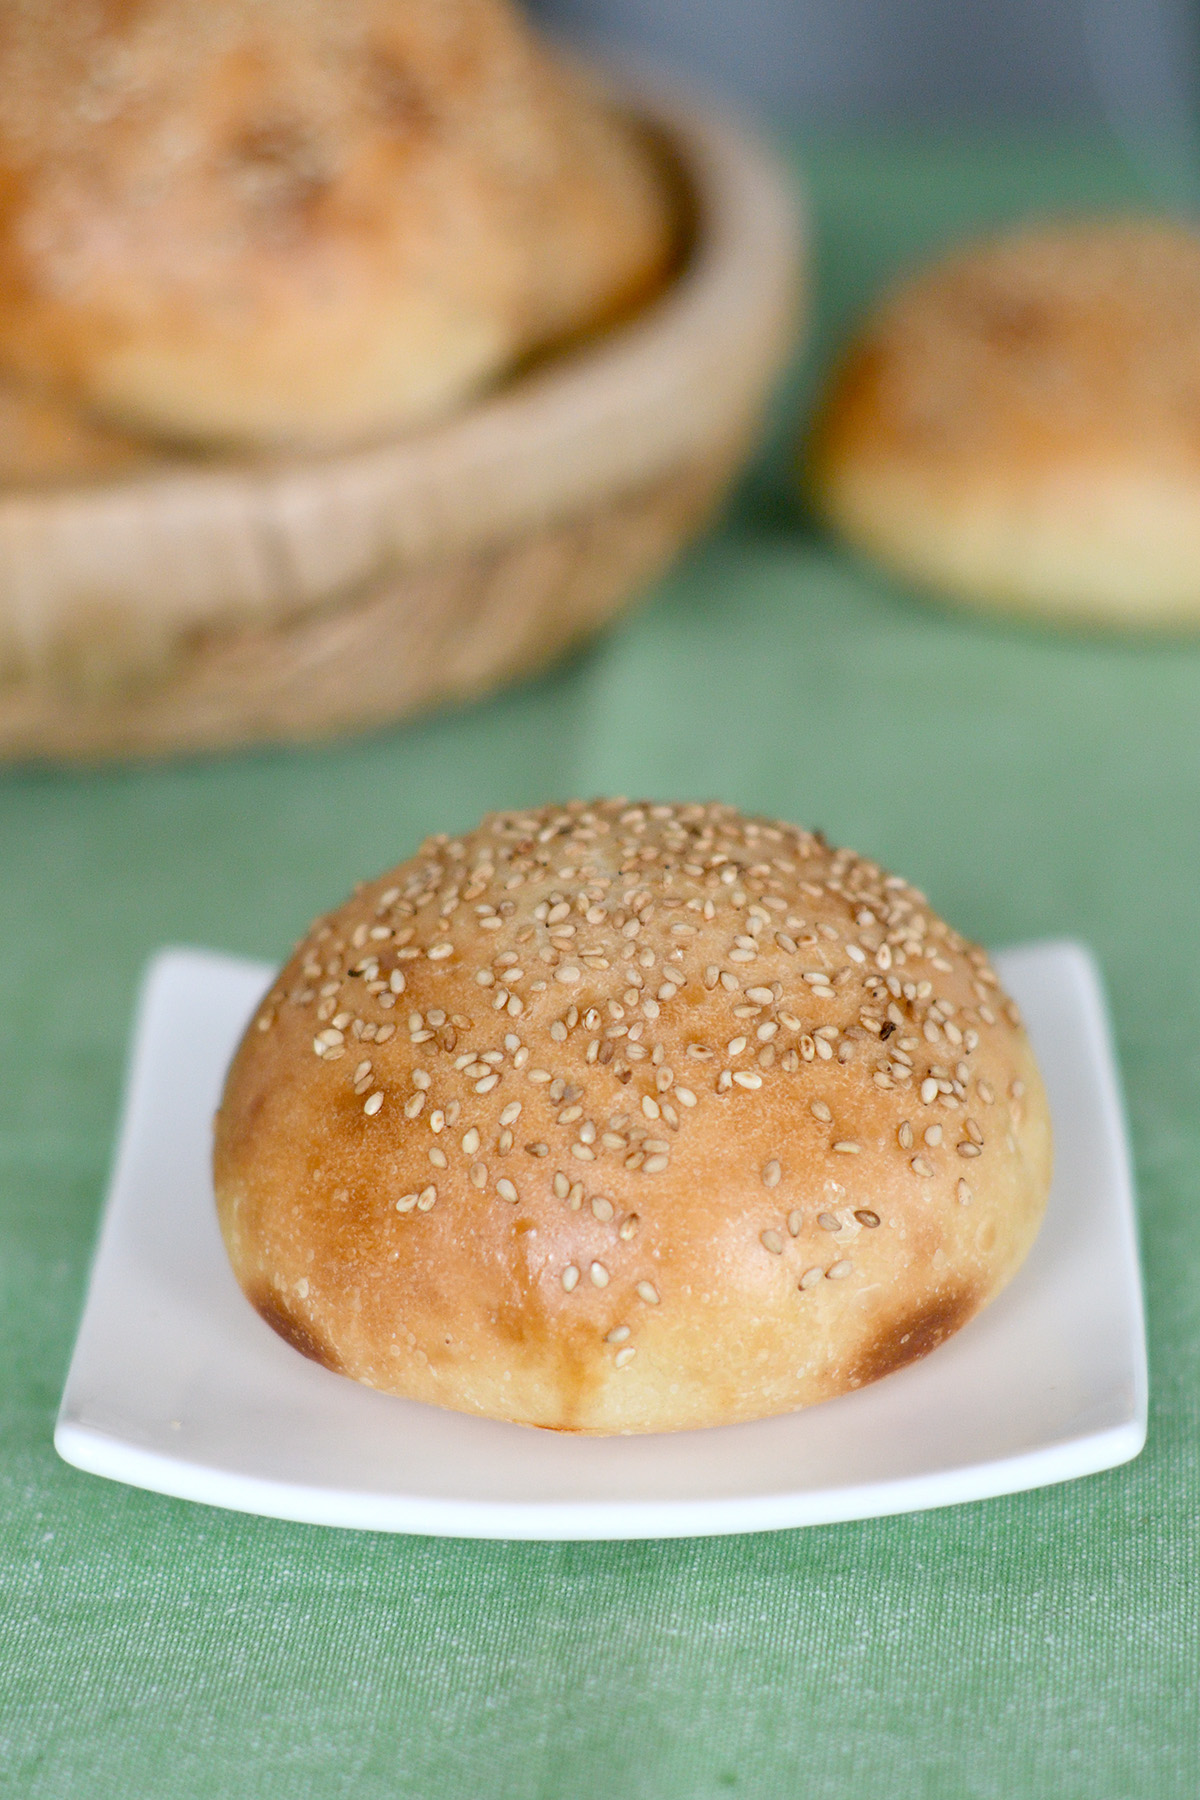
Soft Sourdough Hamburger Buns


Sourdough Hamburger Buns will take your burgers to the next level. They’re plush with an amazing flavor and texture thanks to the sourdough starter in the dough.
If you don’t already have one, I can show you how to make a sourdough starter and how to feed a sourdough starter.
Table of contents
Why you should make Sourdough Hamburger Buns
We spend lots of time thinking about what type of meat (or meat substitute) used to make a burger, and what type of fixins to put on top of the burger. But what about the bun?
A good hamburger bun should be soft enough so you can bite into the burger without all the toppings squishing out. But the bun should also be substantial enough to hold up to the burger juices and toppings without disintegrating.
That is exactly the type of bun this recipe will yield.
Ingredients
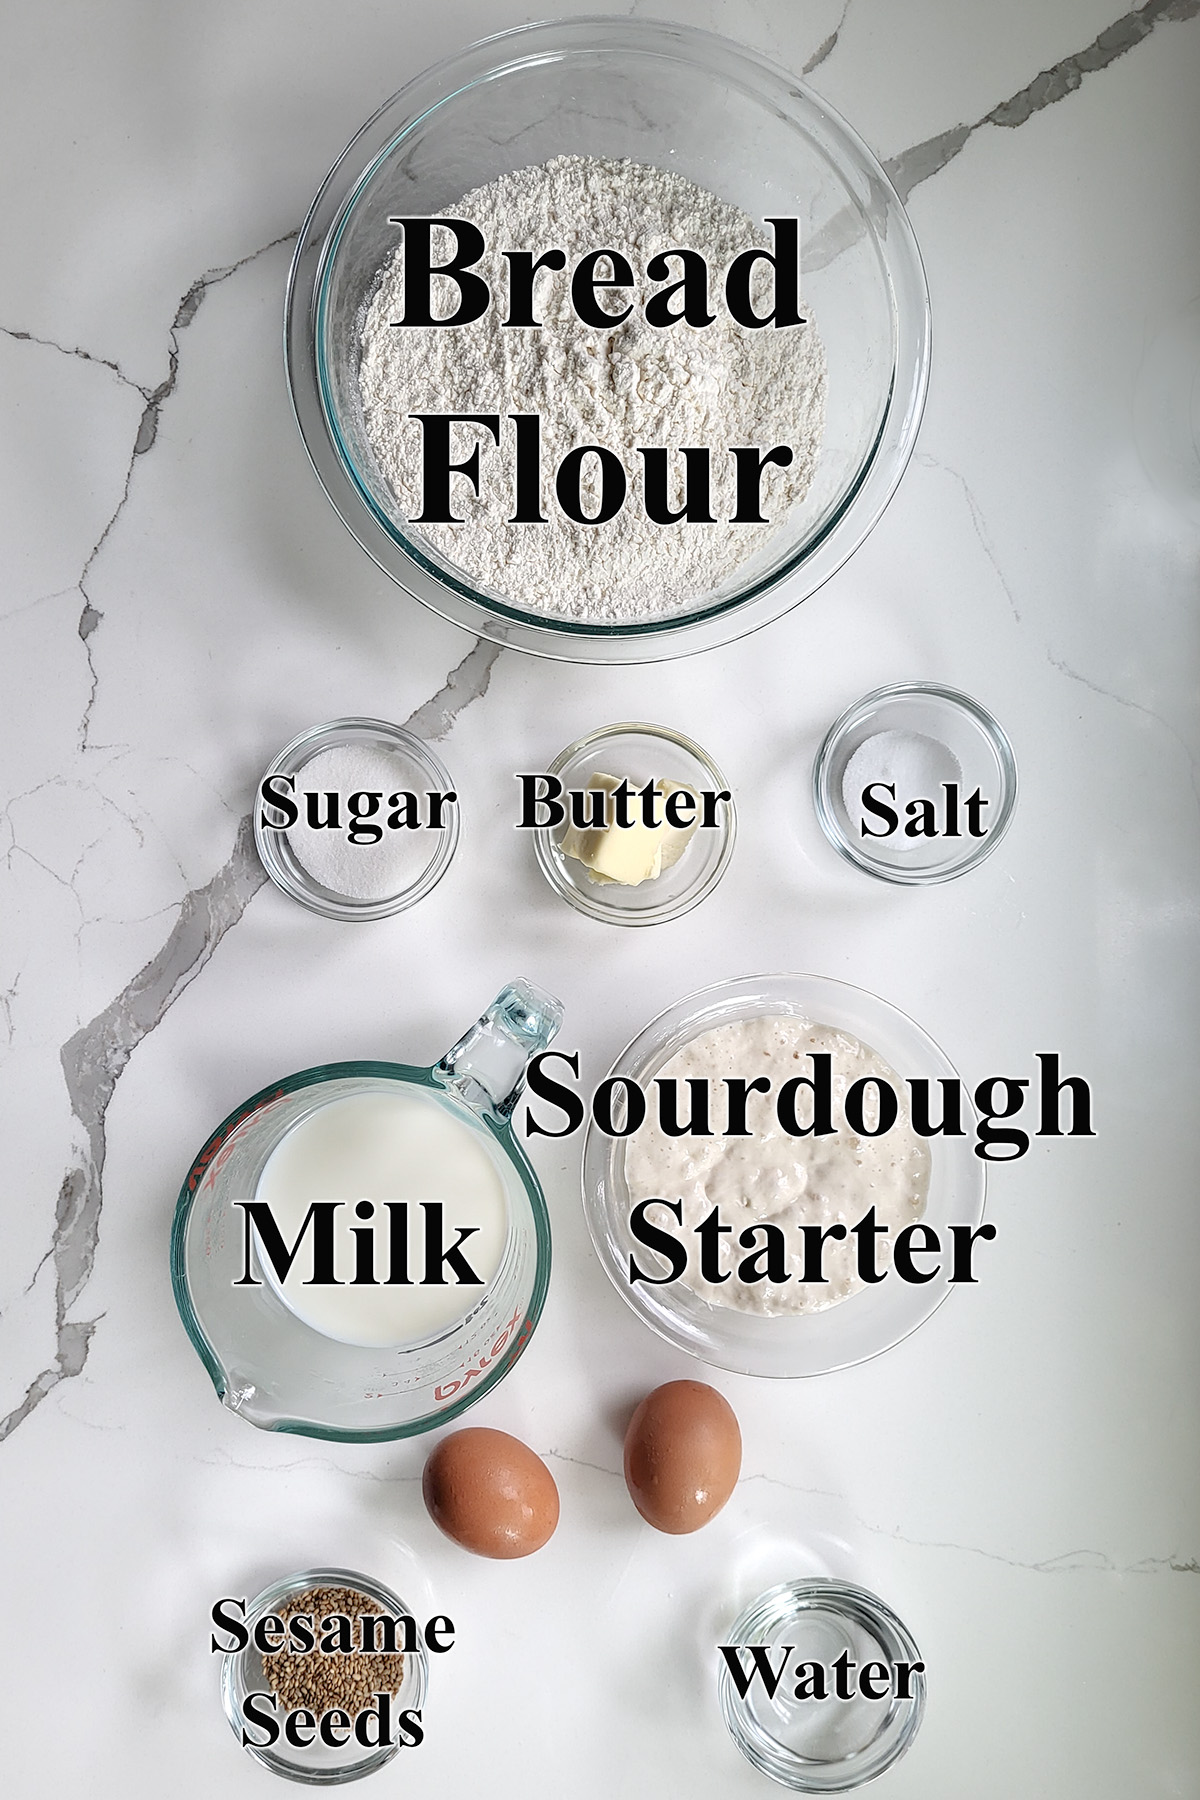
Ingredient Notes
- Sourdough Starter – Use an active, 100% hydration starter. If your starter has a different hydration percent you will need to adjust the flour or water in the recipe as needed.
- Bread Flour – High protein bread flour promotes great gluten development in the dough. The stretchy dough rises high in the oven and the buns keep their round shape.
- Milk – Scalding alters a protein in milk which can interfere with gluten development. Don’t skip the scalding step. The milk, along with butter and a smidge of sugar, tenderizes the dough for a soft crumb.
- Sesame Seeds – These are optional but a very tasty addition.
Step by Step Process Photos
Here’s what the recipe process looks like at each stage. Refer to the recipe card below for measurements and exact instructions.
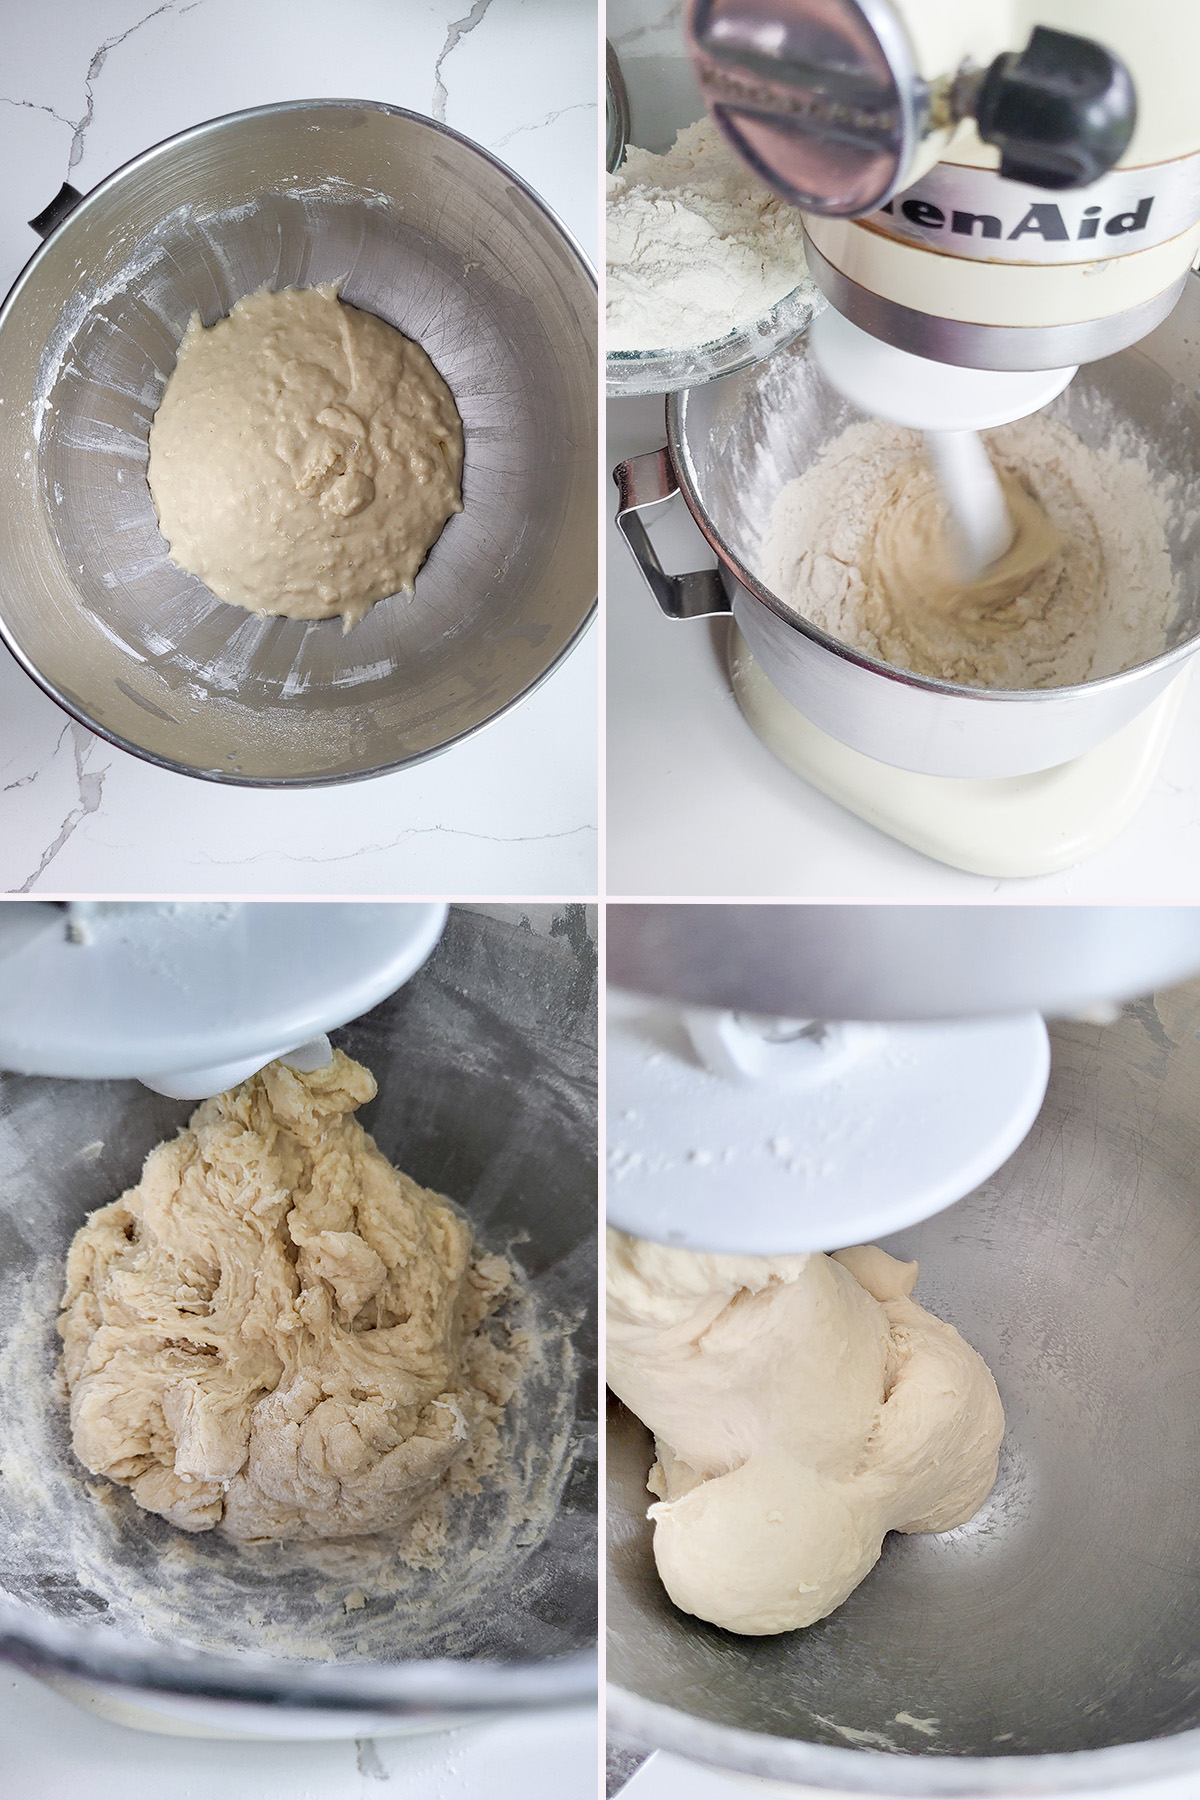
- Combine the starter with the water and 1/2 cup of the flour and set it aside for 60 minutes. Add the milk/butter, sugar, salt, egg and half of the remaining flour. This will form a thick batter. Switch to the dough hook.
- With the mixer running on low speed, add the remaining flour and mix to combine.
- The dough will start out quite shaggy and sticky. Knead for 5 minutes.
- After 5 minutes the dough should cling to the hook and clear the sides of the bowl. This can also be done by hand.
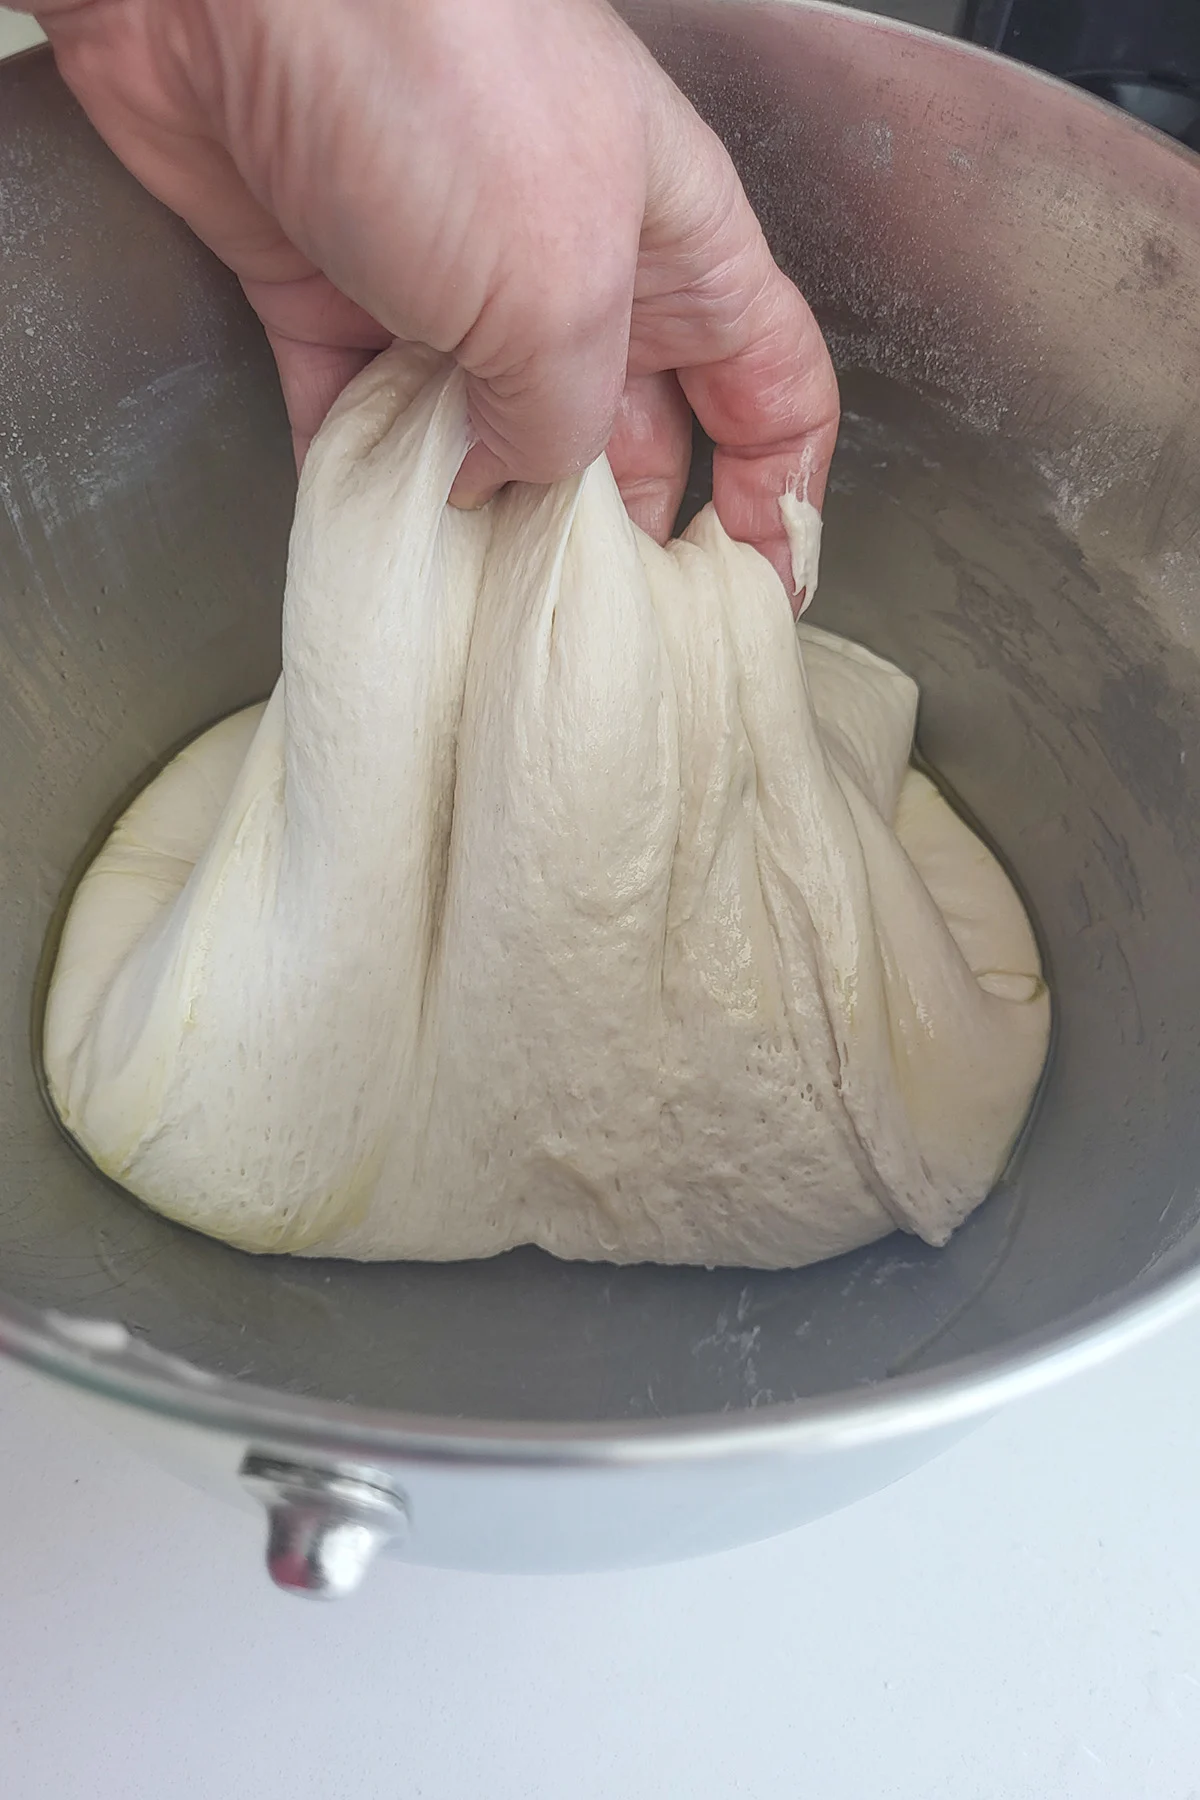
- Set the dough aside to ferment for 3-5 hours. Each hour stretch and fold the dough.
- After the initial fermentation cover the bowl and refrigerate for up to 2 days. If you want to bake the same day proceed with shaping the buns.
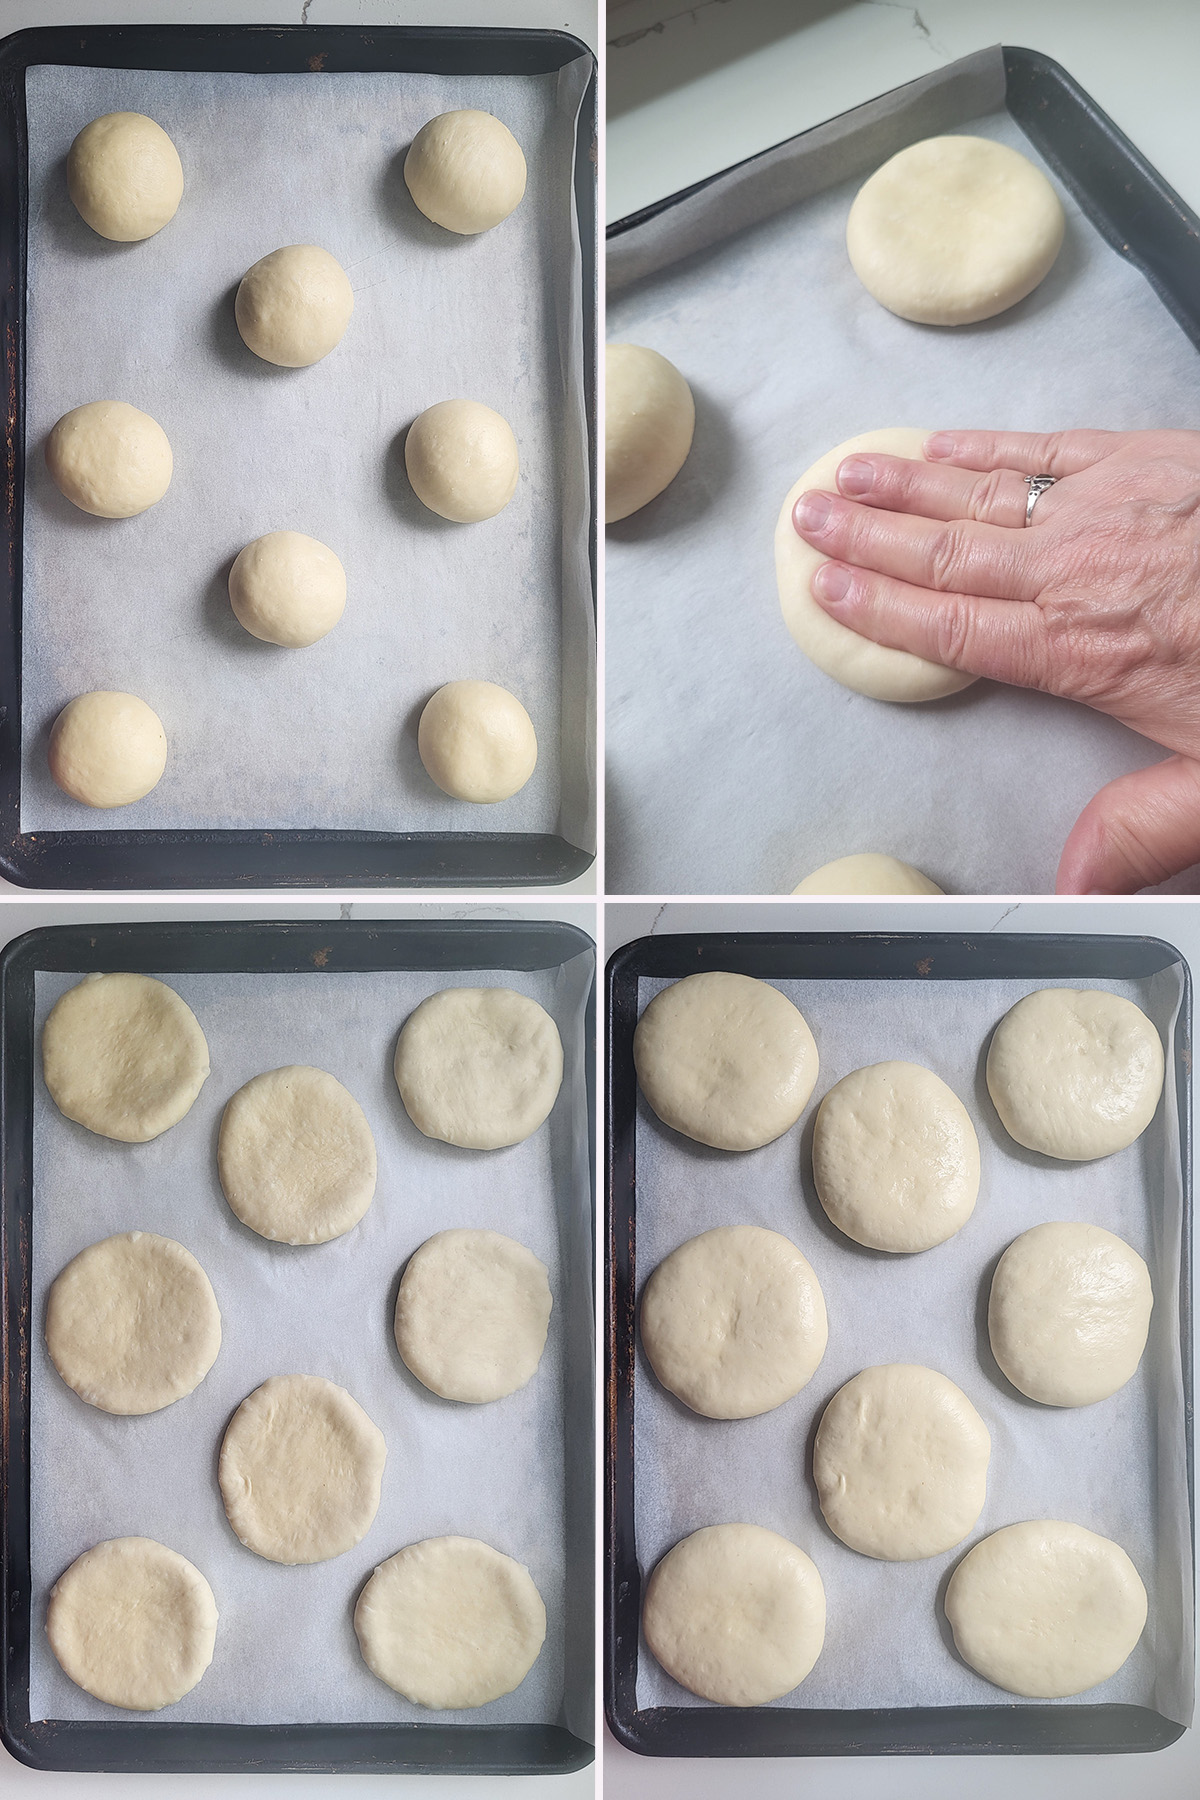
- Divide the dough into 8 equal pieces. Do this by eye or weigh the dough and divide by 8. Roll each piece of dough under your cupped hand to form a tight ball. Set the dough balls onto a parchment lined baking sheet.
- Use your hand to flatten each ball into a disc. Alternately, run a rolling pin over each ball to flatten.
- Set the buns aside to rise for 1 – 2 hours. The rising time will be longer if the dough is cold after refrigerating.
- The buns are ready when they are light and aerated. If you poke the dough it should form a dimple that slowly fills-in. If the dough springs right back it’s not ready.

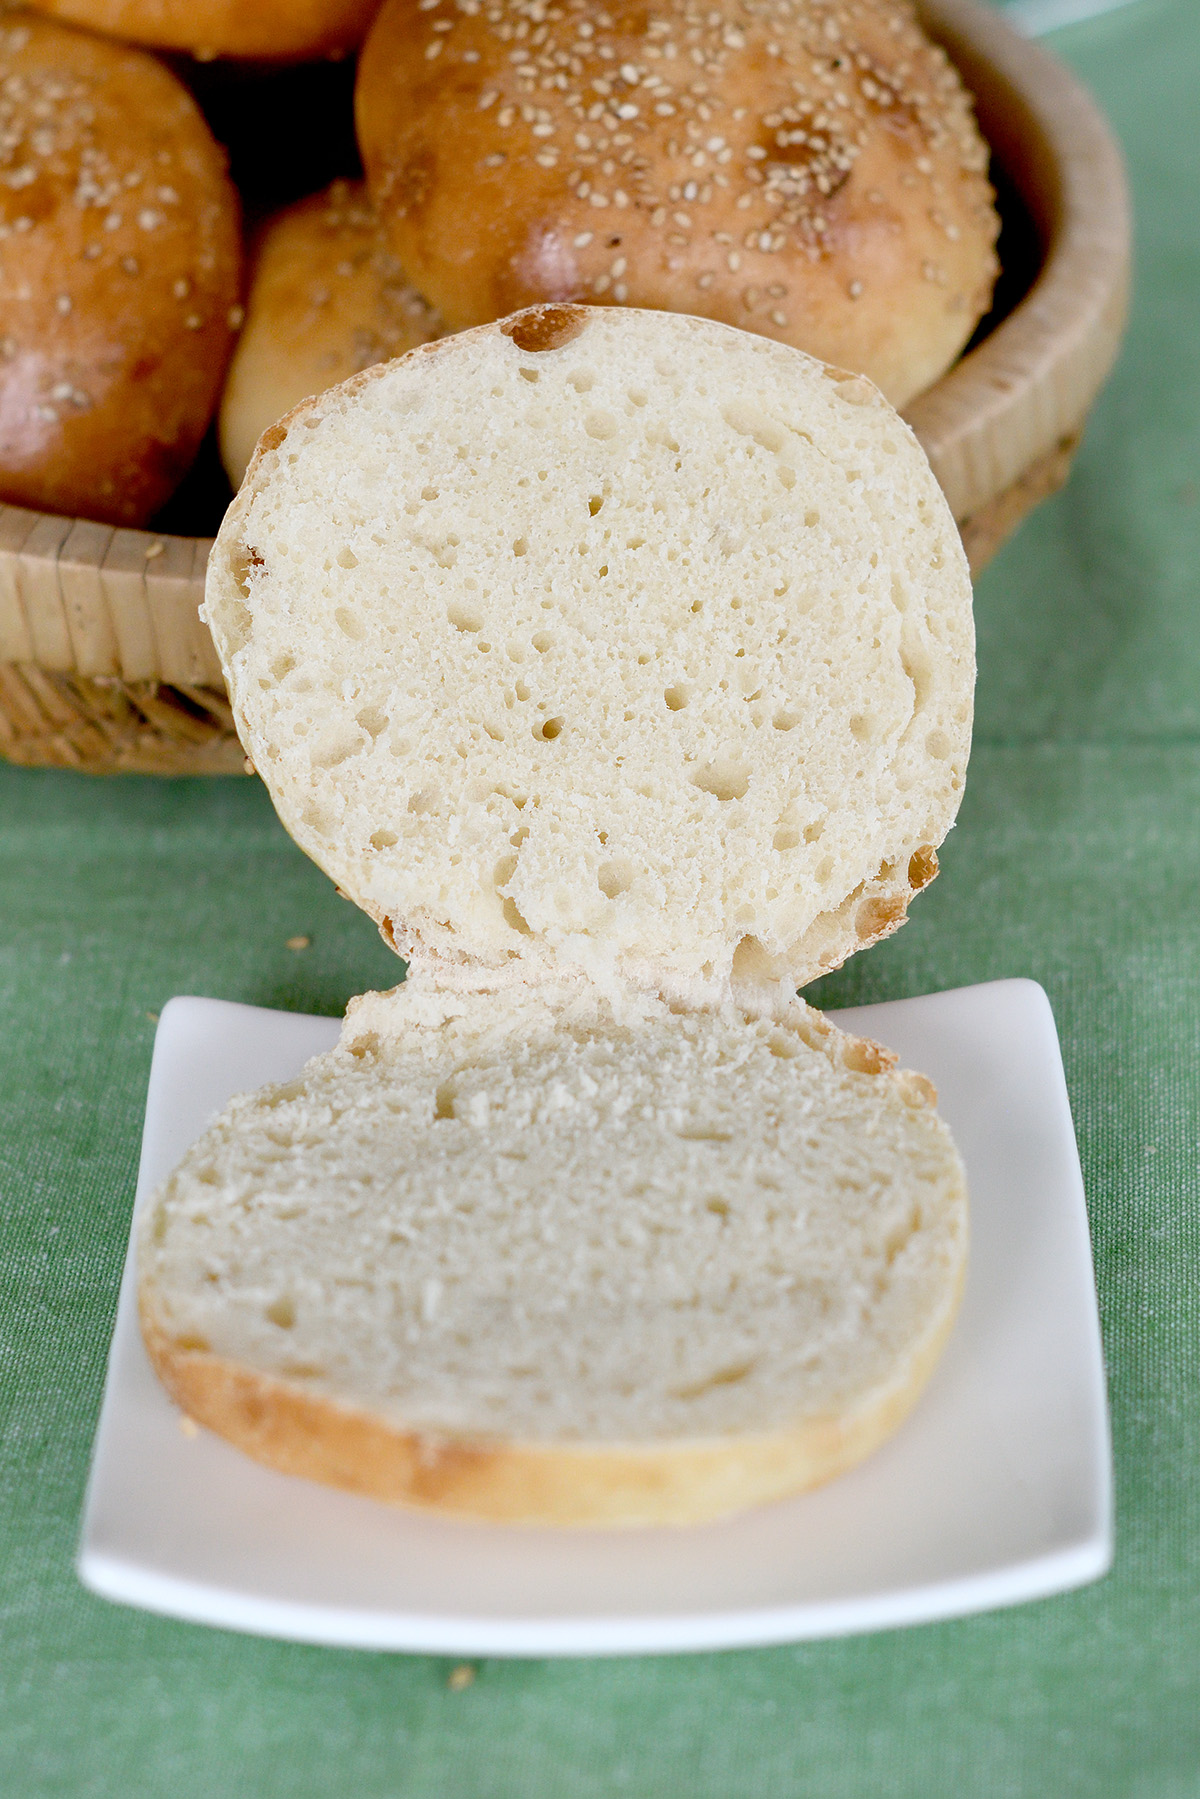
- Brush the buns with egg wash and sprinkle with sesame seeds.
- Bake until golden brown.
Timeline for making Sourdough Hamburger Buns:
Same Day Bake
- Night before – feed starter
- Early am – mix dough
- Early afternoon – bulk fermentation complete
- Early afternoon – shape Buns & rise
- Late afternoon – bake buns
Overnight Cold Fermentation
- Early am – feed starter
- Early afternoon – mix dough
- Early Evening – bulk fermentation complete
- Early Evening – refrigerate dough up to 2 days
- Next Day – shape buns, rise and bake
More Recipes Like This
I know you hate to throw away that sourdough discard. Check out these recipes that use sourdough discard.
If you love this recipe as much as I do, I’d really appreciate a star rating and a quick comment. Ratings and comments help my recipes show in search results. Thanks!

Sourdough Hamburger Bun Recipe
Ingredients
- 8 oz active sourdough starter (1 cup, 100% hydration)
- 2 oz warm water (¼ cup)
- 15 oz bread flour (3 cups, see note)
- 6 oz whole milk (¾ cup)
- 1 oz unsalted butter (room temp)
- 1 oz granulated sugar (2 tablespoons)
- 1 ½ teaspoons salt
- 1 large egg (room temperature)
- 1 egg (for egg wash)
- Sesame seeds for garnish
Instructions
- In the bowl of a stand mixer or in a large mixing bowl, combine 8 oz active sourdough starter, 2 oz warm water and 1/2 cup of the bread flour to form a thick batter. Cover the bowl and allow the mixture to rise for 30-60 minutes.
- Warm 6 oz whole milk in the microwave to scalding. Add 1 oz unsalted butter to the milk and stir until the butter melts. Allow the milk to cool to 110°F. Add the milk, 1 oz granulated sugar, 1 ½ teaspoons salt and 1 large egg to the sponge. Mix to combine.
- Add half of the remaining bread flour. Mix until the batter looks like thick pancake batter. If using a stand mixer, switch to the dough hook.
- With the mixer running, slowly add the remaining bread flour. Mix until the dough begins to gather on the hook and clears the sides of the bowl. Knead for 5 minutes. If mixing by hand, add as much of the flour as you can in the bowl then finish kneading in the rest of the flour by hand And then knead 5 minutes.
- Dump the dough onto a lightly floured surface. The dough should be soft and slightly sticky. Knead to form a smooth ball. If the dough is very sticky sprinkle a little more flour as you knead. Place the dough in an oiled bowl, turning once to coat the dough. Cover and set aside in a warm spot for the initial fermentation.
- Each hour during fermentation, lift one side of the dough and fold it into the middle of the dough. Repeat with the other three sides of the dough then flip the dough over. You're basically turning the dough inside-out to redistribute the yeast and strengthen the gluten.
- After 3 hours the dough should be lively, elastic and airy. If the dough is still sluggish give it another hour or two at room temperature. If you want to finish making the buns the next day return the dough to the bowl, cover tightly and refrigerate overnight. The next morning continue with shaping. Otherwise continue shaping the buns on the same day.
- Turn the dough out onto a lightly floured surface and divide the dough into 8 equal portions (see note). Roll each portion to a ball and set them a parchment lined baking sheet. Use the palm of your hand to flatten each ball to a disc about 1" thick. Alternately, you can run a rolling pin over the dough to flatten.
- Cover the sheet pan and allow the rolls to rise until doubled in size (about 1 hour, longer if the dough is cold). Press a roll with your finger. If it springs right back it's not ready, if the dent slowly fills in the rolls are ready to bake.
- Meanwhile, preheat the oven to 400 °F.
- Brush the tops of the buns with egg wash. Sprinkle each bun generously with sesame seeds. Bake until the buns are golden brown and feel light when lifted off the sheet pan, about 10-15 minutes. Allow to cool completely before slicing.
Would you like to save this recipe?


As an Amazon Associate and member of other affiliate programs, I earn from qualifying purchases.

At what temperature do you preheat the buns? And how long?
Do you mean preheat the oven? Step 10 in the recipe says “Meanwhile, preheat the oven to 400 °F.” How long to preheat will vary based on the ambient temperature of your oven when you turn it on.
Buns feel a littel heavy. I think 400 ferenheight was to heigh for me
Maybe, but almost everything with sourdough will come back to either the condition of your starter or the fermentation time. The dough should definitely be light, lively and elastic at the end of fermentation. Also, if your dough is cold from the fridge before shaping the buns they will take longer for the final rise.
Can I use a mix of all-purpose and whole wheat flour? How much would you suggest?
Yes. I would use 2/3 white and 1/3 whole wheat.