• Skip to primary navigation
  • Skip to main content
  • Skip to primary sidebar
  • Skip to footer

Baking Sense®

  • Home
  • Recipes
    • Breads
    • Sourdough Recipes
    • Pies & Tarts
    • Cakes/Cupcakes Recipes
    • Cookies & Bar Cookies
    • Muffins, Quick Breads & Donuts
    • Savory
    • Ice Creams & Frozen Treats
    • Custards
  • Baker’s Resources
    • Essential Baking Tools & Equipment
    • Baking Weights & Measures Conversion Chart
    • Baking Ingredient Substitutions
    • Baking Tips & Classic Techniques Explained
  • Baking School
  • About Eileen/FAQ
  • Contact Me
  • Navigation Menu: Social Icons

    • Email
    • Facebook
    • Google+
    • Instagram
    • Pinterest
    • Twitter

Sourdough Cinnamon Buns

February 12, 2019 by Eileen Gray 110 Comments

Jump to Recipe
a pinterest image for sourdough cinnamon buns

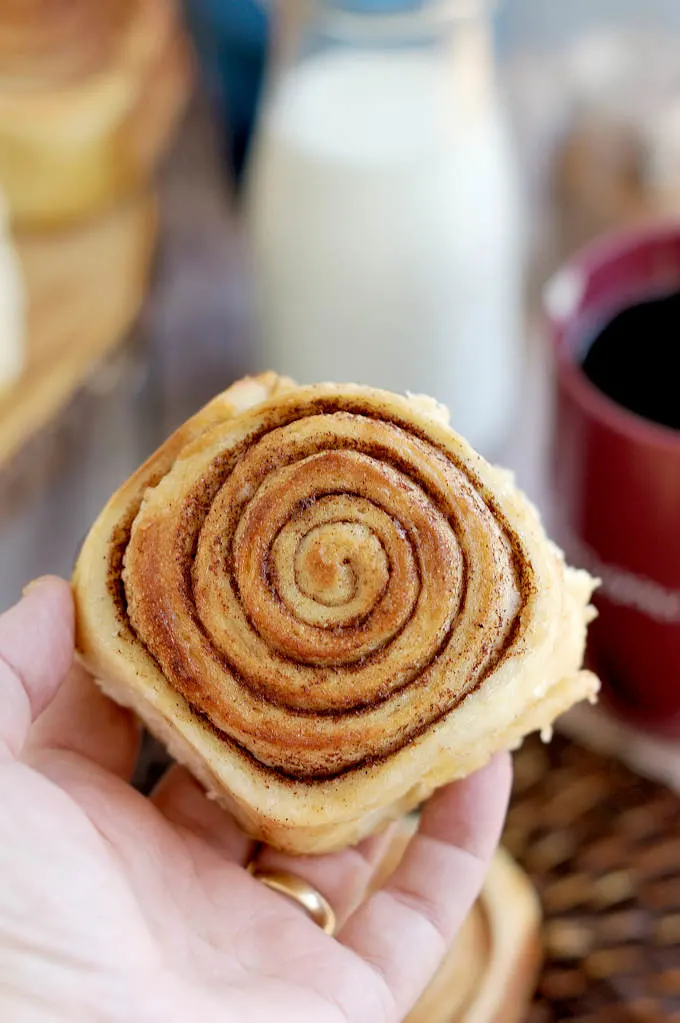
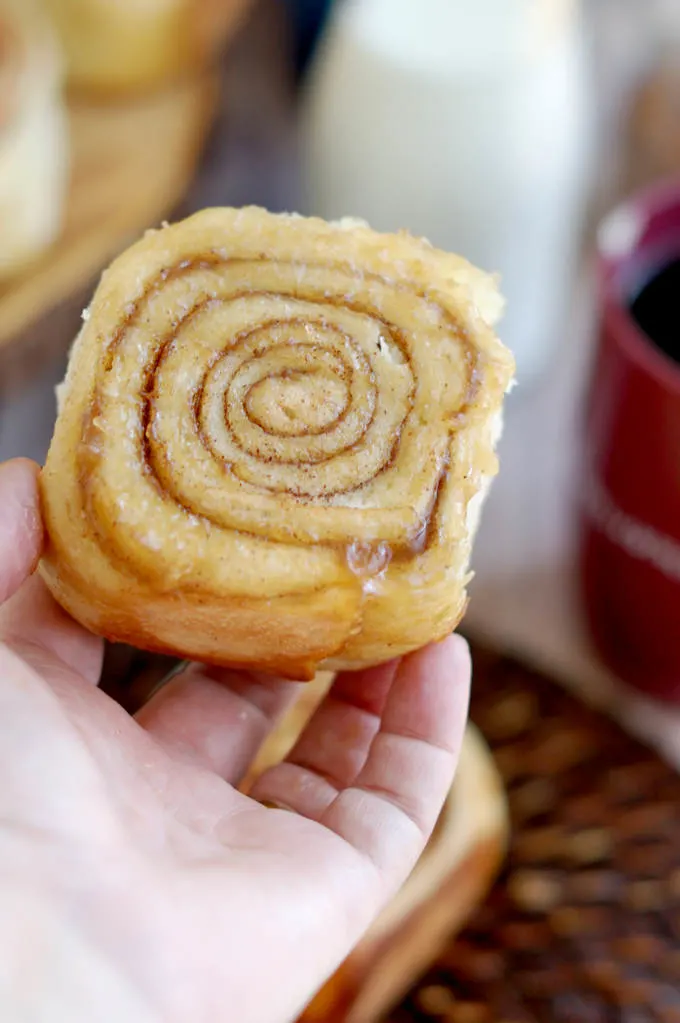
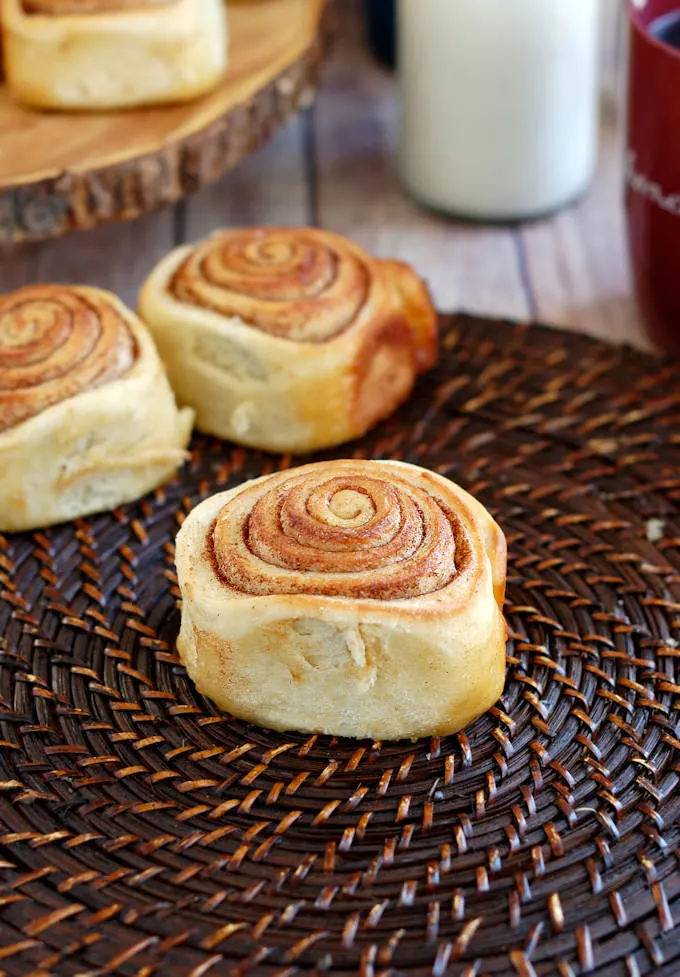
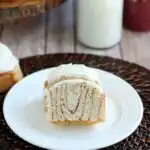
These Sourdough Cinnamon Buns are the best cinnamon rolls ever! There’s a bonus “sticky bun” layer at the bottom & cream cheese frosting on top. WOW!

a sourdough cinnamon bun

Does anything in the world smell as good as freshly baked Cinnamon Buns? I know, stupid question.

I think we can all agree that even a bad cinnamon bun (aka cinnamon roll) is pretty good. But we can do better. Two things set this recipe apart from other Cinnamon Bun recipes.

First and foremost, the dough is made with sourdough starter instead of commercial yeast. If you love to bake bread but haven’t delved into the world of sourdough yet, I encourage you to dive-in head first.

If you don’t have one, you can learn How to Make a Sourdough Starter. Then I can show you how to Feed and Maintain Sourdough Starter or How to Keep a Small Sourdough Starter.

You cannot imagine how a little sourdough starter enhances the taste and texture of any bread recipe. That’s a long-winded way of saying that these Sourdough Cinnamon Buns are extra yummy because of the starter.

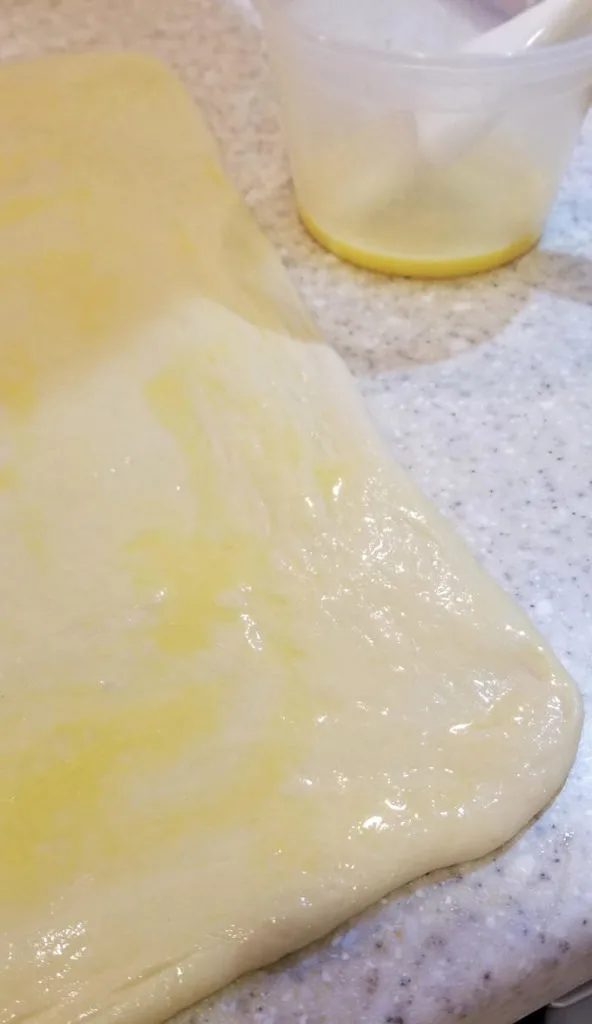
Click through the slideshow to see how to assemble Sourdough Cinnamon Buns:

sourdough sticky bun dough
Brush the dough with egg wash to help the filling stick
a sourdough with cinnamon sugar on top
Use a generous full cup of cinnamon sugar for great flavor and a “sticky bun” bottom
raw cinnamon rolls
Roll the dough tightly and cut into 1.5″ wide buns
cinnamon buns before and after baking
The cinnamon buns will rise enough to fill the pan when they’re baked

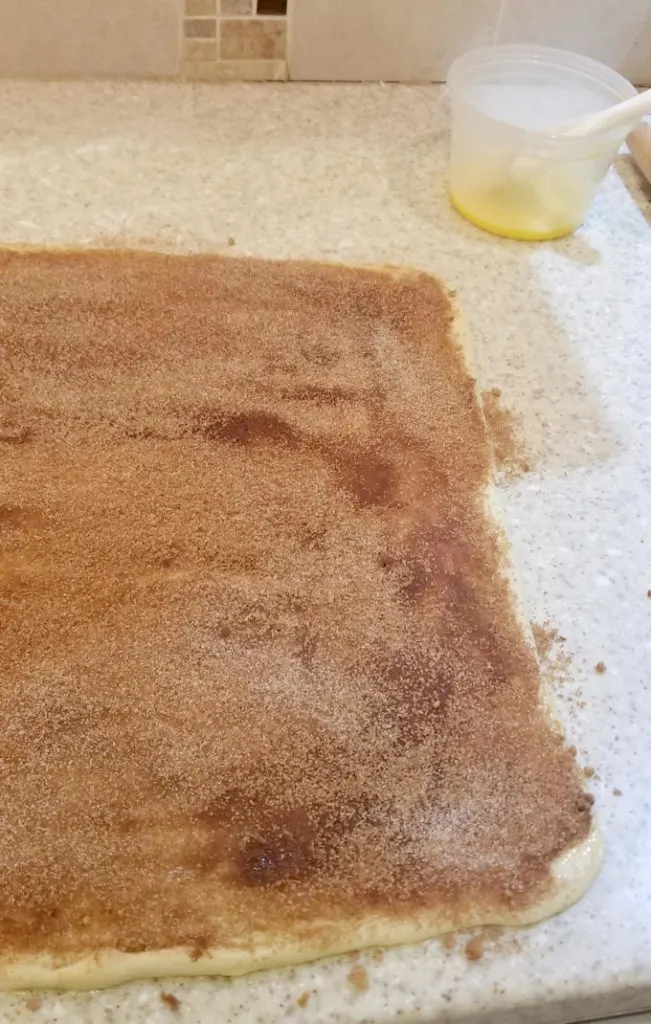
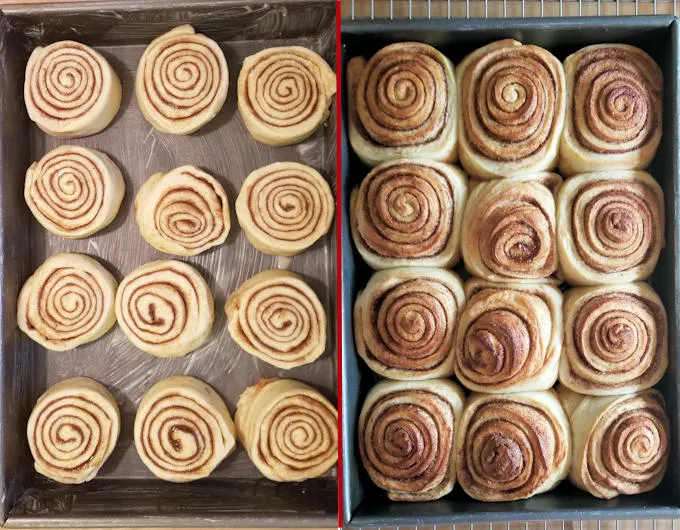
The other thing that sets this recipe apart is the result of a happy-mistake. Because I wanted lots of cinnamon sugar in the buns, I sprinkled a whole cup of sugar over the dough before rolling it up to form the buns.

This is an “overnight” recipe, so the assembled buns spend a night in the refrigerator. That’s great because you can do most of the work the day before and then bake the buns in the morning.

The first time I tested the recipe I found that during the overnight rest in the refrigerator some of the sugar “melted” and formed a syrup at the bottom of the pan.

But, hey, you know what? That syrup bakes up to form a sticky, gooey bottom layer on the buns, which is really quite nice. So I embraced the “mistake” and it’s now part of the recipe.

a sourdough cinnamon bun
The syrup that forms in the pan overnight bakes into a sticky, gooey layer on the bottom of the buns.
Sourdough Cinnamon Bun

Tips for making great Sourdough Cinnamon Buns (sourdough cinnamon rolls)

  • To work ahead the logs can be wrapped tightly in two layers of plastic wrap. Freeze for up to 3 months. Defrost the dough overnight in the refrigerator, then proceed with the recipe as listed.
  • To bake the buns the same day instead of putting the pan in the refrigerator, let the the buns rise at room temperature until they almost fill the pan. Bake as directed.
  • To get the chilled buns active I like to warm them up a bit. Turn on the oven for just a minute or two to get it just a little warm. Turn off the oven then place the pan with the buns in the barely warm oven. Once they’re starting to rise remove the pan from the oven. You can then preheat the oven while the buns finish rising.

So it’s kind of a twofer recipe; sticky bun on the bottom and iced cinnamon bun on top. Who’s going to complain about that? Not me!

Sourdough Cinnamon Bun with cream cheese icing

Since you’ve got your starter fed, check out the entire list of My Best Sourdough Recipes. Have fun!

I know you hate to throw away that sourdough discard. Check out these recipes that use sourdough discard.

If you love this recipe as much as I do, please consider giving it a 5-star review.

Continue to Content
Sourdough Cinnamon Buns

Overnight Sourdough Cinnamon Buns

Yield: 12 Buns
Prep Time: 45 minutes
Rising Time: 12 hours
Baking Time: 25 minutes
Total Time: 13 hours 10 minutes

A long slow rise gives these Sourdough Cinnamon Buns an extra special flavor & texture. The warm buns are topped with cream cheese frosting for an indulgent breakfast or brunch treat, and there's a bonus "sticky bun" layer at the bottom of the buns.

Ingredients

For the Dough

  • 1 cup (8 oz, 224g) active sourdough starter (100% hydration)
  • 1/4 cup (2 oz, 60ml) warm water
  • 1 cup (8 oz, 240ml) warm milk (110°F)
  • 4 cups (20 oz, 560g) unbleached all purpose flour
  • 1/3 cup (3oz 84g) sugar
  • ¼ cup (2oz 56g) unsalted butter, melted
  • 1 large egg
  • 1 teaspoon salt

For Assembly:

  • 1/4 cup (2 oz, 56g) unsalted butter, melted
  • 1/2 cup (4 oz, 112g) granulated sugar
  • 1/2 cup (4 oz, 112g) brown sugar
  • 1 tablespoon ground cinnamon
  • 1 egg for egg wash

For the Icing

  • 1/4 cup (2 oz, 56g) cream cheese, room temperature
  • 1/2 stick (2 oz, 56g) softened butter, room temperature
  • 3/4 cup (3 oz, 84g) confectioner's sugar
  • 1/2 teaspoon vanilla extract
  • 1/2 teaspoon lemon juice (optional)

Instructions

  1. In a mixer bowl combine the starter, water, milk and 2 cups of the flour. Mix to form a thick batter. Cover the bowl and set aside to rise for 30 minutes.
  2. Add the sugar, melted butter, egg and salt then mix to combine. Change to the dough hook if using a stand mixer. With mixer on low add the remaining flour, 1/2 cup at a time. The dough should be soft and elastic, will clear the sides of the bowl and gather on the hook. Knead for 2-3 minutes. If mixing by hand continue mixing and then kneading in the flour by hand. Dump the dough onto a lightly floured surface. Knead into a smooth ball.
  3. Transfer the dough to a lightly oiled bowl, turning once to coat the dough. Cover the bowl and set it aside at room temperature. After 30 minutes uncover the bowl, lift one side of the dough over into the middle of the dough. Repeat with the other three sides of the dough then flip the dough over. Cover the bowl and after 30 minutes repeat the procedure. Cover the bowl and after 60 minutes repeat the procedure. Cover the bowl and after 60 minutes repeat the procedure one last time. By now the dough should be lively, elastic and airy. If the dough is still sluggish give it another hour or two at room temperature.
  4. Generously brush a 9” x 13” baking pan with some of the melted butter, reserve the rest. In a small bowl, combine the granulated sugar, brown sugar and cinnamon. Turn the dough onto a floured surface without kneading out the air. Roll the dough to a 18" x 16" (46cmx41cm) rectangle. Generously brush the surface of the dough with egg wash. You should use almost 1/2 the egg wash to get a good coating so the cinnamon sugar will stick. Sprinkle the cinnamon sugar over the egg washed dough. Use your hands to smooth out the cinnamon sugar to an even layer all the way to the edge of the dough.
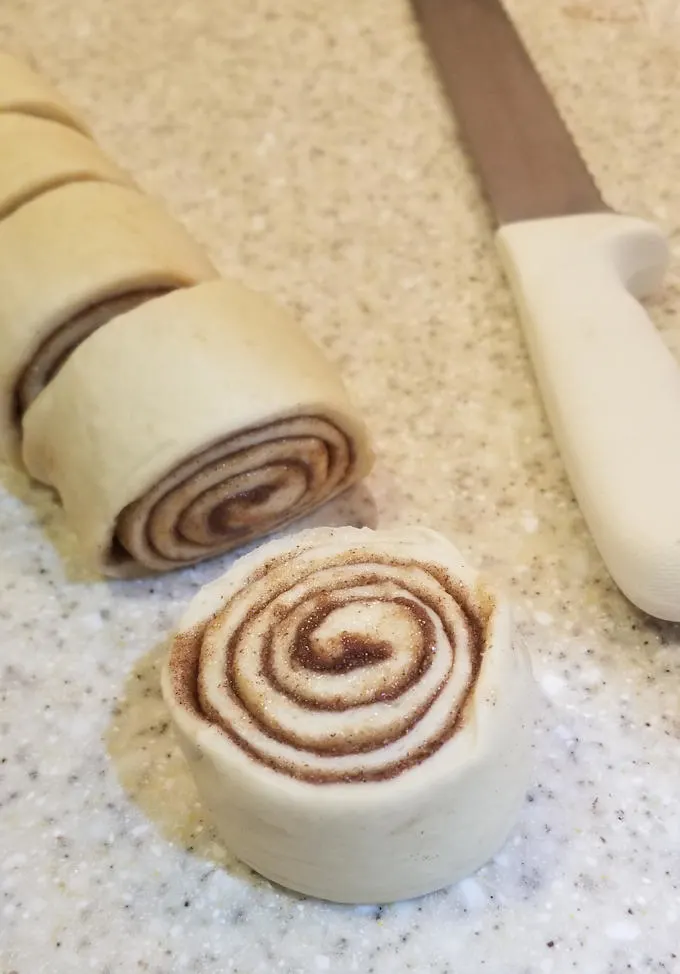
  5. Working from the long side, tightly roll the dough into a log, pinch the seam to seal. Straighten out the log so it's of even thickness and is 18" 46cm) long (see note 1).
  6. Use a serrated knife to cut the log into twelve 1.5" (3.5cm) wide buns. Place the buns in the prepared pan. Generously brush the tops of the buns with the melted butter. Cover the buns with plastic wrap and refrigerate overnight (see note 2).
  7. In the morning take the pan out of the refrigerator. You'll see some melted sugar in the bottom of the pan, this will form a sticky bottom as the buns bake. Allow the buns to proof at room temperature until they’re puffy and almost filling the pan, about 1.5 - 2 hours. The exact time needed for proofing will vary depending how active your starter was and the temperature of your kitchen.
  8. Preheat the oven to 375°F (190°c) Bake the buns until they're until golden brown and set in the center, 25-30 minutes. 
  9. While the buns are baking, make the icing. Combine the butter and sugar in a mixing bowl and cream until well combined. Add the cream cheese and whip until well aerated. Add the vanilla and optional lemon juice. The lemon juice will spark the flavor of the icing but it's ok to go without.
  10. Remove the buns from the pan to a serving plate while they are still warm. Spread cream cheese icing generously over the buns and indulge.

Notes

1. At this point you can wrap the log and freeze for up to 32 months. Defrost and then continue the recipe.

2. If you want to bake the buns the same day you can leave them at room temperature to rise at this point.

Recommended Products

As an Amazon Associate and member of other affiliate programs, I earn from qualifying purchases.

  • Pastry Brush, 1 1/2", Commercial Grade
    Pastry Brush, 1 1/2", Commercial Grade
  • Breadtopia Sourdough Starter (Live)
    Breadtopia Sourdough Starter (Live)
  • Ateco Offset Spatula with 4.5-Inch 
    Ateco Offset Spatula with 4.5-Inch 
  • Calphalon Signature Nonstick Bakeware 9-in. x 13-in.
    Calphalon Signature Nonstick Bakeware 9-in. x 13-in.
  • KitchenAid 5-Qt. Stand Mixer 
    KitchenAid 5-Qt. Stand Mixer 

Did you make this recipe?

Please leave a comment on the blog or share a photo on Instagram

© Eileen Gray
Cuisine: baked goods / Category: Breads

Filed Under: Breads, Recipes, Sourdough Recipes Tagged With: cinnamon buns, sourdough

Previous Post: « Chocolate Cherry Brownies with Whipped White Chocolate Cherry Ganache
Next Post: Sourdough English Muffins »

Reader Interactions

Comments

  1. Farheen

    November 24, 2020 at 1:49 am

    I tried this today. I realized I did not have enough active starter. I had 180gms. I added 4 gms of commercial yeast to the recipe. It turned out so good. The frosting was so nice too. I finally found my perfect recipe. Thank you so much.

    Reply
    • Eileen Gray

      November 24, 2020 at 9:29 am

      You’re welcome!

      Reply
  2. Shawn

    October 16, 2020 at 7:16 pm

    Made these dozens of times so far, great recipe. I wanted to leave a bit of feedback for you (not that you probably need any tips) but also for others coming across this recipe.

    I have modified the schedule for making these to better meet my available time with working. On night 1 after work I make the dough, do the folds, leave it rise for a couple hours, and then put it in the refrigerator overnight covered with plastic wrap.

    On night 2, I prep the filling and my pans (more on that later), and then I take out the cold dough. I immediately roll out the dough and apply the filling. I then roll out the log. If the log has gotten soft, I transfer the log onto a cookie sheet (cut the whole log in half to make it fit) and then put back in refrigerator for about 15 minutes to firm back up. Then I cut the log, but here is the biggest of all my tips. Get unwaxed dental floss, a piece about 18 inches long. Pick up the end of the log, and place the dental floss under the log. Wrap around, and pull tight. You end up with perfect cuts every time, with no worries of sticking to the knife or flattening the rolls. I cut mine to about 1″ thick because 1.5″ is a bit too much to east for me. I have reduced cook time to about 22-25 minutes vs 25-30 as a result.

    The next tip comes with the pans. I bought some 2.5-LB disposable Takeout Pans with cardboard Lids – 8.6″ x 6.1″ x 2″ on amazon. I put 4 or 6 roll in each pan, and then a lid on top, with butter already on top. I leave one pan in refrigerator, and then on third morning, wake up, proof, and eat for breakfast. The other pans freeze nicely, in very convenient containers to get out and cook as desired. You can leave some frozen icing in a baggie in the pans if desired as well, just take out before you cook.

    Reply
    • Eileen Gray

      October 17, 2020 at 10:43 am

      Love these tips. Thanks for sharing.

      Reply
  3. Sophie

    September 6, 2020 at 3:45 pm

    Sorry I read again and found the 2 cups in the second step.. aaahhh cooking to fast again!

    Reply
    • Eileen Gray

      September 6, 2020 at 4:31 pm

      No worries. Have fun.

      Reply
  4. Sophie

    September 6, 2020 at 3:37 pm

    Hi! Is it 4 cups or 2 cups of flour for the dough?
    Ingredients say 4 cups but instructions only refer to 2?

    Reply
    • Melanie Shellito

      November 25, 2020 at 10:42 am

      omg, I just added all four cups to my initial mix and THEN re-read that it’s only supposed to be 2 cups at first. WAAAAHHHH!! Certainly my own fault but I wonder if perhaps it would be handy to adjust the ingredient list to say “4 cups flour (separated)” to remind people as they’re working? I’m freaking out because I don’t have enough starter left to start over, and these were going to be for Thanksgiving breakfast. I have NO idea what to do now… 🙁

      Reply
      • Eileen Gray

        November 25, 2020 at 11:56 am

        Don’t worry, you can still go ahead with the dough. Just finish adding the remaining ingredients and proceed with the recipe. The initial “sponge” made with part of the flour does help with gluten development, but you can certainly still mix the dough without that step.

        Reply
  5. Julia

    August 5, 2020 at 9:42 pm

    Have made these three times. It never disappoints. Thank you!

    Reply
    • Eileen Gray

      August 6, 2020 at 9:36 am

      Thanks!

      Reply
  6. Coby

    August 3, 2020 at 10:37 am

    These are delicious!!! The sourdough adds just the right amount of tang. I omitted the cream cheese frosting because my kids don’t like it, and honestly I think they taste great without it!

    Reply
  7. Debbie

    July 19, 2020 at 6:34 am

    I’ve baked these twice now and each time they came out delicious. I’ve just started my sourdough journey since lockdown in the uk. I may have gained some Covid kilos though.

    Reply
  8. shawn

    June 27, 2020 at 11:50 am

    Quick question about the egg wash. Can you describe your recipe that you are using. I am using a 1 TBSP water with an entire egg including yolk. Are you adding water or milk to your egg to make the egg wash? My issue might be simply that I am applying too much egg wash, but my issue is that when I roll it up, I end up with the brown watery sugary mix being sort of runny and wanting to squirt out and making the process of rolling and cutting a mess. Any tips on this part that might be helpful would be appreciated.

    Reply
    • Eileen Gray

      June 27, 2020 at 12:23 pm

      I use a little water (maybe a Tablespoon) and one egg for the egg wash. I use about 1/2 the egg wash on the dough. With the amount of sugar filling I haven’t had a problem with it becoming runny as I roll the dough. After sprinkling on the sugar, pat the sugar in place so it adheres to the egg wash. There will be some liquid leaking out and it proofs.

      Reply
      • Nina

        November 20, 2020 at 11:28 am

        I ran out of eggs in the middle of the recipe and used 1/4 cup of melted butter instead of the egg wash. It worked great! Love your recipes. I’m working my way through everyone of them.

        Reply
  9. Samantha A

    June 15, 2020 at 2:01 pm

    I’ve made these a couple times and they are now my husband’s favorite cinnamon rolls! i do have a question: i started a batch last night but it got really late and I put the dough in the fridge before forming the rolls so it’s been in the fridge about 12 hours and am now ready to finish up. How long should I leave to rise now once I for the rolls? Do I need to bulk ferment again?

    Reply
    • Eileen Gray

      June 15, 2020 at 2:31 pm

      You don’t need to bulk ferment again. Once you roll them you can cut them and leave them to rise at room temp and then bake.

      Reply
  10. Livy

    June 5, 2020 at 8:19 am

    Hi Eileen! I baked them off this morning and they were so delicious! I also made the soft crust sourdough sandwich bread at the same time..because I’m an eager baker…lol it .was also so delicious. I broke off a piece and spread some butter on it… i couldn’t wait for it to cool down. I’ll be sure to leave my remarks and comments on the sourdough sandwich bread recipe page. thank you so much for all your hard work and detailed note taking! as an amateur baker i now have confidence to continue with breadmaking!

    Reply
    • Eileen Gray

      June 5, 2020 at 9:24 am

      Great!

      Reply
  11. Livy

    June 4, 2020 at 3:12 pm

    hi thank you so much for all the detailed instructions and notes! I’m not sure what i did wrong but i had a hard time rolling and cutting the log. the dough was extremely soft with huge bubbles. I’d like to know what you think went wrong. in any case, they’re sitting in the fridge right now to bake tomorrow. thank you again!

    Reply
    • Eileen Gray

      June 4, 2020 at 3:48 pm

      Hi Livy. It is a soft dough and you do often get large bubbles with sourdough. Just use plenty of flour when handling the dough. Also, make sure your starter is 100% hydration. If your starter is wetter you’ll need to adjust the flour or liquid in the recipe. Finally, since these guys bake in the pan they are very forgiving. Even if they don’t look perfect when you cut them, they’ll bake up deliciously. Let me know how they work out.

      Reply
  12. Emily

    June 2, 2020 at 11:42 am

    Hello!
    I’m excited to try this recipe. I was wondering if you bake them the day of about how long do they take to rise for baking?

    Reply
    • Eileen Gray

      June 2, 2020 at 11:56 am

      It will be faster, probably 1 to 1 1/2 hours. It depends on the temp in the room of the dough how active your starter was, etc. Just look for them to be nice and puffy and almost fill the pan.

      Reply
  13. Jordan

    May 23, 2020 at 11:46 am

    Thank you for this recipe! I’ve made these a couple times, they are a family favorite. I froze half of the dough for the first time. How long would you recommend defrosting in the refrigerator before slicing the log?

    Reply
    • Eileen Gray

      May 23, 2020 at 12:57 pm

      Depends on how cold your fridge is. I would expect it to take at least over night. You could also defrost at room temp for a faster turn around. I like to let them defrost until they are still slightly frozen in the center, but soft enough to slice. This way you get nice clean slices.

      Reply
  14. Ashlee

    May 20, 2020 at 12:42 pm

    Has anyone ever tried using butter for in between the layers, rather than the egg wash? I made this recipe over the weekend and while the flavour was good, one of my favourite parts of eating a cinnamon bun is peeling the layers and eating my way to the middle! Mine turned out to be more like a cinnamon bread role and the layers did not pull apart at all. I’m wondering if using butter instead of egg wash would help this, as butter is what I use for my usual cinnamon bun recipe I make. Additionally, my starter is also very active. I wanted to bake them same day so I proofed the buns at room temp for 3 hours and they already filled the pan. Not sure if that would have anything to do with how they turned out.

    Reply
    • Eileen Gray

      May 20, 2020 at 1:20 pm

      I have had readers comment that they use softened butter for the filling. I use egg because I use so much of the filling I don’t want it to separate the layers too much. Try it and let us know how you like it.

      Reply
  15. hendel deutsch

    May 18, 2020 at 6:06 pm

    Hi these look delicious. I was wondering if I can cut the log into pieces and then freeze them and then take them out to defrost? Does it make a difference when it gets frozen?

    Reply
    • Eileen Gray

      May 18, 2020 at 6:19 pm

      Yes, you can do that. I’ve done it. Defrost the log until it’s soft enough to slice. Then proof and bake as directed. I’ve also frozen the fully-baked buns. To serve just defrost in a low oven until warmed through. I freeze the frozen buns with a bag of icing so I can take out and and serve as many buns as I want.

      Reply
  16. Sarah

    May 18, 2020 at 4:34 pm

    These are amazing! I made them vegan with a flax egg. Instead of an egg wash, I spread super softened vegan butter over the dough and sprinkled the cinnamon sugar mix over that. Deelish!

    Reply
    • Eileen Gray

      May 18, 2020 at 6:17 pm

      Nice adaptation!

      Reply
  17. Erin

    May 15, 2020 at 5:12 am

    What do you mean by 100%hydration on the starter?

    Reply
    • Eileen Gray

      May 15, 2020 at 10:25 am

      A starter that is fed with equal weights of starter-flour-water is 100% hydration. The percentage refers to the water in relation to the flour. If you had 10g of flour and 8g of water it would be an 80% hydration starter. I put that note so someone with a thicker or thinner starter can adjust the liquid in the recipe as needed.

      Reply
  18. Elizabeth

    May 12, 2020 at 3:00 pm

    My second time in a week to bake these — seriously, this is the most delicious way to use some sourdough discard! The second time I added some finely chopped raisins and toasted pecans to the swirl, and used browned butter in both the dough and the glaze. One of the best things to come out of my kitchen during the Shelter-in-Place started in mid-March — and I’m sure they’ll be in regular rotation for family events. The day-before assembly and overnight rise makes them really easy. Thank you for a wonderful recipe!

    Reply
  19. Karen

    May 10, 2020 at 11:58 am

    I made these last night and baked them this morning. They were absolutely delicious! I used my traditional approach to the filling (soft butter, brown sugar and cinnamon) but otherwise used your recipe (minus icing). So impressed with the results and how tasty and light they are. Thank you!

    Reply
    • Eileen Gray

      May 10, 2020 at 6:01 pm

      Thanks!

      Reply
  20. Vikki

    May 5, 2020 at 4:44 am

    My family didn’t want to wait so I added a little yeast and did them on the day – I don’t think this changed them much because they were so light and fluffy. Next time I will do them overnight to compare.

    Reply
    • Eileen Gray

      May 5, 2020 at 9:32 am

      Leaving the rolls overnight for a long slow rise at a cool temp gives the rolls great flavor. But they still taste good made in one day.

      Reply
      • Vikki

        May 6, 2020 at 7:46 pm

        Doing another batch now and leaving overnight. Doing a double batch so I can also try apple and cinnamon. Will let you know how it goes

        Reply
        • Eileen Gray

          May 6, 2020 at 8:05 pm

          Apple cinnamon…mmmmm…

          Reply
          • V

            May 11, 2020 at 1:24 am

            Apple and cinnamon turned out amazing

  21. Elaine James

    May 3, 2020 at 9:52 pm

    A friend of mine just made these buns and had nothing but good things to say about them. I’m hoping to make them next weekend, but want to use non-dairy milk and butter. Do you have a recommendation on which non-dairy milk to use? I usually lean towards oat milk

    Reply
    • Eileen Gray

      May 4, 2020 at 9:30 am

      Hi Elaine. I don’t have a lot of experience with non diary milk. The dairy milk is contributing water, fat and milk solids (protein). As long as you get a similar mix it should work.

      Reply
    • Janet

      May 20, 2020 at 7:24 am

      I made these with almond milk and they turned out fantastic!

      Reply
      • Eileen Gray

        May 20, 2020 at 9:28 am

        Great, thanks for the tip.

        Reply
  22. Shawn

    April 29, 2020 at 6:10 pm

    In the first step, when you let it rise for 30 minutes, how much rise should I be expecting? Double in size? A lot less?

    Reply
    • Eileen Gray

      April 29, 2020 at 7:24 pm

      During the first hour you’ll see very little rise. I generally see the dough “wake up” during the second hour.

      Reply
    • Shawn

      April 29, 2020 at 8:11 pm

      And while you answer this, how much rise should you get from step 3 and all of the folding?

      Reply
  23. Trisha L Monroe

    April 28, 2020 at 12:58 pm

    I left my 1st review a little over a week ago. I have to date made these buns 5 times. Twice for my family and 3 batches for my husband and son to take to work. I have gotten rave reviews from everyone.
    I can’t really take the credit though, after all I found the recipe here. Thank you Eileen for sharing such a scrumptious recipe.

    Reply
    • Eileen Gray

      April 28, 2020 at 2:43 pm

      Thanks!

      Reply
  24. Erin

    April 25, 2020 at 12:08 pm

    Amazing— came out perfectly— even for this sourdough novice! Just wondering how long they will stay fresh in the refrigerator? Thank you!!!

    Reply
    • Eileen Gray

      April 25, 2020 at 2:58 pm

      Ideally they shouldn’t be refrigerated. Like all breads, the refrigerator makes them stale faster. If they’re already iced you could leave them at room temp for a day and then freeze. If they’re uniced they can stay at room temp for a couple of days and ice them as you eat them. I eat what we want the first day then freeze the baked buns (uniced) in a freezer bag. I put a sandwich bag of the icing in the bag with the buns. This way you can defrost and ice only as many buns as you will eat that day.

      Reply
      • Erin

        April 25, 2020 at 10:10 pm

        Thank you!! They were so good, we will probably finish them in a day or two anyway!!

        Reply
  25. Apryl

    April 24, 2020 at 9:38 pm

    Hi Eileen,

    What is the de-frost time for these if I were to freeze them?

    Thanks so much!

    Reply
    • Eileen Gray

      April 24, 2020 at 9:51 pm

      I couldn’t say. It would totally depend on the room temp. But I could estimate a good 2-3 hours until they are defrosted enough to slice and then an hour or two to rise.

      Reply
  26. Richard

    April 22, 2020 at 8:50 am

    Tasty – but dough was very very hard to roll and work with – perhaps increasing the flour would help next time.. Thanks!

    Reply
    • Eileen Gray

      April 22, 2020 at 10:06 am

      You can add more flour if you’re having trouble handling the dough. Less is more so sprinkle a little at a time. It may change the texture of the final buns if you add a significant amount of flour. Because this is an enriched dough (milk, eggs, butter added) it is softer and more supple than a straight bread dough. But that’s also what makes the buns softer and richer when baked. Another strategy to make the dough easier to handle would be to refrigerate the dough overnight and roll the buns in the morning while the dough is cold.The cold dough is easier to handle. At that point you can either refrigerate the assembled buns and bake on the 3rd day or leave them to rise and bake the day you roll them. My mantra these days is that with sourdough we always have to be flexible and adapt as the starter and dough tells us to.

      Reply
  27. Sara

    April 22, 2020 at 2:01 am

    Just came across your recipe and it sounds delicious! Can I use a glass Pyrex dish for baking the buns as I don’t a deep metal one?

    Reply
    • Eileen Gray

      April 22, 2020 at 9:52 am

      Yes.

      Reply
  28. shelley

    April 21, 2020 at 1:38 pm

    I was looking for new ways to use my sourdough and came upon this recipe. I made them following the recipe and they were very good. But as a baker. I have a few comments. I hate recipes that waste my time with unnecessary steps.. The constant turning of the dough does nothing for this recipe. Sourdoughs are slow rise breads as they are formulated from naturally made yeast. They can be made tough by too much handling. The next time I would just let it rise for approximately 6 hours to where it was doubled in size, then form it. I also let mine rise in a pan on the counter overnight and they turned out just fine. I would make this recipe again but not waste the time constantly turning the dough.

    Reply
    • Eileen Gray

      April 21, 2020 at 3:34 pm

      I’m sorry if you think I wasted your time. I like to do the folds during fermentation, each fold taking about 10 seconds, so I can monitor the progress of the dough. The folding also develops the gluten, which is necessary even in an enriched dough. It would be hard to make a dough with milk sugar butter and eggs too tough, especially since it will rest for hours at room temp. I think leaving the buns out on the counter overnight is great if you have a cool kitchen. It might be a problem in warmer months so as always with sourdough, we need to be flexible. Glad you liked the end product.

      Reply
    • Wendy

      June 6, 2020 at 9:14 am

      Shelley, folding over a sourdough dough multiple times does help the dough. It helps develop the gluten in the flour and it makes the bubbles smaller and more uniform. That said, in this recipe it probably isn’t as necessary as it would be in a lean bread dough. Also a baker.

      Reply
  29. Sherry S

    April 20, 2020 at 11:04 pm

    Thanks for the recipe, and for the starter instructions. My first starters (I’ve got 2 in the fridge) are going like crazy, and I made the cinnamon rolls today. My first sourdough adventure! They’re so good!

    Reply
    • Eileen Gray

      April 21, 2020 at 9:33 am

      Have fun!

      Reply
  30. Mishel Wolfe

    April 19, 2020 at 2:36 pm

    I made these and used buttermilk. I also used a combination of melted butter and the remaining egg wash brushed on the top before refrigeration. Lastly, I used fresh squeezed tangerine juice instead of lemon. O M G
    Hands down the best cinnamon rolls I have ever made, and my neighbors all agree.
    Thank you very much for the recipe!

    Reply
    • Eileen Gray

      April 19, 2020 at 2:53 pm

      They sound delish!

      Reply
  31. Joan e Braun

    April 17, 2020 at 1:02 am

    Hi Eileen, Can I make the buns up in the morning and then put in the fridge for the next morning bake? Not sure if there was a certain amount of time they should or shouldnt be in the fridge. Thank you.

    Reply
    • Eileen Gray

      April 17, 2020 at 9:40 am

      They can stay in the fridge for quite some time. But given how long it takes to make the dough and let it ferment even if you start super early in the morning it would be at least afternoon by the time the dough is ready. That being said 12-16 hours in the fridge should be just fine.

      Reply
  32. Anna Broadway

    April 12, 2020 at 4:44 pm

    I interpreted “active” starter to mean fed, so I did that 4ish hours before and pulled the starter out over it had doubled. Forgot to add the egg until the first knead, and worried at several points that the dough hasn’t risen enough, but these are hands-down the best and moistest cinnamon rolls I’ve ever made. My other tweaks: mostly used honey in place of sugar (and probably reduced it some); stirred a little cinnamon into the dough and perhaps a 1/2 teaspoon cardamom into the filling. I made only half a batch of the frosting, which was the perfect amount, to my taste.

    Reply
  33. Jamie

    April 12, 2020 at 11:58 am

    Oh man, I added the zest of one orange to my filling, and used orange juice in the glaze/frosting DELICIOUS! I just love this dough, thanks again for the recipe!

    Reply
    • Eileen Gray

      April 12, 2020 at 12:03 pm

      Wow, sounds amazing!

      Reply
  34. Kylie

    April 11, 2020 at 9:23 am

    Eileen,

    Thank you so much for this recipe!!! I just made it again and the results were as perfect as they were last time. Although… ha ha ha, This time I used half of it to make monkey bread for the kiddos for Easter Eve and we will have the other half for dinner rolls tomorrow on Easter. The monkey bread turned out amazing and I’m sure the rolls will too. This is seriously the best sourdough bread recipe that I have found. My dough ends up gorgeous! So elastic and smooth, just luscious. I feel like a weirdo for describing dough so vividly, but after so many failed or half-successful attempts at dough you can imagine my relief to have such great results with minimal effort. Thank you! Thank you! Thank you!

    Small tip for anyone whose results are not perfect. It’s imperative that your sourdough be active. Very active. Both times I’ve made this my sourdough has been sitting out for at least a week with daily feedings (I’ve found that I can get away with once a day although twice a day feedings is really optimal). Active. Active. Active! Your sourdough and beautiful body require it! Ha ha Happy Easter! #Heisrisen

    Thank you!!!!

    Reply
    • Eileen Gray

      April 11, 2020 at 9:49 am

      I know what you mean by describing sourdough vividly. I often describe the dough as alive or lively. It really does come alive under your hand as you work it over the fermentation. A good active starter can make all the difference!

      Reply
  35. pauline evill

    April 7, 2020 at 10:27 pm

    It’s not going to be as tidy as yours as the dough was so fluffy and light I couldn’t roll thin so only managed one lot of swirls!! Smells divine and I am sure it will taste great.

    Reply
    • Eileen Gray

      April 8, 2020 at 9:51 am

      Fluffy and light sounds good to me. I’ll take great flavor and texture over pretty any day!

      Reply
    • Eileen Gray

      April 8, 2020 at 9:56 am

      Fluffy and light sound great to me. I’ll take tasty over pretty any day.

      Reply
  36. Jamie

    April 6, 2020 at 12:52 pm

    I’ve made these twice now, once refrigerating overnight, and once left out on the counter. Both turned out amazing and delicious. I like being able to pop them right in the oven in the morning when left out overnight. Thanks for sharing the recipe!

    Reply
    • Eileen Gray

      April 6, 2020 at 1:37 pm

      Thanks Jamie. I do think if you kitchen is quite cool you can leave them out overnight. Glad it worked out both ways.

      Reply
  37. Terri l Bertelsen

    April 2, 2020 at 12:32 pm

    can you use salted butter in this recipe?

    Reply
    • Eileen Gray

      April 2, 2020 at 12:34 pm

      Yes. You might want to reduce the salt in the recipe. Maybe from 1 tsp down to 1/2 tsp.

      Reply
  38. Cinnabar Drake

    April 1, 2020 at 12:16 pm

    Can anyone convert the measurement from inches & ounces to EU measurements? I really want to try this recipe but with all those measurements to convert it’s really difficult.
    Also, it give three different weights for butter – 2 oz is 55 g, 56 g and 60 g?

    Reply
    • Eileen Gray

      April 1, 2020 at 2:31 pm

      Thanks for pointing out the inconsistencies. I’ve updated the recipe. Let me know if you have any other questions.

      Reply
      • Cinnabar Drake

        April 5, 2020 at 11:33 pm

        Thank you, Eileen! You’re a star! <3

        Reply
      • Richard

        May 27, 2020 at 9:42 am

        I’m afraid the conversions between cups and ounces/grams is still all mixed up, You have 1 cup = 8 oz and then later 4 cups = 20 oz! That’s not great for us bakers outside North America!

        Reply
        • Eileen Gray

          May 27, 2020 at 9:50 am

          The conversions are not all mixed up. Not all ingredients have the same density so a cup of water will not weigh the same as a cup of flour. A cup of water weighs 8 oz. A cup of all purpose flour weighs 5 oz. So 4 cups of all purpose flour weighs 20 oz. I go through the trouble of converting all my recipes from volume measure to US weight measures and to metric measures. I include metric measures specifically for bakers outside of North America.

          Reply
  39. Olivia Burkholder

    March 12, 2020 at 3:07 pm

    Can these be frozen?

    Reply
    • Eileen Gray

      March 12, 2020 at 4:34 pm

      Yes, I have frozen the unbaked log. Then defrost, cut and proceed with the recipe.

      I’ve also frozen the baked buns (uniced). A few second in the microwave to warm up. I froze a bag of the baked buns with a sandwich bag of the icing in the same bag. It’s easy to just scoop out enough icing for the number of buns you will defrost.

      Reply
  40. Chelsea

    December 24, 2019 at 5:20 pm

    If my house runs cold (60 degrees through the night) could I just leave them out at room temp all night?

    Reply
    • Eileen Gray

      December 24, 2019 at 10:46 pm

      Probably.

      Editing to add: I had previously frozen cinnamon buns that I defrosted, sliced and put in the refrigerator on Christmas eve afternoon for Christmas morning. Later on Christmas eve night they were still quite cold so I took them out and left them on the counter overnight. By about 8 the next morning they were perfectly risen and ready to bake. So I would say if the buns are quite cold and your house is cool you can certainly leave them out overnight.

      Reply
  41. Candace

    November 28, 2019 at 4:01 pm

    Wonderful dough. Easy breezy to work with.

    Reply
    • Eileen Gray

      November 28, 2019 at 8:31 pm

      Thanks!

      Reply
  42. sneha datar

    February 14, 2019 at 4:59 am

    These smell so good, look so stunning.

    Reply
  43. Kalyani

    February 14, 2019 at 12:46 am

    Cinnamon bakes are so much my weakness I feel like a kid at the bakery / stall that sells these. the sourdough would have lent a deper flavour and texture, Elleen ! gorgeous looking rolls, and perfect with a hot cuppa !

    Reply
    • Sharon

      June 15, 2020 at 3:04 pm

      Do you think adding finely chopped pecans into the filling would be good? Hubby loves pecans.

      Reply
      • Eileen Gray

        June 15, 2020 at 3:14 pm

        Yes!!

        Reply
  44. Chef Mireille

    February 13, 2019 at 10:58 pm

    I would love to wake up to these – Perfectly rolled with no spaces! These look so delicious!

    Reply
  45. Wendy

    February 13, 2019 at 11:28 am

    They are gorgeous and I can just about smell the cinnamony goodness.

    Reply
    • Eileen

      February 13, 2019 at 2:44 pm

      Thanks!

      Reply
  46. Stacy

    February 13, 2019 at 5:56 am

    Nothing smells better than cinnamon buns baking! Nothing. Sadly, I just had to throw my sourdough starter out because it had been neglected for so long that it turned on me. But I am willingly to give it a go again, if only to try your gorgeous overnight buns, Eileen. That sticky bottom!

    Reply
    • Eileen

      February 13, 2019 at 11:15 am

      I can’t tell you how many times I’ve brought my starter back from the brink. It’s hard to remember to revive it once it gets shoved to the back of the fridge.

      Reply
  47. Cindy

    February 13, 2019 at 4:26 am

    I’ve never had much luck with sourdough starter. I’m willing to try it again for these rolls!

    Reply
    • Eileen

      February 13, 2019 at 11:15 am

      Thanks, Cindy.

      Reply
  48. Pavani

    February 12, 2019 at 6:38 pm

    I am literally drooling over those soft, fluffy and delicious cinnamon rolls. Adding sourdough must have made them tangy and delicious.

    Reply
    • Eileen

      February 12, 2019 at 7:52 pm

      Thanks, Pavani! I’ve got several dozen in the freezer if you want to stop by .

      Reply
    • Therese Bennett

      April 29, 2020 at 9:47 am

      Could I leave them in the fridge for a day or so? That is, before I bake them. Thanks!

      Reply
      • Eileen Gray

        April 29, 2020 at 9:52 am

        I’ve left them as long as 16 hours with good results. I think it should be fine. Also, another way to extend the time would be to put the dough (before forming the buns) in the refrigerator for up to 2 days before forming the buns and leaving them to rise.

        Reply
        • Therese Bennett

          May 1, 2020 at 6:52 pm

          Thanks!

          Reply
  49. Karen

    February 12, 2019 at 3:53 pm

    A little sticky bun action on the bottom is a happy surprise! I need to feed my starter and try these.

    Reply
    • Eileen

      February 12, 2019 at 4:10 pm

      Thanks, Karen!

      Reply

Leave a Reply Cancel reply

Your email address will not be published. Required fields are marked *

Primary Sidebar

My new book is now available at Amazon! As an Amazon Associate I earn from qualifying purchases.

About Me…

a photo of the website author with cookcook

Footer

  • Home
  • Contact Me
  • Recipes
  • Baker’s Resources
  • Baking School
  • Privacy Policy

Copyright © 2019 Baking Sense on the Foodie Pro Theme