Dutch Crunch Bread aka Tiger Bread


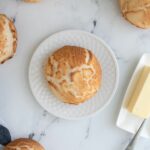
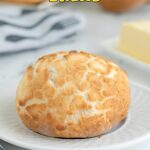
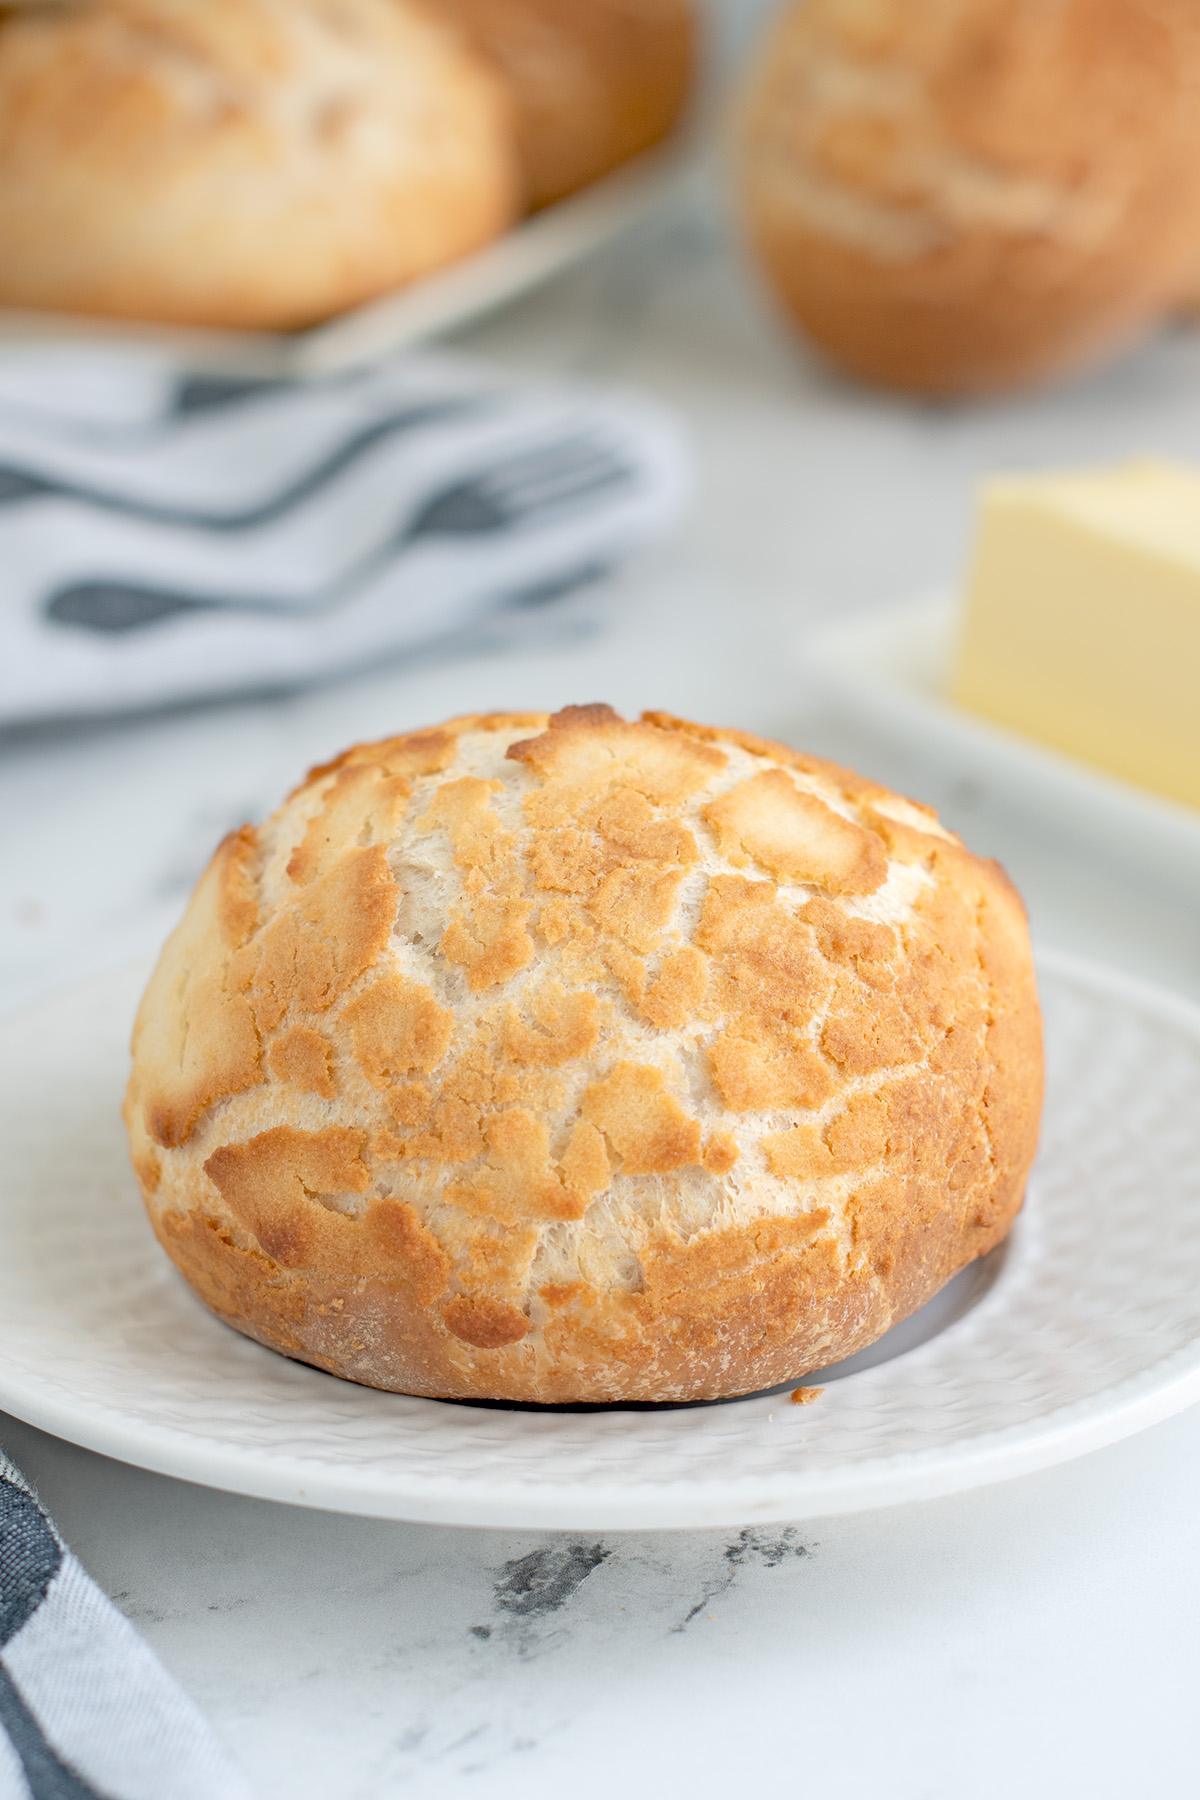
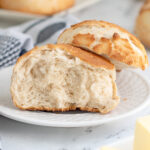
Dutch Crunch Bread gets it’s name from the most amazingly crunchy crust that shatters with every bite. As the bread bakes, the crust splits into deeply browned striations, which is why it’s also known as Tiger Bread. Whatever you call it, it’s really something special.
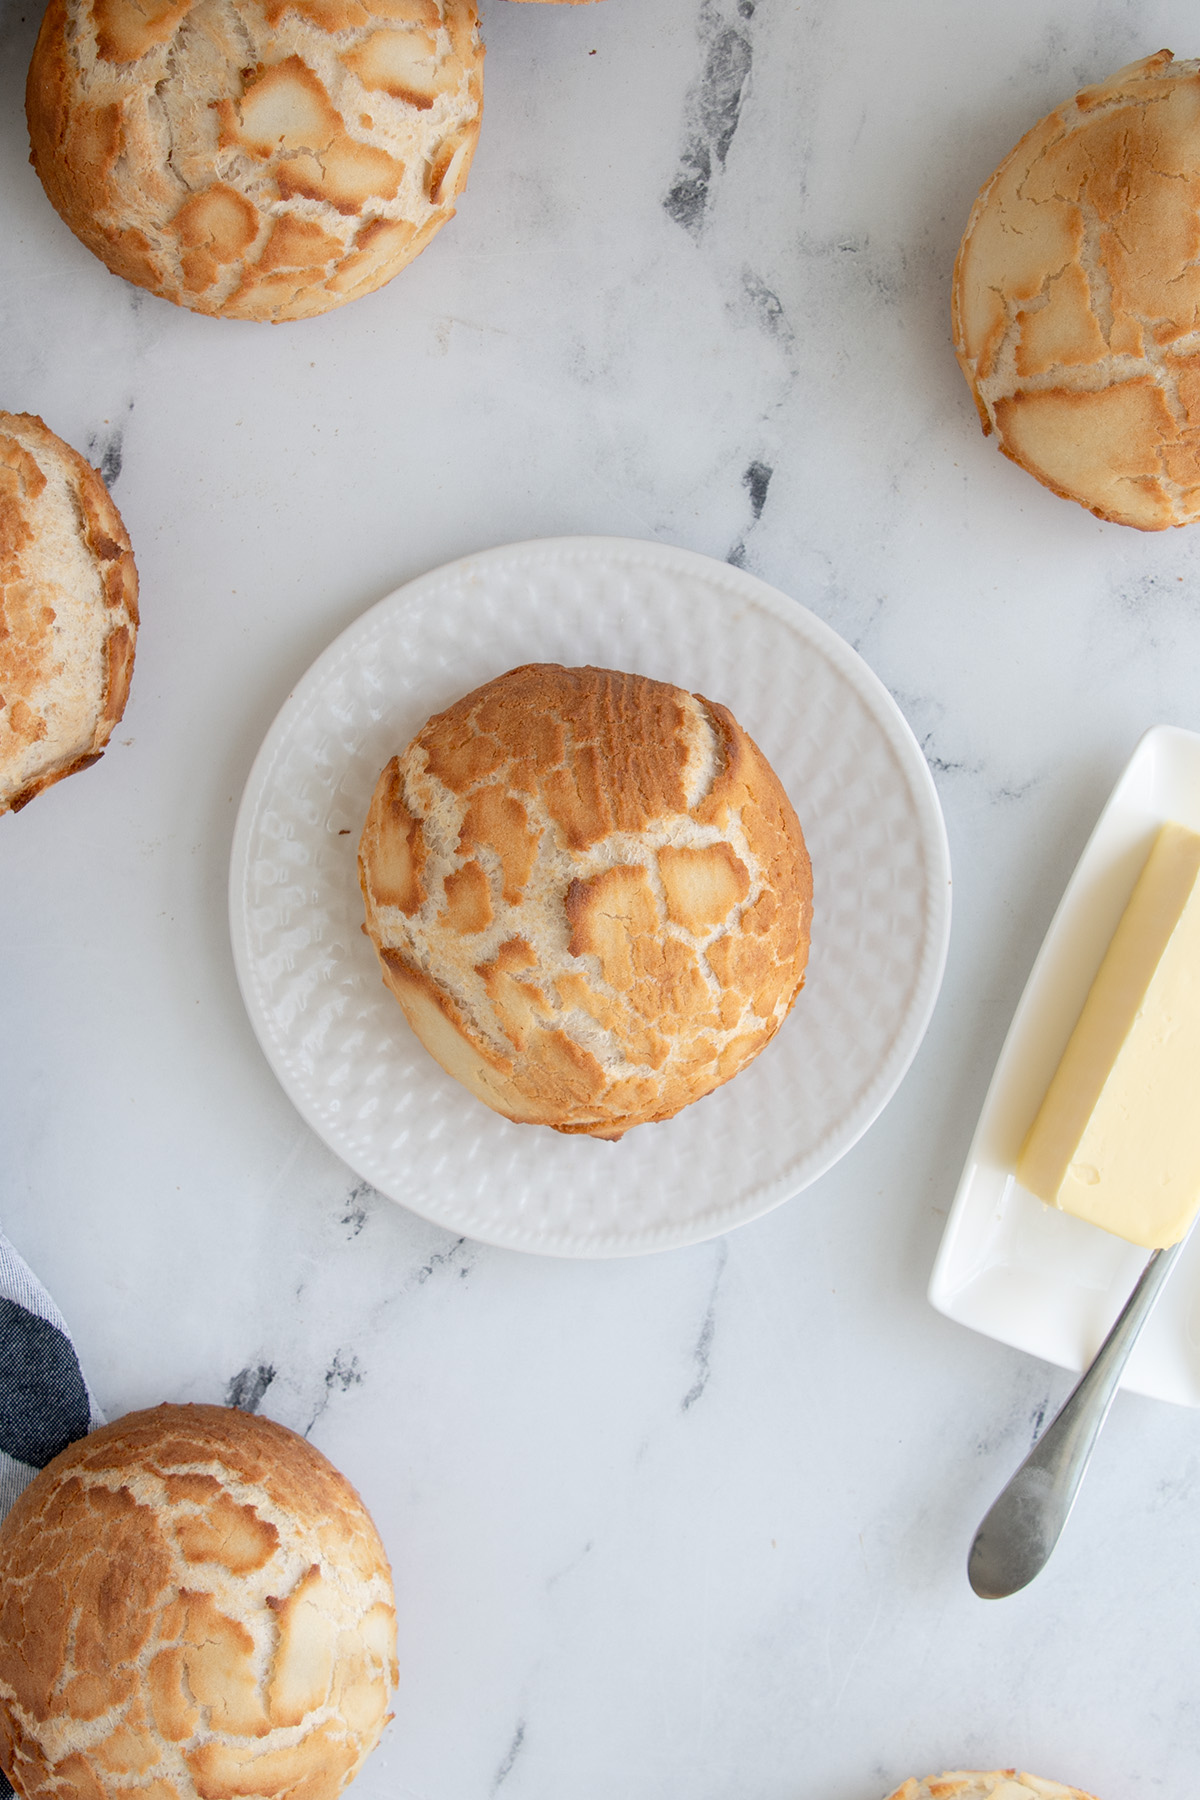
Table of contents
Why this is a standout recipe
While doing recipe research in old Dutch cookbooks I kept coming across recipes for Tiger Bread (Tijgerbrood in Dutch) or Tiger Rolls (tijgerbolletjes).
Since I don’t remember having this kind of bread in The Netherlands, I asked the Dutch hubby if this is really a Dutch recipe (and not Pennsylvania “Dutch”, which is German). He assured me that it really is a Dutch recipe.
I add just a hint of whole wheat flour to the dough for an extra wheaty flavor and a slightly creamy color on the crumb.
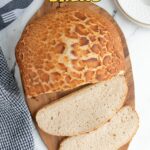
The dough can be baked as a loaf or as individual rolls. You’ll find instructions for both in the process photos.
In the US Tiger Bread is called Dutch Crunch Bread and in the UK it’s known as Giraffe Bread. Whatever you call it, with it’s soft interior and crunchy top, it’s fabulous!
If you love baking bread and want to understand the process a little better, take a look at comprehensive Bread Baking Guide. It covers the basics of mixing, kneading, proofing, and baking so you can get perfect results every time.
Ingredients
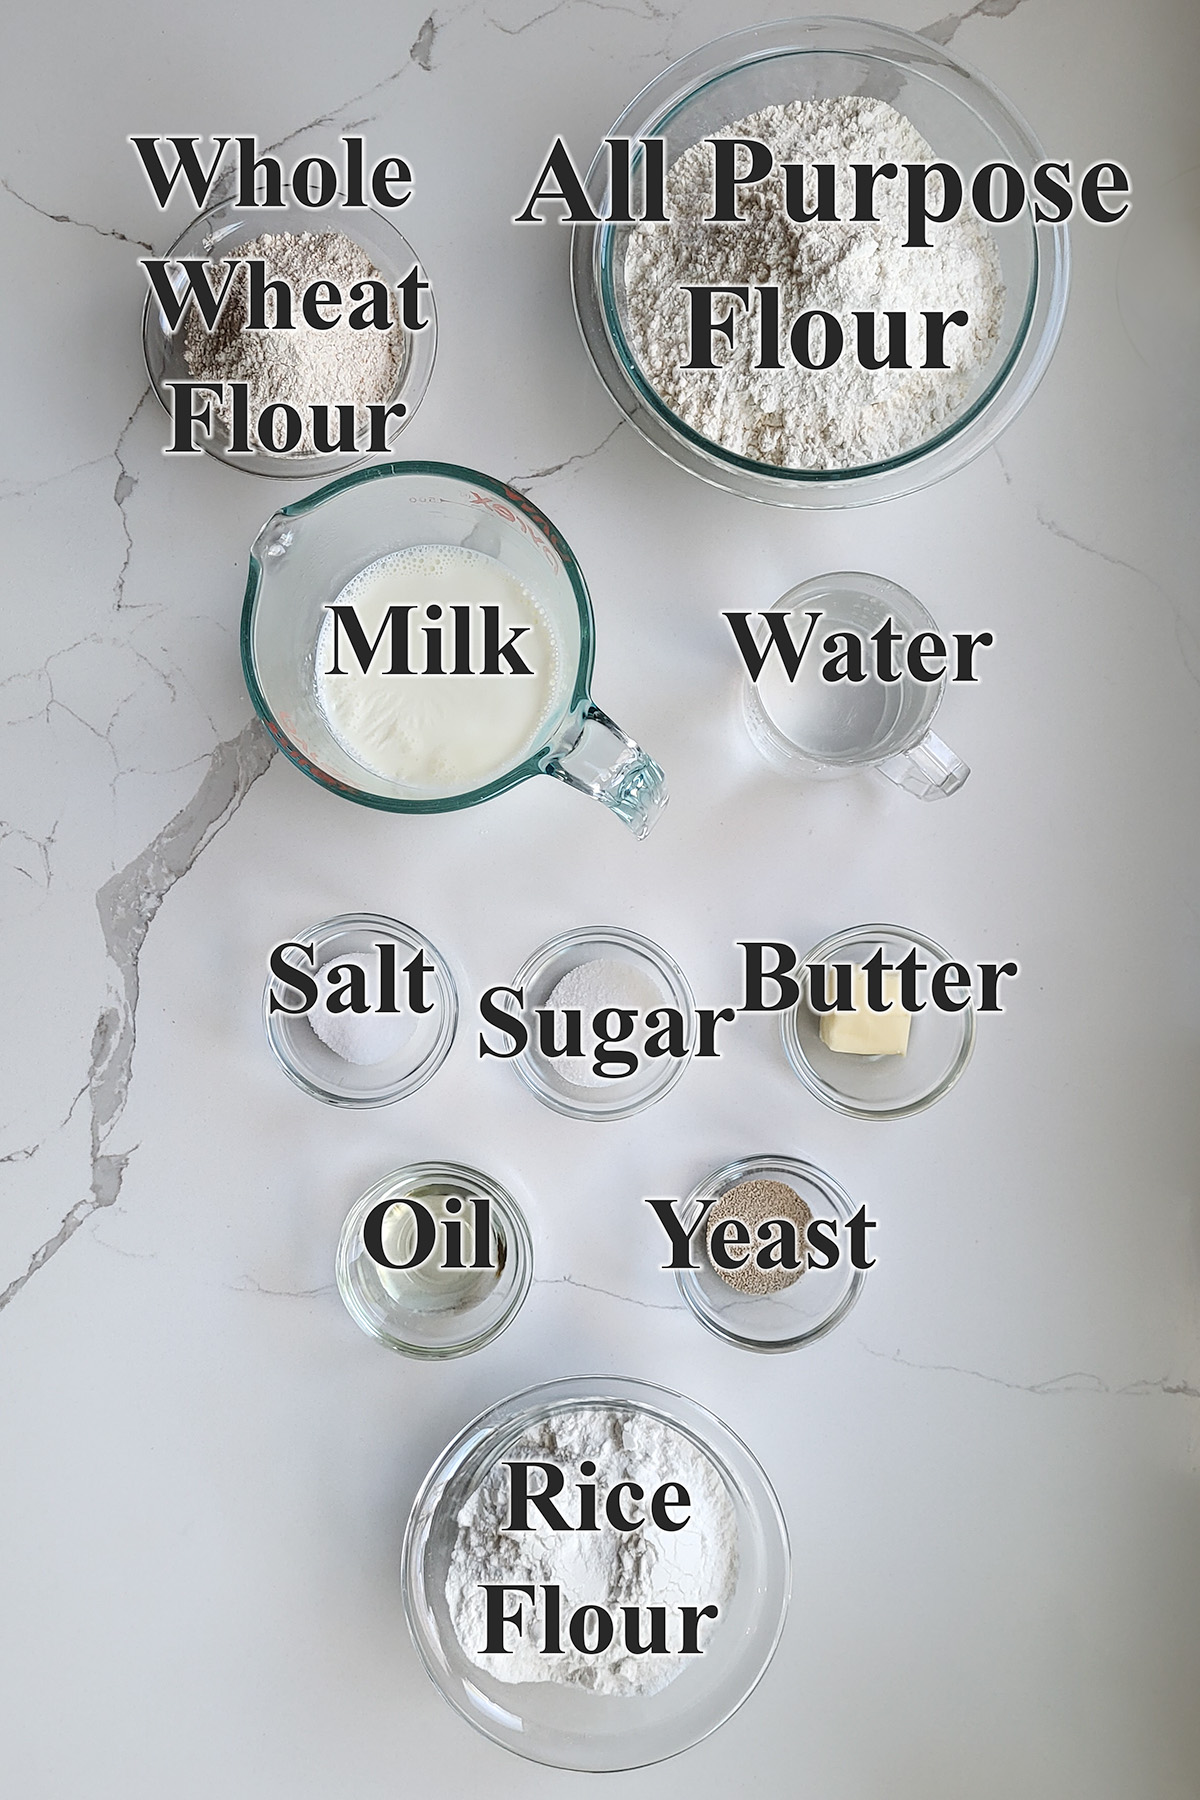
Ingredient Notes
- Whole wheat flour – A hint of whole wheat flour adds an interesting background flavor and nice crumb texture. You can use all AP flour or increase the wheat flour to up to half the flour in the recipe.
- All purpose flour – Medium protein AP flour has enough protein to form a strong gluten network in the dough so it rises nicely in the oven. But it also makes a more tender crumb than strong white bread flour.
- Whole milk – Milk tenderizes the bread and helps with browning.
- Butter/Sugar – Both are tenderizers and add flavor.
- Dry Yeast – I prefer instant yeast to rapid rise yeast for a slightly slower rise. A slower rise yields a better flavor.
- Rice flour – Rice flour is used to make the paste on the outside of the rolls. The paste dries quickly in the oven. As the dough rises the paste cracks into the characteristic tiger pattern.
Baking Science Tip
Why should you scald milk when making bread dough? Scalding alters a protein in the milk which can interfere with gluten development.
Process Photos
Here’s what the recipe process looks like at each stage. Refer to the recipe card below for measurements and exact instructions.
Make the dough

- Mix all the ingredients to form the dough. It will start out quite shaggy and rough.
- Knead until the dough clings to the hook and clears the sides of the bowl. If kneading by hand, knead until the dough is silky and elastic.
- Set the dough aside to rise.
- The dough is ready when it has doubled in volume.
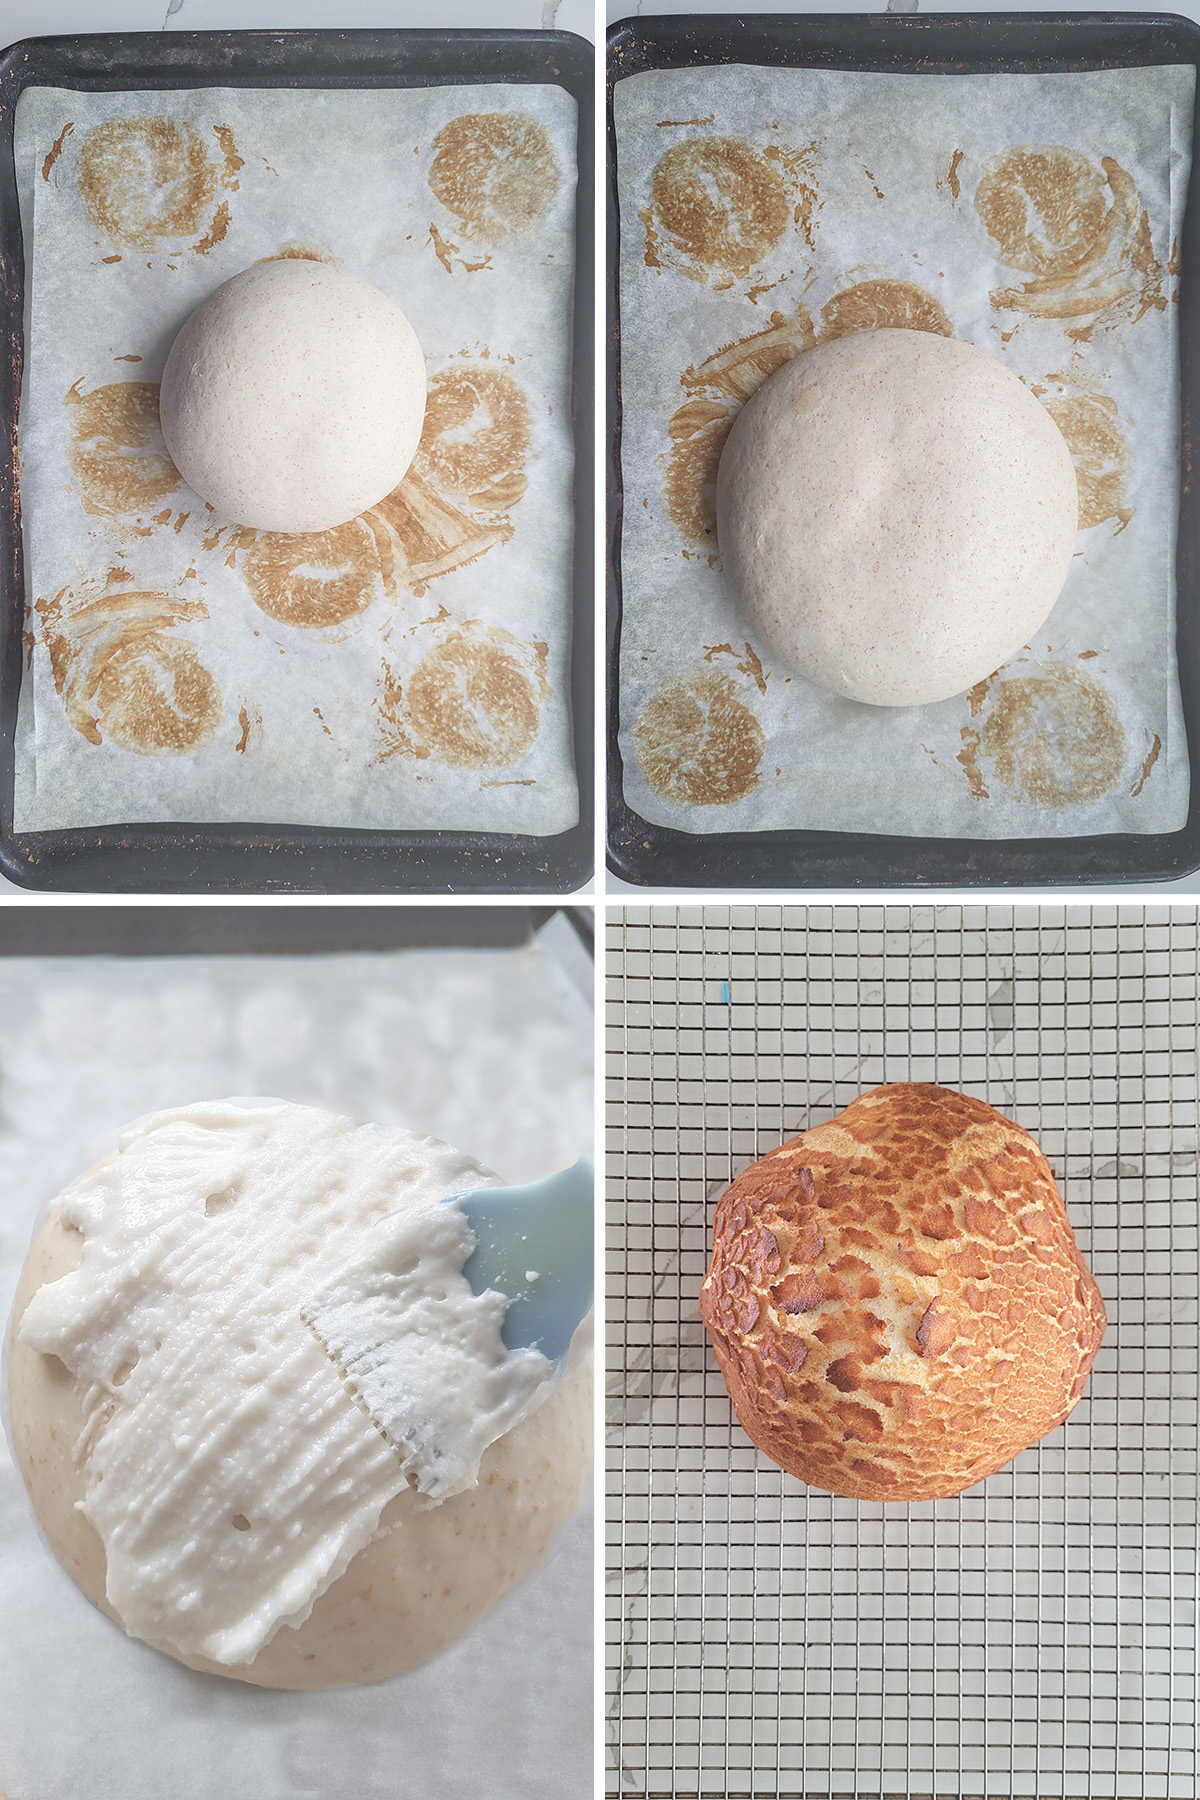
To form rolls (bolletjes)
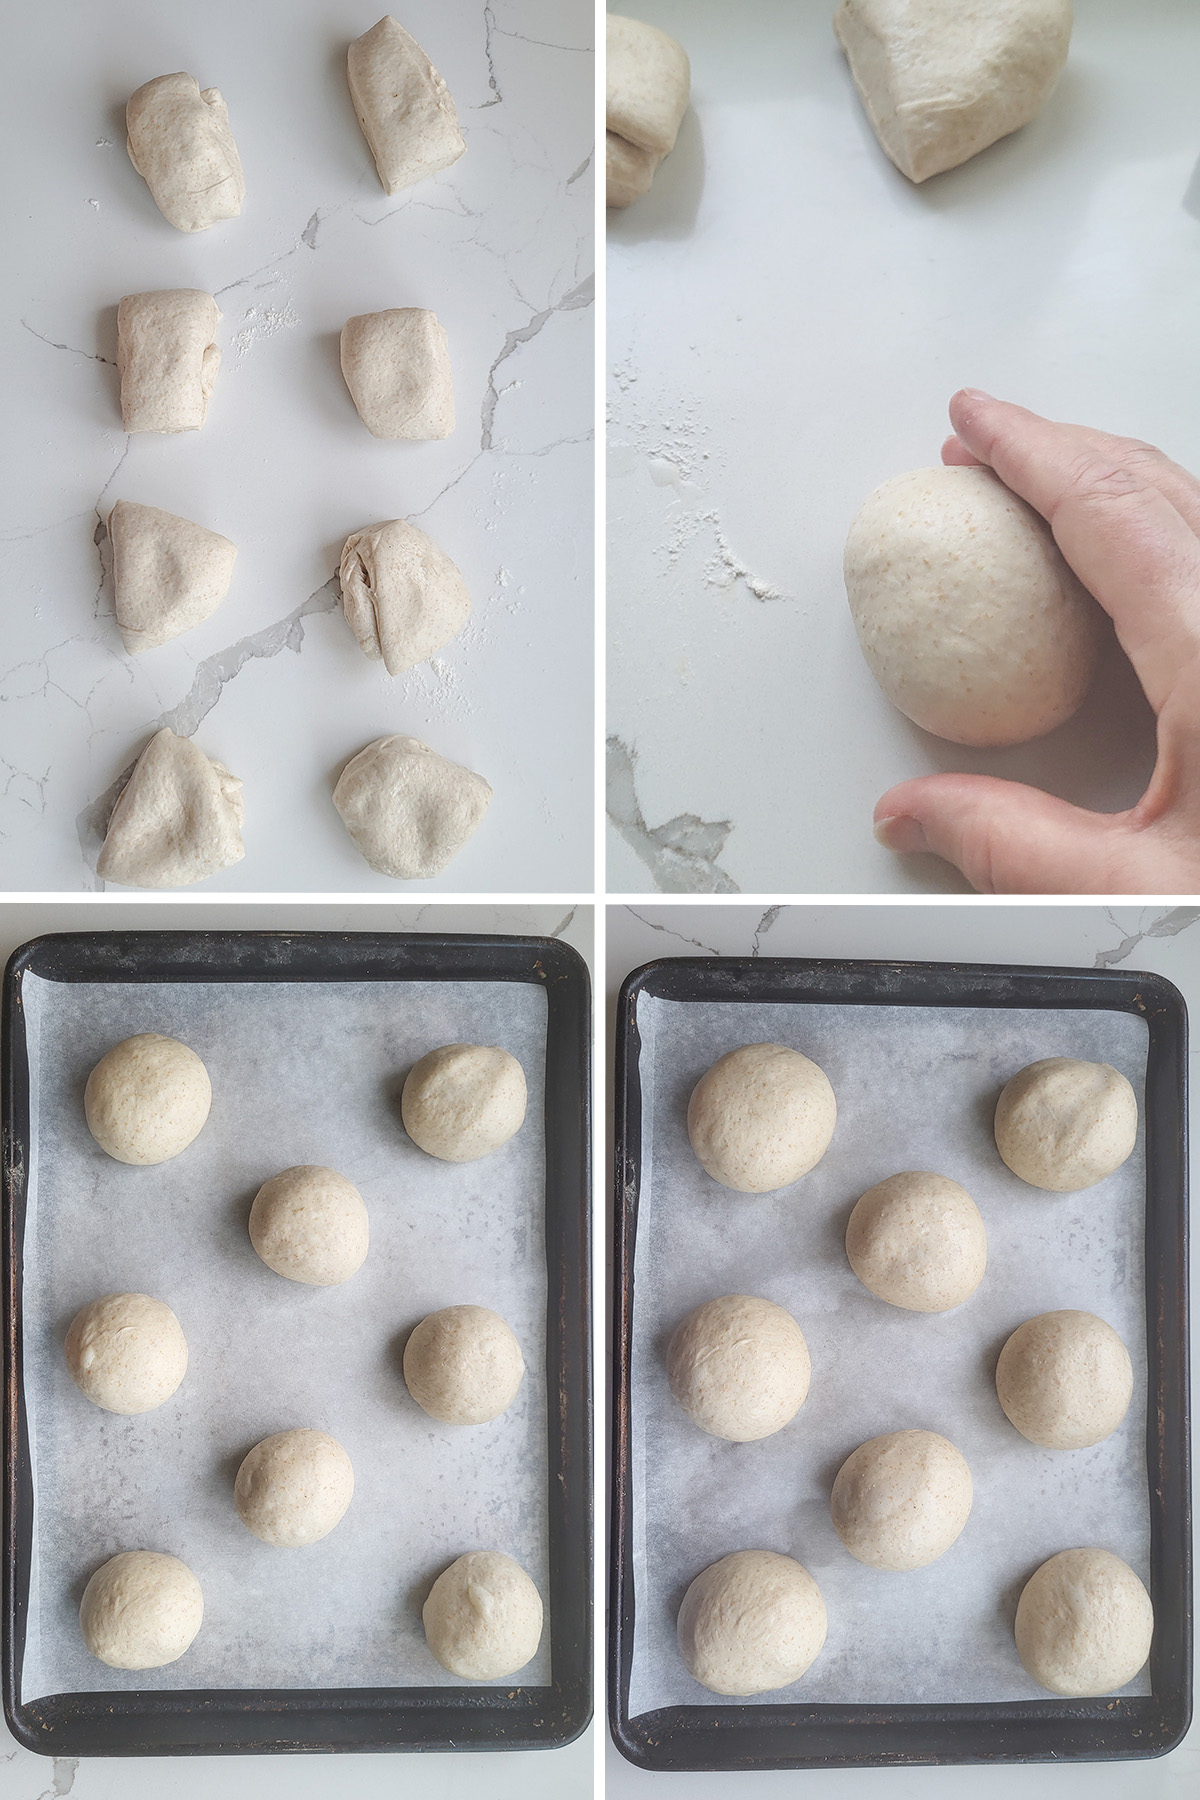
- To make rolls, divide the dough into 8 equal pieces.
- Roll each piece of dough under your cupped hand to form a tight ball.
- Line the dough balls onto a parchment lined baking sheet.
- Set them aside to rise for 30 minutes.
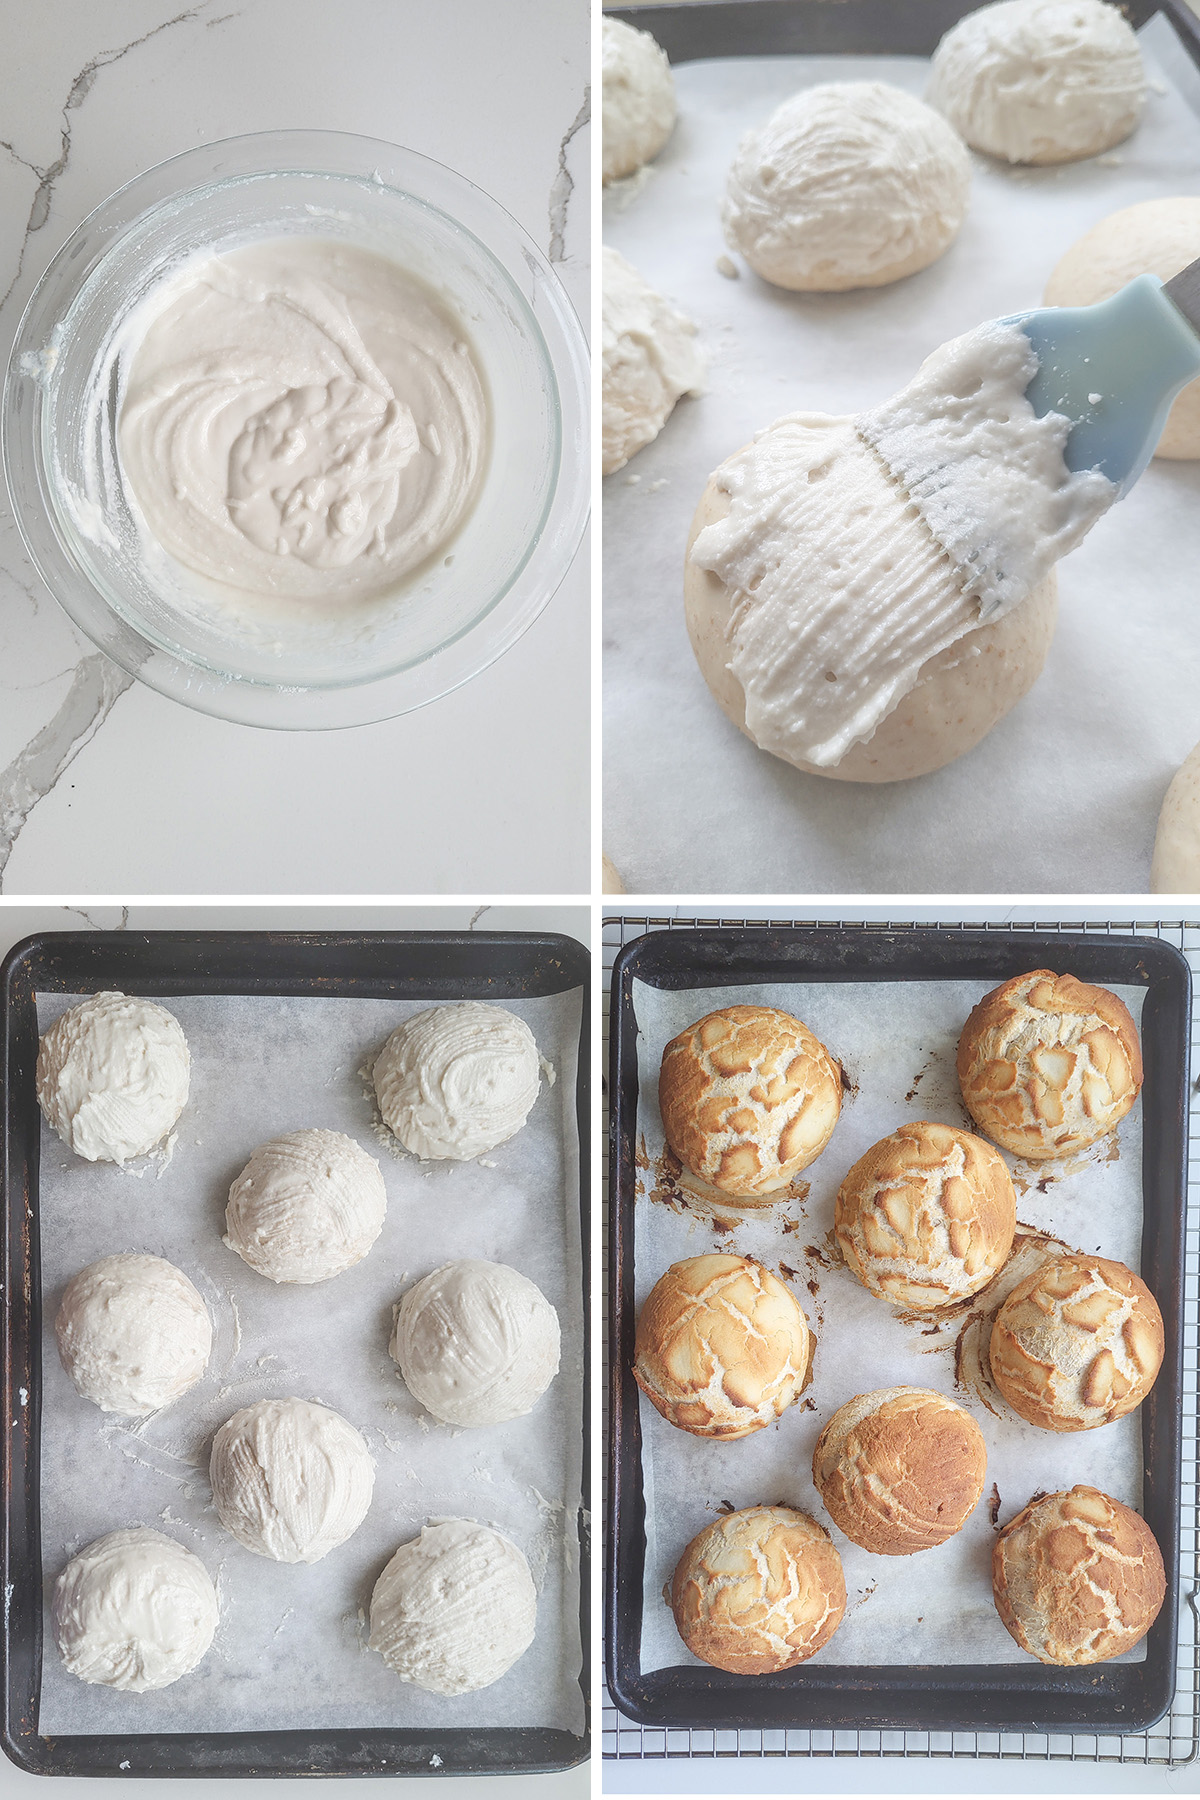
- While the rolls are rising, make the rice paste in a small bowl. Set it aside for 20 minutes.
- Brush the rolls with the rice mixture. Set the rolls aside for another 20 minutes.
- Total rising time is about 50 minutes.
- Bake until the rolls are golden brown with a crackled surface.
- The rice flour paste dries quickly in the oven. As the dough continues rising the dried paste on the outside crackles and forms the “tiger” pattern on the rolls.
To make a loaf (brood)
- Form the dough into 1 large round loaf and set it on a parchment lined baking sheet.
- Set the loaf aside to rise. Meanwhile, make the rice flour paste.
- After 30 minutes brush the entire loaf with the rice paste and let it finish rising (total rise time about 1 hour).
- The loaf can be baked on the sheet pan or in a pre-heated Dutch oven.
Storage
Tiger Bread is best the day it’s made. It will keep at room temperature for a day. Rolls or bread freeze very well.
More Dutch Recipes
- Dutch Apple Tart
- Dutch Sugar Bread
- Dutch Speculaas Cookies
- Dutch Savory Pancake
- Dutch Stroop Waffels
- Dutch Boter Koek
- Dutch Filled Speculaas Cake
- Spekkoek (Thousand Layer Cake)
Looking to make a great submarine sandwich? You can make Homemade Hoagie Rolls!

If you love this recipe as much as I do, please consider giving it a 5-star review.
Dutch Crunch Bread Recpie
Video
Ingredients
Bread Dough
- 8 oz whole milk (1 cup)
- ½ oz unsalted butter
- 4 oz warm water (½ cup)
- ½ oz granulated sugar (1 tablespoon)
- 2 ¼ teaspoons dry yeast
- 2 ½ oz wheat flour (½ cup, see note)
- 15 oz all purpose flour (3 cups)
- 1 ½ teaspoons table salt
Topping
- 3 oz rice flour (½ cup)
- 1 teaspoon dry yeast
- 1 ½ teaspoons granulated sugar
- ¼ teaspoon table salt
- 1 ½ teaspoons vegetable oil
- 3 oz warm water (⅓ cup)
Instructions
- Microwave 8 oz whole milk until scalding hot. Add ½ oz unsalted butter to the milk and stir until it melts. Set the milk aside to cool to about 100F.
- In a large mixing bowl or the bowl of a stand mixer, combine the scalded and cooled milk with 4 oz warm water, ½ oz granulated sugar, and 2 ¼ teaspoons dry yeast. Add 2 ½ oz wheat flour and 2 cups (10oz) of the all purpose flour and mix until it forms a thick batter. Cover the bowl and set it aside for 30-60 minutes.
- Switch to the dough hook. Add 1 ½ teaspoons table salt and the remaining cup of flour. Knead on medium speed for 5 minutes. The dough should clear the sides of the bowl and cling to the dough hook. If mixing by hand, add as much flour as you can with a wooden spoon then knead the remaining flour. Knead by hand for 7-8 minutes until the dough is smooth and elastic.
- Transfer the dough to a lightly oiled bowl, turning once to coat. Cover the bowl and set aside to rise until doubled in volume, about 1 hour. Line a half sheet pan with parchment paper or a silicone baking mat.
- Turn the dough out onto a lightly floured surface and divide into 8 equal portions. Roll each piece of dough into a smooth ball and set on the prepared baking sheet. If you want to make a loaf briefly knead the dough then form into a large round ball. Set the loaf onto the parchment lined pan.
- Cover the baking sheet with a damp kitchen towel and set aside to rise for 30 minutes. Meanwhile, mix the topping (see note).
Topping
- Preheat the oven to 400 °F. If you want to bake the loaf in a Dutch oven preheat the pot in the oven.
- Whisk together 3 oz rice flour, 1 teaspoon dry yeast, 1 ½ teaspoons granulated sugar and ¼ teaspoon table salt. Add 1 ½ teaspoons vegetable oil to 3 oz warm water then add it to the dry ingredients. Whisk until combined. Set the topping aside for 20 minutes until bubbly.
- Brush the topping generously onto the the rolls or the loaf. Let the dough rise another 20 minutes. Bake until golden brown, about 20-25 minutes for rolls and about 40 minutes for a loaf.
Would you like to save this recipe?


As an Amazon Associate and member of other affiliate programs, I earn from qualifying purchases.

The timings in the instructions are a bit confusing:
Cover the baking sheet with a damp kitchen towel and set aside to rise for 30 minutes. Meanwhile. mix the topping (see note).
TOPPING
Whisk together the dry ingredients. Add the oil …. Set the topping aside for 20 minutes until bubbly.
Brush the topping generously onto the the rolls. Let the rolls rise another 20 minutes.
What is the timing from covering the rolls to brushing on the topping? Do you do it after 30 minutes, with another 20 minutes rest?
Set the rolls aside and begin making the topping. Assuming it takes 5 or 10 minutes to make the topping and then it sits for 20 minutes, by the time you’re ready to brush on the topping the rolls should have sat aside for 30 minutes. Brush on the topping and leave it another 20 minutes. By then the rolls should have been rising about 50 minutes.
Sorry, I am an experienced baker and I think you have the wet/dry proportions off on these, I tried making them exactly as indicated and ended up with a very very wet dough. I added an extra half cup of flour and it still felt more like a biscuit dough than a bread or roll dough. Ended up with rolls that basically flattened into pancakes and did not hold their shape at ALL – and that’s with adding an extra half cup of flour. Disaster. Would not make again, Trying someone else’s recipe as I really want to make this.
No, the proportions are fine. This dough has a 65% hydration, that is the ratio of moisture to flour in the dough. That is not a particularly wet dough. Do you use volume or weight measure? If you use volume measure this recipe is tested using the “dip and sweep” method for the flour. There can be quite a bit of weight difference if you spoon the flour into the cup.
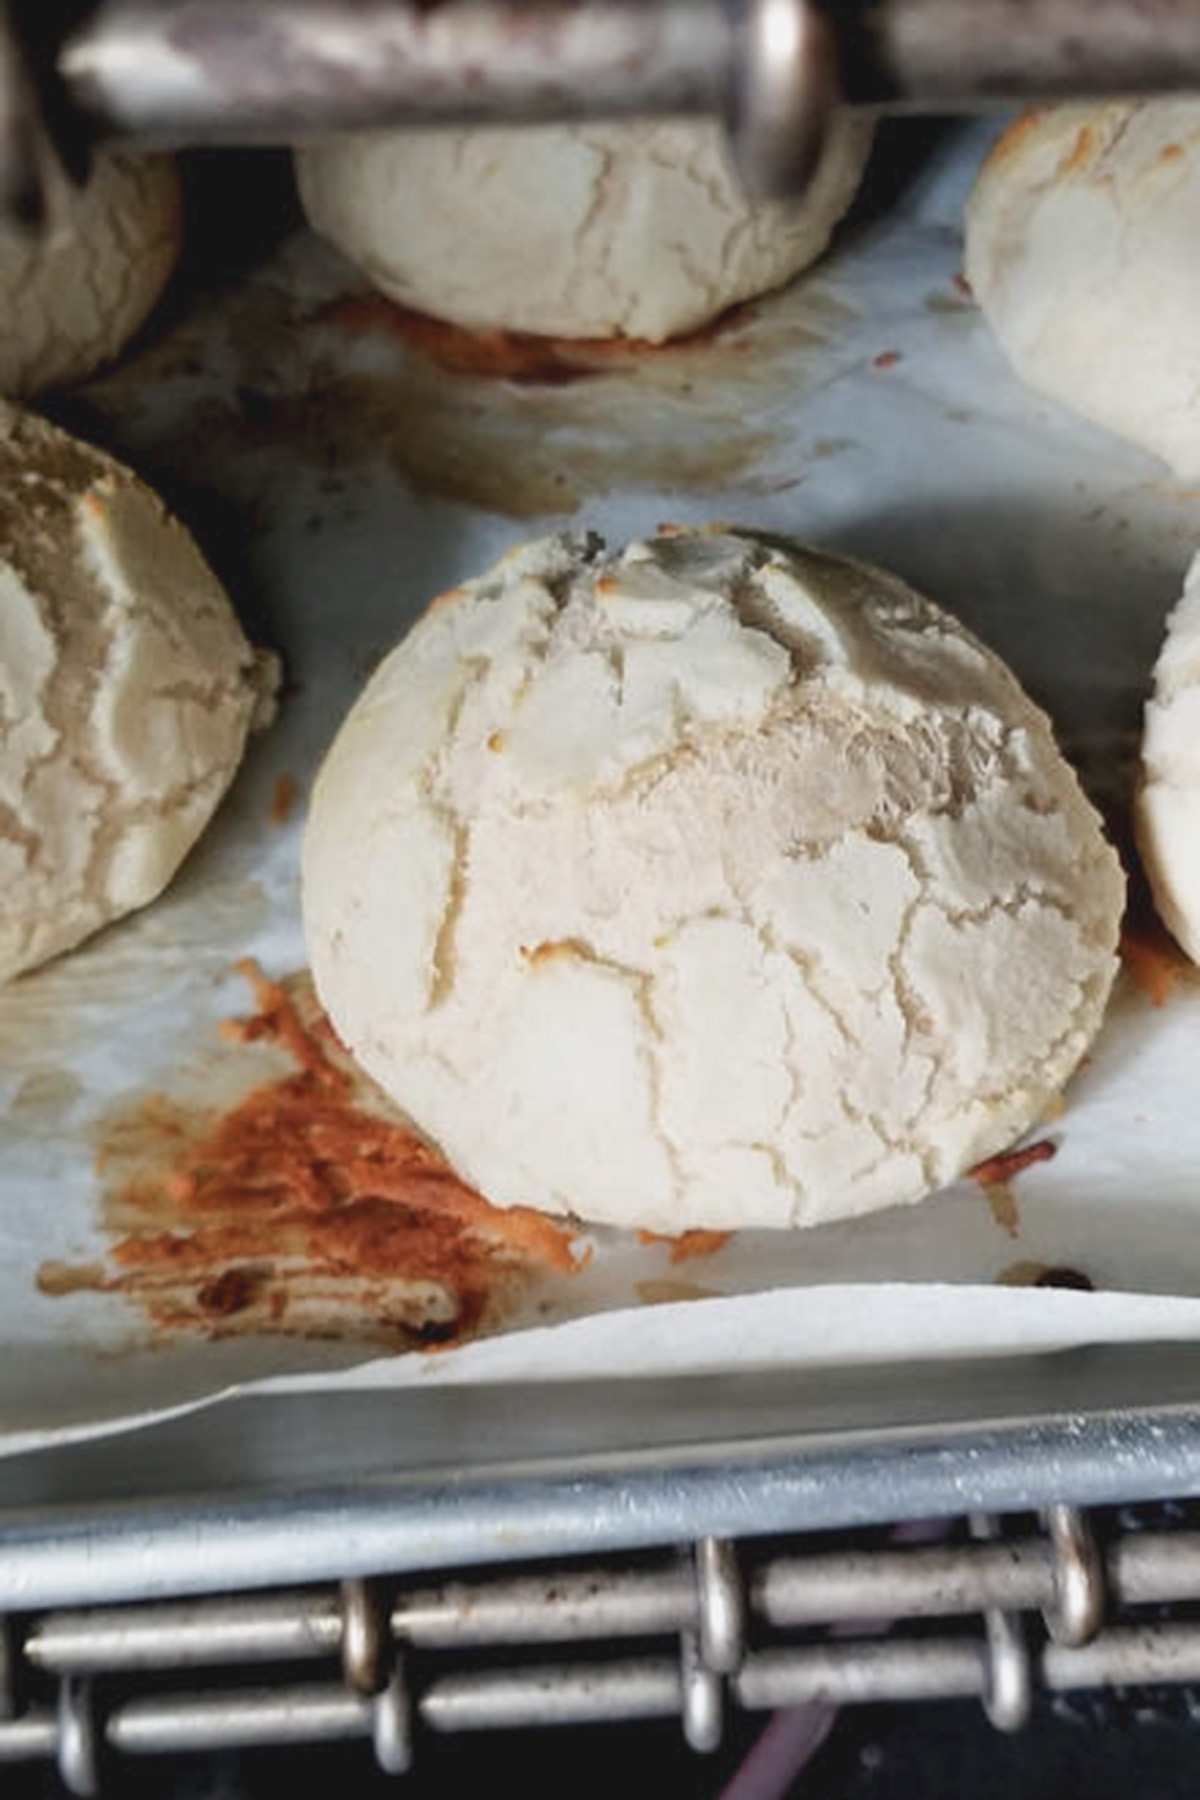
I made this recipe for the first time and the rolls are lovely, just a question, when I took them out of the oven the tops were lovely and crispy, but then they softened up. How do I keep the tops crusty??
How long did it take for them to soften up? They should stay crisp for a day or so. Maybe give them another minute or two in the oven to finish crisping. Also, cooling on a rack helps.
It didn’t take long at all. I cooled them on a rack, by the time they were cool they were soft. Could humidity be a factor? It was awfully humid yesterday.
It could. But I would try giving them an extra couple of minutes to get nice and crunchy.
Hi, these look absolutely beautiful, I cannot wait to try baking them. May I ask a question…… if I wish to make a loaf rather than rolls, what size loaf tin (or free form?), and what Oven temperature and for how long? Thank you.
You could either bake in a loaf pan or as a free form loaf on a sheet pan. Bake at 400F. Instead of 20 minutes I would guess more like 40 minutes. But that’s just an estimate. It will vary based on the size and shape of the loaf. Keep an eye on the loaf starting at 35 minutes. An interior temp of 190-200F is what you need. I generally just flip the loaf over and tap on the bottom. If the loaf is baked it will have a hollow sound.
Very nice and easy to do! Very tasty. I let it rise before and after putting the topping on. Mine definitely didn’t come as neat as yours – but very good all the same!
I couldn’t find rice flour – so I used ground rice – which is more course – but was very nice! As a young baker I would recommend this recipe for people to do – it is very nice!
Great idea to use ground rice.