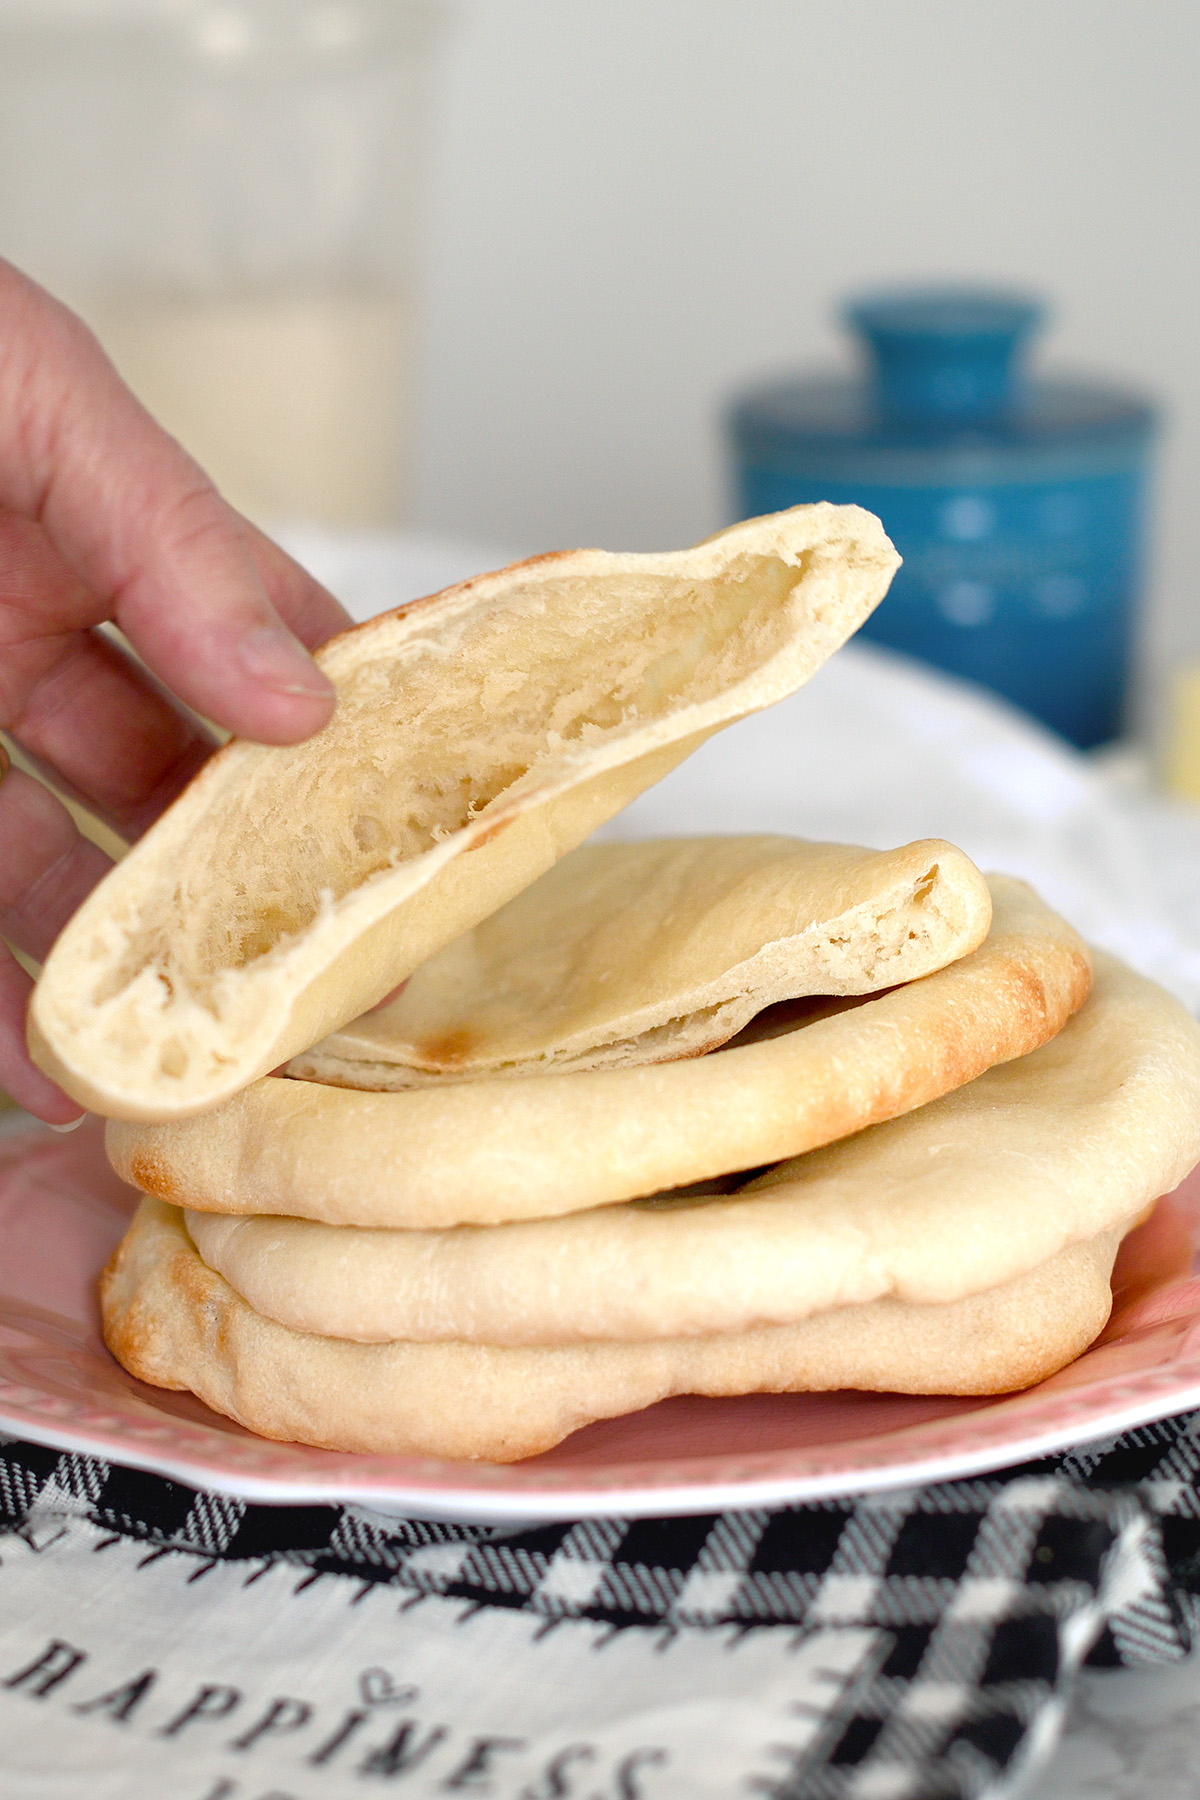
Sourdough Pita Bread
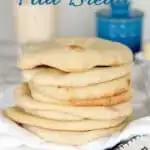

Sourdough Pita Bread is actually quite easy to make. Using sourdough starter instead of commercial yeast extends the time, but it’s mostly hands-off. The payoff is a big boost in flavor and an amazing texture.
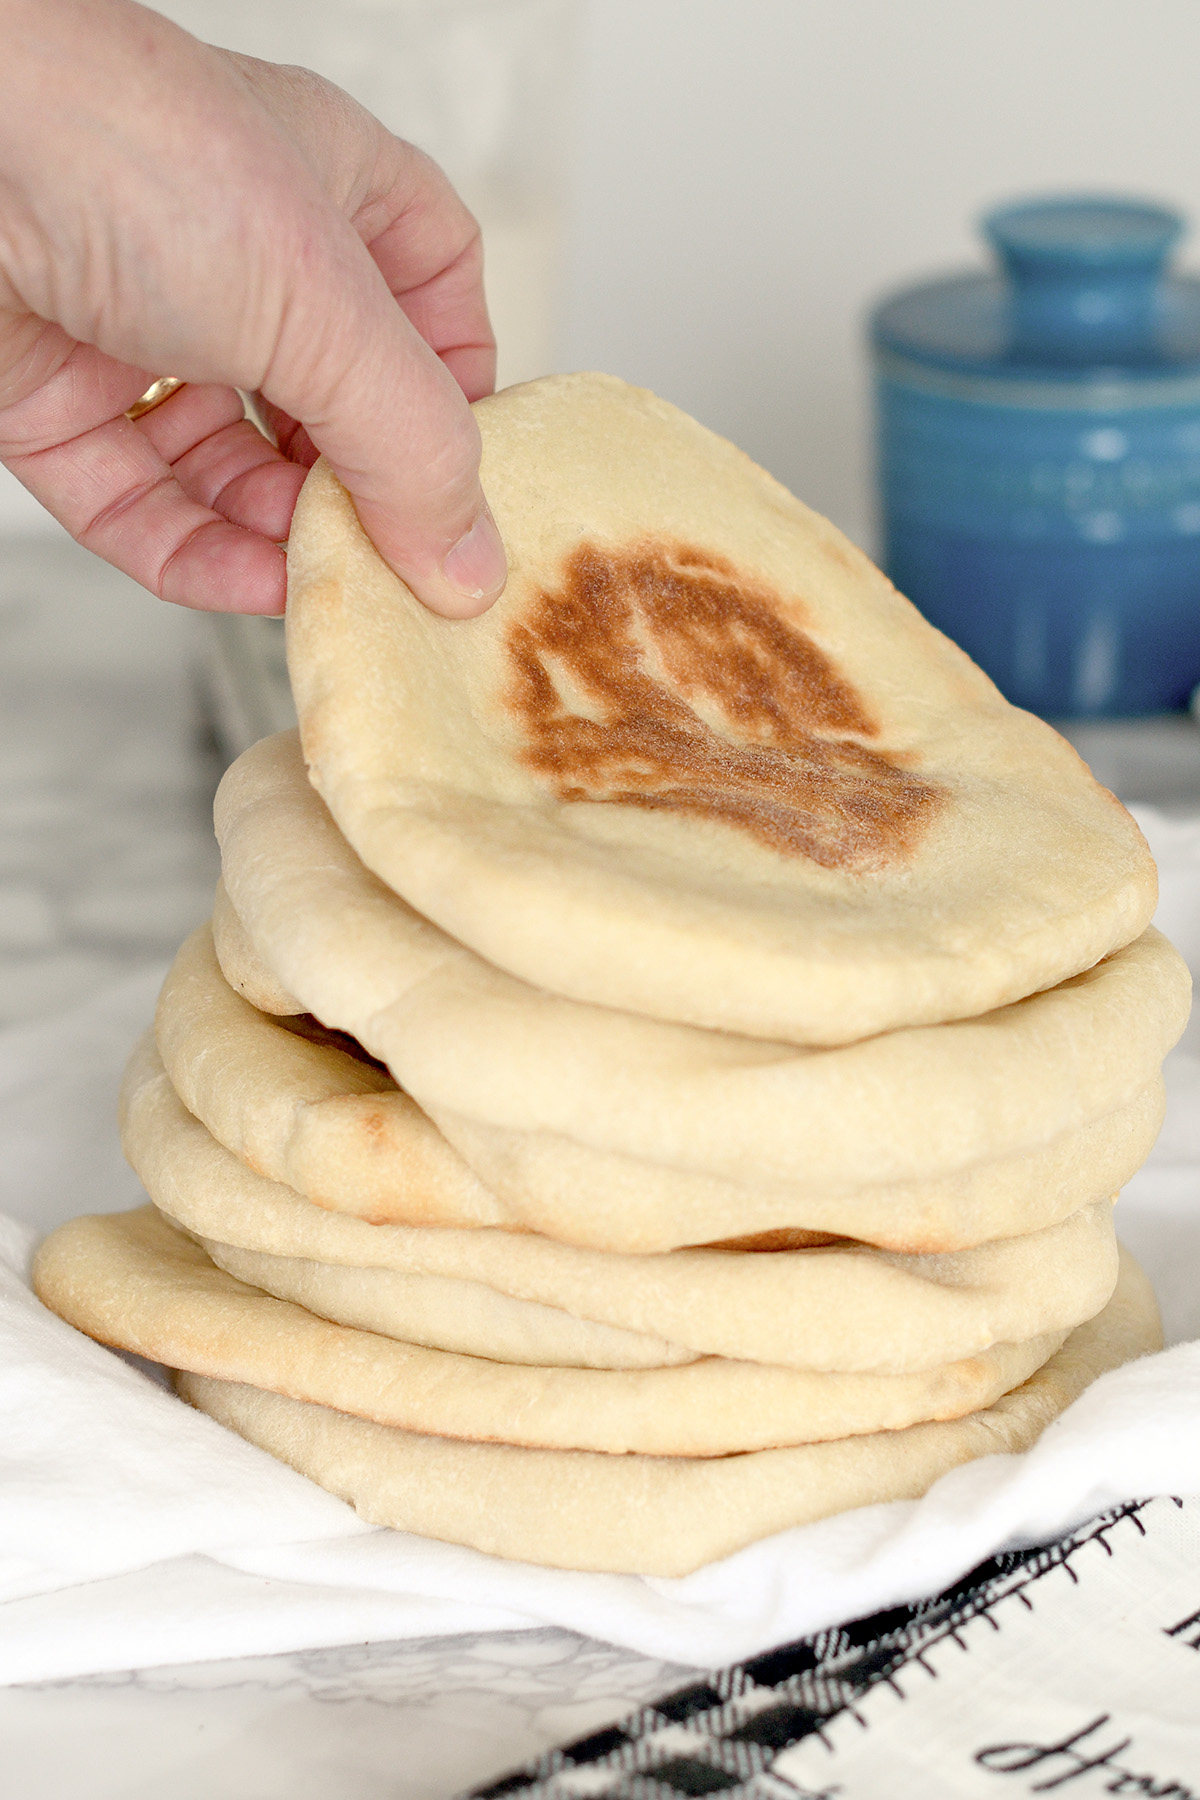
Table of contents
Why This is a Standout Recipe
Have you ever made pita bread at home? It’s so much fun to watch the rounds of dough puff up in the oven. I think you’ll be surprised how easy it is to make this delicious bread.
This Sourdough Pita recipe uses a full cup of starter for a deep flavor and the most amazingly moist and tender texture.
I’ll take you through the step by step process for making the best pita pockets using no commercial yeast.
The recipe can be made over two days or you can make the dough and bake it the same day. See the sample baking schedules at the end of the post.
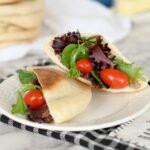
These pitas are a great recipe to have on hand whenever you need to use your starter. The bread can be made in one day and they freeze beautifully. I almost always have a bag of pita pockets in my freezer.
If you don’t already have one, I can show you how to make a sourdough starter and how to feed a sourdough starter. In the meantime you can make Homemade Pita Bread with commercial yeast.
Ingredients
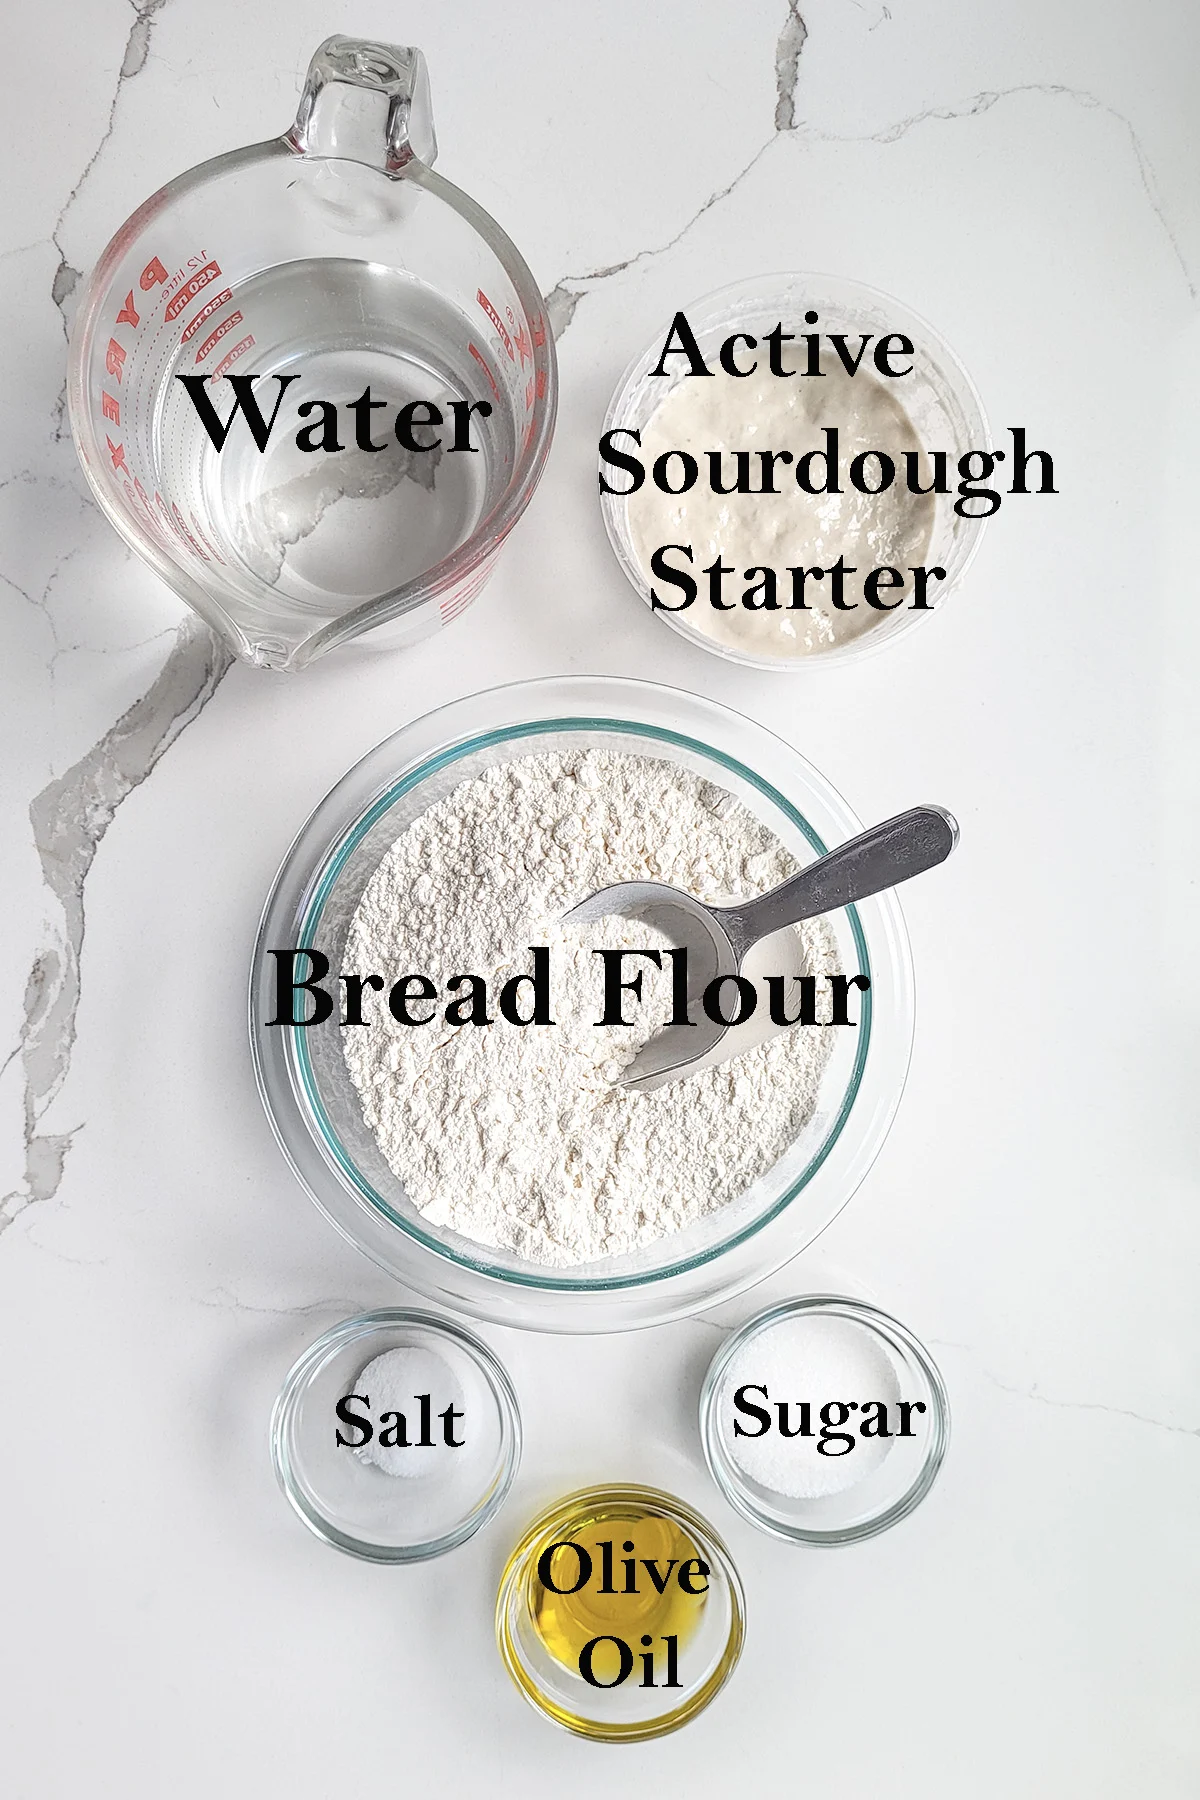
Ingredients Notes
- Active Sourdough Starter – Your starter should be at 100% hydration, recently fed and active.
- Bread Flour – High protein bread flour will develop enough gluten to allow the pita to puff up in the heat of the oven.
- Salt – For flavor.
- Sugar – For flavor and browning.
- Olive Oil – To enrich the bread and add flavor.
Process Photos
Here’s what the recipe process looks like at each stage. Refer to the recipe card below for measurements and exact instructions.

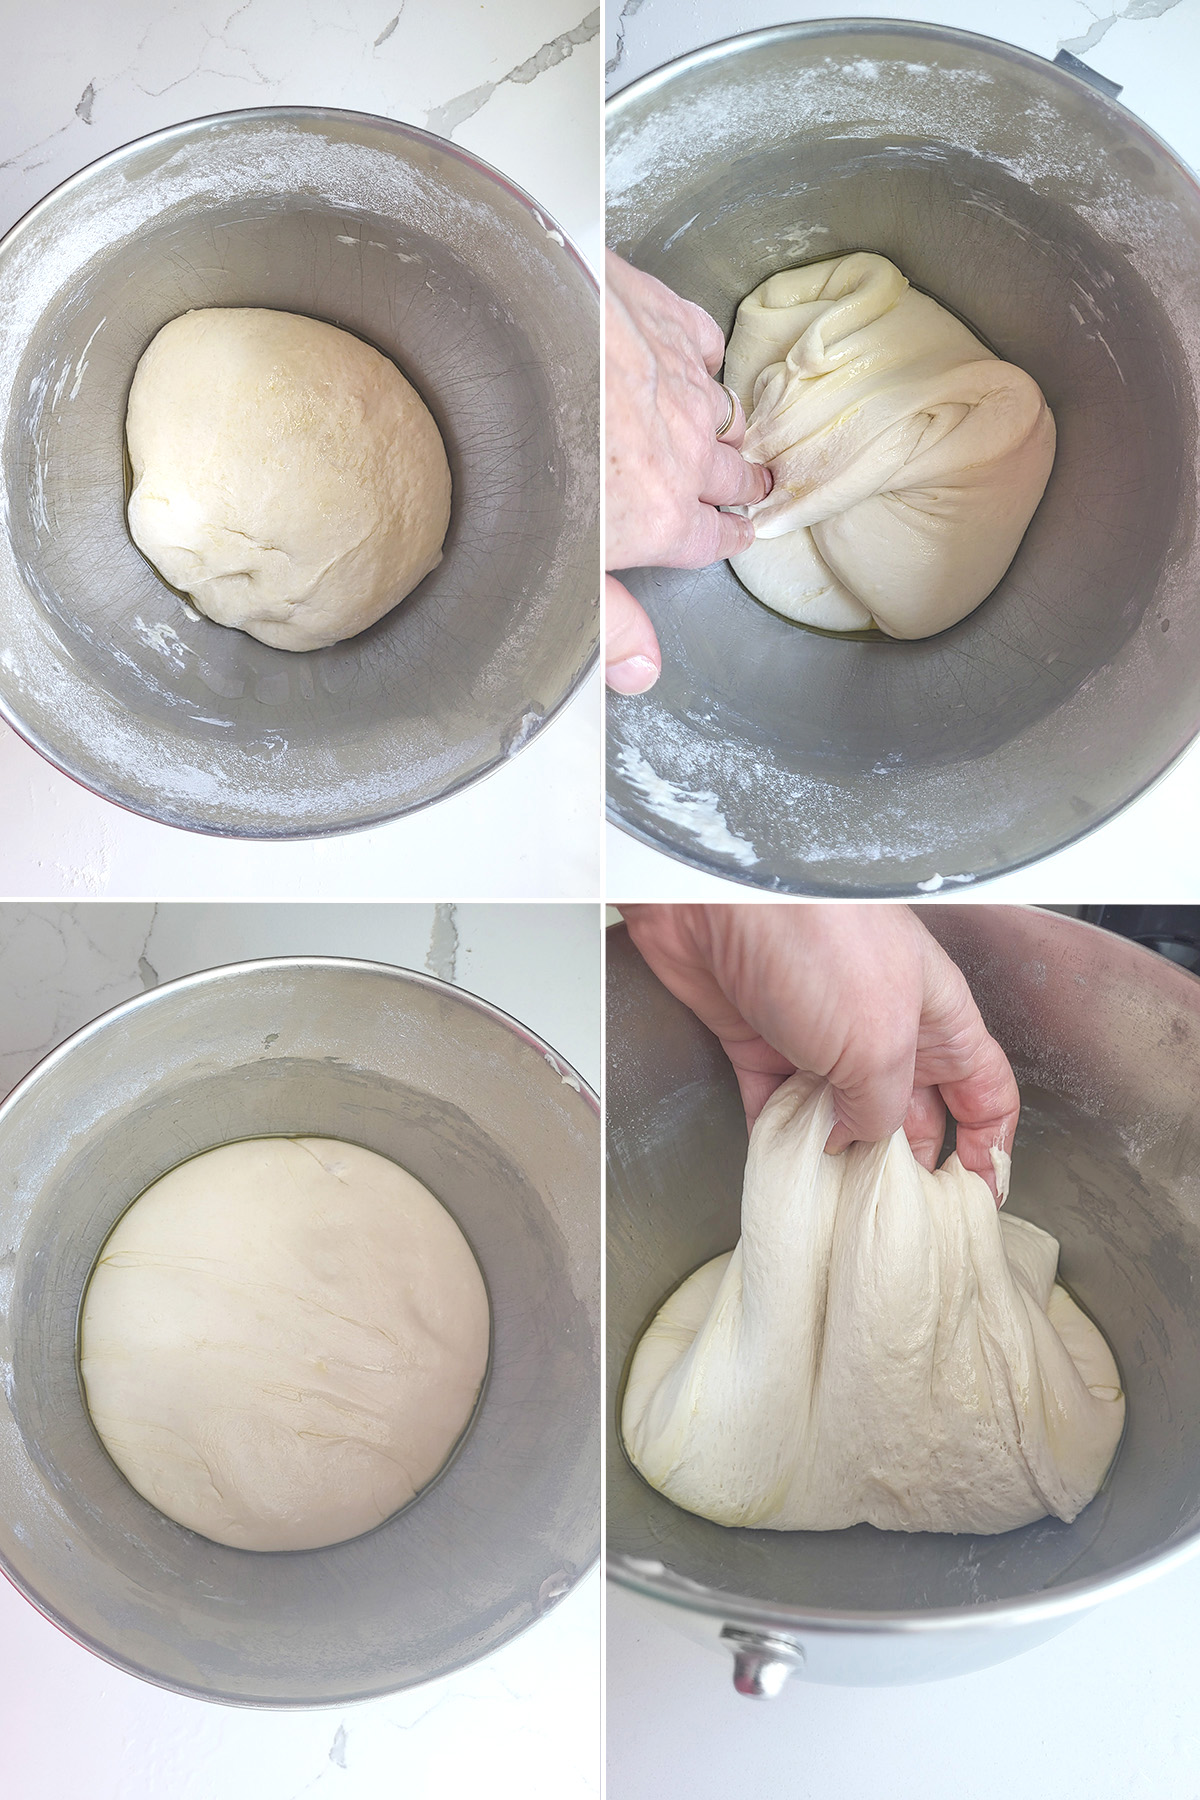
- Combine the active starter with the water and some of the flour. Mix to combine.
- Cover the bowl with plastic wrap or a damp tea towel and set it aside for 30-60 minutes.
- Add the olive oil, sugar and remaining flour. Switch to the dough hook attachment if using a stand mixer.
- Knead the dough for 5 minutes or until the dough clears the sides of the bowl and clings to the hook. If kneading by hand knead until the dough is silky and elastic.
Autolyse
Combining the starter with the water and flour and letting it rest is called “autolyse”. This process gives the flour time to absorb the water and it gives the gluten and yeast a head start before you add the other ingredients to the dough. You can skip this step if you’re in a hurry, but it’s worth a little more time for a dough that’s easier to work with.
- Set the dough aside at room temperature to bulk ferment.
- After 1 hour fold the dough. Continue to fold every hour.
- The dough should become more elastic and cohesive during the 3-5 hour fermentation.
- By the end of bulk fermentation the dough should feel lively and elastic. At this point the dough can be refrigerated for up to 2 days or you can continue forming and baking the pitas the same day.
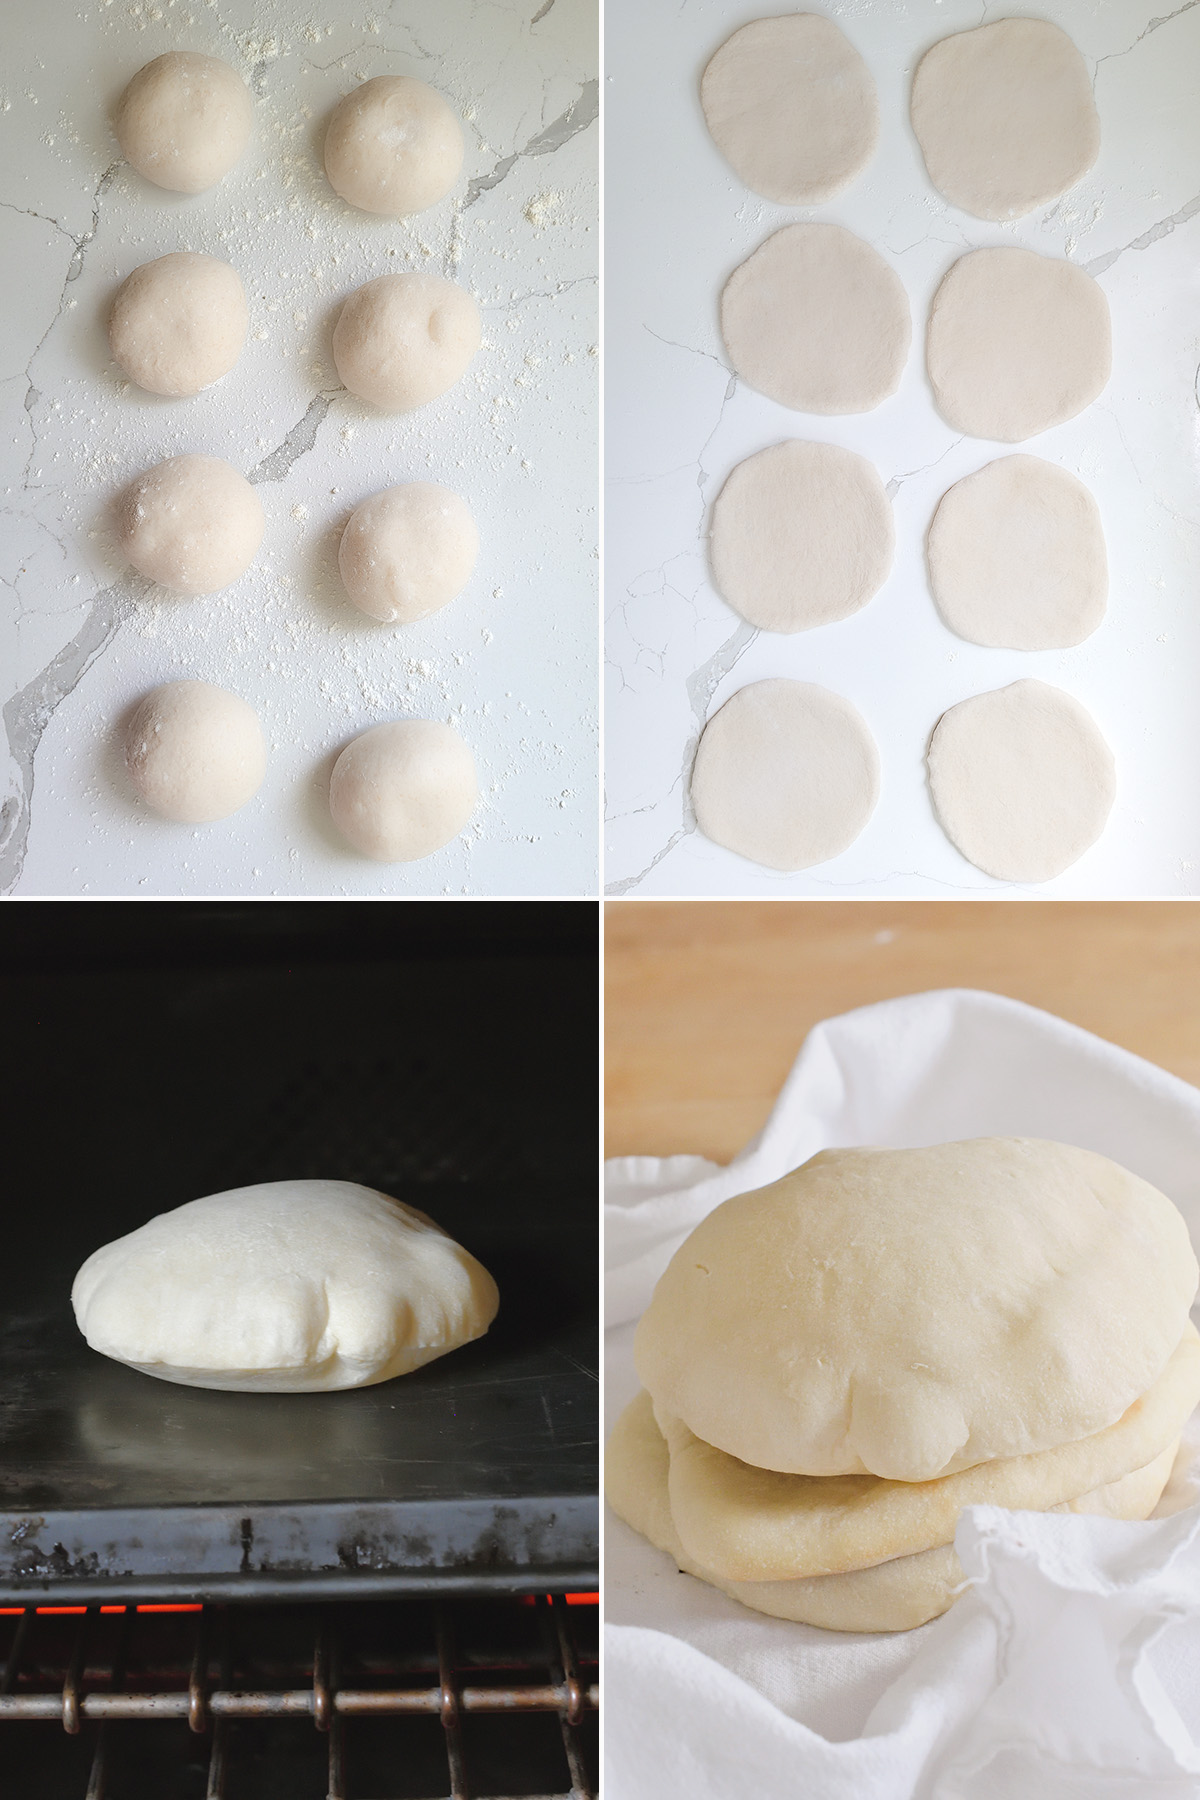
- Divide the dough into 8 equal portions. Using a cupped hand, roll each piece into a tight dough ball.
- Roll each dough balls to a 6-7″ round. Roll all the rounds before you begin baking.
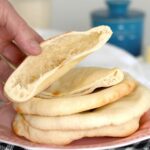
- Bake the pitas in a very hot oven on a dark colored pre-heated sheet pan, baking steel or pizza stone. I can fit 2 rounds at a time on my baking steel. Bake until the pita is puffed and lightly browned on the bottom. If the pita fails to puff bake until the top is set and the bottom is brown.
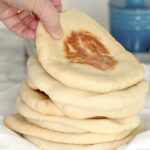
- Wrap the warm pitas in a clean kitchen towel as they come out of the oven.
Recipe Tip
Roll all the pita rounds before you start baking. This allows the first rounds to rest a bit before going into the oven. The pitas will puff better after a short rest.
Baking Schedules
Two Day Schedule
- If your starter needs feeding, do that early in the morning of the day you want to make the dough. You want to use the starter at it’s peak for mixing the dough.
- Mix the dough in the afternoon. Allow it to ferment at room temperature during the day.
- Refrigerate the dough in the evening before going to bed.
- The dough can stay in the refrigerator for 2-3 days at this point.
- Take the dough out first thing in the morning and let it come to room temperature.
- Roll and bake the pita rounds once the dough is at room temperature.
- You should have fresh bread by lunch time.
One Day Schedule
- If your starter needs feeding, do that the night before the day you want to bake.
- Mix the dough first thing in the morning. Allow it to ferment at room temperature until late morning/early afternoon.
- After the bulk fermentation is done, roll and bake the pita rounds.
- You should have fresh bread by lunch time.
FAQs about making Sourdough Pita Bread:
Yes, start the dough early in the morning and skip the refrigeration step.
If your oven is not hot enough the pita may not puff properly. If the sheet pan or pizza stone is not pre-heated the pitas won’t form a pocket. If the bread is rolled too thin in spots it may not puff properly.
The bread keeps for 1-2 days at room temperature.
Yes! Store the pita rounds in a freezer bag for up to 3 months.
Wrap the pita in foil and place in a 200°F oven until warm.
I know you hate to throw away that sourdough discard. Check out these recipes that use sourdough discard.
More recipes to try:
- Sourdough Whole Wheat Pita Bread
- Basic Sourdough Bread
- Sourdough Pizza Crust
- Sourdough Baguette
- Sourdough Soft Sandwich Bread
- Sourdough Rye Bread
- Sourdough Whole Wheat Bread
- Sourdough Cracked Wheat Bread
- Sourdough Potato Buns
- Sourdough Hoagie Rolls
- Sourdough Brioche
- Sourdough Semolina Bread.
If you love this recipe as much as I do, I’d really appreciate a star rating and a quick comment. Ratings and comments help my recipes show in search results. Thanks!

Sourdough Pita Bread Recipe
Ingredients
- 8 oz active sourdough starter (1 cup (100% hydration))
- 8 oz warm water (1 cup)
- 13 ¾ oz bread flour (2 ¾ cups, see note)
- 1 oz olive oil (2 tablespoons)
- ½ oz granulated sugar (1 tablespoon)
- 1 ½ teaspoons table salt
Instructions
- In the bowl of a stand mixer fitted with a paddle, or in a large mixing bowl, combine 8 oz active sourdough starter, 8 oz warm water and half of the flour. Mix until it forms a thick batter. Cover the bowl and set aside for 30-60 minutes.
- If using a stand mixer, switch to the dough hook. Add 1 oz olive oil, ½ oz granulated sugar and 1 ½ teaspoons table salt then mix to combine. With the mixer running on low, add the remaining flour. Mix until the dough clings to the hook and clears the sides of the bowl. If mixing by hand add flour until you can no longer stir, then turn the dough out onto a floured surface to finish by hand. Knead 5 minutes. Form the dough into a smooth ball.
- Put the dough into a lightly oiled bowl, turning once to coat the dough. Cover the bowl and set it aside at room temperature.
- After 60 minutes uncover the bowl, lift one side of the dough and fold it into the middle of the dough. Repeat with the other three sides of the dough then flip the dough over. You're basically turning the dough inside-out to redistribute the yeast and develop the gluten.
- Every 60 minutes repeat the procedure again. By the end of 3 hours the dough should be lively, elastic and airy. If the dough is still sluggish give it another hour or two at room temperature.
- Cover the bowl tightly and refrigerate overnight (see note). Remove the bowl from the refrigerator in the morning and allow the dough to come to room temperature.
- Preheat the oven to 450 °F. Use the convection setting if you have it. If you have a baking steel or stone place it in the oven. Otherwise, place a baking sheet on the bottom rack of the oven. If you have a dark colored baking sheet use that. You can even use a cast iron skillet but may have to bake the bread one at a time.
- Divide the dough into 8 equal pieces. Using a cupped hand on a lightly floured surface, roll each piece of dough into a tight ball. Use a rolling pin to roll each ball into about a 6” round. If the dough springs back too much let it rest for 5 minutes and continue rolling. Once all the pitas are rolled you can begin baking.
- Place two pita rounds on the baking steel or pan. Close the oven and bake until the rounds puff up like a balloon, about 3-4 minutes. You don’t need to flip the bread. Remove the baked breads and wrap in a clean kitchen towel while you continue baking the remaining pitas.
- The pitas are best the day they are made, but they also freeze very well.
Would you like to save this recipe?


As an Amazon Associate and member of other affiliate programs, I earn from qualifying purchases.
I’ve made good sourdough pita many times, using a different recipe. This recipe produced a more delicious pita than I’ve made in the past. The instructions were clear. As my starter is very active, I began making the dough in the morning and baked it successfully 6 hours later. 3 minutes on a preheated stone was the perfect amount of baking time for me. Thank you for such a good recipe!