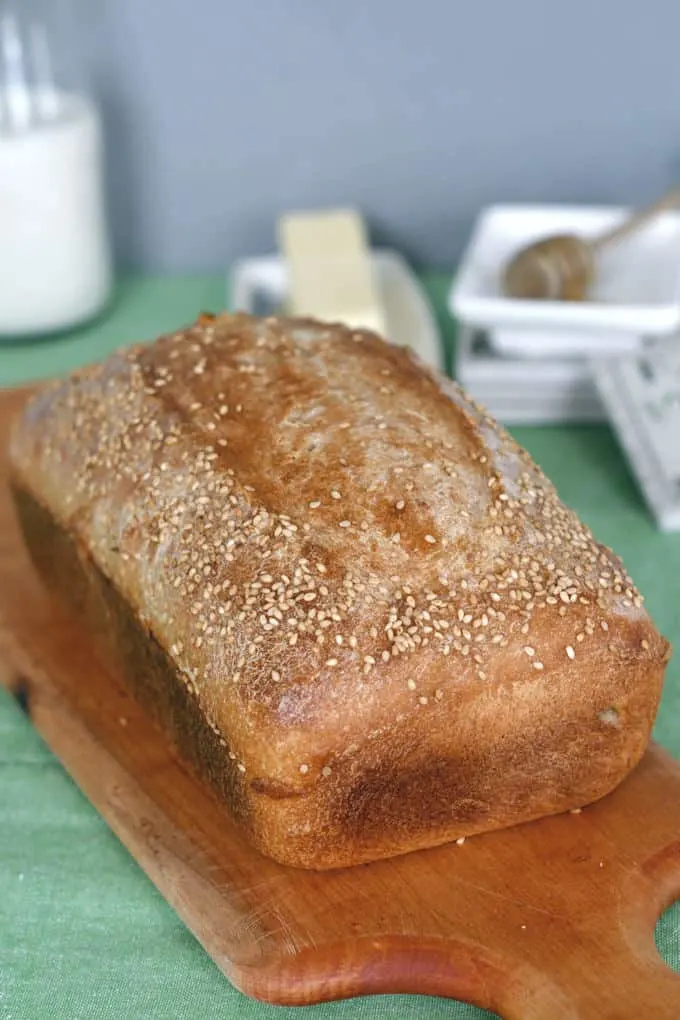
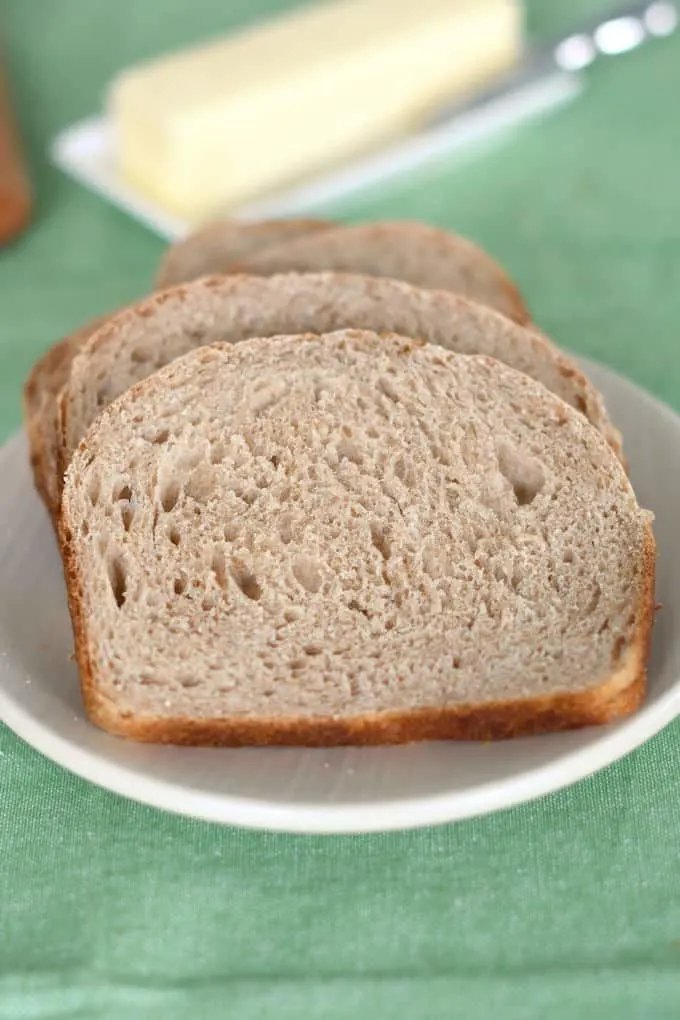
Whole Wheat Sourdough Sandwich Bread


Whole Wheat Sourdough Sandwich Bread tastes fantastic and will keep fresh for several days. Milk and honey give this loaf a soft crumb and crust. Sourdough starter enhances the hearty whole-grain flavor.
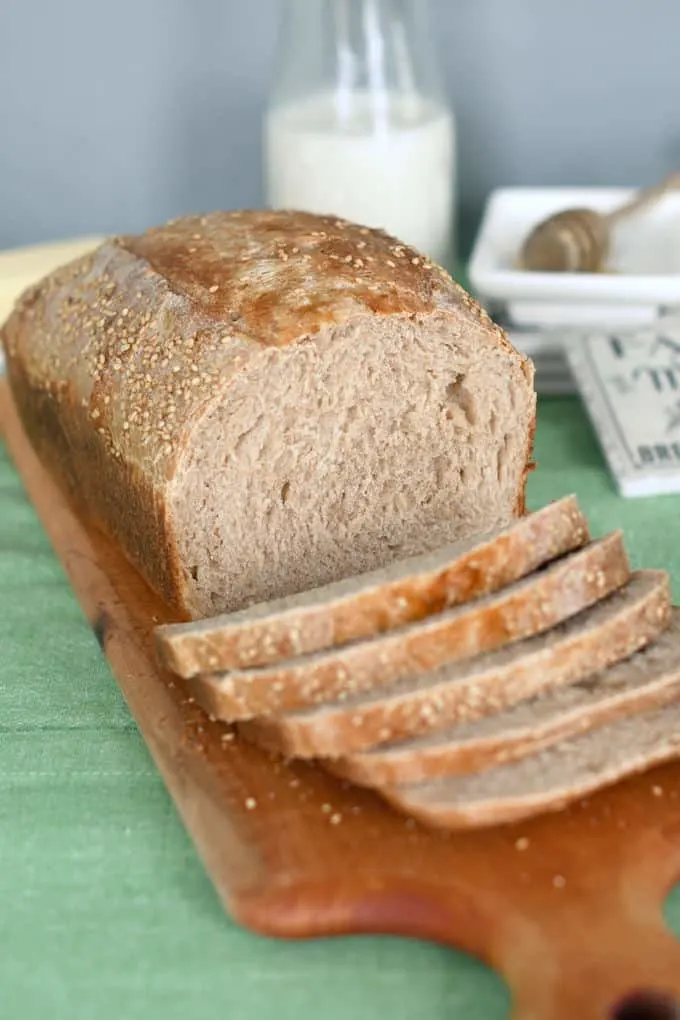
Table of contents
Why you’ll love this recipe
This recipe is a variation of my popular Milk & Honey Whole Wheat Bread recipe. This is a perfectly soft and slightly sweet sandwich bread.
Although this sourdough wheat bread recipe takes a good 12+ hours from start to finish, the vast majority of the time is hands off.
To make this recipe even more convenient, you can let the dough rise over night. A long rise in the refrigerator does only good things for the bread.
If you don’t have one, check out my post to learn How to Make a Sourdough Starter. Then check out my system to Feed and Maintain Sourdough Starter.
Ingredients
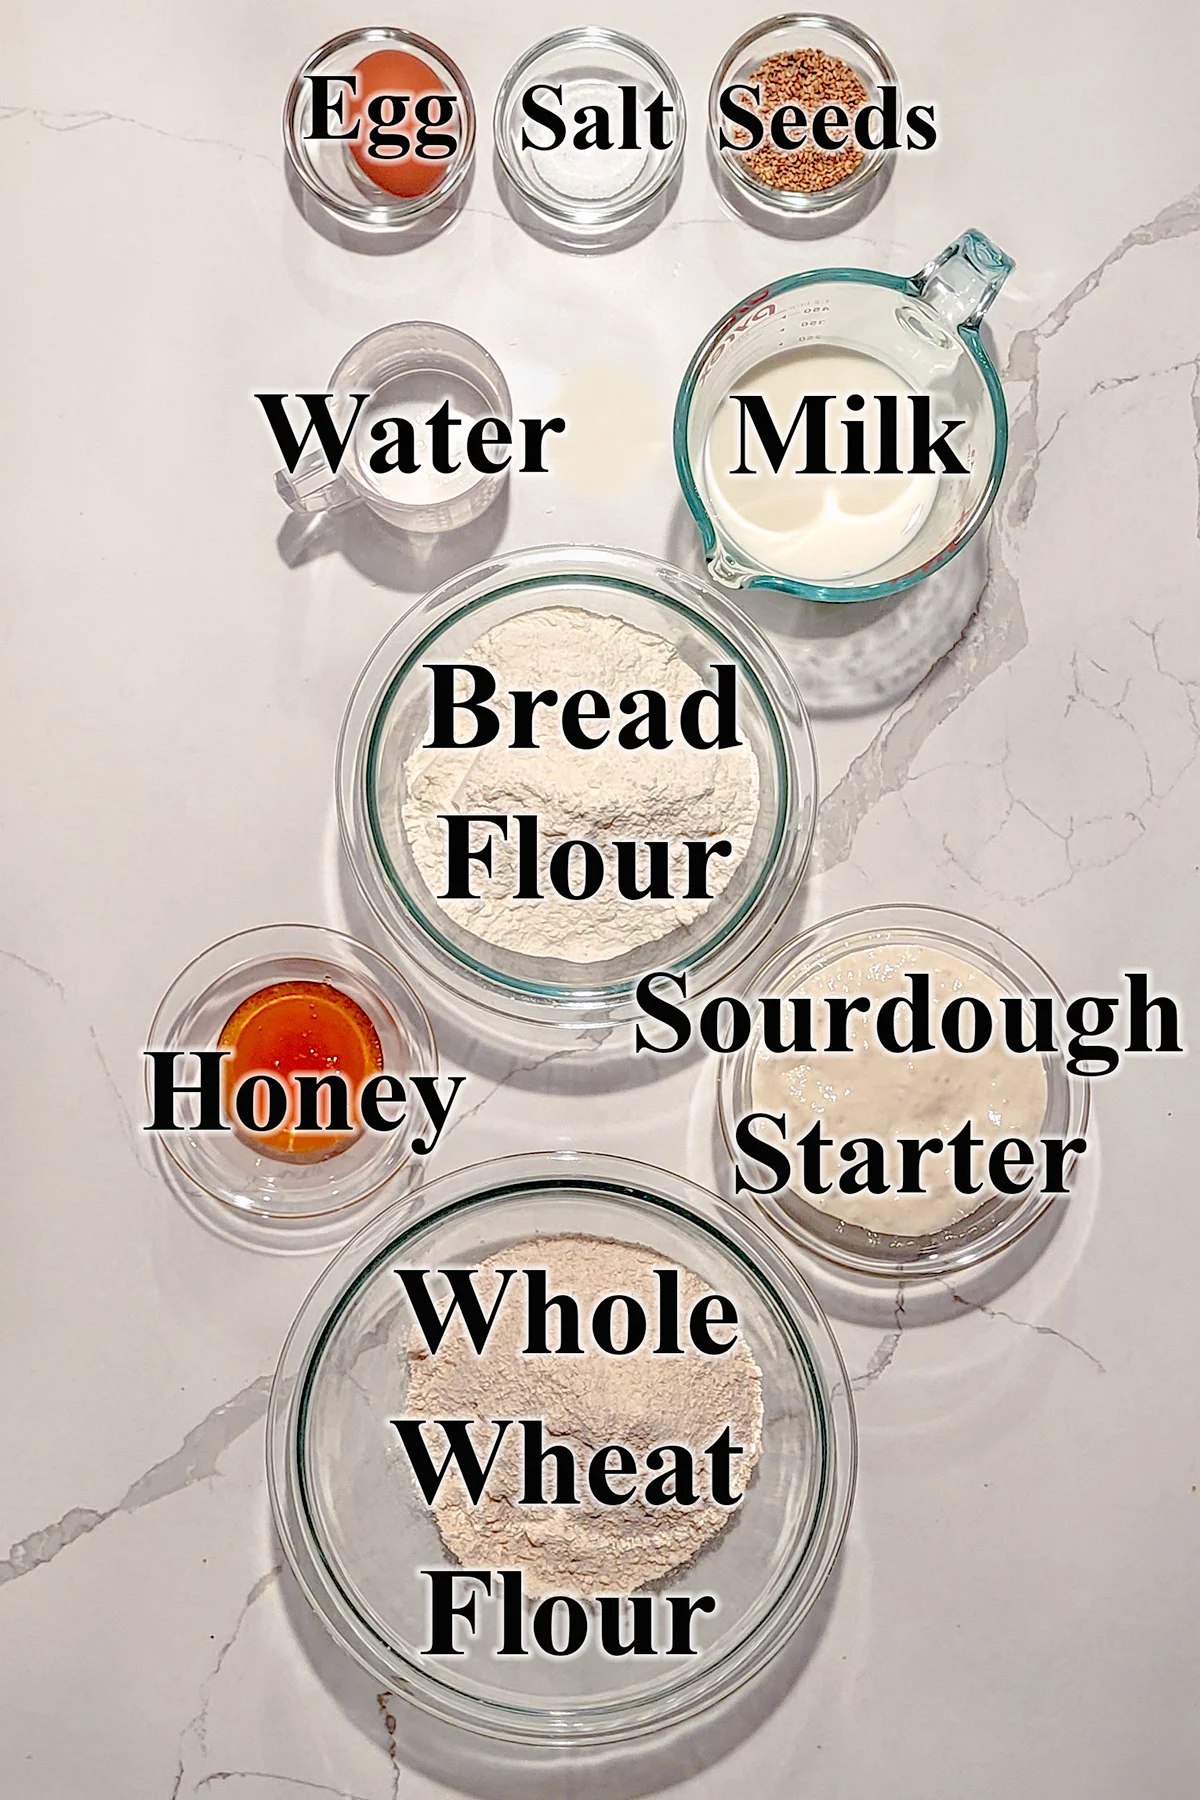
Ingredient Notes
- Sourdough Starter – This recipe was developed using 100% hydration starter. You will need to adjust the liquid or flour in the recipe if you’re starter isn’t at 100% hydration.
- Bread Flour has a high protein content. Higher protein means better gluten development.
- Whole Wheat Flour does not have quite as much of the gluten forming properties of bread flour. Using a combination of whole wheat and bread flour makes a loaf that has great whole grain flavor, yet rises tall in the oven. You can adjust the proportion of wheat vs. bread flour to make a loaf to your liking.
- Milk – Scalding denatures (breaks down) proteins in the milk which can interfere with gluten development.
- Honey – Adds wonderful flavor, enhances browning and makes the crumb soft and slightly sweet.
- Salt – For flavor.
- Sesame Seeds – For crunch and flavor on the crust.
How to make Whole Wheat Sourdough Sandwich Bread
Here’s what the recipe process looks like at each stage. Refer to the recipe card below for measurements and exact instructions.
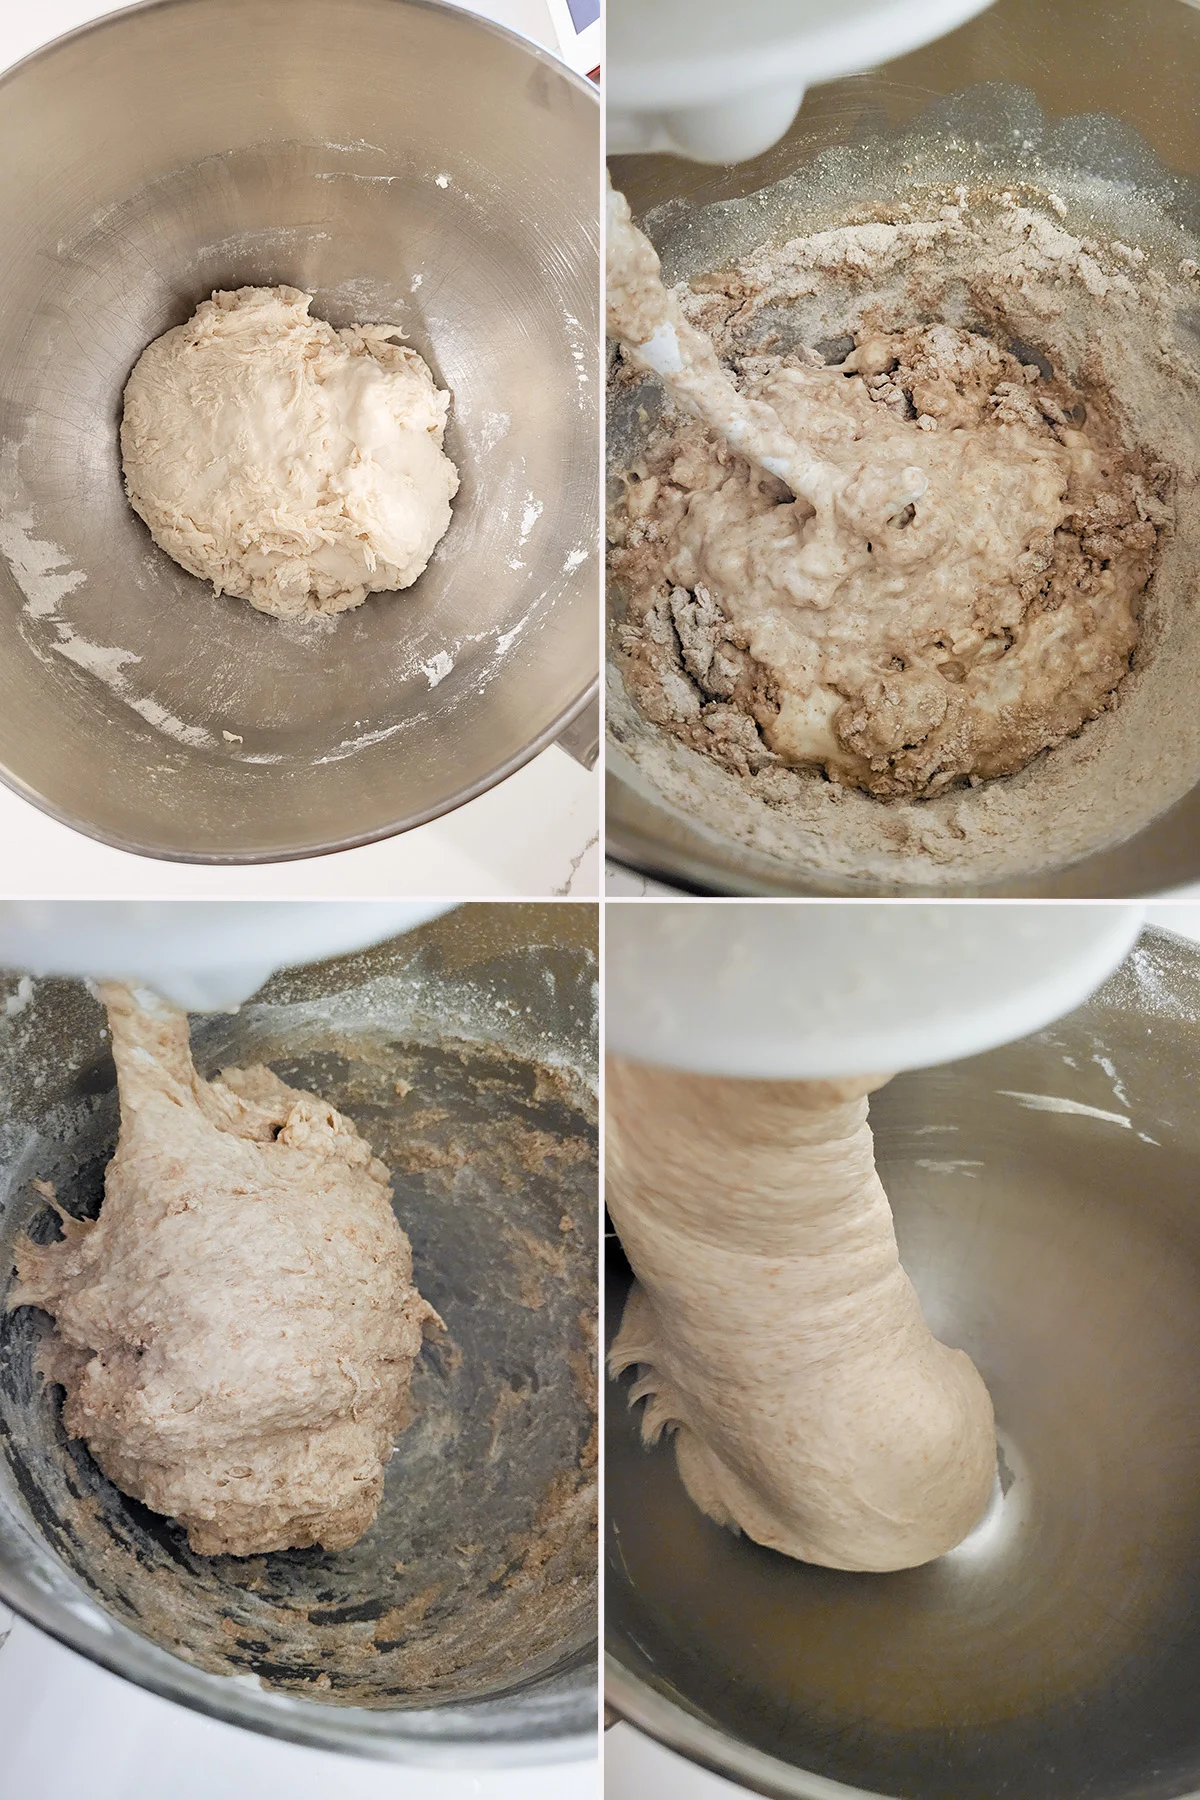
- Combine the starter, water and 1 cup of the bread flour to form a thick batter. Cover the bowl and set the mixture aside for 30-60 minutes.
- Add the rest of the ingredients.
- The dough will start out quite rough and sticky.
- Continue kneading until the dough begins to gather on the hook and pulls away from the sides of the bowl. Place the dough in an oiled bowl, turning once to coat the dough. Cover and set aside in a warm spot.
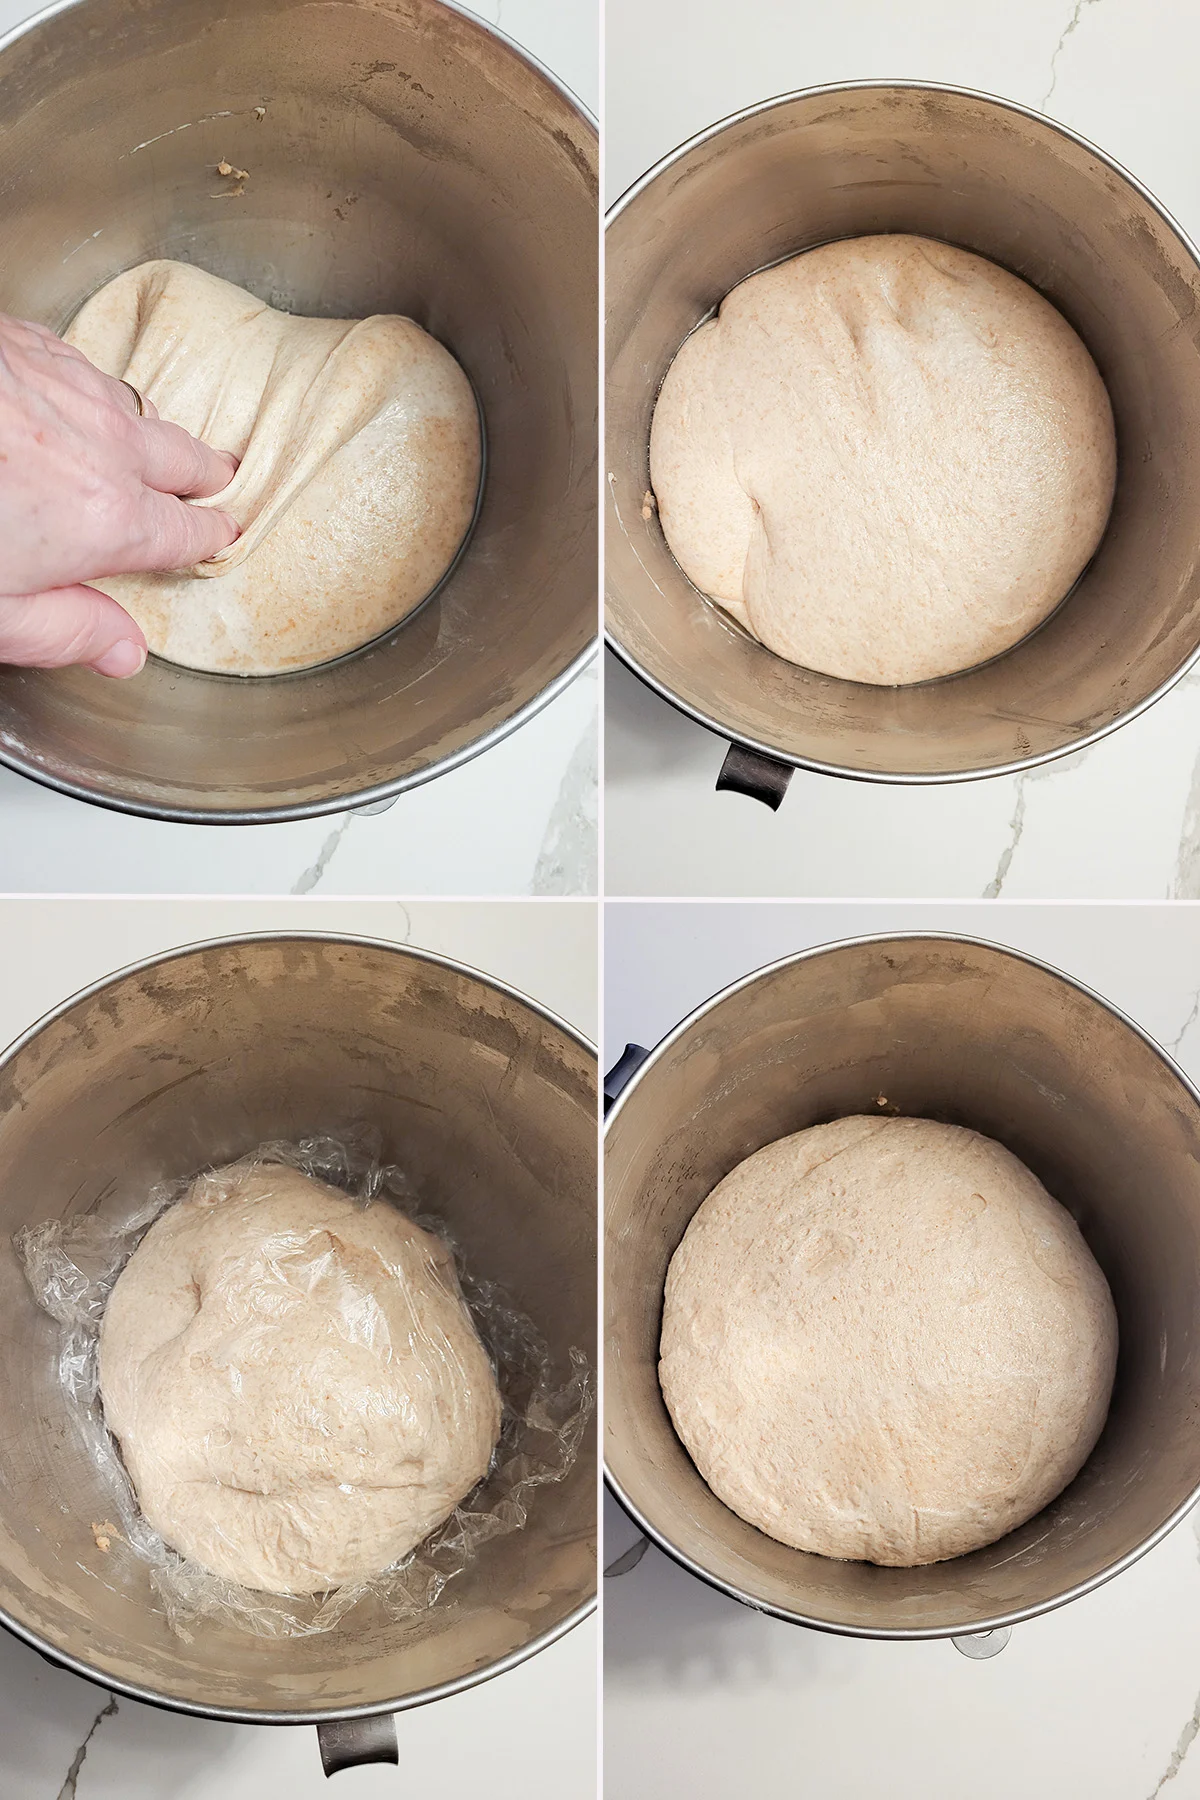
- After 30 minute, lift one side of the dough and fold it into the middle of the dough. Repeat with the other three sides of the dough then flip the dough over.
- Fold the dough every hour. After 3 hours the dough should be lively, elastic and airy.
- Cover the bowl tightly and refrigerate overnight. (If you prefer you can skip the refrigeration step and continue shaping the loaf right after the initial fermentation.)
- The next morning continue with shaping.
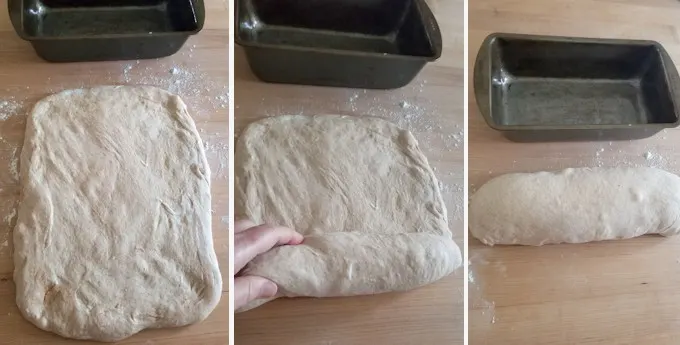
- Without kneading, use your hands to pat the dough into a rectangle.
- Roll the dough to a log.
- Set it into a lightly greased loaf pan
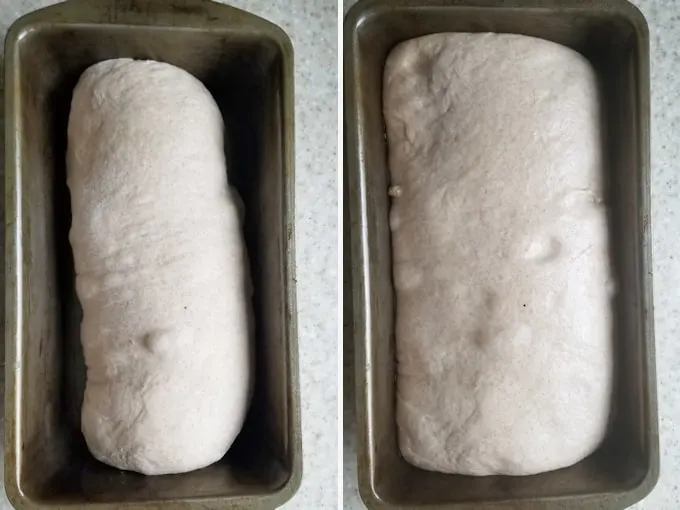
- Cover the pan and set it aside for 1 1/2 – 2 hours.
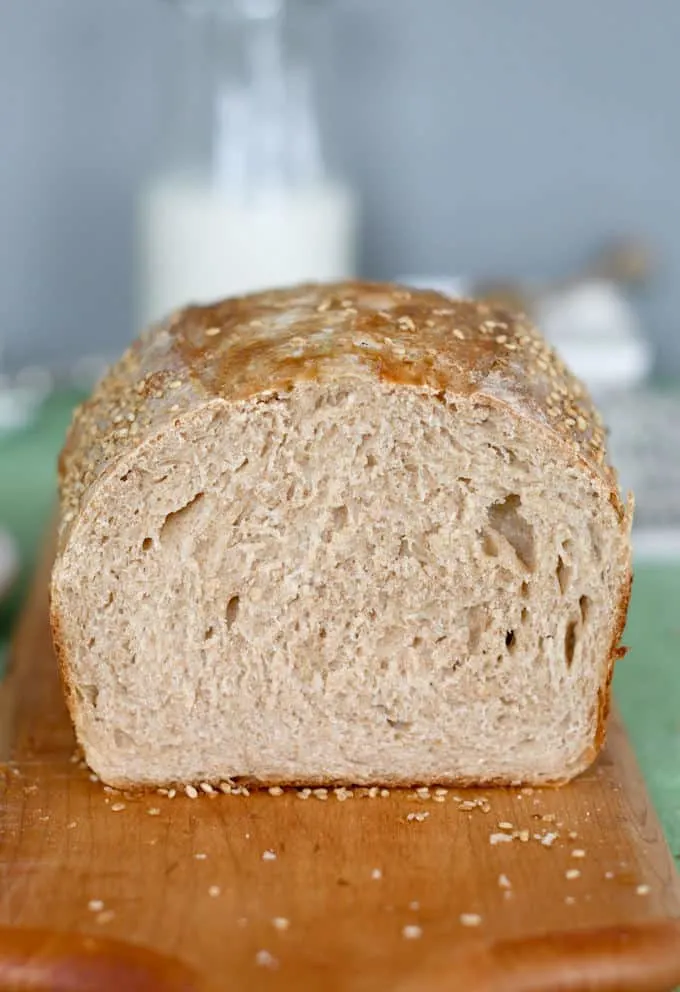
- The loaf will rise to fill up the loaf pan.
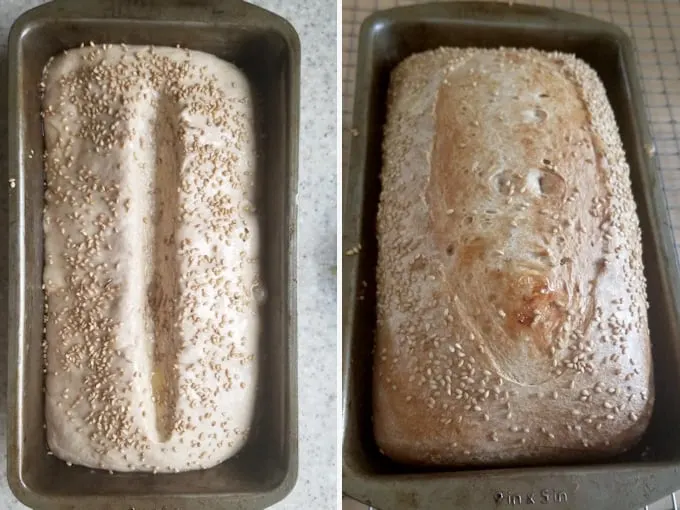
- Cut a slash down the center of the loaf. Brush with egg wash and sprinkle with sesame seeds (optional).
- Bake until the interior is 200F.
A timeline for making this recipe
- If your starter needs feeding, do that the night before or early in the morning of the day you want to make the dough.
- Mix the dough in the afternoon, allow it to ferment for 3-6 hours then refrigerate the dough before going to bed.
- Take the dough out of the refrigerator first thing in the morning, shape the loaf and set it into the pan.
- Leave the loaf to rise for 1 1/2- 2 hours, or as long as is needed to almost double in size.
- To make and bake the dough in the same day, feed your starter the evening before so it’s active by morning. Start the dough early in the morning and it should be ready to bake by late afternoon or early evening.
Storage
Sourdough Whole Wheat Bread stays fresh at room temperature for 2-3 days. The bread (sliced or whole) can be frozen for up to a month.
I know you hate to throw away that sourdough discard. Check out these recipes that use sourdough discard.
If you love this recipe as much as I do, I’d really appreciate a star rating and a quick comment. Ratings and comments help my recipes show in search results. Thanks!

Whole Wheat Sourdough Sandwich Bread
Ingredients
- 8 ounces active sourdough starter (1 cup (100% hydration))
- 4 ounces warm water (½ cup)
- 10 ounces bread flour (2 cups, see note)
- 8 ounces whole milk (1 cup)
- 1 ½ ounces honey (2 tablespoons)
- 1 ½ teaspoons table salt
- 7 ½ ounces whole wheat flour (1 ½ cups)
- 1 egg for egg wash
- Sesame seeds for garnish (optional)
Instructions
- In the bowl of a stand mixer or in a large mixing bowl, combine 8 ounces active sourdough starter, 4 ounces warm water and 1 cup (5 oz) of the bread flour to form a thick batter. Cover the bowl and allow the mixture to rise for 30-60 minutes. Warm 8 ounces whole milk until scalding hot then set it aside to cool until it is slightly warmer than body temperature.
- Add the scalded milk, 1 ½ ounces honey and 1 ½ teaspoons table salt to the sponge. Stir to combine. Add 7 ½ ounces whole wheat flourand stir until the batter looks like thick pancake batter. If using a stand mixer, switch to the dough hook.
- With the mixer running, slowly add the remaining bread flour. Continue mixing until the dough begins to gather on the hook and pulls away from the sides of the bowl. Knead for 5 minutes. If mixing by hand, add as much of the flour as you can in the bowl then finish kneading in the rest of the flour by hand.
- Dump the dough onto a lightly floured surface. The dough should be soft and slightly sticky. Knead to form a smooth ball. If the dough is very sticky sprinkle a little more flour as you knead. Place the dough in an oiled bowl, turning once to coat the dough. Cover and set aside in a warm spot.
- After 30 minutes uncover the bowl, lift one side of the dough and fold it into the middle of the dough. Repeat with the other three sides of the dough then flip the dough over. You're basically turning the dough inside-out to redistribute the yeast and strengthen the gluten. Cover the bowl and after 60 minutes repeat the procedure again.
- Cover the bowl and after 60 minutes fold the dough one more time. By now the dough should be lively, elastic and airy. If the dough is still sluggish give it another hour or two at room temperature. If you want to finish making the bread in the morning cover tightly and refrigerate overnight. The next morning continue with shaping. Otherwise continue shaping the loaf on the same day.
- Turn the dough out onto a floured surface. Without kneading out the air, gently push the dough to a 9"x 12” rectangle. Tightly roll the dough from top to bottom to form a log shape. As you roll pinch the ends of the dough to form a tight roll.
- Grease a 9"x 5" loaf pan with a very light film of vegetable oil or with baking spray. Set the dough into the pan and cover with oiled plastic wrap. Set in a warm place to rise until the dough almost doubles in size, about 1 ½ hours. It will take longer to rise if the dough is cold from a night in the refrigerator. In the meantime, preheat the oven to 350 °F.
- Use a sharp knife or razor to cut a 1/2" deep slash down the center of the loaf. Brush the dough with egg wash and sprinkle with seeds.
- Bake about 35-40 minutes until golden brown and and a toothpick inserted in the center comes out clean. The interior temp should be about 200 °F.
- Cool in the pan about 5 minutes before turning out onto a cooling rack. Cool to room temperature before slicing.
Would you like to save this recipe?


As an Amazon Associate and member of other affiliate programs, I earn from qualifying purchases.
Delicious bread and prep worked for me pretty much as described. A suggestion: instead of measuring the water for the first step of mixing weigh it. I found much better results and a better balanced mix using 70g flour and 70 g water mixed with the starter to begin. The half cup of water made it too runny and I found I had to add flour in the later stages just to get the dough to firm up enough to fold.
Thanks for the tips and glad that worked for you. Although I will note that the 1/2 cup of water weighs 4 oz and step one instructs to add a cup of flour, which is 5 oz. So that ratio is actually slightly heavier in flour than equal 70g water and flour. But please do it however it works for you. I think recipes are meant to be adapted!
I tried this recipe. After adding all the ingredients the dough was almost soupy. I ended up adding almost 2 more cups of flour to get the dough manageable enough to knead. My recipe said 1 1/2 cups bread flour, and I see your current recipe calls for 2 cups.
I’m not a beginner; I’ve been making sourdough for 20 years. My starter is 100% hydration and I double-checked the measurements as I weigh everything instead of measuring.
I’m on my first 30 minute proof. We’ll see what happens.
I have no idea how anyone gets this recipe to work.
The recipe is meant to be baked in a loaf pan so a wetter dough can still hold it’s shape. I did revise the recipe to make the dough easier to handle. But even with the original amounts the recipe works. The original hydration percent would be 78%, which is quite wet. With the revision the current hydration percent is 69%, which is wet but certainly manageable. Do you weigh you ingredients or use cup measures? How someone fills the cup with flour can make a big difference in the weight of the flour. If you added 2 extra cups of bread flour, even with the original 1.5 cups to start, that would mean your dough had a total of 29 oz of flour. That would make the dough 52% hydration. That is quite a stiff dough. After the long fermentation, by the time it goes into the pan the texture should become more cohesive.
Hey! Love this recipe, but have a question about baking times.
I bake in glass pans, generally two loaves in the oven at once. Our loaves take anywhere from 50-70 minutes to get as browned as yours do with our oven set to 350 F. Any tips or insights on this? I plan to invest in an oven thermometer to check how accurate ours oven is. I’d like to stick with glass pans cause I have them but wouldn’t be opposed to investing in new ones if needed.
Sam
I bake my loaves in dark colored metal pans, so they will bake faster than in glass pans since glass is not a great heat conductor. Often I will take the loaf out of the pan once it is almost done and finish baking it right on the oven rack. Not only does this speed up the last few minutes of baking, it makes the crust nice and brown. An oven thermometer is always a good idea, but the baking time can vary because of the pan, the temp of the dough, etc. The baking times in a recipe are always just a guideline.
Is it possible to reduce or omit the honey without affecting the end result? Thanks.
Yes, You can either replace with sugar or just omit the honey. It’s there for flavor and moisture.
Hi Eileen,
I am making this now–fingers crossed! 🙂 I wanted to let you know that although you updated the measurement for the bread flour in the ingredient list (from 1.5 to 2 cups), that adjustment didn’t make it to the instructions. Right now, the instructions say that you add 1 cup of bread flour to the sponge, then only 1/2 cup to the dough mixture. In any event, I’m excited for these loaves–look like they’ll be great!
Thanks, I’ll update it.