Sourdough Sandwich Bread with a Soft Crust


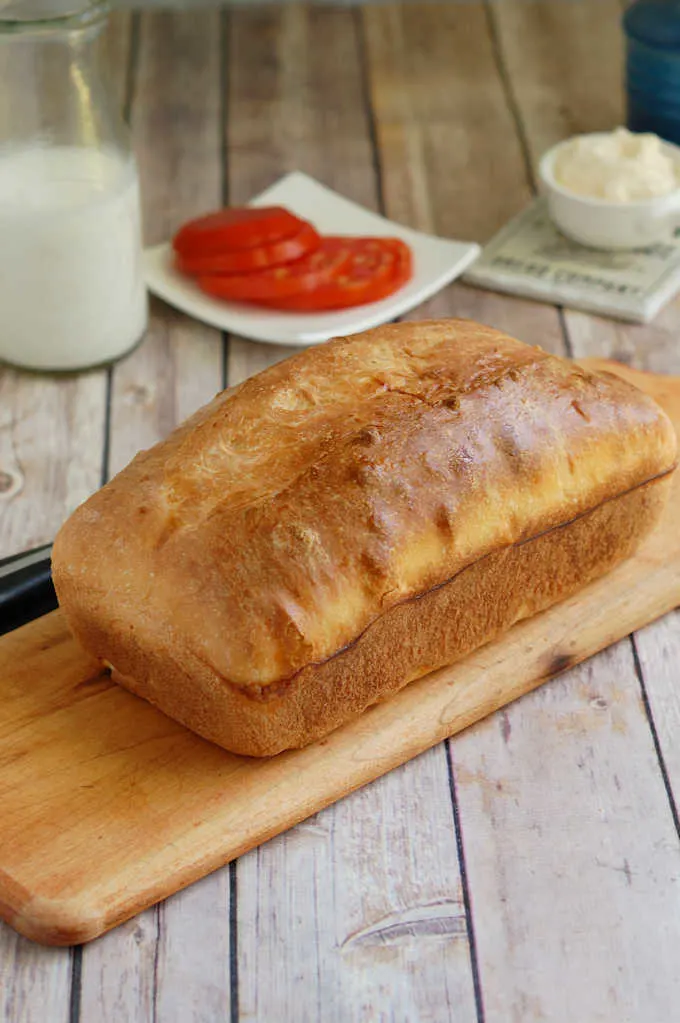
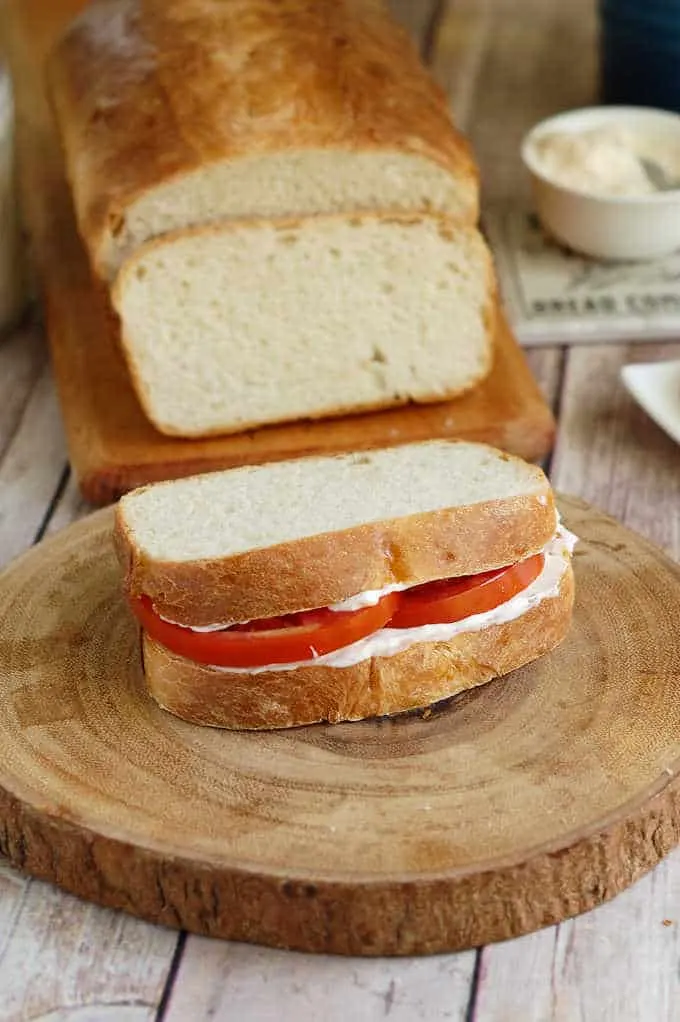
Sourdough Sandwich Bread is made with milk, butter & active sourdough starter. This soft crust sourdough bread has a tender crumb and awesome flavor. It makes a perfect sandwich.
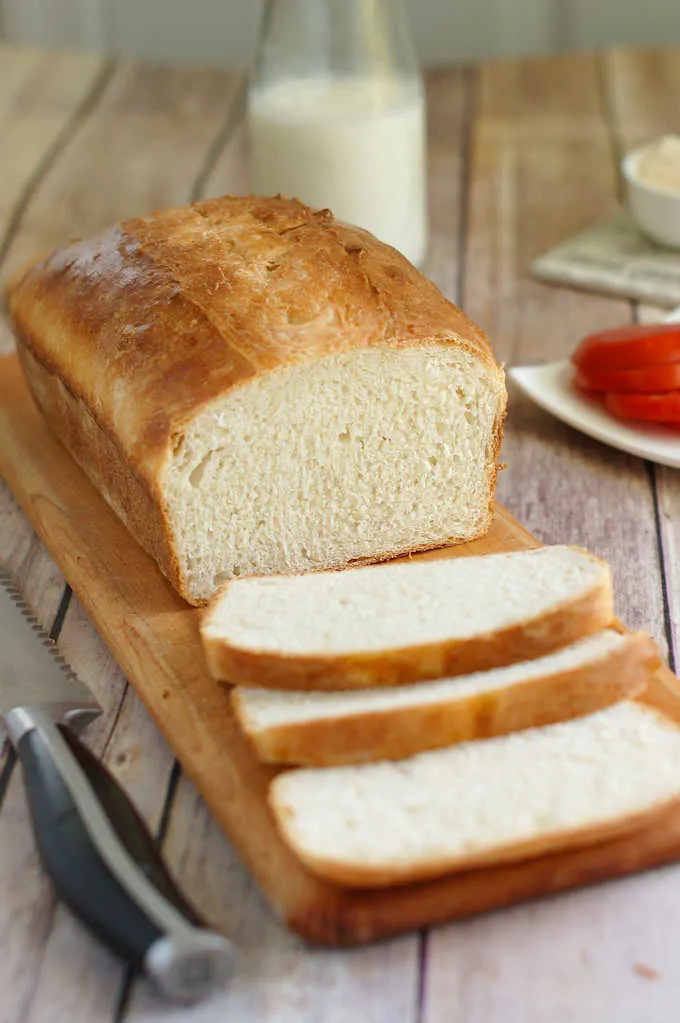
Table of contents
Why this is the best Sourdough Sandwich Bread
White Sandwich Bread doesn’t have to have the lackluster taste and squishy texture of a certain “wonderous” bread that many of us ate growing up. This sourdough sandwich bread has deep flavor, a beautiful texture and a soft crust.
Milk, butter and a whisper of sugar create a perfectly soft white bread that is ideal for making a great PB&J or BLT.
Although this recipe takes a good 8-12 hours from start to finish, the vast majority of the time is hands off.
To make this recipe even more convenient, you can let the dough rise over night. A long rise in the refrigerator does only good things for the bread.
If you don’t already have one, I can show you how to make a sourdough starter and how to feed a sourdough starter.
Ingredients
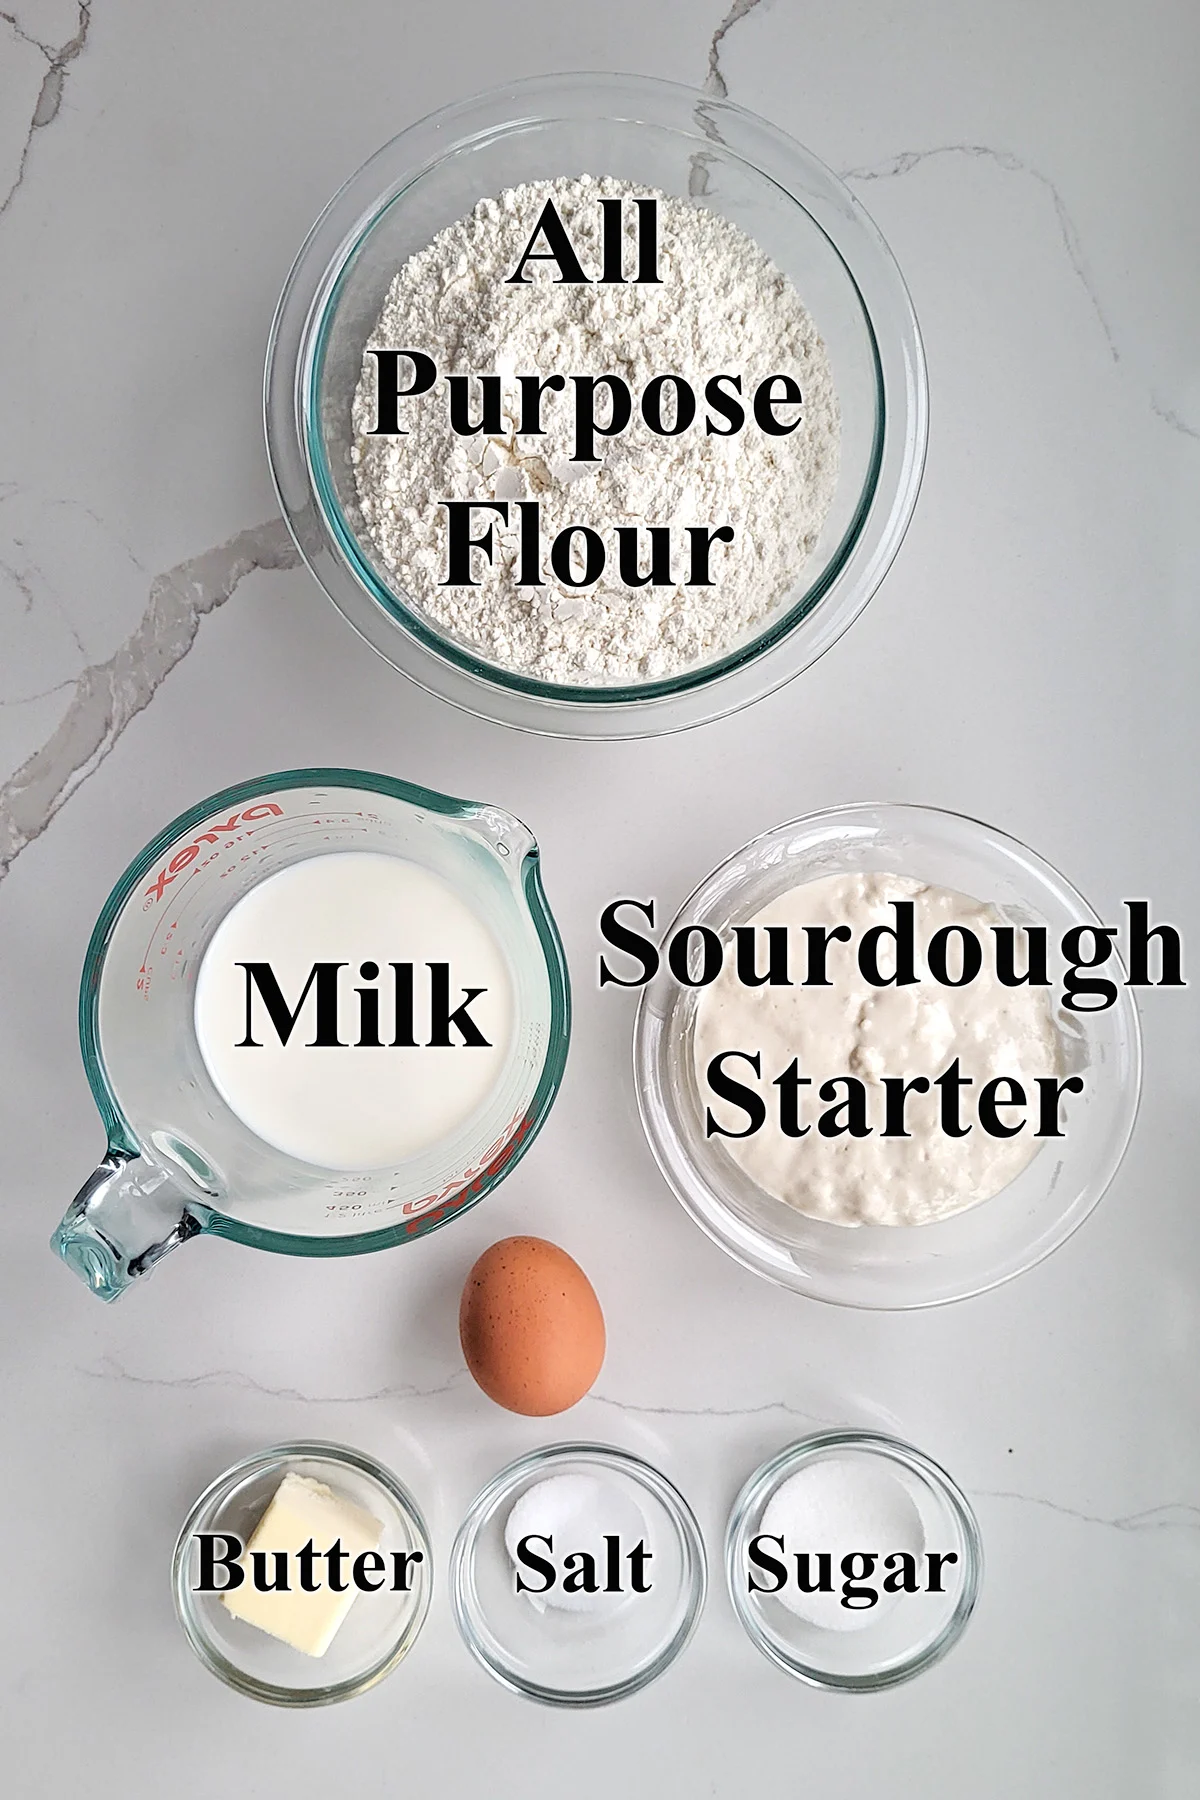
Ingredient Notes
- Sourdough Starter – This recipe was developed using 100% hydration starter. You will need to adjust the liquid or flour in the recipe if you’re starter isn’t at 100% hydration.
- All Purpose Flour – Medium protein AP flour makes a bread with a soft crumb yet develops enough gluten so the bread rises high in the oven.
- Milk – Scalding denatures (breaks down) proteins in the milk which can interfere with gluten development.
- Butter – A little fat softens the crumb of the bread.
- Salt – For flavor.
- Sugar – Enhances browning and make the crumb soft and slightly sweet.
How to make Sourdough Sandwich Bread with a soft crust
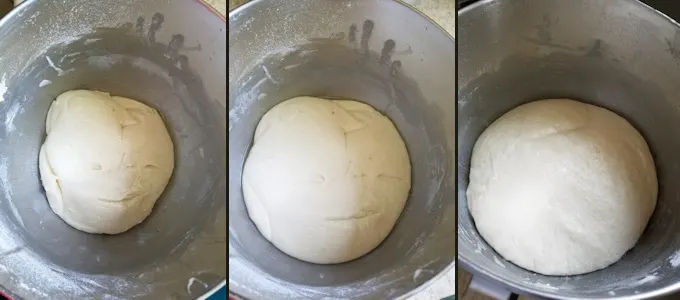
- Mix the dough and set it aside for the initial fermentation.
- With each hour of fermentation the dough will rise higher, become more active and more elastic.
- After the initial fermentation you can continue on to shape and bake the loaf, or you can refrigerate the dough overnight and continue the next day. A long, cool rest in the refrigerator enhances the flavor and texture of the dough.
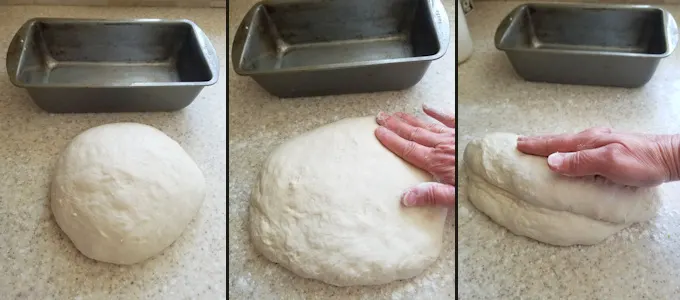
- Turn the dough out onto a lightly floured surface.
- Without kneading out the air, gently form the dough into a rectangle.
- Roll the rectangle into a log and set into a lightly greased loaf pan.
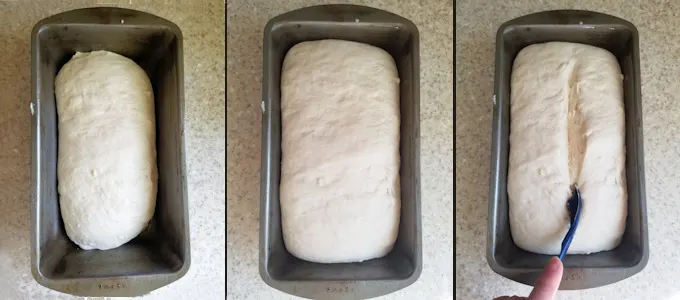
- Cover the pan and set the loaf aside to rise.
- The dough will expand to almost fill the pan.
- Slash the top of the loaf to promote even rising in the oven.
- Brush the loaf with egg wash and bake until the interior temperature is 200F.
- Cool the loaf completely before cutting.
A timeline for making Sourdough Sandwich Bread:
- If your starter needs feeding, do that the night before or early in the morning of the day you want to make the dough.
- Mix the dough in the afternoon, allow it to ferment for 3-4 hours then refrigerate the dough before going to bed.
- Take the dough out of the refrigerator first thing in the morning, shape the loaf and set it into the pan.
- To warm up the dough, turn on the oven just until it’s barely warm. Turn off the oven and set the pan with the cool dough in the oven. Remove the pan once the dough is back to room temperature. You can skip this step, but it does speed up the rising time.
- Leave the loaf to rise for 1 1/2- 2 hours, or as long as is needed to almost double in size.
- To make and bake the dough in the same day, feed your starter the evening before so it’s active by morning. Start the dough early in the morning and it should be ready to bake by late afternoon or early evening.
Storage
Sourdough Sandwich bread will keep at room temperature for 2-3 days. The bread (sliced or whole) can be frozen for up to a month.
I know you hate to throw away that sourdough discard. Check out these recipes that use sourdough discard.
More great sourdough breads
- Whole Wheat Sourdough Bread
- Sourdough Hoagie Rolls
- Sourdough Multigrain Bread
- Sourdough Semolina Bread
- Sourdough Rye Bread
- Crusty Sourdough Bread
If you love this recipe as much as I do, I’d really appreciate a star rating and a quick comment. Ratings and comments help my recipes show in search results. Thanks!

Sourdough Sandwich Bread Recipe
Ingredients
- 8 oz whole milk (1 cup)
- 1 oz unsalted butter
- 8 oz active sourdough starter (1 cup, 100% hydration)
- ½ oz granulated sugar (1 tablespoon)
- 1 ½ teaspoons salt
- 12 ½ oz all purpose flour (2 ½ cups, see note)
- 1 large egg (for egg wash)
Instructions
- Warm 8 oz whole milk in the microwave to until scalding hot (just before it comes to a boil.) Stir 1 oz unsalted butter into the warm milk to melt. Set the milk aside to cool until it's slightly warmer than body temp.
- In a mixer bowl, combine the warm milk with 8 oz active sourdough starter, ½ oz granulated sugar and 1 ½ teaspoons salt and stir to combine. Add 1 ½ cups of the flour and stir until the batter looks like thick pancake batter. If using a stand mixer, change to the dough hook.
- With the mixer running, slowly add the remaining flour until the dough gathers on the hook and clears the sides of the bowl. Knead for 5 minutes. If mixing by hand, stir in as much flour as you can then turn the dough out onto a floured surface and knead in the remaining flour.
- Remove the dough from the bowl onto a lightly floured surface. The dough should be soft and slightly sticky. Knead to form a smooth ball. If the dough is very sticky sprinkle a little more flour as you knead.
- Place the dough in an oiled bowl, turning once to coat the dough. Cover the bowl and set it aside at room temperature.
- After 60 minutes uncover the bowl, lift one side of the dough and fold it into the middle of the dough. Repeat with the other three sides of the dough then flip the dough over. You're basically turning the dough inside-out to redistribute the yeast and strengthen the gluten. Cover the bowl and after 60 minutes repeat the procedure.
- Cover the bowl and after 60 minutes fold the dough one more time. By now the dough should be lively, elastic and airy. If the dough is still sluggish give it another hour or two at room temperature. If you want to finish making the bread in the morning return the dough to the bowl, cover tightly and refrigerate overnight. The next morning continue with shaping. Otherwise continue shaping the loaf on the same day.
- Grease a 9"x 5" loaf pan with a very light film of vegetable oil.
- Turn the dough out onto a floured surface and without kneading out the air, gently push the dough to a 9" rectangle. Tightly roll the dough to form a log.
- Set the dough into the pan and cover with a damp kitchen towel or oiled plastic wrap. Set in a warm place and rise until the dough is doubled in size, about 1-1½hours.
- Preheat the oven to 350 °F. Use a sharp knife or razor to cut a 1/2" deep slash down the center of the loaf. Brush the loaf with egg wash.
- Bake about 30-35 minutes until golden brown and and a toothpick inserted in the center comes out clean. The interior temp should be 200 °F.
- Cool in the pan for 5 minutes before turning out onto a cooling rack. Finish cooling to room temperature before slicing,
Would you like to save this recipe?


As an Amazon Associate and member of other affiliate programs, I earn from qualifying purchases.
Hi there,
First time with sourdough starter (started about 2 weeks ago) and first time ever making break.
So I followed all the steps above (to the best of my ability) and unfortunately the result was a super dense loaf. It smells great and it’ll probably still taste good (still waiting for it to cool) but not sure what I did wrong.
My starter was bubbly and smelled good however I noticed it was a tad runnier than it used to be. Perhaps I am feeding it incorrectly? It used to be thicker and more of a “doughy” consistency.
Following all the steps (didn’t do the overnight refrigeration – I just spent the entire day doing the recipe) I even checked the “bounce back” it dented and slowly filled in. Reading comments above that meant it was ready to bake.
So yeah, maybe I didn’t kneed enough? I know the one step I was confused on was the step before placing in the loaf pan. I took it out careful not to push out air bubble and “shaped” into a rectangle. I didn’t know what you meant by roll into a log so I turned it over in half (log) and literally rolled into a log and placed in the pan. The knife score didn’t go so well – it stuck to the knife.
Is your starter a 100% hydration starer? That is, fed equal weights of starter-flour-water. Did it look like the bread rose and then fell or didn’t rise at all in the oven?
Hi, my dough is very liquidy, what did I miss? This is the third time I’m making it and thefirst time it was perfect, the second time it ramained liquidy for a long time, and now it’s liquidy again. Does a hot home make it this way? I’m in California and we are currently going through a heat wave. Thanks!
The heat will matter less than the texture of your starter. Was the starter at a different stage of activity the first time you made it? Do you weigh your ingredients or use volume measure? If you use cup measures make sure to use the “dip and sweep” method.
So when I put the dough on the floured surface I missed the part about making the rectangle and rolling up tightly. I just shaped it into a fat log and put in the loaf. It has risen well but I wonder if I will have to many big holes and should reshape and roll it now? It looks beautiful though.
I would go ahead and bake it anyway.
This sandwich bread is amazing! I only refrigerate when I run out of time. I also take the temp of my dough prior to bulk fermentation so I know about how long to let it go. Typically I end up at about 4-5 hrs for BF with my 75-76’ dough. My dough rises best in my microwave. Then I wait until it fills up my bread pan on the next rise before baking. The egg wash is a must in my book! Makes the crust super yummy and looks beautiful. I store in a container without the lid fully engaged or in a tea towel. The only question I had is is there a nutrition fact for fats and calories?
I don’t calculate the nutrition on my recipes. You can always copy and paste the ingredients into a recipe calculator.
Do you think almond milk or pea milk would work in this recipe?
Yes, I think they should work.