Sourdough Ciabatta
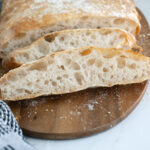
Sourdough Ciabatta Bread has a crisp crust & light, chewy crumb full of big jagged holes. Made with a full cup of active sourdough starter, this tasty loaf makes great panini, or just tear off a hunk and dip it in olive oil.

Table of contents
Why you’ll love this recipe
This recipe has just 4 simple ingredients, including water! It’s amazing that those four simple ingredients create a loaf with such a deep and complex flavor.
The acidity in the sourdough starter strengthens the dough, which allows it to hold onto large air bubbles despite the high hydration (90%). The sourdough starter improves the keeping quality of the bread and adds a layer of complexity to the flavor.
This is a very wet dough that can be a bit tricky to handle. The good news is that the loaf is supposed to be kind of free form so don’t worry if it doesn’t look so pretty going into the oven.
Watch the recipe video to see how to gently handle the dough to avoid loosing the air bubbles when the dough is shaped. The video shows the process for mixing ciabatta with commercial yeast, but once the dough comes together the process for forming the loaf is the same for this sourdough loaf.
Ingredients
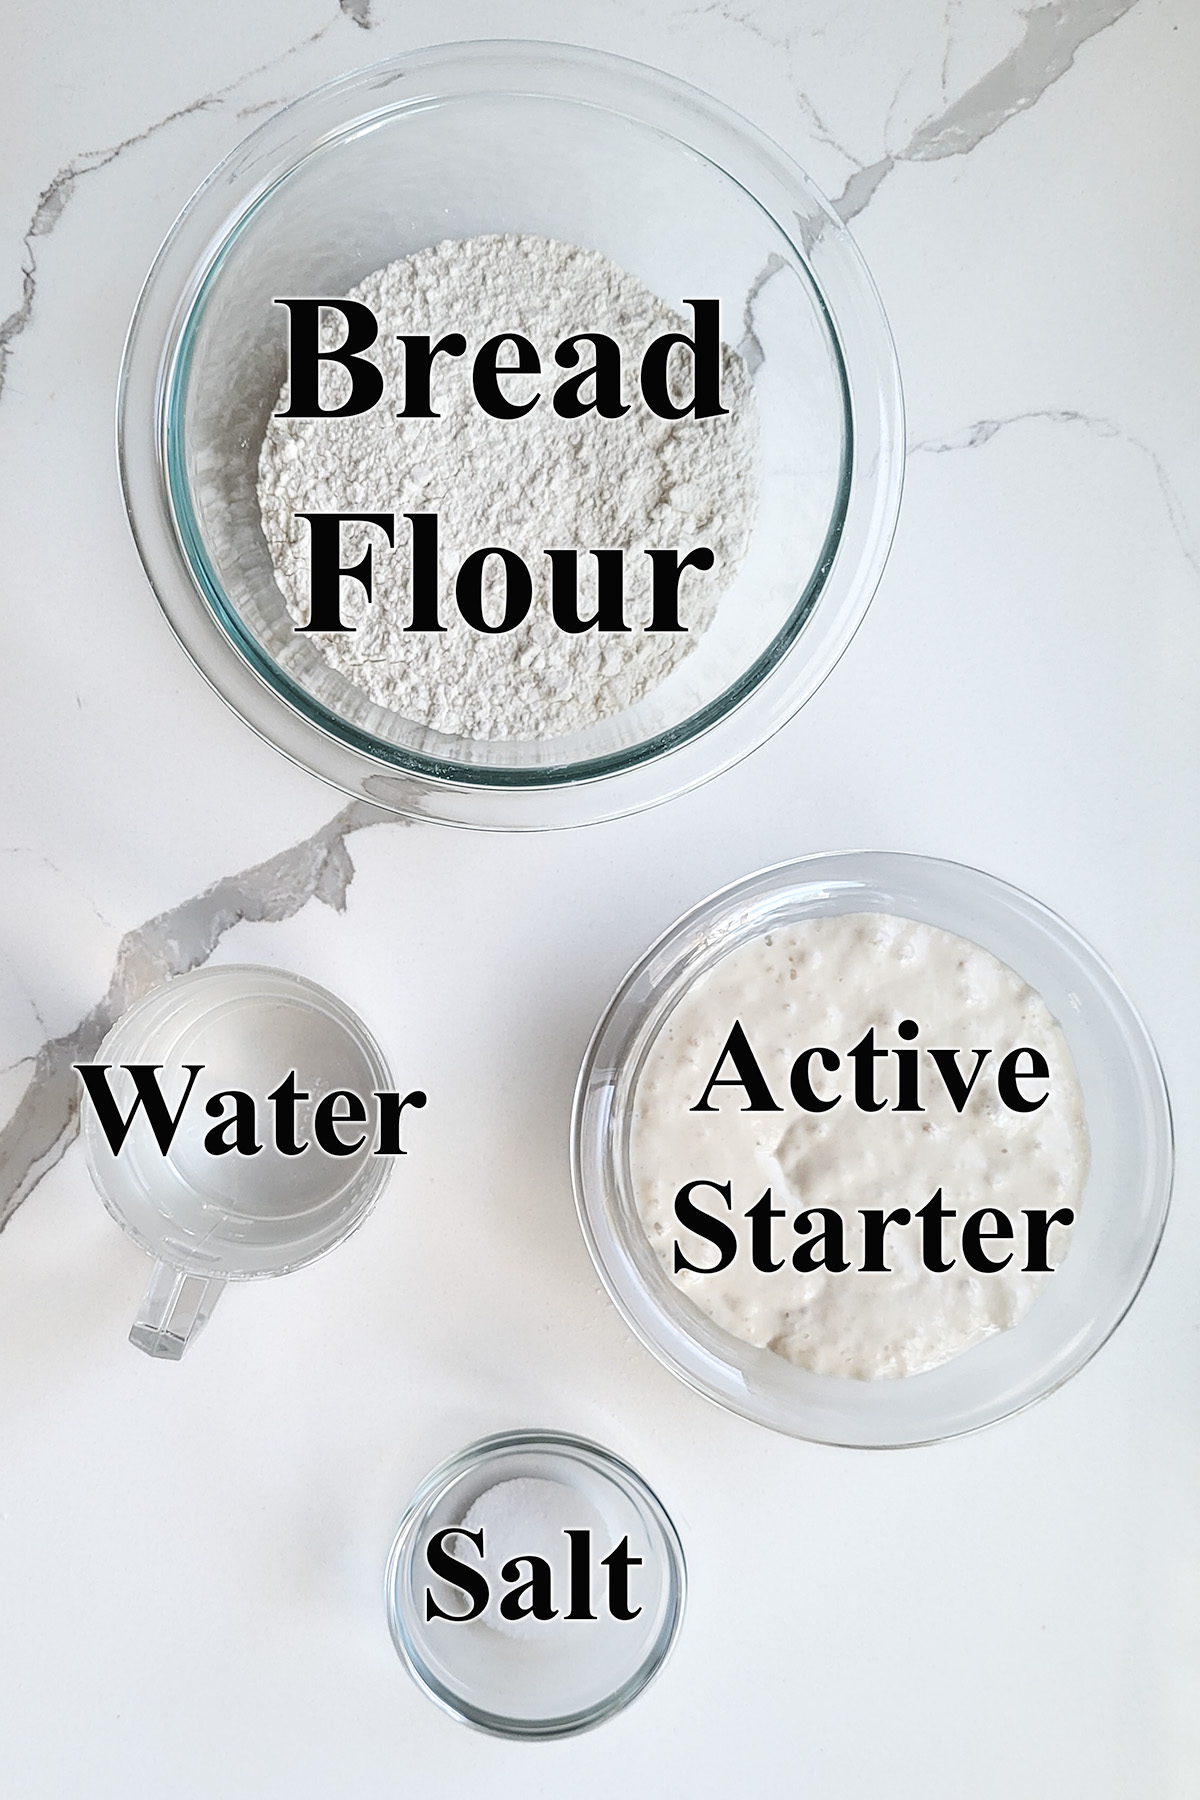
Ingredient Notes
- Active Sourdough Starter – This recipe was developed using 100% hydration starter at the peak of activity. If your starter has a different hydration percent you will need to adjust the water or flour. You’re going for 90% hydration dough.
- Bread Flour – At 90% hydration high protein bread flour helps form enough gluten to give the dough structure. That structure will hold in the large air bubbles as the dough rises in the oven.
Process Photos
Here’s what the recipe process looks like at each stage. Refer to the recipe card below for measurements and exact instructions.
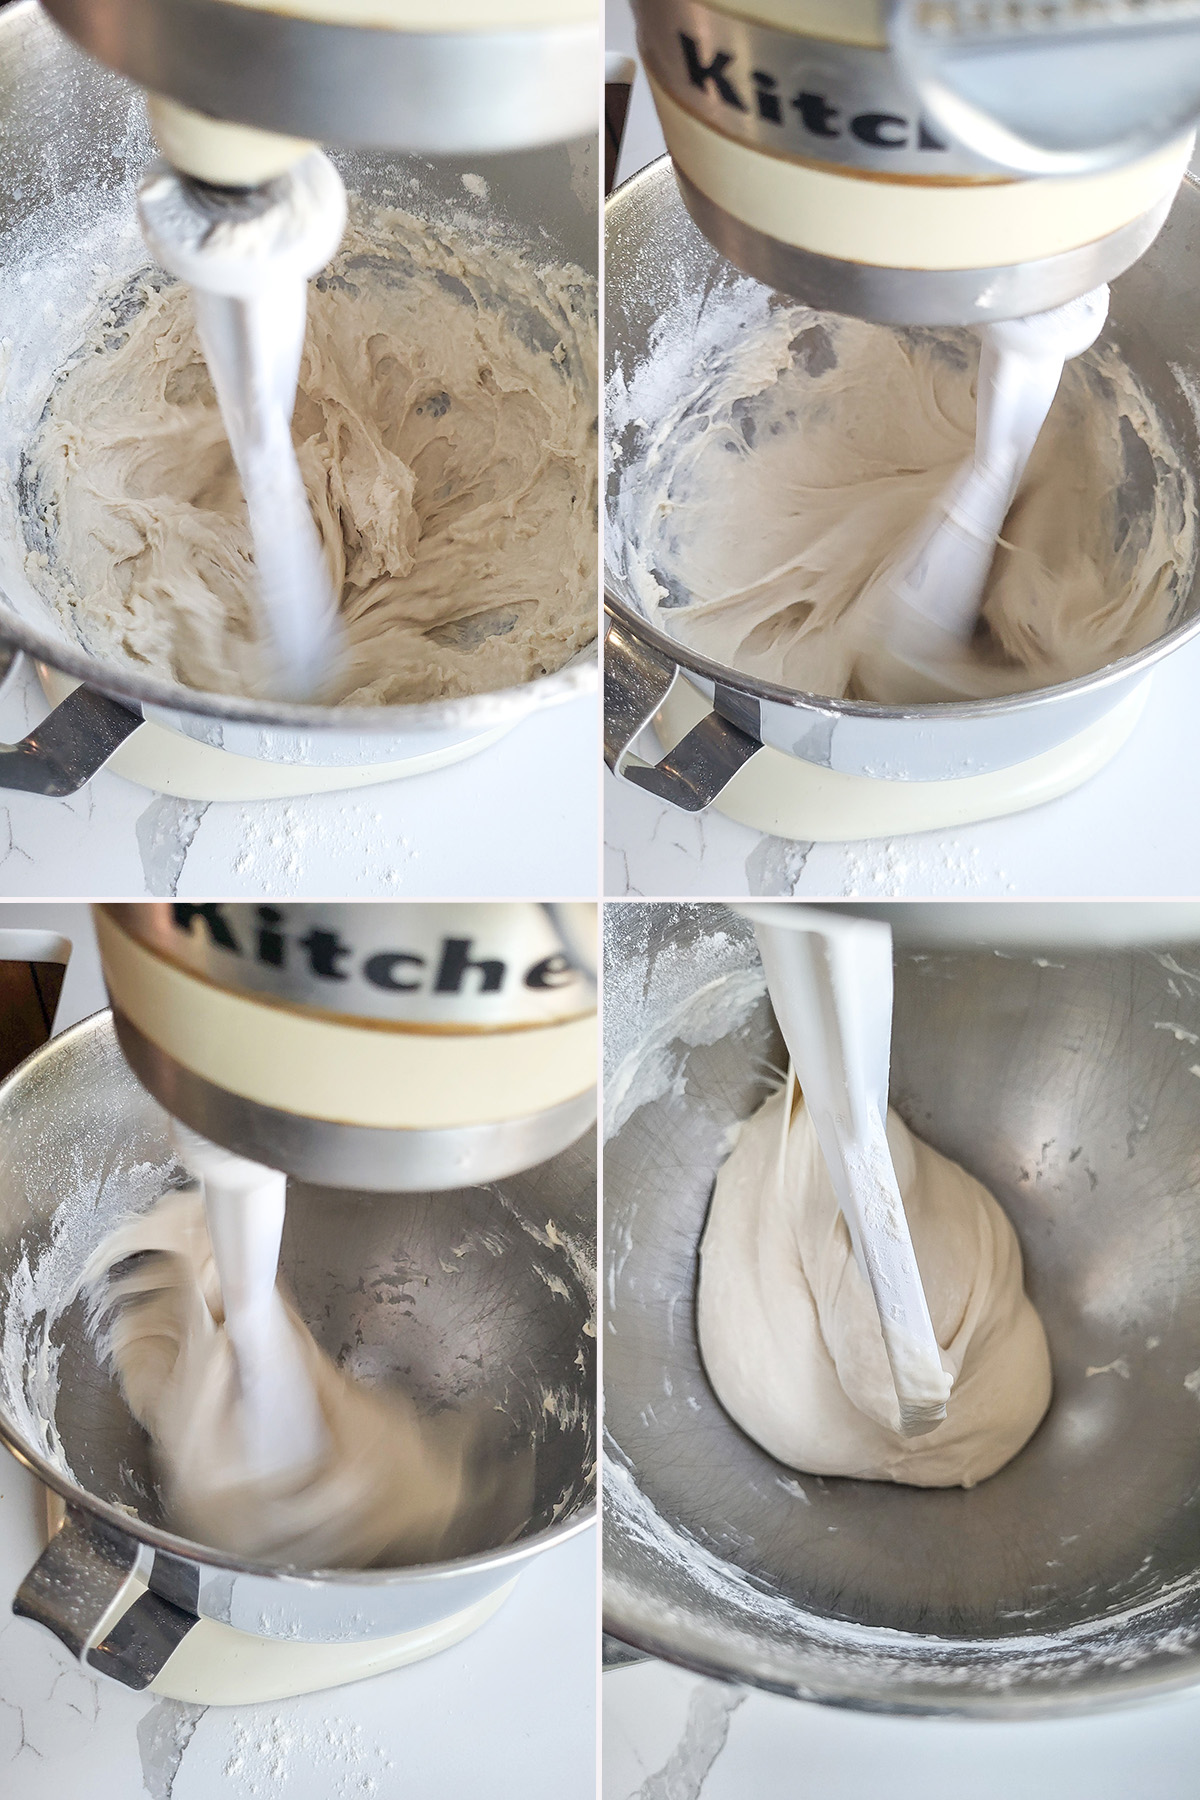
- Combine all the ingredients in a mixing bowl. Mix the dough for 5 minutes on medium high speed.
- At first the dough will be quite sticky and shaggy.
- As the gluten develops, the dough will begin to gather on the paddle.
- The dough is ready when it gathers on the paddle and clears the sides of the bowl.
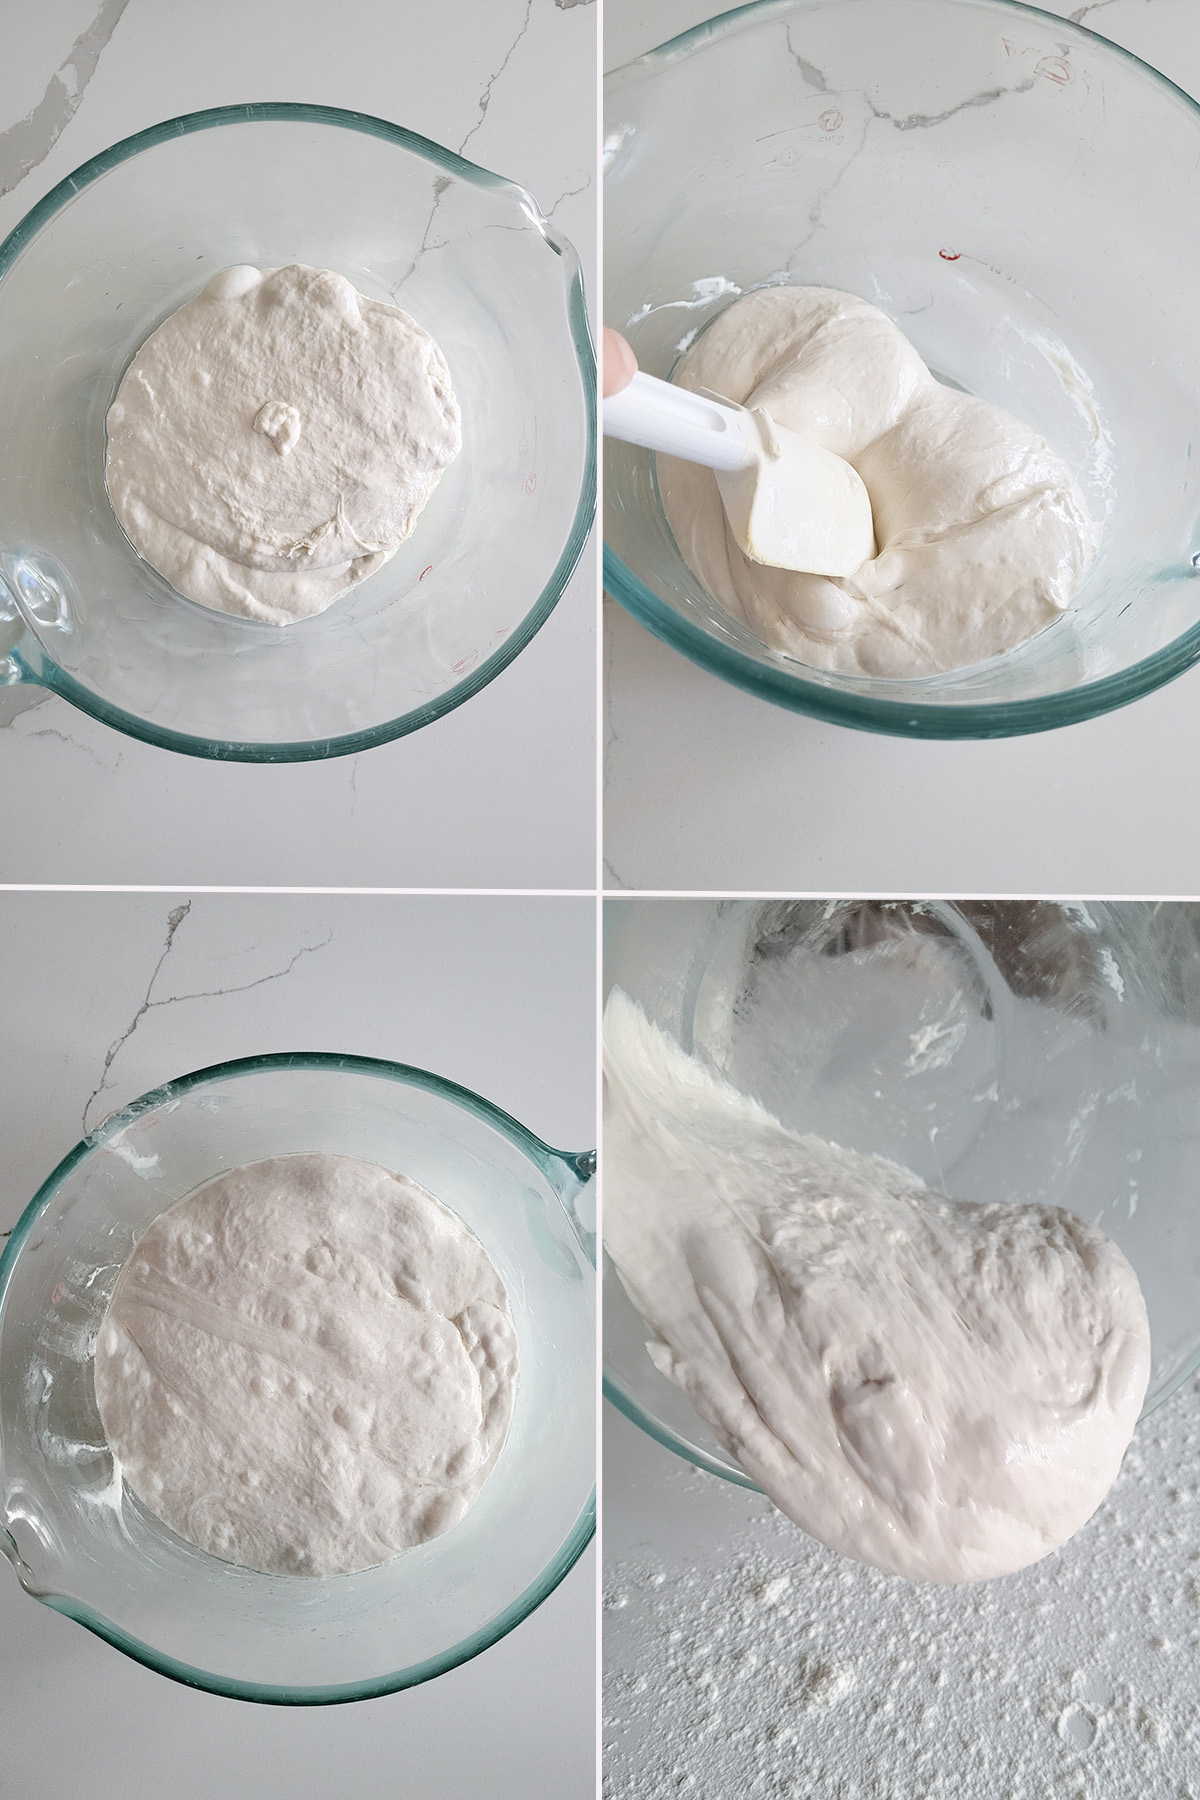
- Transfer to the dough to an oiled container and set it aside.
- After 60 minutes use a spatula to fold the dough from the 4 sides towards the middle, then turn the dough. Repeat that procedure 2 more times.
- By the end of 3 hours the dough should be lively, elastic and airy. If the dough is still sluggish give it another hour or two at room temperature. Cover and refrigerate the dough overnight.
- Take the dough out in the morning and gently turn it out onto a well-floured surface. Do not knead.
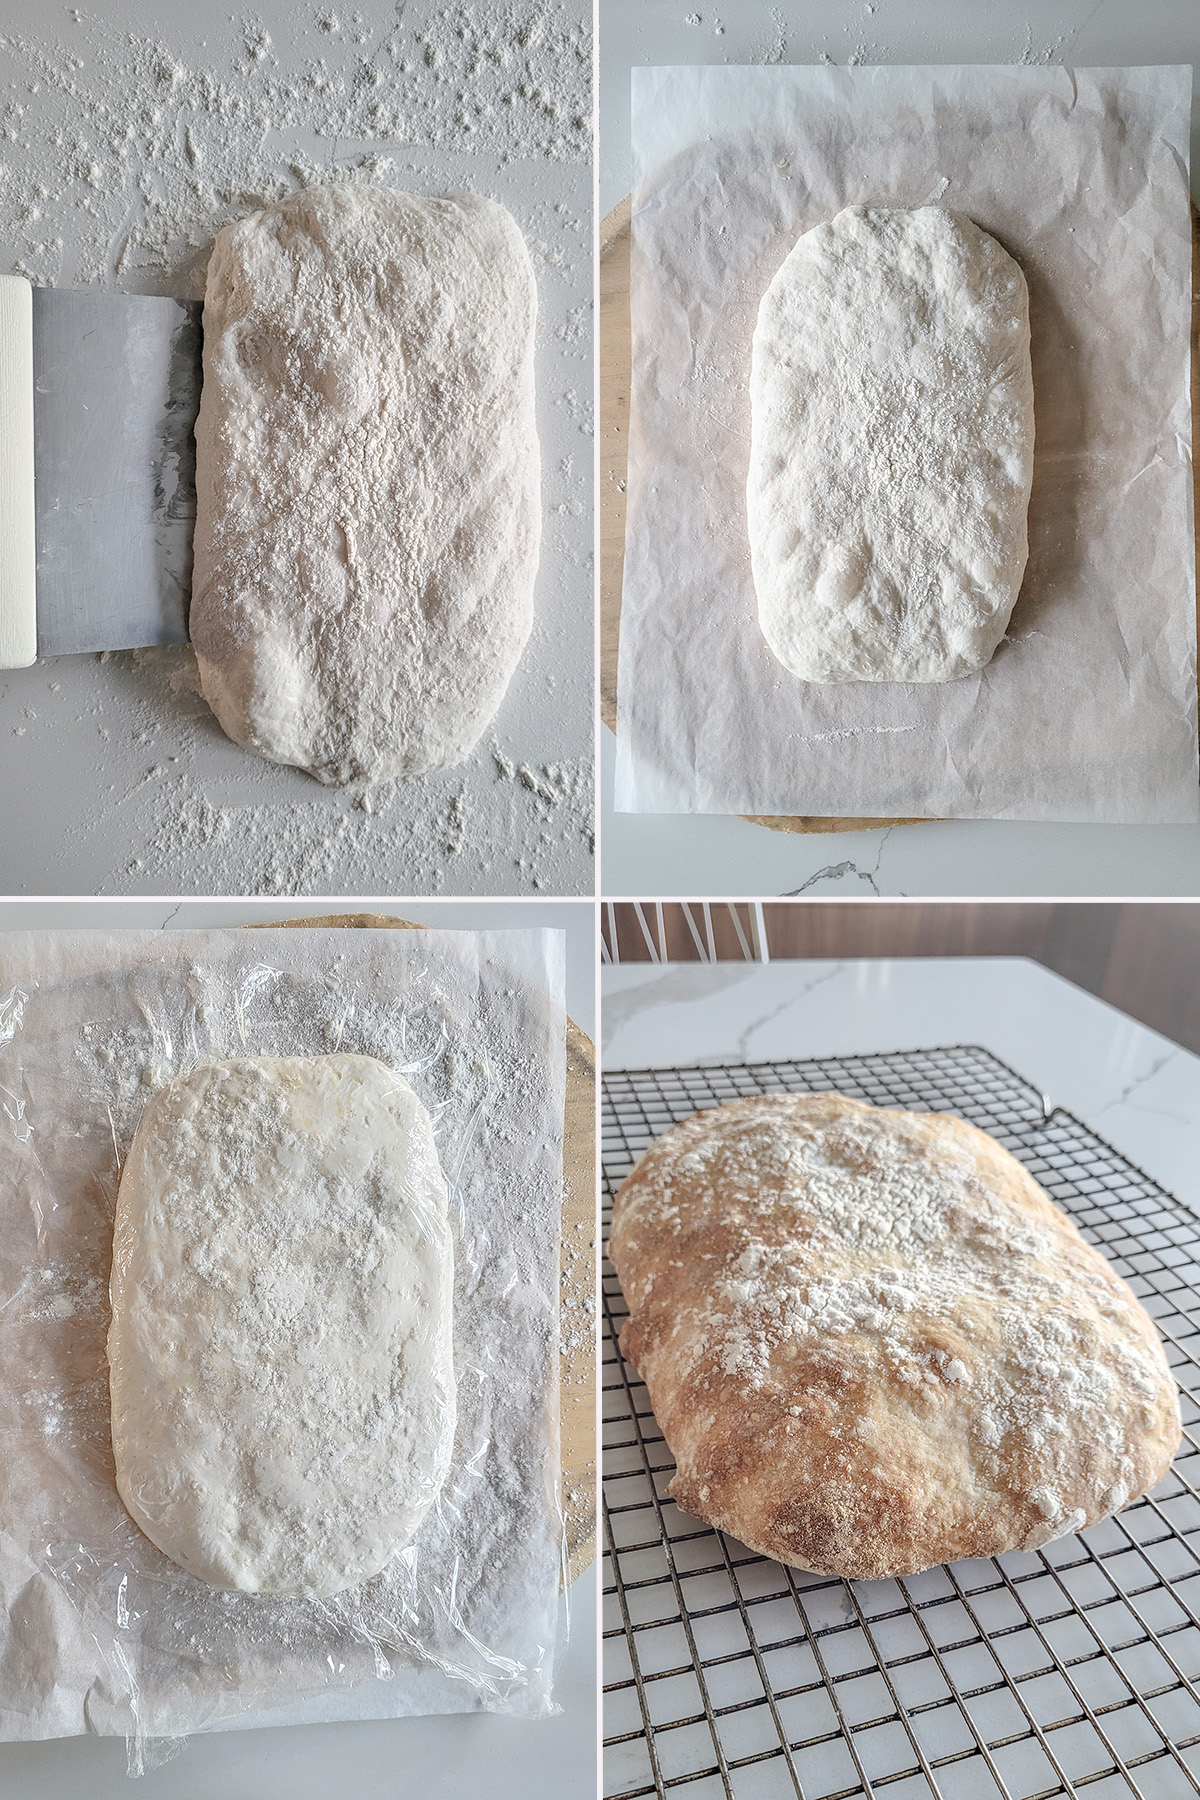
- Using well-floured hands and a bench scraper or spatula, gently shape the dough to approximately 10″x 4″ rectangle.
- Transfer the loaf to a sheet of parchment paper. Slide the paper onto a baking sheet or peel. Cover and set aside for 1 – 1 1/2 hours. Meanwhile, preheat the oven.
- Slide the loaf into the oven.
- Bake until golden brown and crisp.
Recipe Tips
- For this recipe I don’t recommend using volume (cup) measurements. Weighing your ingredients is the best way to ensure accuracy. This is a very wet (high hydration) dough and even a small shift in the amount of flour could throw off the texture of the bread.
- If you have a baking stone or steel this is a good time to use it for the crispiest crust.
- Introducing steam into the oven helps make a thin and crisp crust on the bread.
- To make ciabatta rolls, follow the recipe to the point where you form the rectangle. Using plenty of flour and a bench scraper or sharp knife, cut the dough into 4 or 6 smaller rectangles. Use floured hands to reform the rolls.
Storage
Sourdough Ciabatta Bread is best the day it’s baked but will keep at room temperature for a day. Leftovers can be frozen for up to a month.
More Great Sourdough Bread Recipes
If you love this recipe as much as I do, I’d really appreciate a star rating and a quick comment. Ratings and comments help my recipes show in search results. Thanks!
Sourdough Ciabatta Bread
Video
Ingredients
- 8 oz active sourdough starter (100% hydration)
- 5 oz warm water
- 6 oz unbleached bread flour
- 1 teaspoon table salt
Instructions
Make the dough (day 1)
- In the bowl of a stand mixer, using the paddle attachment, or in a large mixing bowl, combine 8 oz active sourdough starter with 5 oz warm water and 6 oz unbleached bread flour. (It is possible to mix this dough by hand but with such a soft dough you'll have to use a wooden spoon to vigorously stir the dough since it's too wet to knead.)
- Add 1 teaspoon table salt and mix on medium low speed until the dough comes together. It will be quite soft and sticky. Still using the paddle, increase the speed to medium high and mix for 5 minutes. The dough should gather on the paddle and clear the sides of the bowl.
- Scrape the dough into a lightly oiled bowl. Cover the bowl and set aside at room temperature for 3-5 hours. Every hour repeat the following procedure: Uncover the bowl, use a dough scraper or spatula to lift one side of the dough over into the middle of the dough. Repeat with the other three sides of the dough. By the end of 3 hours the dough should be lively, elastic and airy. If the dough is still sluggish give it another hour or two at room temperature.
- Put the dough in the refrigerator overnight. Alternately, you can go ahead with shaping the dough if you want to bake it the same day.
Bake the Ciabatta (Day 2)
- Take the dough out of the refrigerator. Have a half sheet of parchment paper or a silicone baking mat ready to receive the loaf after it's shaped.
- Carefully turn the risen dough out onto a generously floured surface. Sprinkle the top of the dough with flour. Use well-floured hands to form the dough into a 10" long rectangle that is about 4" wide. Carefully transfer the dough to the parchment sheet and use your hands to push the sides of the dough to reform the rectangle. Lightly sprinkle the top of the loaf with flour and cover the dough with plastic wrap. Let it rise for about 1½-2 hours until it is light and puffy. If the dough is cold from the refrigerator it will take longer to rise.
- Preheat the oven to 450 °F. Place a baking stone or steel in the oven if you're using one. Put a small pan at the bottom of the oven to preheat.
- When the dough is ready slide the parchment paper with the dough onto a baking sheet or, if you're using a baking stone or steel slide the loaf onto the back of the baking sheet. Slide the pan with the loaf into the oven or slide the paper with the loaf onto the baking stone. Pour a ½ cup of hot water into the pan at the bottom of the oven. Immediately close the oven to trap the steam created. Bake about 15 minutes until puffed and golden brown.
- Transfer the loaf to a cooling rack and cool to room temperature.
Would you like to save this recipe?


As an Amazon Associate and member of other affiliate programs, I earn from qualifying purchases.

Followed the recipe and used AT PEAK starter. Used my KA on 7-8 speed for approximately 5 minutes and the dough did exactly what the video shows. Let the dough fridge proof for 21 hours and then proceeded according to the recipe. Baked on a baking stone and used the suggested steaming.
My results were delicious with a crispy, thin crust and a full-of-holes crumb.
PERFECT results, I am delighted. Thanks for sharing your recipe, Eileen. You nailed it!
This recipe seemed like it didn’t have enough flour for the amount of water and starter.
We mixed for well over 5 minutes and the dough was quite liquidy and sticky. Should we have mixed it longer? We ended up adding more flour to get the dough to cling to the paddle.
Suggestions?
Ciabatta is ciabatta because of the super wet dough. As I mentioned in the post, it is 90% hydration. I made this dough over and over again before publishing and I will say that every time I waited for the dough to cling to the paddle and clear the bowl and it always did eventually. It was always very close to 5 minutes of kneading, but depending on conditions it could vary slightly. Did you watch the video to see how the dough changes while it’s kneading? Did you use a 100% hydration starter at the peak of activity? Did you use bread flour?
Another great sourdough recipe from the master!
I make my sourdough starter with potato flakes instead of flour. Can I make your bread recipes with it?
Hmmm, I haven’t used a potato flake starter. It would certainly work as far as leavening. You may need to do some adjusting with the flour to ensure you have enough gluten in the dough since a potato starter wouldn’t have gluten. Is the starter 100% hydration?