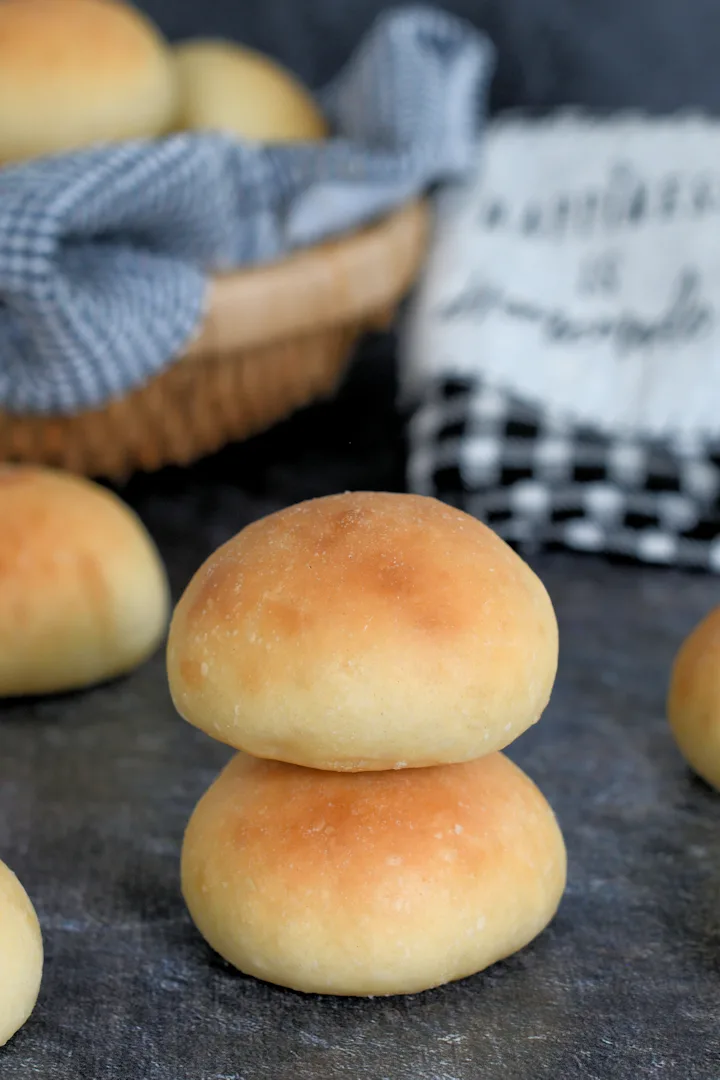
Sourdough Dinner Rolls with Buttermilk


Sourdough Dinner Rolls are soft, buttery, light and luscious. They have a special flavor and texture thanks to a healthy dose of sourdough starter.
Before we get into the recipe, I want you to know that if you don’t have a sourdough starter, you can make Buttermilk Dinner Rolls with commercial yeast.
Why you’ll love this recipe
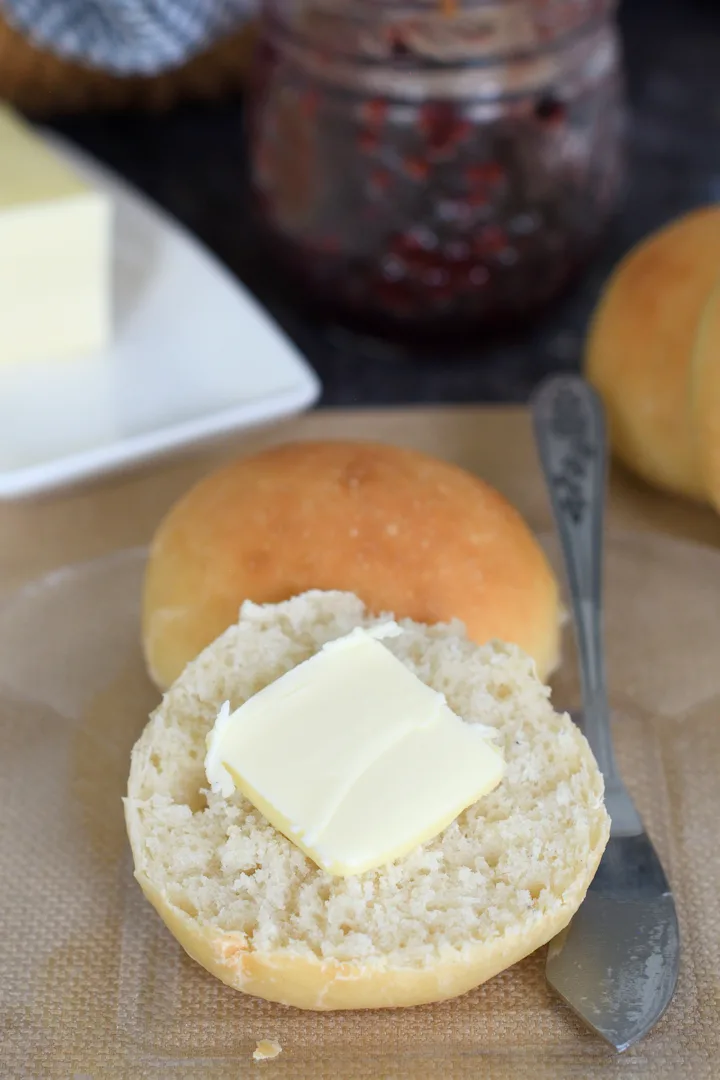
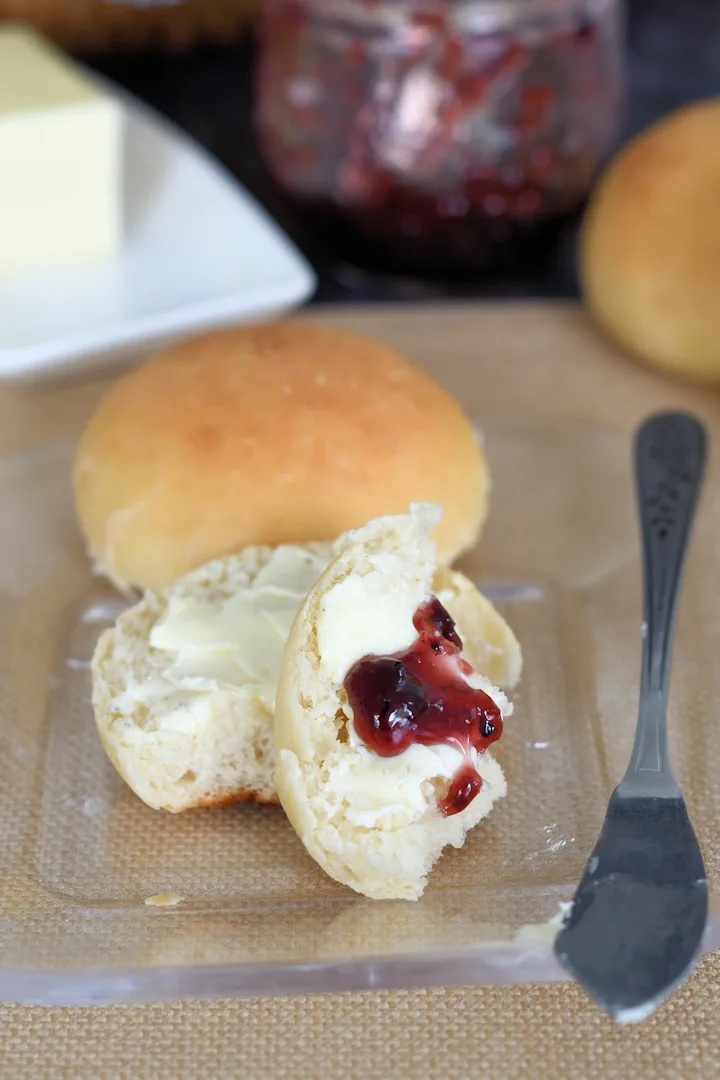
Whether you use commercial yeast or sourdough starter for leavening, a really great dinner roll should be soft, buttery and slightly sweet.
Acidic buttermilk softens the gluten in the bread even for an extra tender crumb and great flavor. A whole cup of sourdough starter makes a light and tender roll with amazing flavor.
Melted butter brushed onto the rolls before baking keeps the tops soft and a little more brushed on as soon as they come out of the oven is the perfect finishing touch.
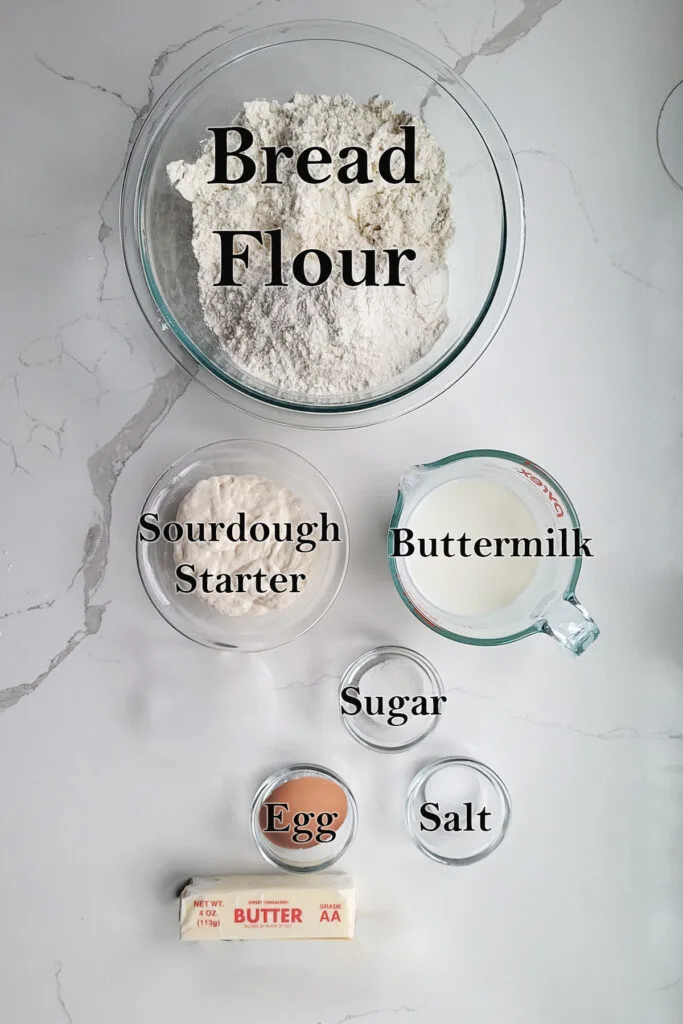
Ingredients
How to make Sourdough Dinner Rolls
Here’s what the recipe process looks like at each stage. Refer to the recipe card below for measurements and exact instructions.

- Combine the starter with the wet ingredients and half the flour.
- Switch to the dough hook and add the remaining flour.
- Toss in the softened butter.
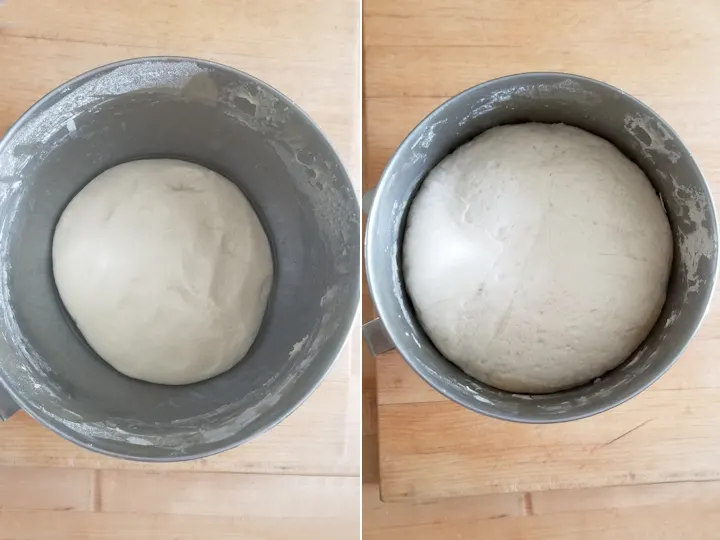
- Set the dough aside to ferment for at least 3 hours.
- After the initial fermentation you can refrigerate the dough overnight or continue with the recipe the same day.
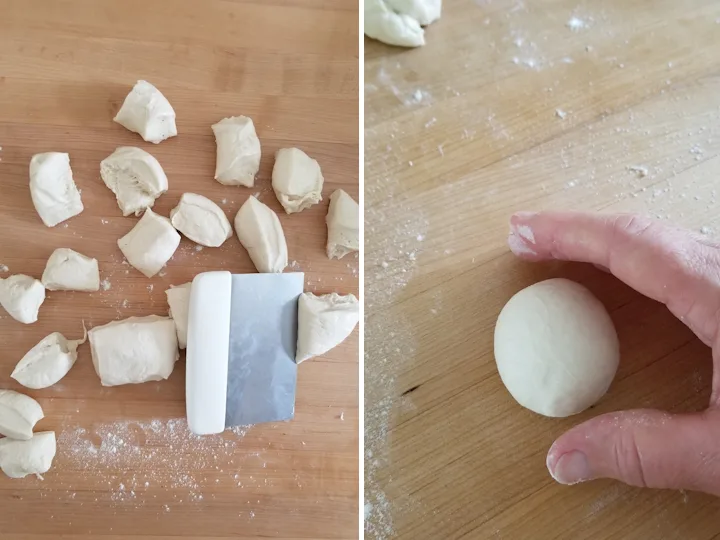
- Divide the dough into 24 equal pieces.
- Shape each piece into a smooth ball.
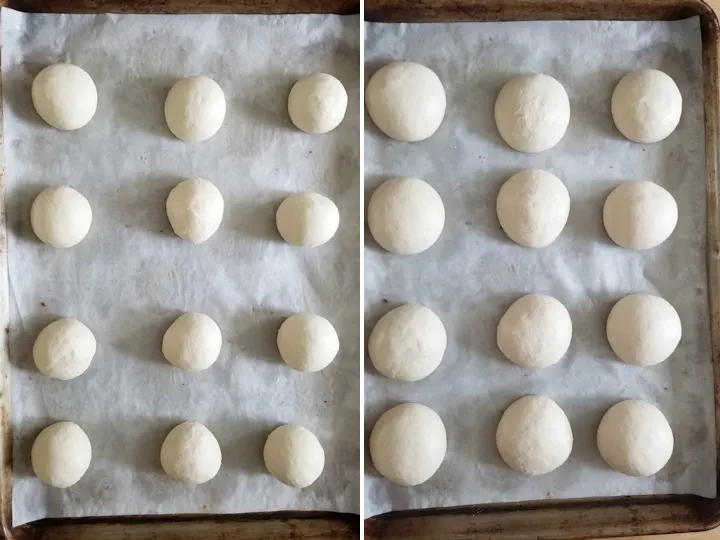
- Set the rolls aside to rise.
- At this point the rolls can go into the refrigerator for several hours or overnight.
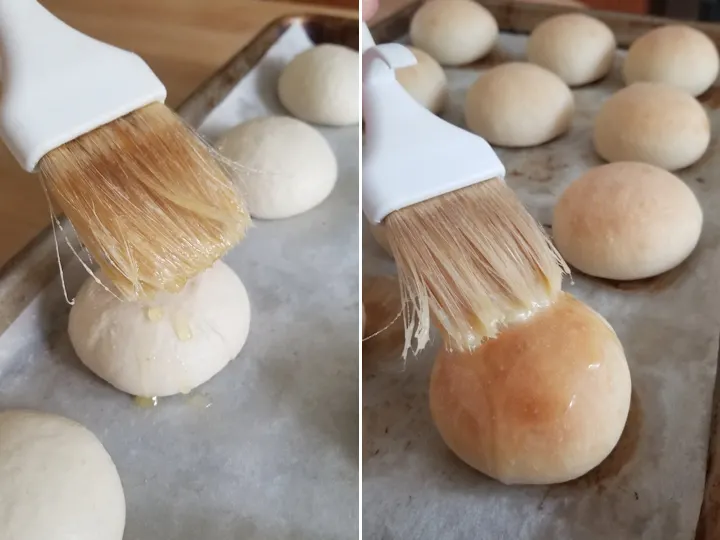
- Brush the rolls with melted butter before and after baking.
A timeline for making Sourdough Dinner Rolls:
- If your starter needs feeding, do that the night before or early in the morning of the day you want to make the dough.
- If you want to make dough the same day that you will bake, mix the dough first thing in the morning. This means your starter should be fed the night before. Allow the dough to ferment at room temperature during the day. By later in the afternoon the rolls should be ready to bake and will be fresh for dinner.
- If you want to make the dough the day before baking, mix the dough in the afternoon. Allow it to ferment at room temperature during the day. Refrigerate the dough in the evening before going to bed. Or shape the rolls, wrap the tray and refrigerate overnight.
- Take the dough out in the morning, shape the rolls and set them aside to rise. The rise will take longer since the dough is cold.
Storage
Dinner rolls are best the day they are baked but will keep at room temperature for 1-2 days. Leftover rolls can be frozen. Defrost and then rewarm in a 200F oven for the best results.
I know you hate to throw away that sourdough discard. Check out these recipes that use sourdough discard.
If you love this recipe as much as I do, I’d really appreciate a star rating and a quick comment. Ratings and comments help my recipes show in search results. Thanks!

Sourdough Dinner Rolls
Ingredients
- 8 oz active sourdough starter (1 cup, 100% hydration)
- 12 oz buttermilk (1 ½ cups, room temperature)
- ½ oz granulated sugar (1 tablespoon)
- 1 large egg (room temperature)
- 1 ½ teaspoons table salt
- 20 oz bread flour (4 cups, see note)
- 4 oz unsalted butter (room temperature)
Instructions
- Combine 8 oz active sourdough starter, 12 oz buttermilk,½ oz granulated sugar, 1 large egg and 1 ½ teaspoons table salt in a mixing bowl. Mix on low speed to combine the ingredients. Add half of the bread flour and mix to combine. Switch to the dough hook if mixing on a stand mixer.
- With the mixer running on low speed, add the remaining bread flour until the dough gathers on the hook and begins to pull away from the sides of the bowl. Knead on medium for 3 minutes then reduce the speed to low. If mixing by hand stir in as much flour as you can with a wooden spoon, then knead the remaining flour in by hand.
- With the mixer running, toss in 4 tablespoons (half) of the softened butter a tablespoon at a time. If working by hand, knead in the butter. Reserve the remaining butter.
- Mix on medium for 3 minutes, if the dough is still very sticky add a little flour. The dough will stick to the bottom of the bowl but should gather on the hook. Dump the dough onto a floured surface and knead to form a smooth ball. The dough should be soft and smooth.
- Transfer the dough to a lightly oiled bowl, turning once to coat the dough. Cover the bowl and set it aside at room temperature for 3 hours. Every hour or so check on the progress of the dough by folding it over itself in the bowl. This will help redistribute the yeast too. After about 3 hours the dough should be lively, elastic and airy. If the dough is still sluggish give it another hour or two at room temperature. At this point the dough can be refrigerated for up to 2 days.
- Line two half sheet pans with parchment paper or a silicone baking mat. Turn the dough out onto a lightly floured surface and roll the dough to form a long log shape. Using a sharp knife or bench scraper cut the dough into 24 pieces.
- Roll each piece of dough under your cupped hand to form a smooth ball. Place the rolls onto a parchment lined baking sheet. Melt the reserved butter and use half of it to brush the rolls. Cover and set aside in a warm spot to rise until nearly doubled in size and the dough springs back slowly when poked, about 1-2 hours. The rising will take longer if the dough was cold from the refrigerator. Meanwhile, preheat the oven to 375 °F.
- Bake the rolls until they are golden brown and feel light when picked up. About 10-15 minutes.
- As soon as the rolls come out of the oven brush the tops with the rest of the melted butter. Enjoy warm or at room temperature.
Would you like to save this recipe?


As an Amazon Associate and member of other affiliate programs, I earn from qualifying purchases.
Really nice, easy little roll recipe. I halved it and used some fairly active discard and it came out fine (slightly longer rise time). My bake time took about 25 minutes though, which is quite a bit longer than the recipe states. Rolls were delicious and everyone loved them. I might try a different pan set up next time, but I’m happy to have this recipe in my baking index.
Thank you for changing my sourdough world! For the last year I have been trying to make sourdough work, and have kept coming up with a flat heavy loaf that just wasn’t at all inspiring. Since I found your recipes a couple of months ago I’ve had nothing but success, and the family is now loving our bread! I am trying this recipe today for the first time, but I can only imagine it will be perfect like all the rest!
Thanks for making sourdough bread so easy! <3