The Best Jelly Roll Cake
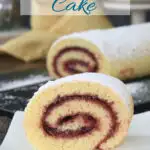
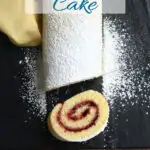
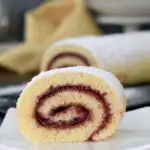
Jelly Roll Cake is a classic dessert made with a light, flexible sponge wrapped around sweet raspberry preserves. When baked and handled correctly, the cake rolls neatly without cracking and slices into clean, elegant spirals.
This is a simple recipe, but the technique matters. Once you understand how the sponge works, you’ll find that a jelly roll is one of the most reliable and adaptable cakes you can make.
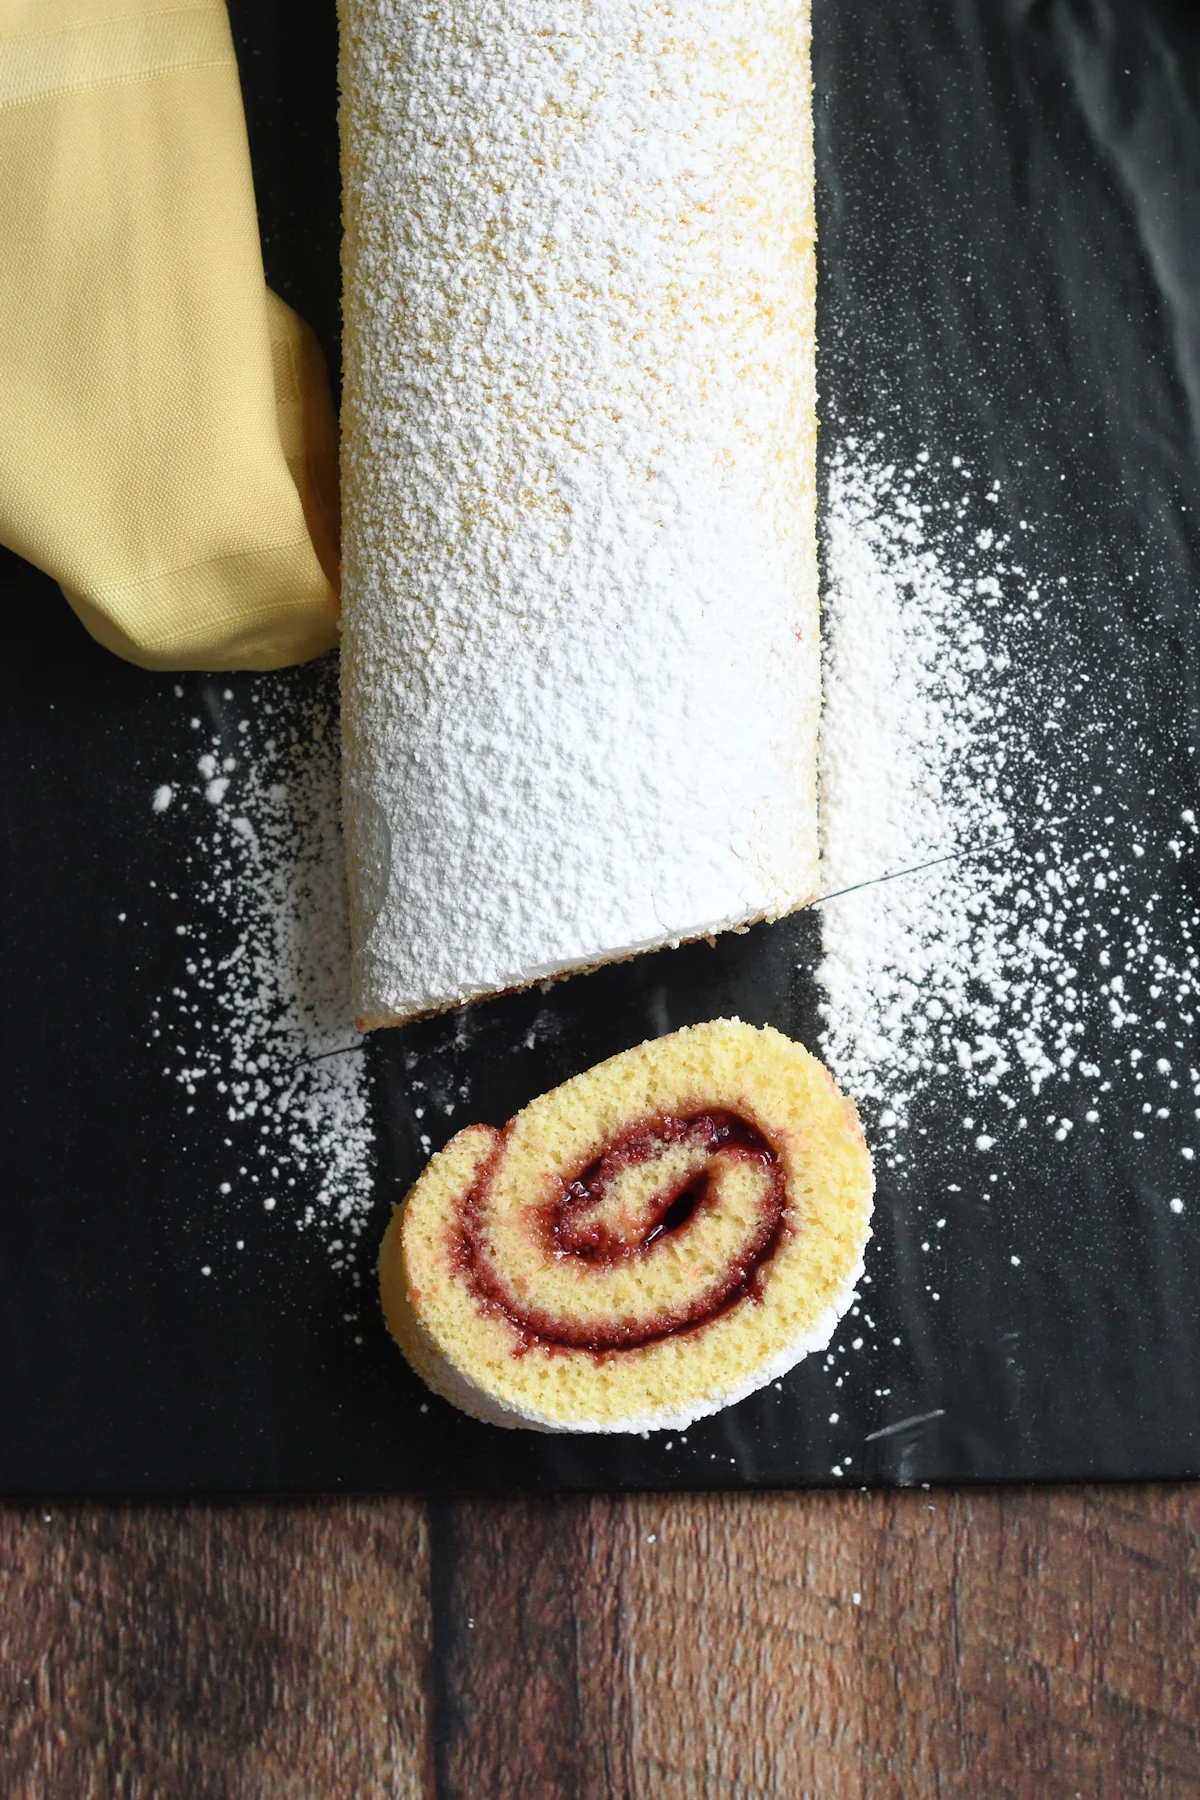
Table of contents
Why This Recipe Works
This jelly roll uses a chiffon-style sponge, which is ideal for rolled cakes. Whipped egg whites provide lift and structure, while oil and sugar keep the crumb moist and flexible.
That balance is key. A sponge that’s too dry or too firm will crack when rolled, but a well-balanced chiffon stays soft enough to shape without tearing or becoming rubbery.
If you’d like to dig deeper into how ingredients affect cake texture, you can learn more in the Cake Baking Guide and Baking Ingredient Science pages.
Ingredients

Ingredient Notes
- Flour: Measure carefully. Too much flour can make the sponge stiff and prone to cracking.
- Oil: Oil keeps the cake soft and flexible even after cooling, which is essential for roll cakes.
- Sugar: A relatively high proportion of sugar helps retain moisture, keeping the cake flexible for rolling.
- Egg Whites: Whip to full peak, but stop before they become dry or grainy. Overwhipped whites are unstable and prone to deflating when folded, which leads to loss of volume in the finished sponge.
- Preserves: Seedless preserves are easiest to spread and give the cleanest slices. Warm slightly if needed for smooth spreading.
Process Photos
Here’s what the recipe process looks like at each stage. Refer to the recipe card below for measurements and exact instructions.
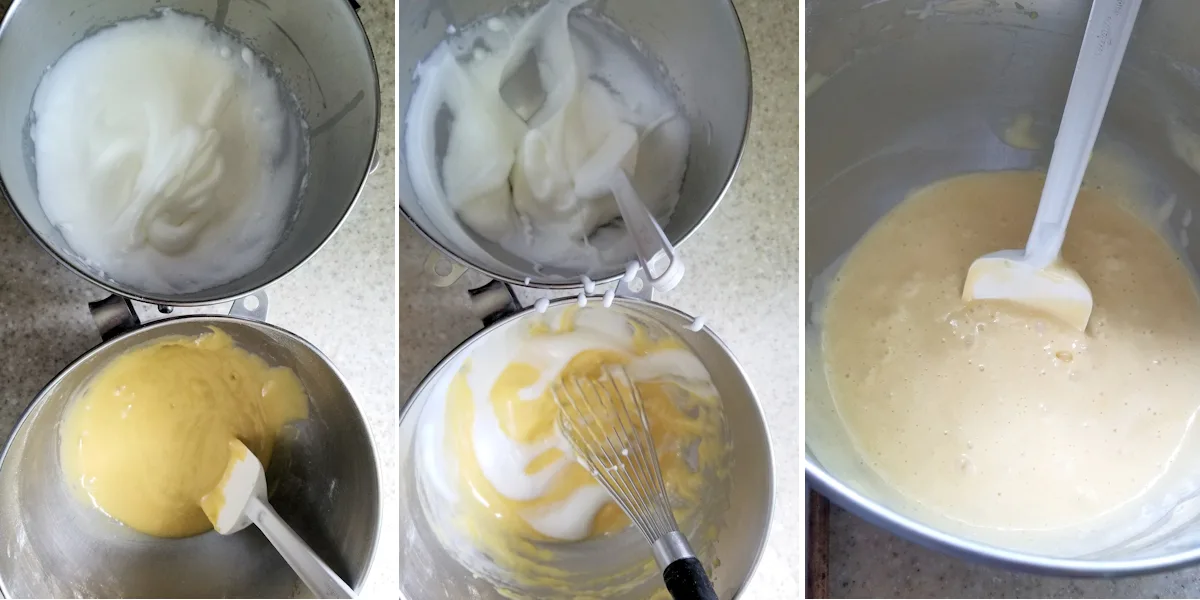
- Whip the yolks and combine with the flour. Whip the whites.
- Fold the whites into the batter just until combined.
- Do not over fold the batter. It should still be light and fluffy.
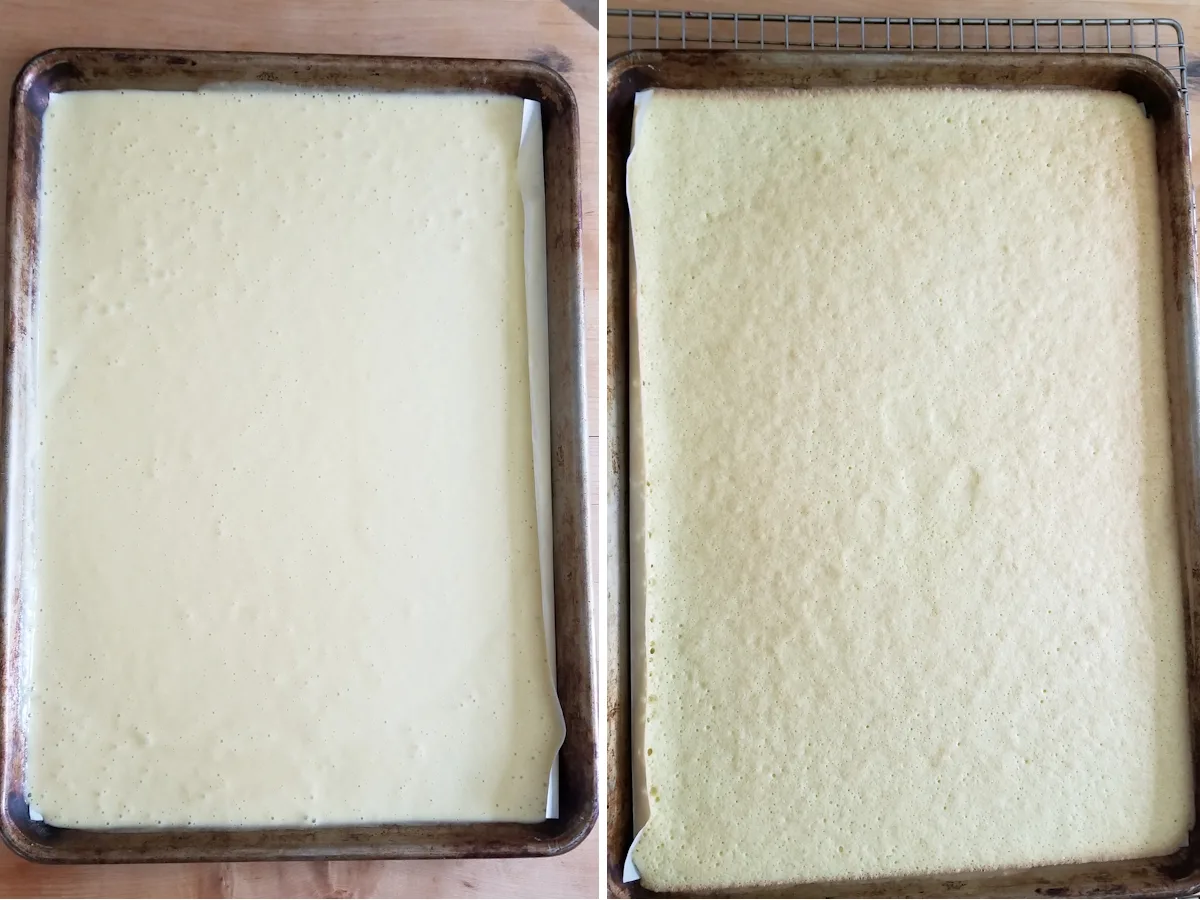
- Spread the batter into the pan and bake just until the center springs back when pressed.
- Be careful. Overbaking can cause cracking.
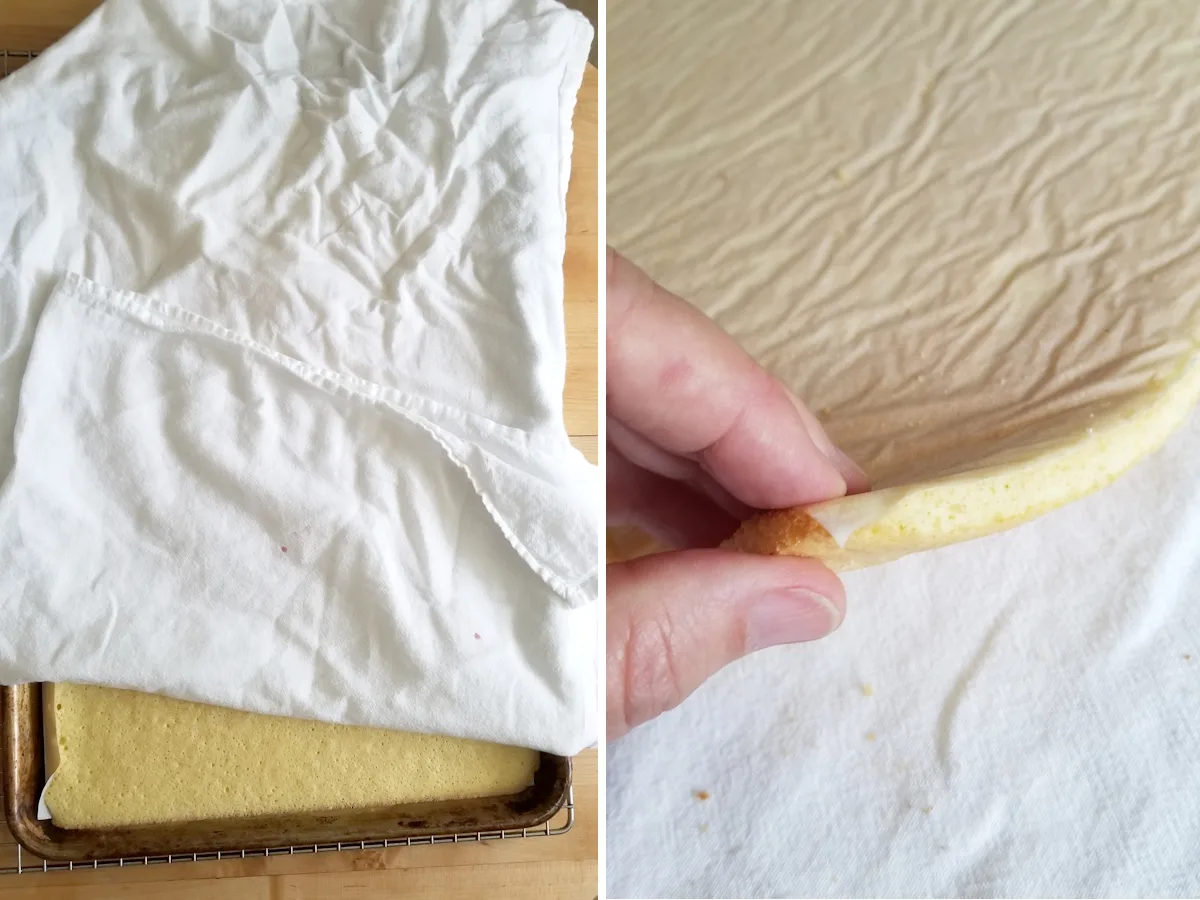
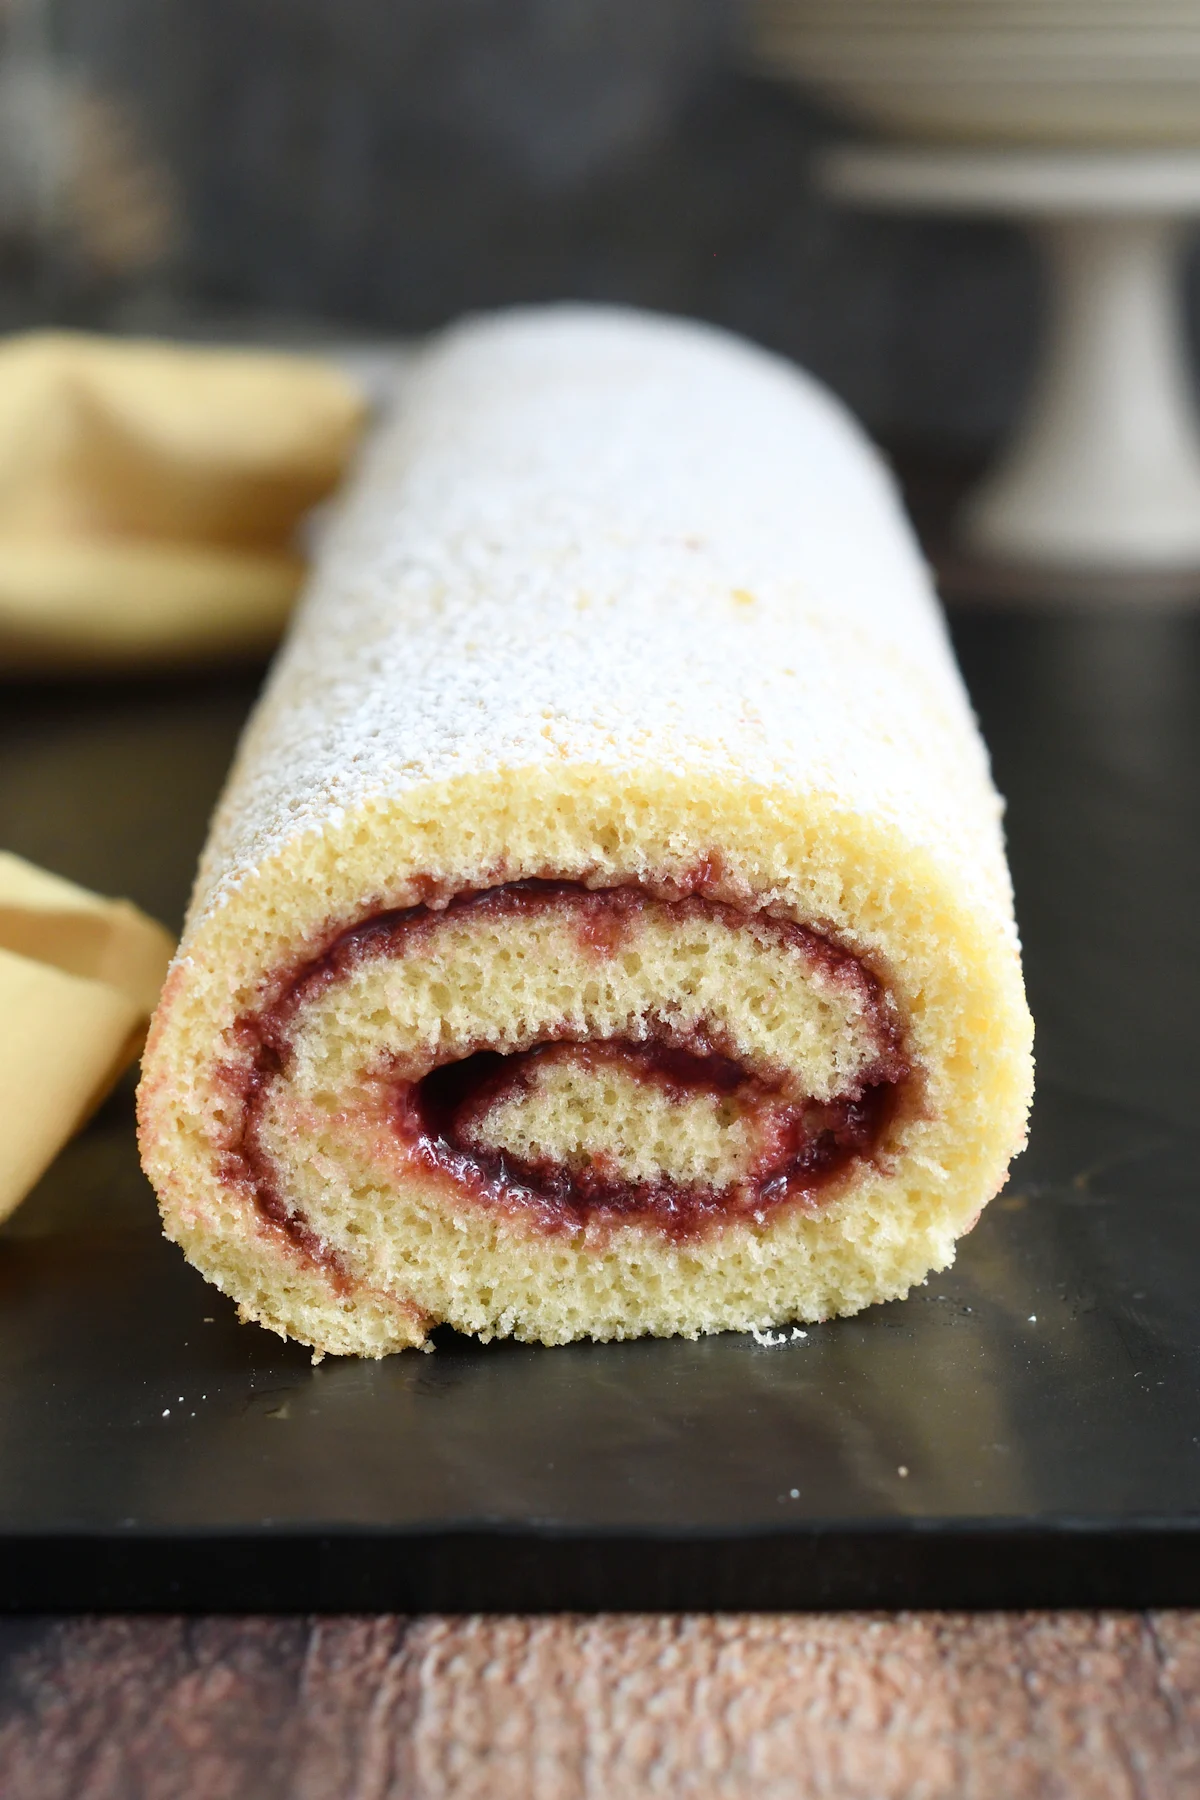
- Cover the cake with a clean kitchen towel and set aside to cool.
- The cake will be quite thin, which allows for a neat spiral when rolled.
Baking Sense Tip
Why Cover the Cake While It’s Warm?
Covering the warm sponge traps a small amount of steam, which keeps the surface moist as the cake cools. A moist sponge stays flexible, allowing you to roll the cake cleanly without cracking—no need to roll, unroll, and reroll.
- Peel the parchment off the cake and use the parchment and towel to help flip the cake.
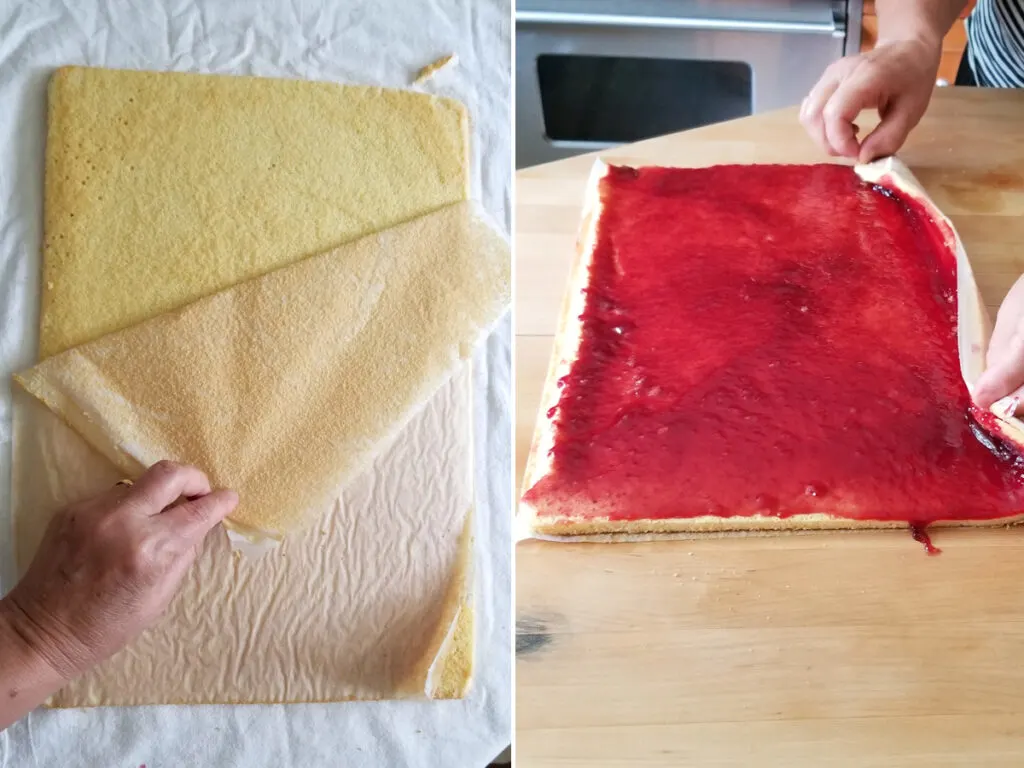
- Spread the jelly over the cake and use the parchment to lift and roll the cake.
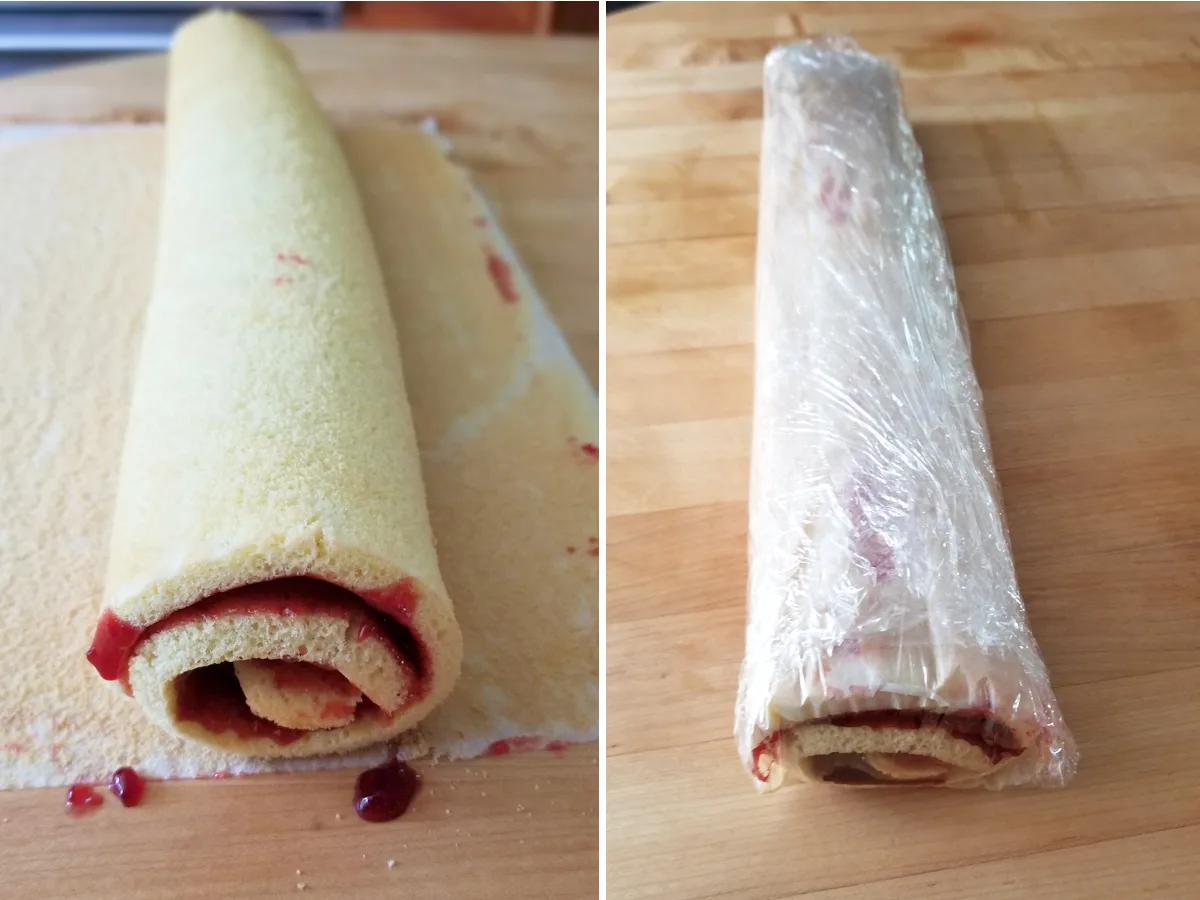
- After rolling the cake, wrap it in the parchment and then in plastic.
- Leave it at room temperature for at least 1-2 hours before serving.
Variations
This jelly roll works well with other fillings. Strawberry or apricot preserves are easy substitutions, and a thin layer of lightly sweetened whipped cream beneath the jam adds richness without overwhelming the sponge.
Thicker fruit curds—such as lemon, raspberry, or passion fruit—can also be used. Spread a thin, even layer so the cake rolls cleanly without squeezing out the filling.
Storage
The assembled cake can be kept covered at room temperature for several hours or refrigerated for 1–2 days.
For longer storage, wrap the cake tightly and freeze for up to one month. Defrost at room temperature in the wrapping. Individual slices can also be wrapped and frozen.
FAQS
The most common causes are overbaking, incorrect ingredient ratios, or letting the cake cool uncovered. A thin sponge dries out quickly, so avoid overbaking and cool the cake under a towel to retain moisture.
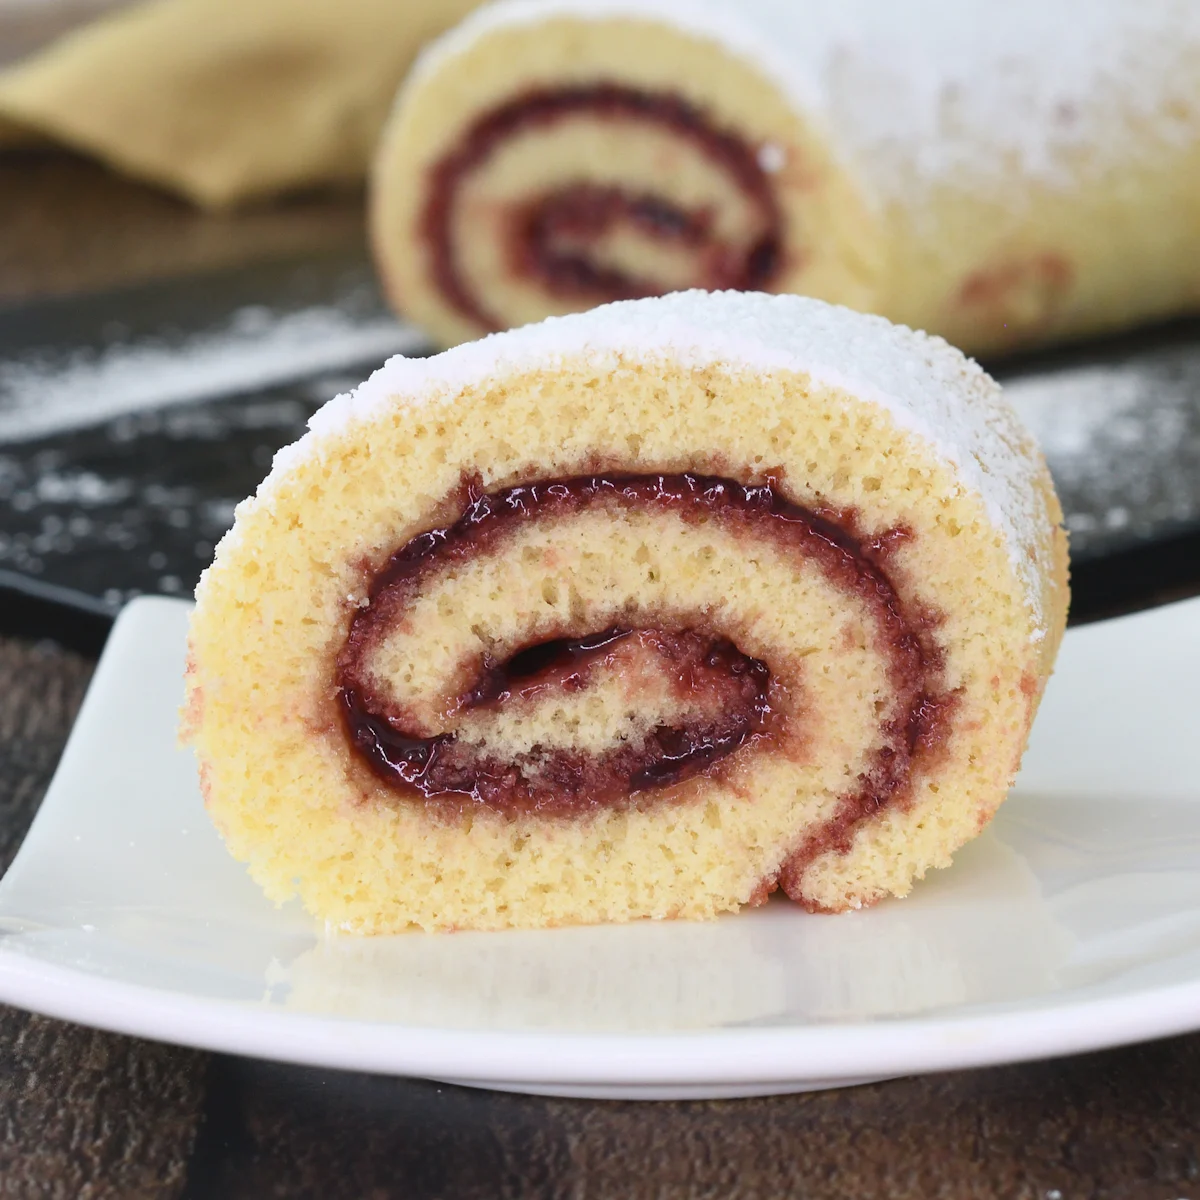
Make sure the cake is rolled tightly (see process photos) and chilled before slicing. Chilling allows the filling to set and lightly absorb into the sponge so the slices hold together.
Yes. Thicker fruit curds such as lemon, raspberry, or passion fruit work well. Spread a thin, even layer so the filling doesn’t squeeze out during rolling.
More Roll Cakes to Try
If you love this recipe as much as I do, I’d really appreciate a star rating and a quick comment. Ratings and comments help my recipes show in search results. Thanks!

Jelly Roll Cake
Ingredients
- 2 oz vegetable oil (¼ cup)
- 3 each large eggs (separated)
- 2 oz water (¼ cup)
- 1 ½ teaspoons vanilla extract
- 5 oz all purpose flour (1 cup, see note)
- 6 oz granulated sugar (¾ cup, divided)
- 1 teaspoon baking powder
- ¼ teaspoon salt
- 12 oz seedless raspberry preserves (1 cup)
Instructions
- Preheat the oven to 375 °F. Line a half sheet pan with parchment paper.
- Combine 2 oz vegetable oil, 3 egg yolks, 2 oz water and 1 ½ teaspoons vanilla extract in a mixer bowl. Mix on medium speed until well combined.
- Sift 5 oz all purpose flour with 1/2 cup of the sugar, 1 teaspoon baking powder and ¼ teaspoon salt. With the mixer on low, add the dry ingredients to yolk mixture. Whip on high speed for 1 minute, then set aside
- Whip 3 egg whites on medium speed to soft peak. Gradually add the remaining 1/4 cup sugar, increase the speed to medium high and whip to full peak. Fold the whites into the yolk mixture in three increments.
- Pour the batter into the pan and smooth until level. Bake until the middle of the cake springs back with lightly pressed, about 12 minutes.
- Cover the pan with a kitchen towel and cool the cake completely in the pan.
- Run a small knife around the edges and flip the cake out of the pan onto the towel. Peel the parchment off the back of the cake. Use the towel and the parchment to flip the cake back over onto the parchment paper.
- Remove the towel and spread 12 oz seedless raspberry preserves over the cake. Use the parchment paper to lift the long side of the cake then roll the cake tightly.
- Wrap the parchment paper around the cake and let it overlap at the bottom. Grab the top edge with one hand and the overlap piece with the other. Pull on the overlap to tighten the parchment around the cake. Wrap with plastic wrap. Let it sit at room temperature for 1-2 hours to allow the jelly to meld into the cake. At this point the cake can be frozen for up to 1 month.
- Unwrap the cake and trim the ends at a slight angle. Transfer it to a serving tray, seam side down. Generously sprinkle the cake with powdered sugar and serve at room temperature. The cake will keep covered at room temperature for 2-3 days.
Would you like to save this recipe?


As an Amazon Associate and member of other affiliate programs, I earn from qualifying purchases.
Love the new recipe format! So much easier to follow! Thank you.
Eileen
I am in awe of your baking experience, part chemist part baker. It is so enjoyable to read your recipes, I am learning new things even after baking for 60 years. I always felt baking is chemistry so thank you for a website. And yes I love your new recipe conversion button. I should use the metric but so used to use cups,teaspoons but its an improvement from the old hand full and pinch. Keep up those recipes,I tried the Italian Merinque Buttercream,Where was this my whole life ? My favorite now.
I really like the new recipe card format. Being able to switch to metric, adjust the serving size and not having to scroll back up for the exact amounts are all definite improvements in my book!
All that is missing now is the addition of temperature in Celsius, for those of us that don’t ‘do’ Fahrenheit…
Thanks for the feedback. From here out I’ll include C temperature in my recipes.
I love this new recipe forma. Would it be possible to include metric measurements to help all of us non U.S. residents who also love your recipes.
With thanks.
Did you click the button at the top of the card switching from US Customary to metric? The default is US Customary so you have click the button to switch. I have always included metric in all my recipes.
LOVE LOVE the new recipe card format!! Scrolling up to read the measurements of an ingredient SEEMS like a minor thing, but it’s just so inconvenient. All aspects of this new style are user-friendly!
So glad you like it, Melanie. I hate scrolling to find ingredient amounts myself. The ingredients being in the instructions does make the card longer. But that feature is turned off when you print the recipe card so it won’t print as long.