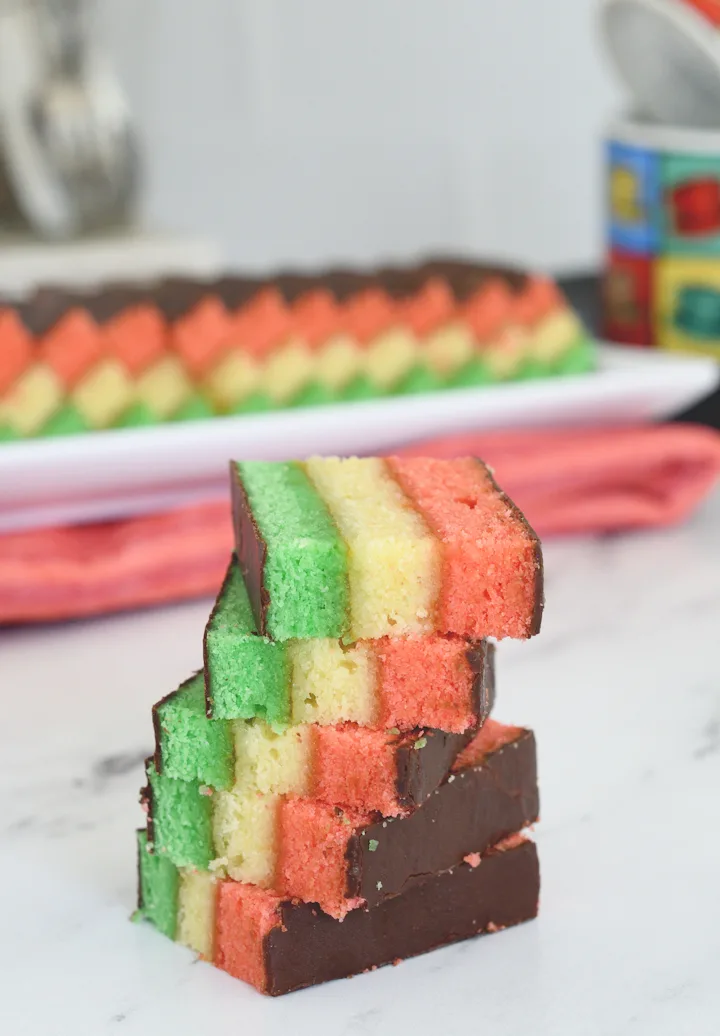
Italian Rainbow Cookies Recipe
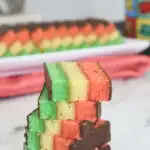
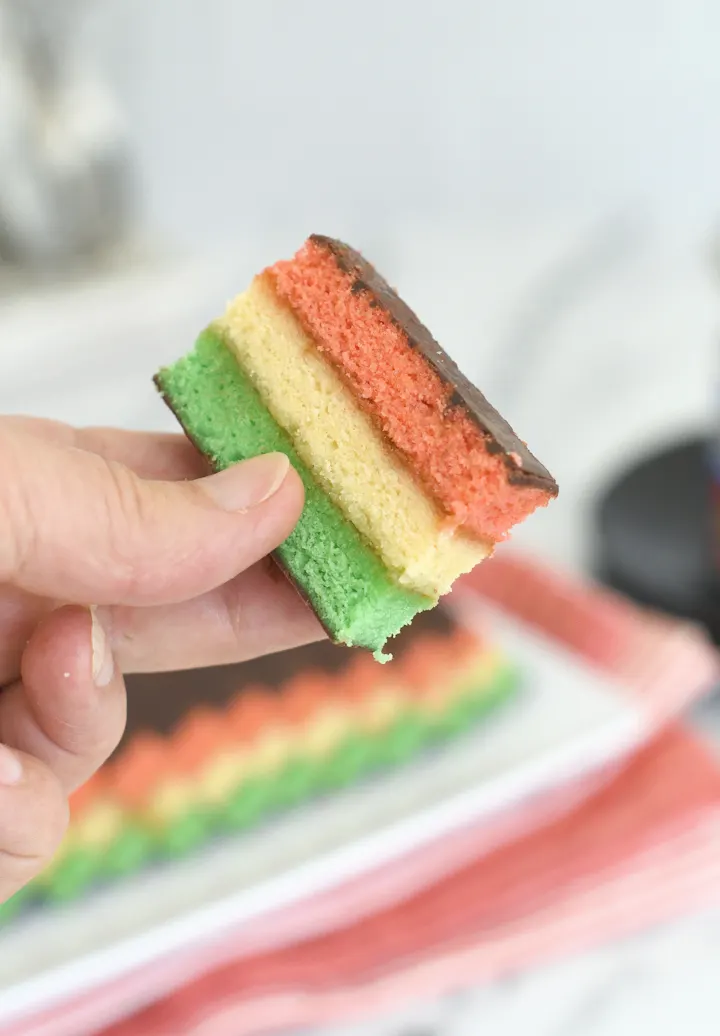
Italian Rainbow Cookies are really more cake than cookie. Either way, they are as tasty as they are beautiful. They look impressive but are surprisingly easy to make.

If you’re from New York or New Jersey (Jersey girl here), you probably remember seeing Rainbow Cookies sold by the pound in every Italian Bakery.
But you don’t have to drive to New York or New Jersey to enjoy these cookies. This Italian Rainbow Cookie recipe can easily be made at home.
Despite the name, the origin of these cookies is probably more Italian American than directly from the old country.
Whatever the history or nationality of these cookies, they are an incredibly tasty treat that look impressive on any dessert table.
Ingredients
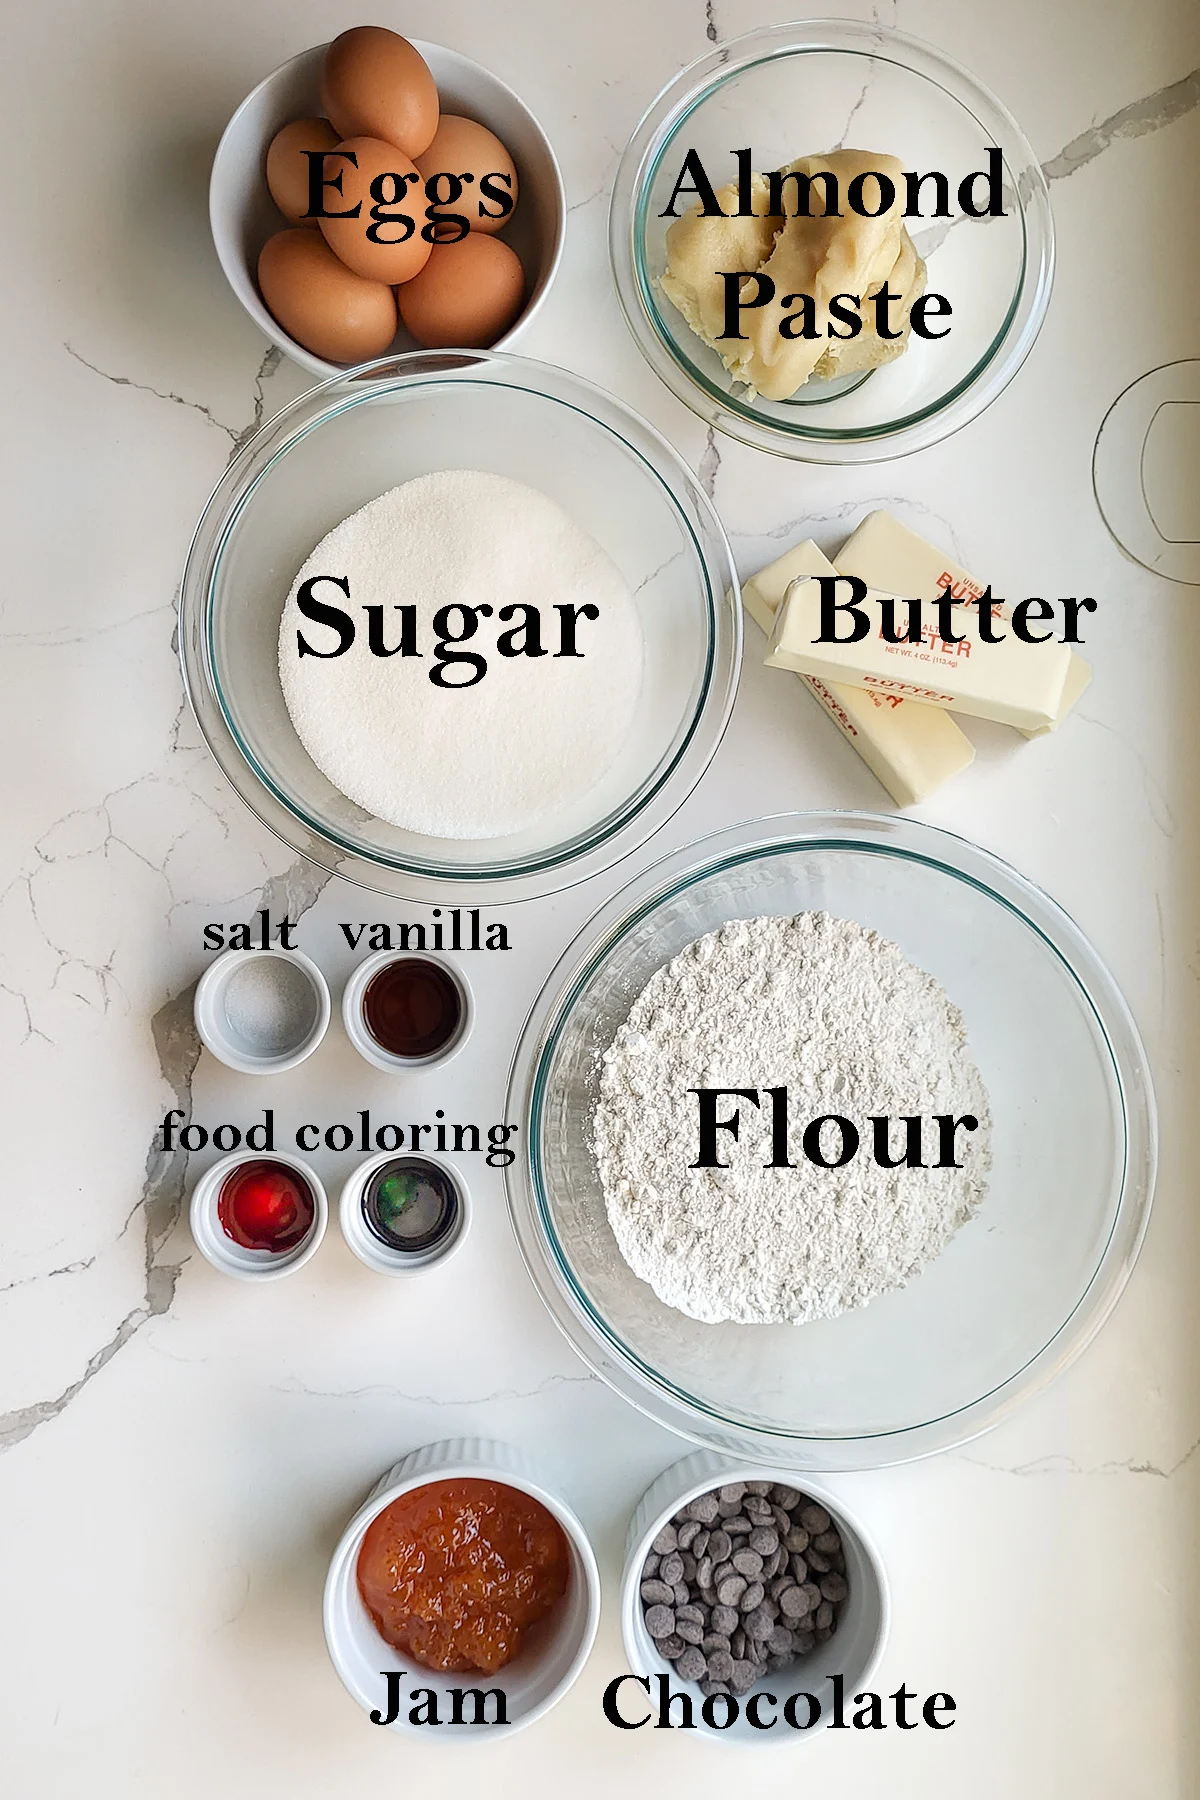
Ingredient Notes:
- Almond Paste: Do not use marzipan in place of almond paste. Marzipan has much more sugar than almond paste and will not work properly in this recipe.
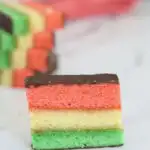
- Eggs: There are more eggs than in a typical “cookie” recipe, which makes the texture similar to a dense sponge cake. Separating the eggs lightens and tenderizes the layers.
- Jam: You can use seedless raspberry or strained apricot preserves between the layers.
- Chocolate: Use a good semi-sweet chocolate to ice the cookies.
How to make Italian Rainbow Cookies:
Here’s what the recipe process looks like at each stage. Refer to the recipe card below for measurements and exact instructions.
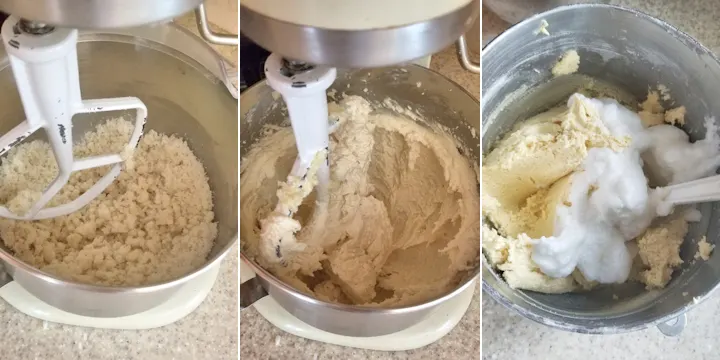
Step 1. Soften the almond paste with sugar.
Step 2. Add butter and cream until light and fluffy.
Step 3. Fold in whipped egg whites.
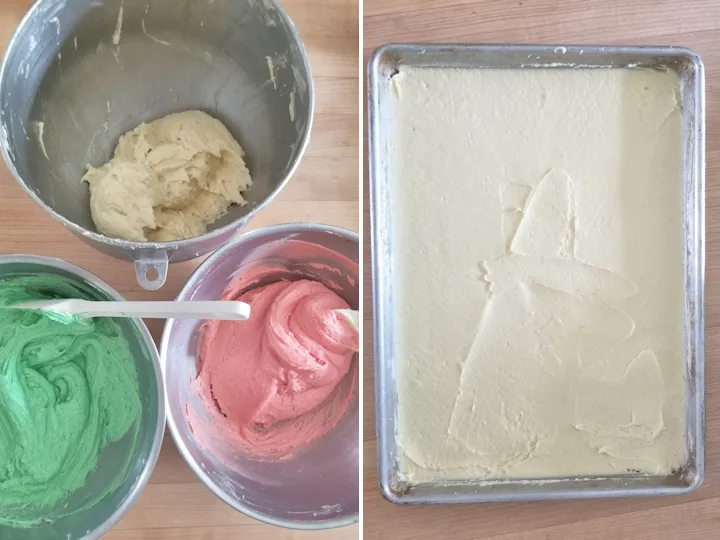
Step 4: Tint the batter with food coloring.
Step 5: Spread each color into a prepared quarter sheet pan.
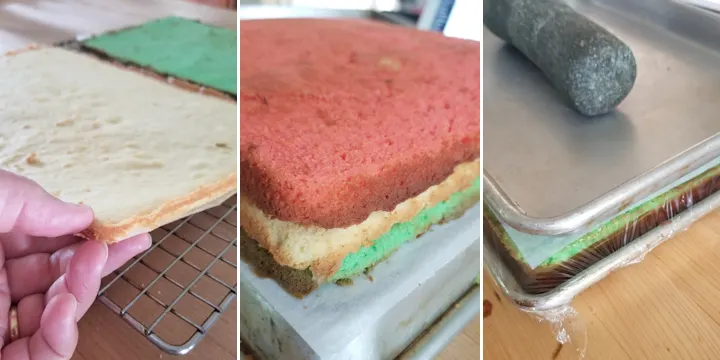
Step 6: The cake layers will be quite thin. Spread preserves between the layers.
Step 7: Wrap and weight the cake for several hour or over night.
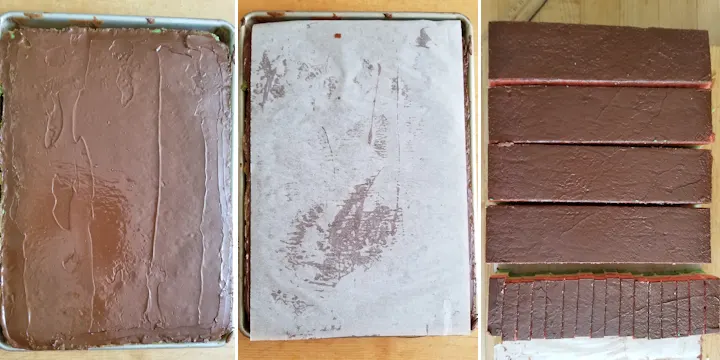
Step 8: Spread chocolate on the green layer.
Step 9: Cover with parchment, flip, and ice the other side.
Step 10: Place the cake onto a cutting board and cut it into 2″ strips and then into 1/2″ slices.
How to Store Italian Rainbow Cookies
You can store the cookies in an air tight container at room temperature for 2-3 days or in an air tight container in the refrigerator for up to a week or in the freezer for up to a month. When you arrange the cookies in the container place plastic wrap or parchment paper between the layers to keep them from sticking together.
Pastry Chef tips for this Italian Rainbow Cookie recipe:
- When you spread the batter into the pan try to get it as even and flat as possible. The more even the cakes bake, the better the finished cookies will look.
- The tri-colors represent the Italian flag but also work as a Christmas cookie. You can adapt the colors to fit in with your theme. I made them with Irish flag colors for my mom’s birthday party.
- After layering the cakes with the preserves, weight the cake and refrigerate for several hours. Weighting the cake will let the preserves absorb into the cake and help the layers stick together. Weighting ensures that the cookies won’t fall apart when sliced.
- Spread the chocolate on the cold cake so it will set immediately.
If you love this recipe as much as I do, I’d really appreciate a star rating and a quick comment. Ratings and comments help my recipes show in search results. Thanks!
Italian Rainbow Cookies
Ingredients
Batter
- 12 oz almond paste ((see note))
- 11 oz granulated sugar (1 ⅓ cups, divided)
- 12 oz unsalted butter (room temperature)
- 6 eggs (separated)
- ½ teaspoon table salt
- 2 teaspoons vanilla extract
- 12 ½ oz all purpose flour (2 ½ cups, see note)
- red food coloring ((see note))
- green food coloring
Assembly
- 1 cup seedless raspberry preserves (or strained apricot preserves)
- 4 oz semi sweet chocolate (chopped)
Instructions
- Preheat the oven to 350 °F. Line 3 quarter sheet pans (9.5"x13") with parchment paper or generously butter and flour the pans. If you don't have 3 pans you can hold the batter at room temperature until a pan is free and bake in batches.
- Cream 12 oz almond paste with 1 cup (8 oz) of the sugar until well-combined. With the mixer running, add 12 oz unsalted butter and increase the speed to medium. Cream until light and aerated. Scrape down the bowl and paddle.
- Add 6 egg yolks, ½ teaspoon table salt and 2 teaspoons vanilla extract and mix to incorporate. With the mixer running on low, add 12 ½ oz all purpose flour and mix just until incorporated. Remove the bowl from the mixer.
- In another bowl, whip 6 egg whites with the remaining 1/3 cup of sugar to full peak. Fold the egg whites into the batter. Divide the batter evenly into 3 bowls. Use the red food coloring to tint one portion and the green coloring to tint another portion.
- Spread each of the batters into one of the prepared sheet pans. Try to get the batter as even and flat as possible. The more even the cakes bake, the better the finished cookies will look.
- Bake until the cake springs back when lightly pressed and is golden brown around the edges, about 12-15 minutes. These are thin layers. Be careful to not overbake.
- Cool the cakes in the pan. If you need to reuse a pan, allow the layer to cool for 5-10 minutes then slide the baked cake out of the pan onto a cooling rack. Prep the pan for the next layer.
Assembly
- Place a piece of parchment paper on the back side of a baking pan or tray. Flip the green layer out of the pan onto the parchment lined pan and peel off the parchment. Spread 1/2 the preserves over the cake. Flip the white layer onto the green layer. Spread the remaining preserves over the white layer. Top with the red cake layer.1 cup seedless raspberry preserves
- Place a piece of clean parchment over the red layer and flip the entire cake into a sheet pan. Cover the pan with plastic wrap. Place another sheet pan on top of the cake and place a heavy object onto the pan to weigh down the cake. Refrigerate for 4 hours or over night.
- Unwrap the pan and spread 1/2 the melted chocolate over the green layer. Once the chocolate is set, place the parchment on the chocolate and flip the cake again. Spread the other 1/2 of the melted chocolate over the red layer. Once the chocolate is set you're ready to slice the cookies.4 oz semi sweet chocolate
- Use a serrated knife to trim all 4 sides of the cake. Use a ruler to measure out 2" increments across the short side of the rectangle. Slice the cake into 2" wide strips. Measure out 1/2" increments along each strip and slice into 1/2" pieces.
- Store the cookies in a covered container for 1-2 days at room temperature or up to a week refrigerated. You can stack the cookies in the container but put a layer of parchment or wax paper between the layers to prevent them from sticking together. The cookies can also be frozen for 2-3 months
Would you like to save this recipe?


As an Amazon Associate and member of other affiliate programs, I earn from qualifying purchases.

I’ve seen and tried a few recipes and have always had a question. Normally, whipping egg whites separately and folding them in makes for a lighter cake. I understand that. But in this recipe, once the cakes are baked and assembled, they are typically compressed to make them denser. Is there any real advantage to whipping the egg whites separately? I have tried it with adding the whole eggs one at a time and don’t really see any difference. Can you explain?
In my recipe testing I found that whipping the whites separately makes the cake more tender. I weight the cookies mostly the give the layers time to adhere to each other so the cookies don’t fall apart when sliced. That being said, if you add the whole eggs and are happy with the result go for it
Can marzipan be substituted for almond paste?
No, it’s not the same thing. Marzipan has more sugar than almond paste.
Hi Eileen – I need your expert advice!
I have enjoyed so many of the recipes you are sending and am so excited to try these cookies, but first need to remedy the disparity in measuring the sugar in C/g’s in this recipe – according to the recipe 1-1/3C = 330 g, however the quantity seemed excessive when I measured it out. So I checked with the King Arthur Weight Chart and they say 1C = 198g or 7 Oz, making 1/3C = 66g or 2-1/3 Oz, for a total of 264g. Since all the rest of your recipes have been spot on, this has confused me.
Thank you so very much for all you are doing to help us all to become better bakers!!!
While I have the utmost respect for the KA website and almost exclusively use their flours, I will say that there is no definitive authority of converting volume to weight measures. So much depends how you fill the cup, etc. Every time I dip a measuring cup into the bin of sugar and weigh the sugar it comes out very close to 8 oz. So that is the conversion I use for sugar, 8 oz/cup. Buuuut, that being said, I did calculate the grams wrong according to my own conversion. 1 1/3 cups (11oz) of sugar should be 310g. I probably forgot to update the amount while tweaking the amounts. Thanks for the heads up.
@Eileen Gray, I’m sure – what with your busy schedule doing all of this – all I can say is WoW – you certainly are a professional. I thank you very much Eileen for your help. I’ll get on with the cookies now! Wish I had your talent! All I can do is try. Have a great day!
I’d say it’s less about talent, more about years of trial and plenty of errors…Enjoy the cookies.
I love the idea of these “cookies” – can you tell me how to eliminate or sub the almond paste to vary the flavor? Thx!
The almond paste is key to the flavor and texture of the cookies. The only substitution that might work is another nut paste.
We cannot buy almond paste in England. Could you give us a receipe to make these from scratch please?