Sourdough Bread Recipe

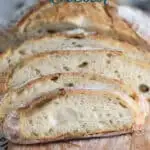


This basic sourdough bread recipe produces an artisan-style loaf with a crisp crust and chewy crumb—the kind of bread most people picture when they think of sourdough. It’s best baked in a Dutch oven, but the method is flexible and adaptable for home kitchens.
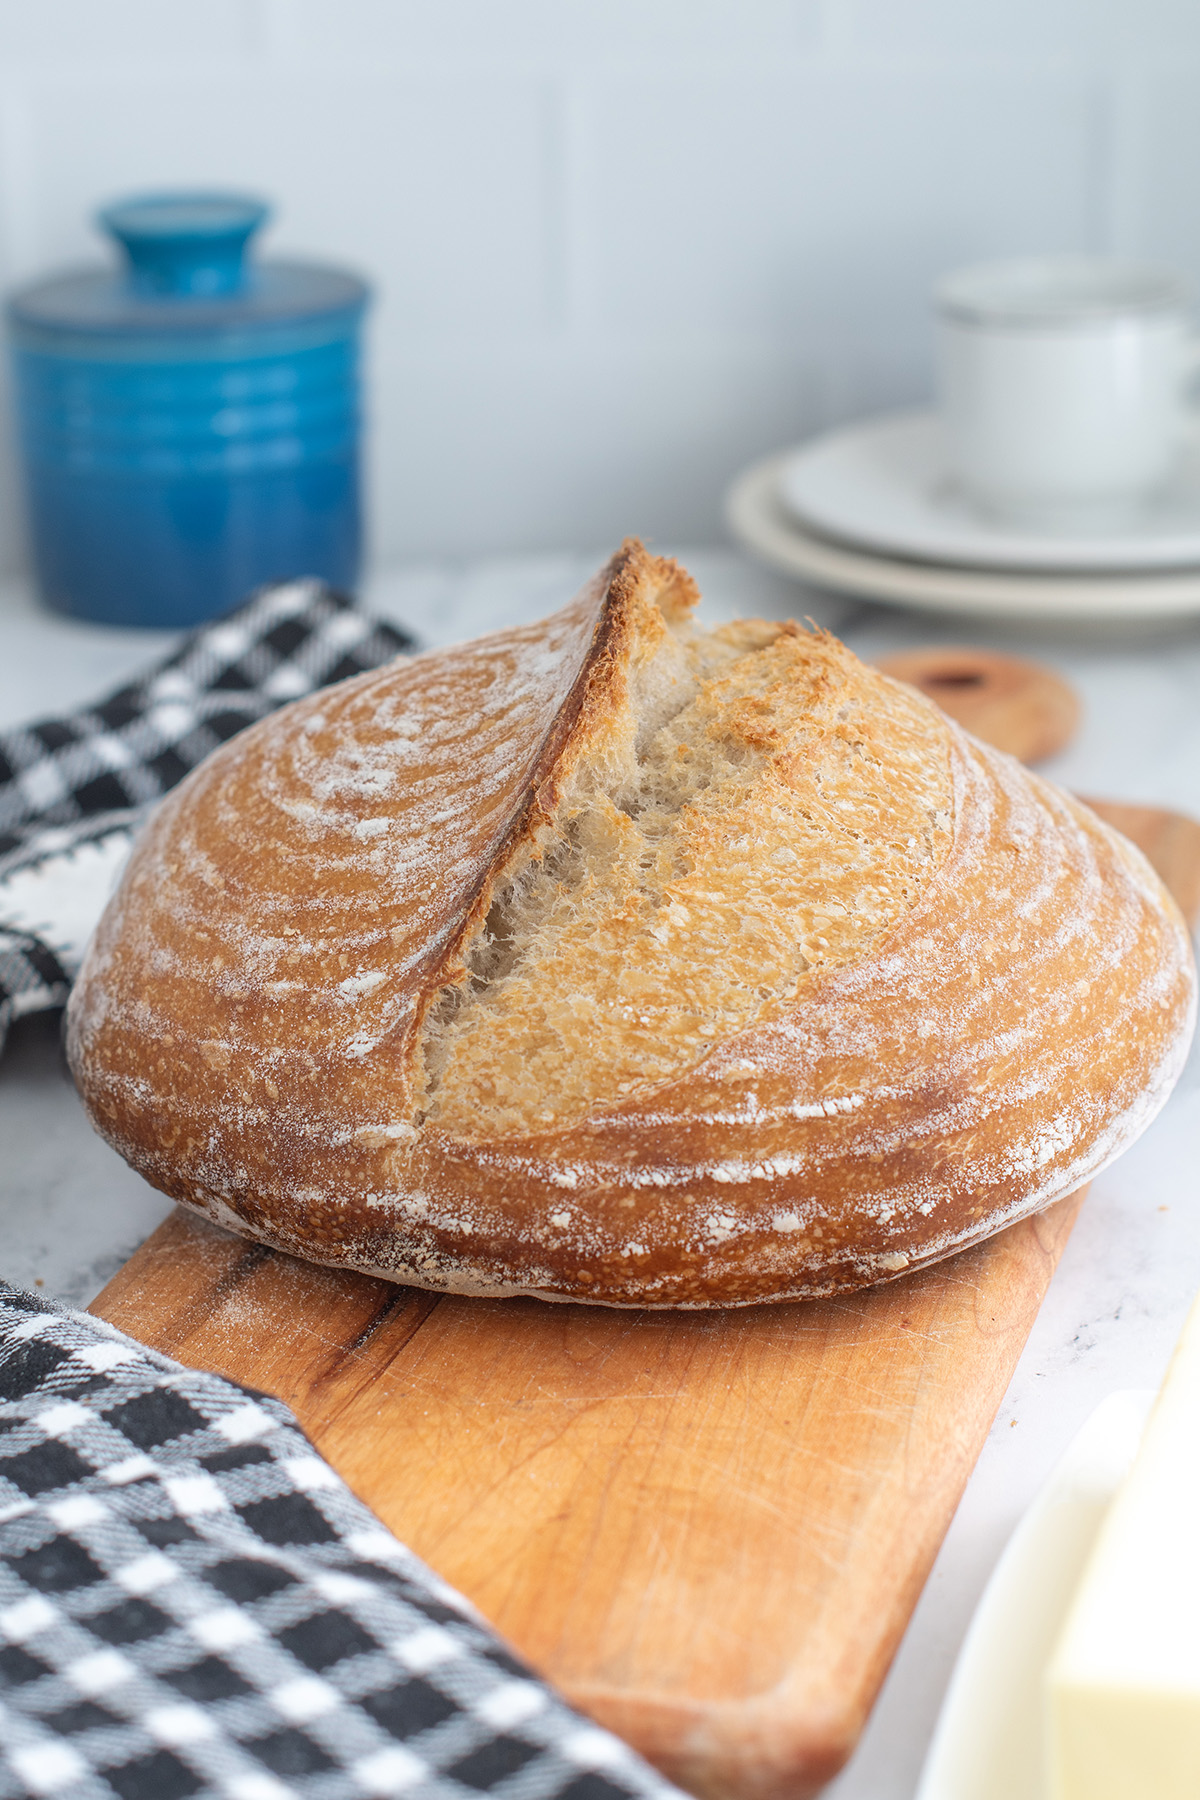
Table of contents
For me, this loaf alone is reason enough to keep a sourdough starter. The wild yeast in a starter gives the bread depth of flavor and texture that’s hard to match with commercial yeast.
Because the bread freezes beautifully, I often make a loaf each time I feed my starter. One bake now means good bread on hand later.
What Makes This a Classic Sourdough Loaf
Any bread made with a sourdough starter is technically “sourdough,” but a few key choices produce the light, crusty, and chewy loaf most people associate with artisan sourdough bread.
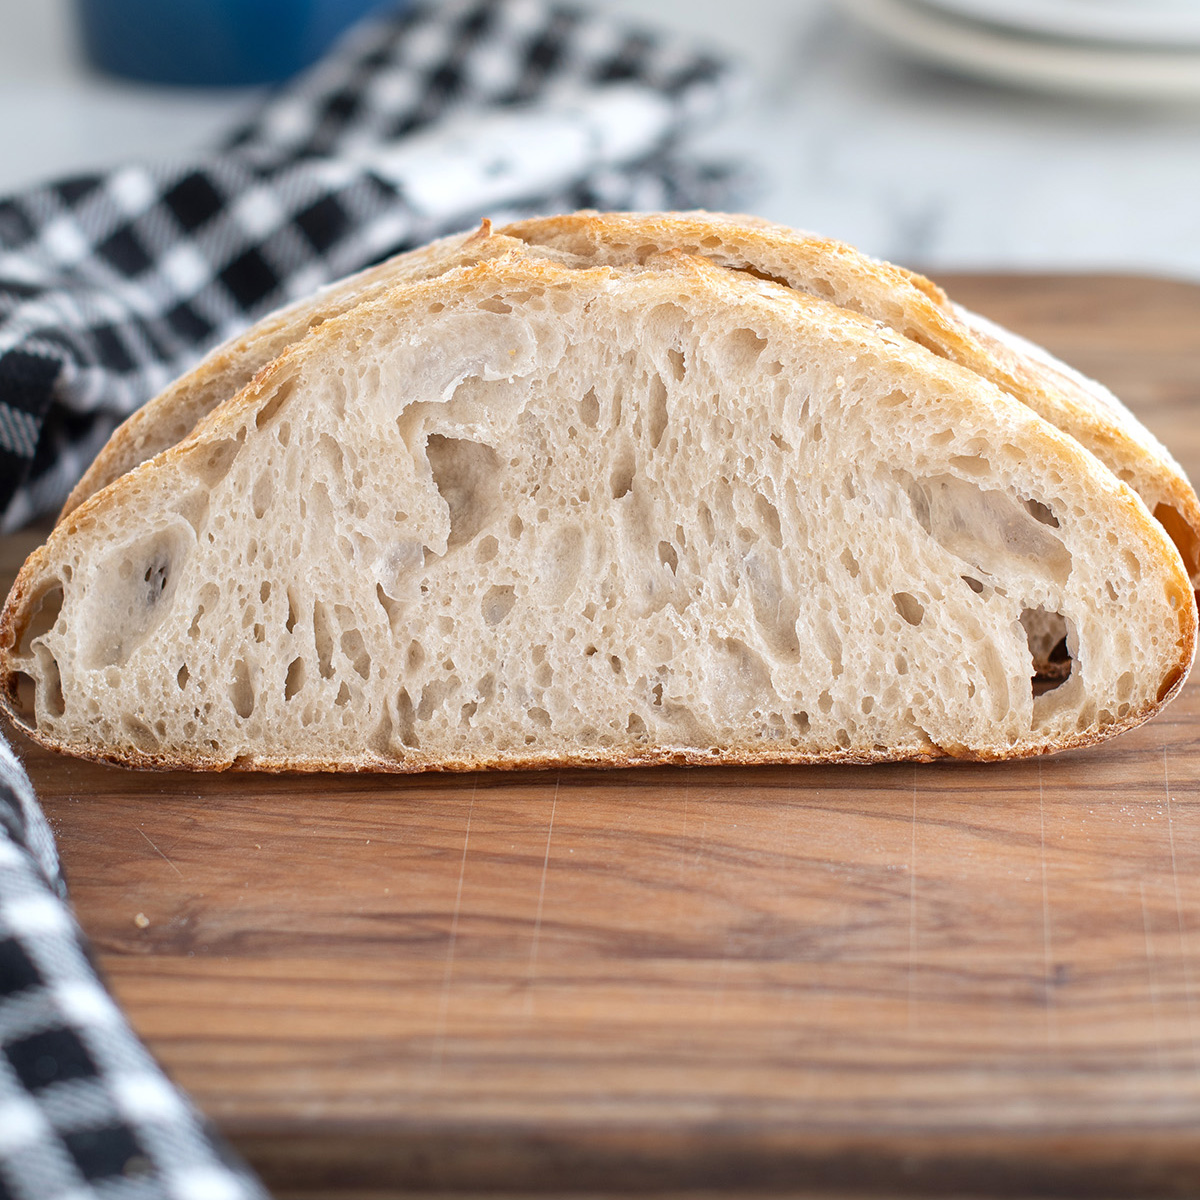
This recipe relies on a naturally leavened dough, a relatively high-hydration dough and a long, slow fermentation. Together, those elements allow the dough to develop strength and flavor without intensive kneading, resulting in an open crumb and a deeply flavorful crust.
Ingredients
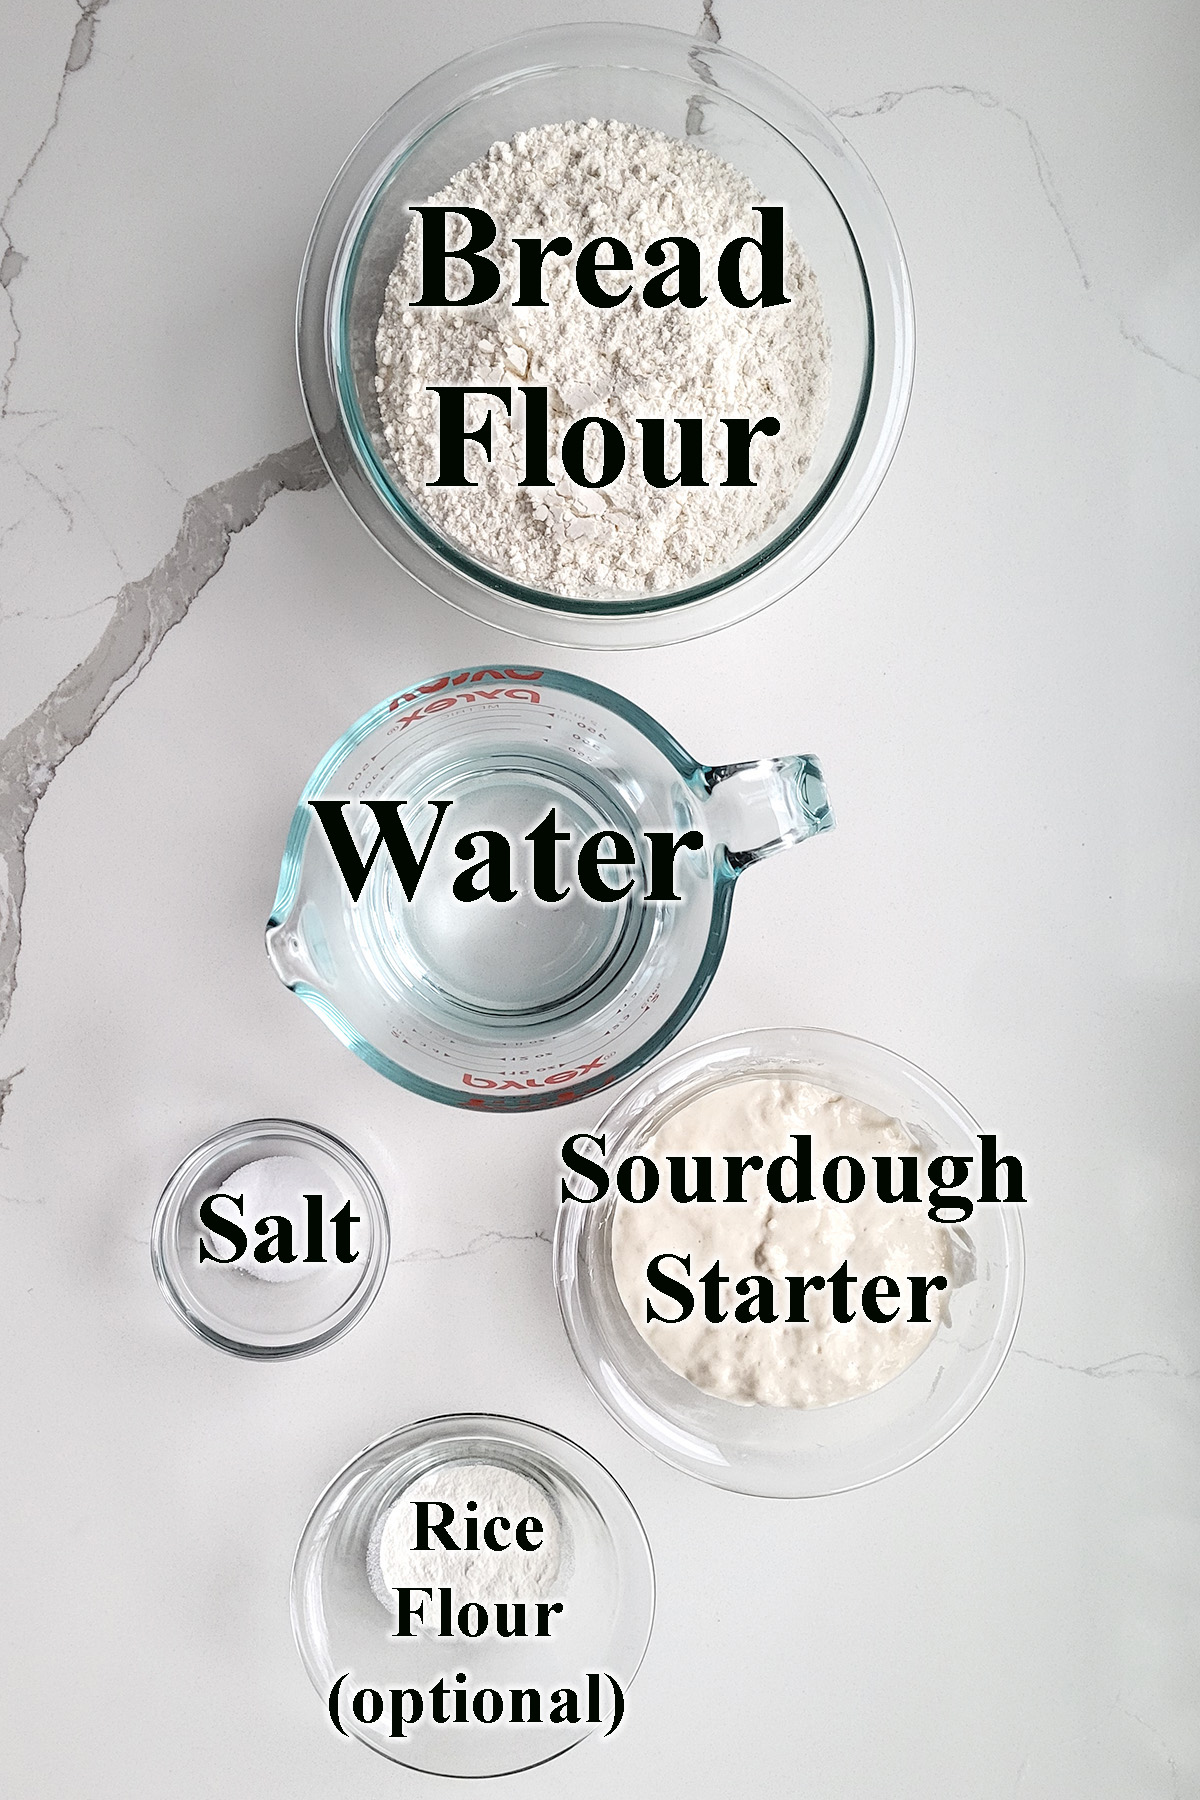
Ingredient Notes
- Active sourdough starter (100% hydration): This recipe is written for a starter fed with equal weights of flour and water. The starter should be active and near its peak when mixed into the dough.
- Warm water: Slightly warm water helps kick-start fermentation, especially if your kitchen runs cool.
- Unbleached Bread Flour: Bread flour’s higher protein content encourages stronger gluten development, which supports the structure of this relatively wet dough.
- Salt: Salt strengthens gluten and balances flavor.
- Rice flour (optional): Used for dusting a proofing basket. Rice flour resists sticking better than wheat flour.
If your starter is maintained at a different hydration, you’ll need to adjust the flour and water slightly. You’ll find guidance for that in the Sourdough Baking Guide.
Process Photos — How This Dough Comes Together
Here’s what the recipe process looks like at each stage. Refer to the recipe card below for measurements and exact instructions.
Mixing and Bulk Fermentation
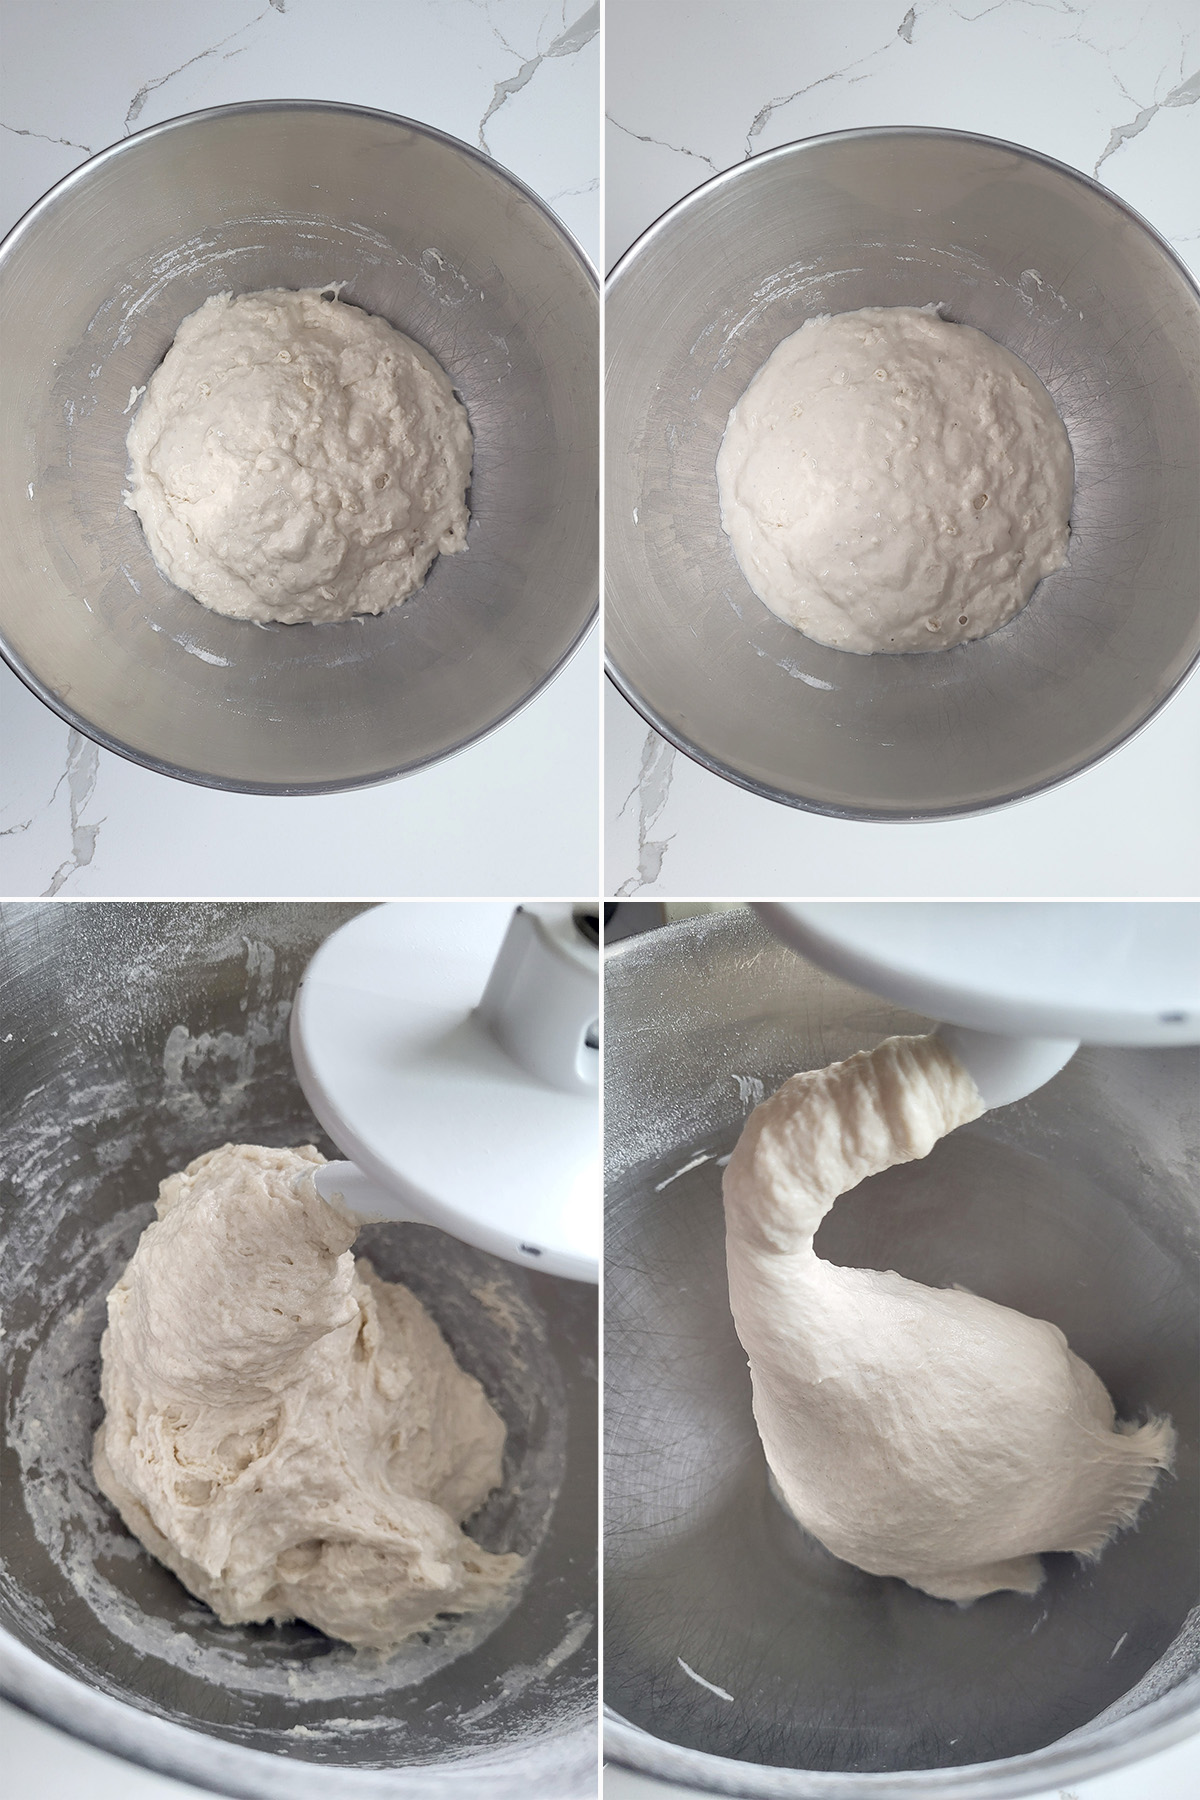
- The dough can be mixed by hand or on a stand mixer. For the autolyse, mix the starter, water, and a portion of the flour, then set it aside.
- Add the salt and remaining flour. If kneading in a mixer, the dough should clear the sides of the bowl.
- The dough will start out quite sticky but will become more cohesive as fermentation progresses. This transformation happens gradually—don’t worry if the dough still feels sticky early on.
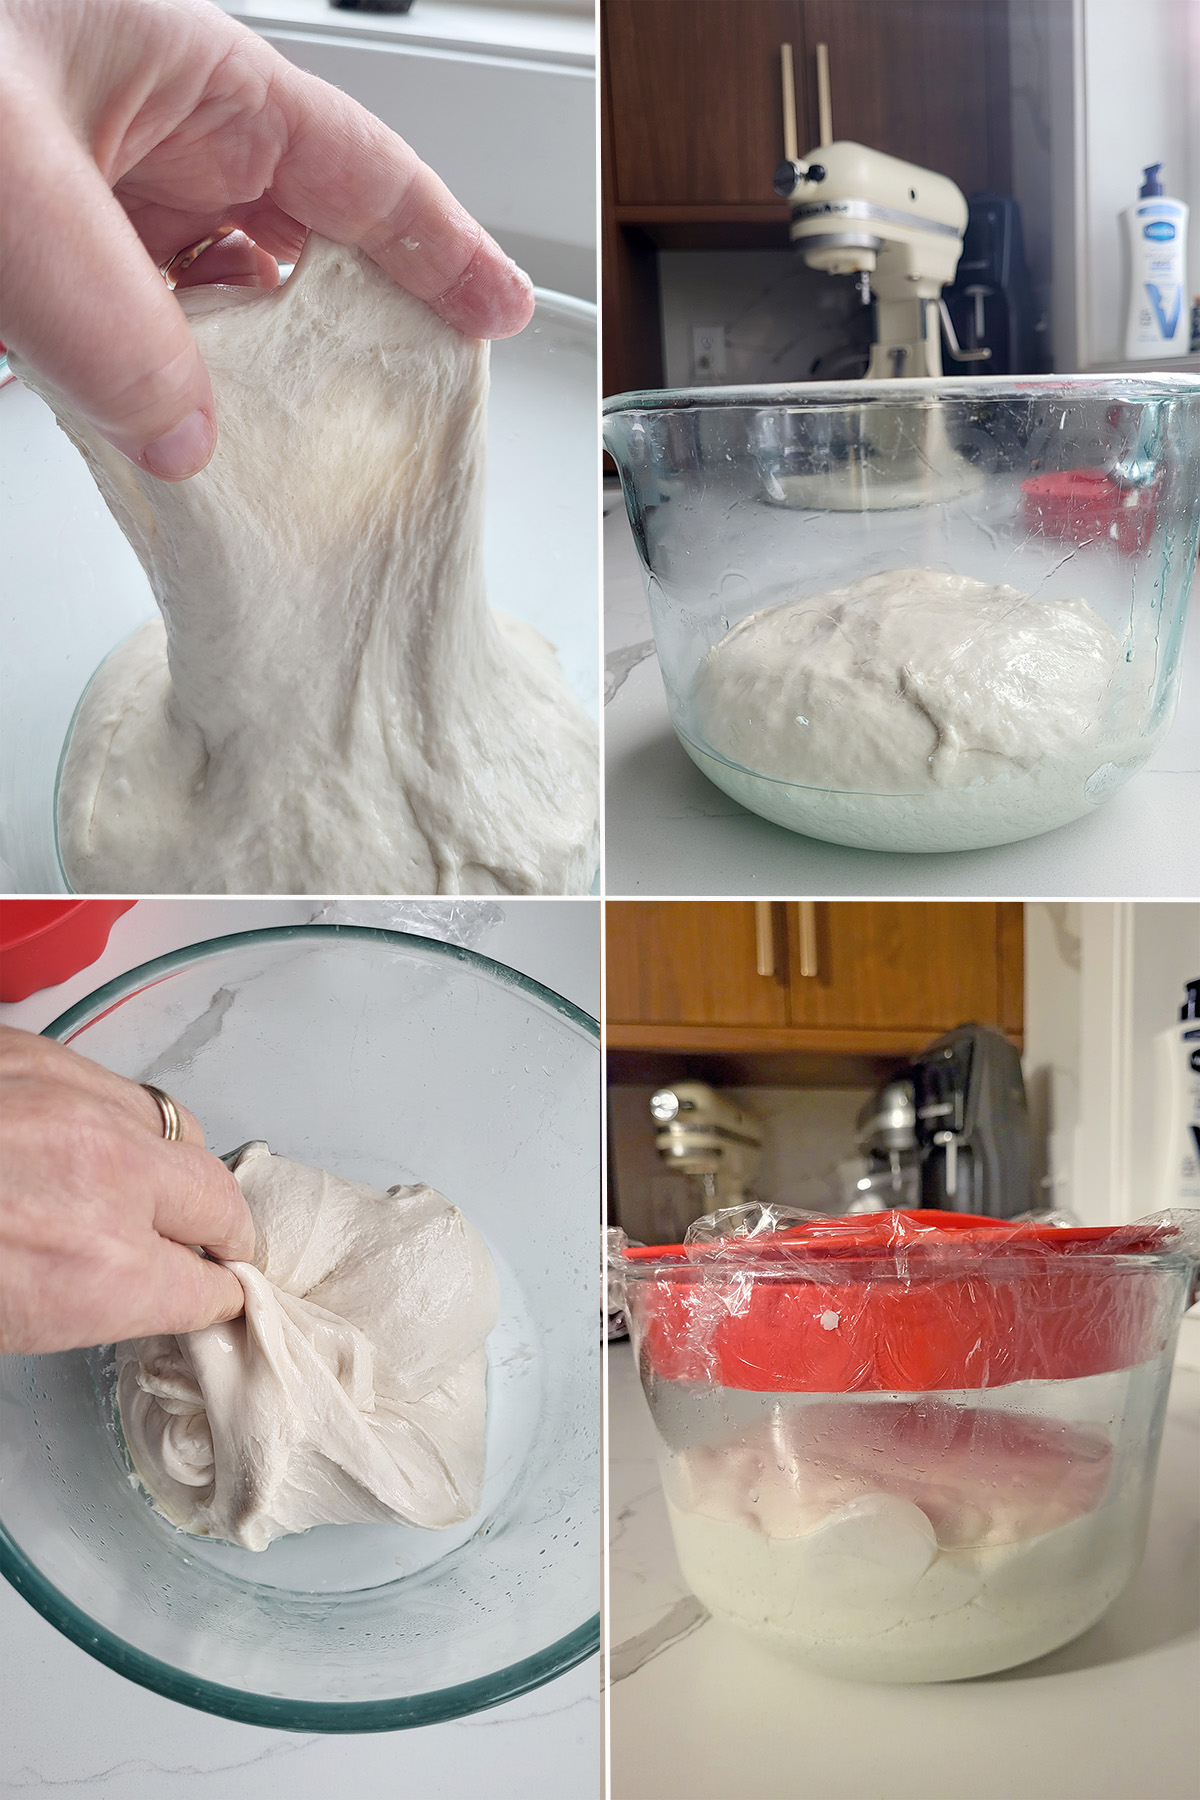
- Although the dough is sticky, it should show signs of gluten development, such as stretching without tearing.
- Set the dough aside for bulk fermentation, about 3–5 hours. Stretch and fold the dough hourly during this time. The dough will become livelier and more aerated as it ferments.
- After bulk fermentation, cover the bowl and transfer it to the refrigerator.
Cold Fermentation

- Refrigerate the dough overnight. The dough can remain refrigerated for up to two days.
- While the dough is chilling, prepare your proofing basket or parchment paper.
- Turn the dough out onto a lightly floured surface. Do not knead the dough.
Shaping and Final Rise

- Stretch and pull the dough on the top side and fold it toward the center. Continue stretching and folding all sides of the dough.
- Flip the dough seam-side down and use cupped hands to rotate it in circles, forming a tight ball.
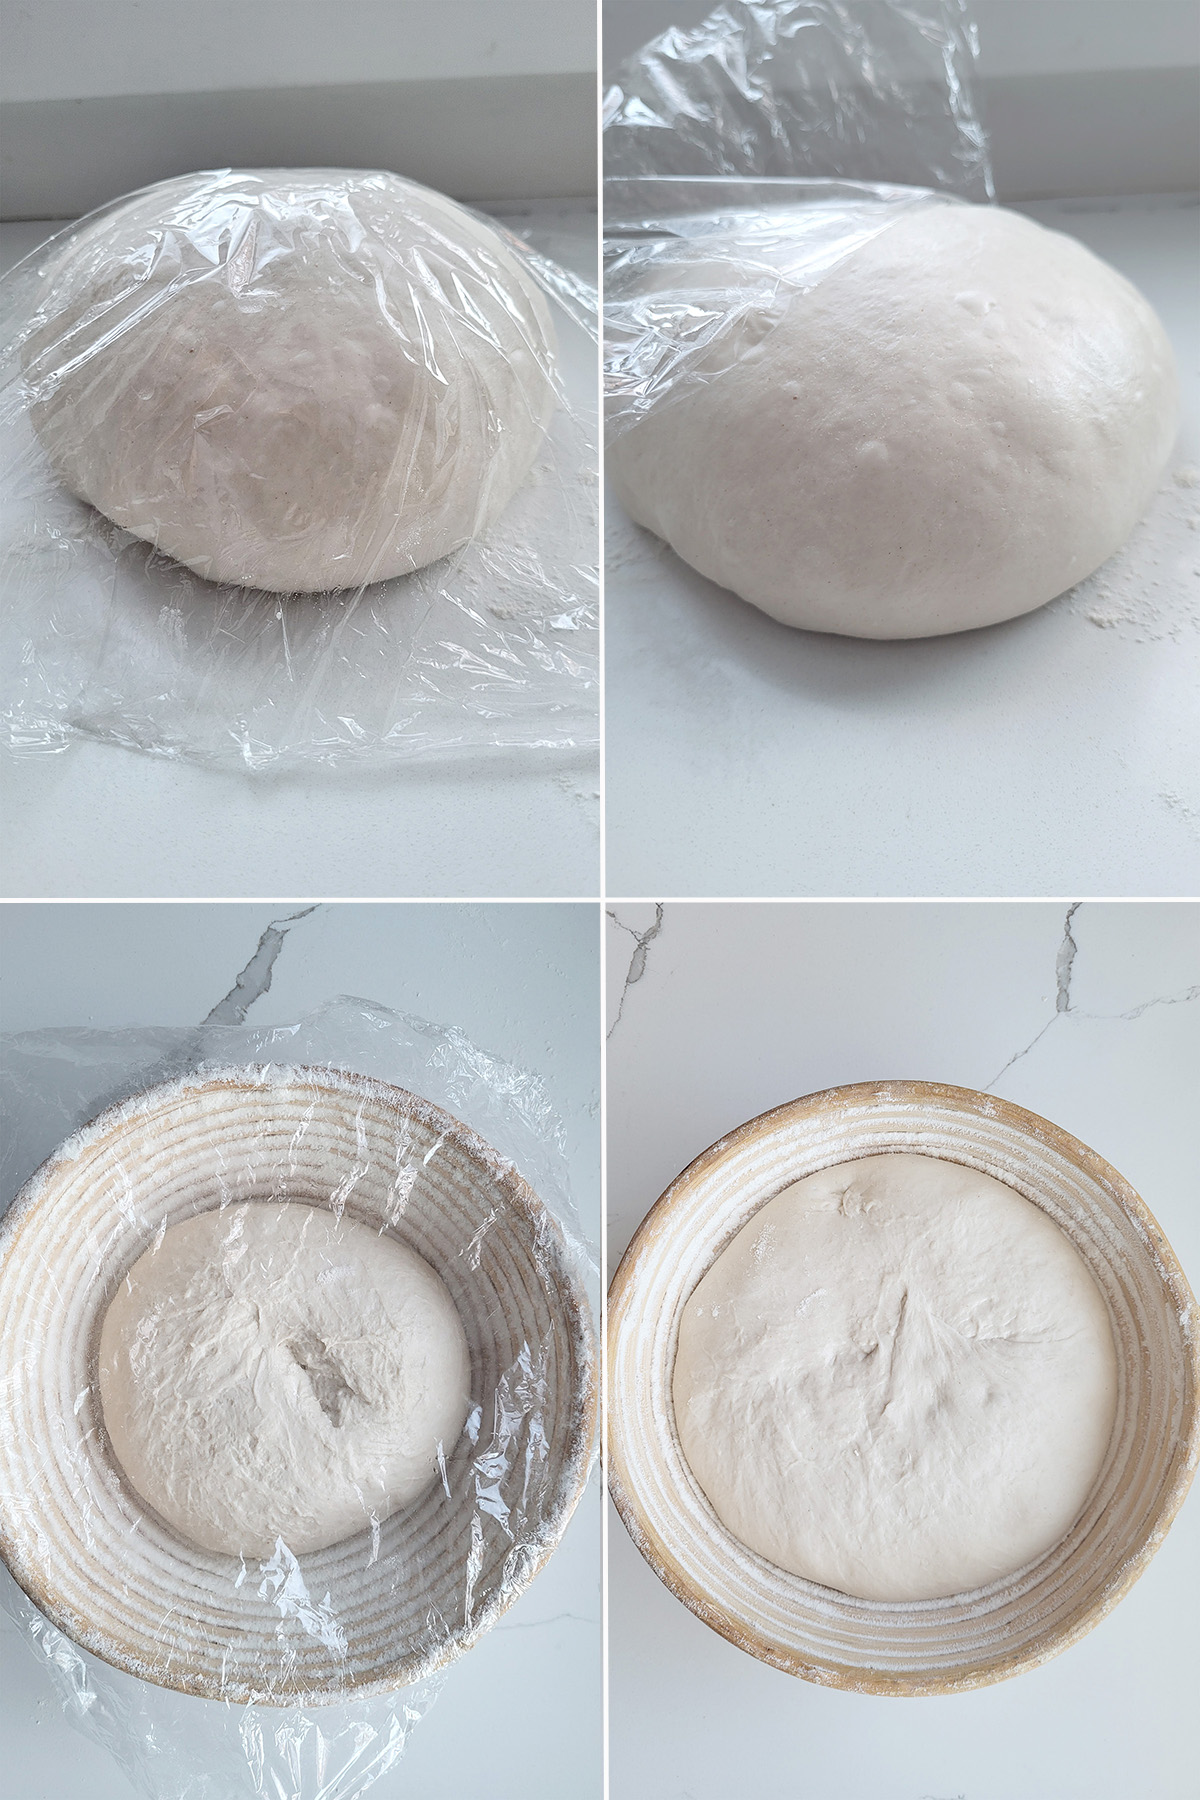
- Cover and let the dough rest for 20–30 minutes. If the dough spreads during this time, repeat the folding and shaping to strengthen the structure.
- Once the dough holds its shape, place it seam-side up in a prepared proofing basket. If you don’t have a basket, place the dough seam-side down on parchment paper for rising.
- Cover and let rise for 2–3 hours, until the dough has visibly expanded. Rise time will vary depending on dough and room temperature.
Baking the Loaf
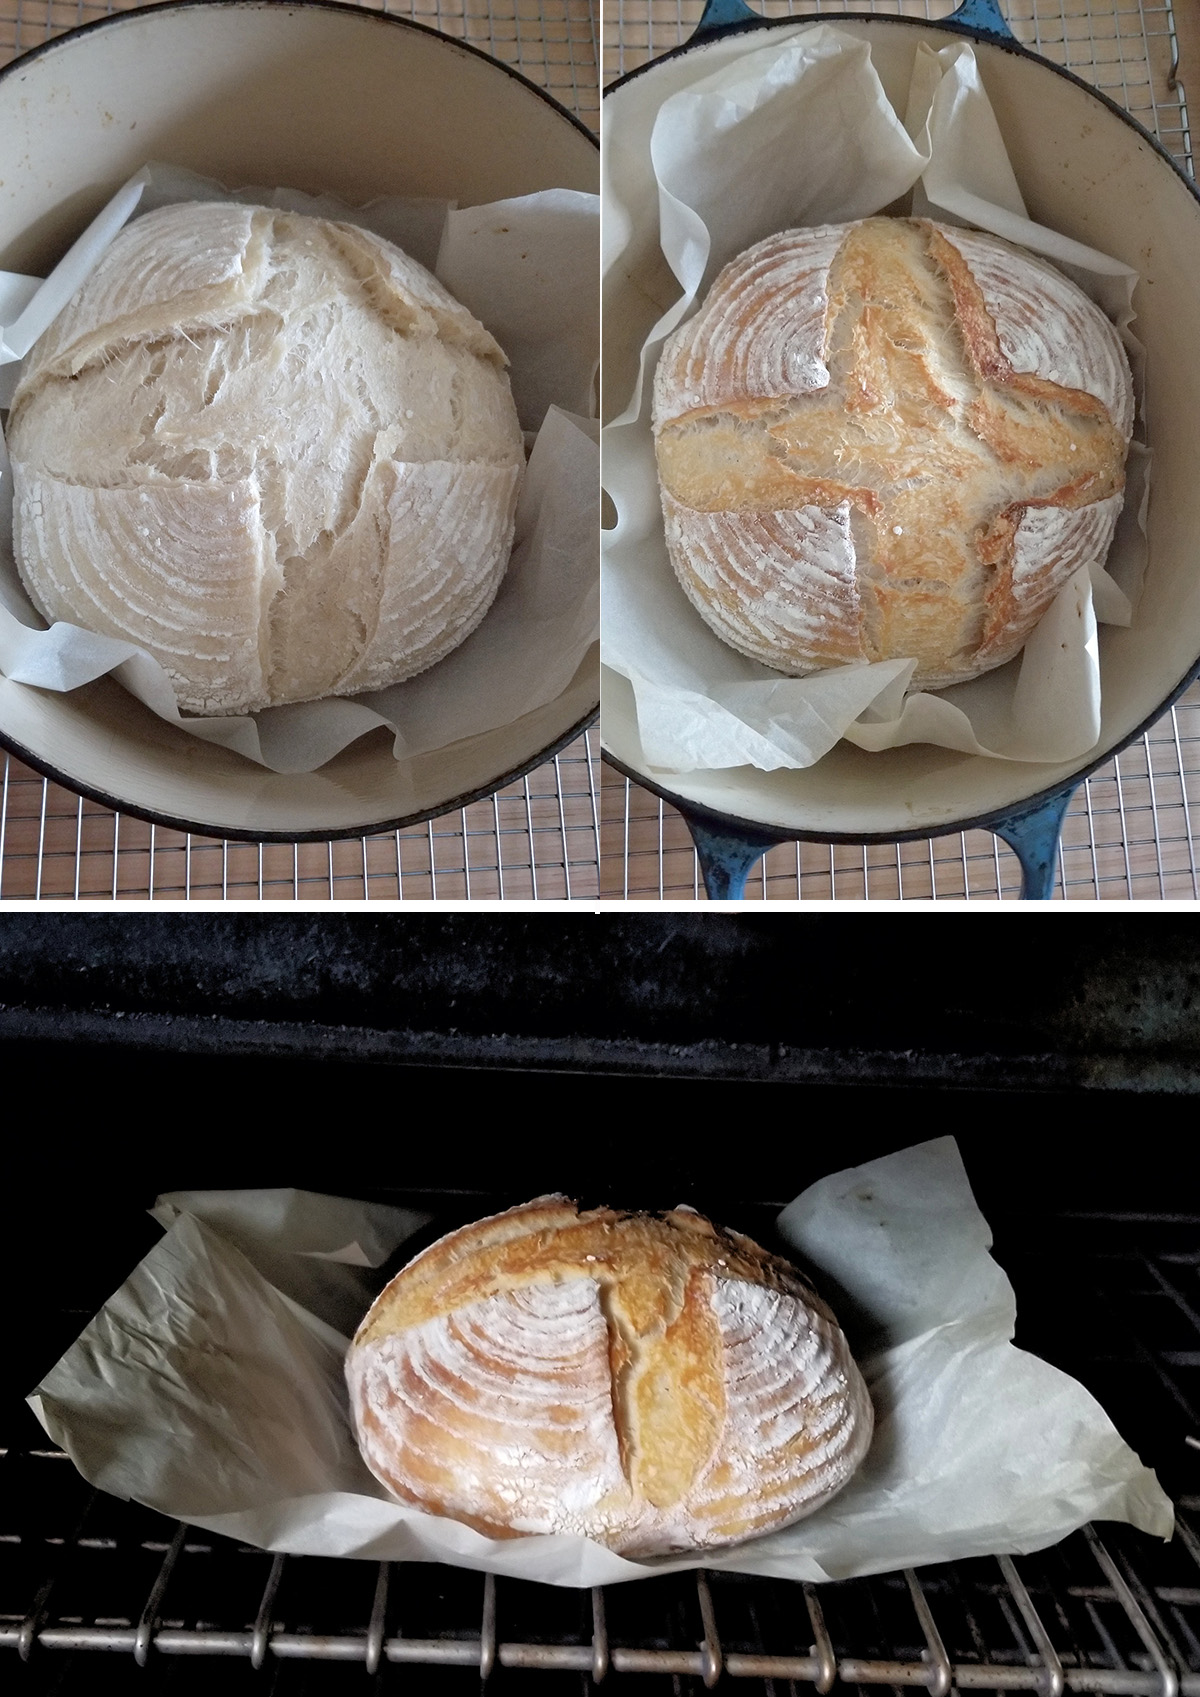
- Flip the loaf onto a piece of parchment paper, score the top, then use the paper to lower the loaf into the preheated Dutch oven. After 20 minutes baking the loaf is well-risen but still pale.
- Remove the lid and continue baking another 20 minutes until the loaf is golden brown.
- Remove the loaf from the Dutch oven and place it directly on the oven rack. Bake until deeply golden brown and very crisp.
Timeline for Making Sourdough Bread:
- Before mixing:
Feed your starter the night before or early in the morning. - Late Morning/Early Afternoon:
Mix the dough and allow it to ferment at room temperature. - Evening:
Refrigerate the dough before going to bed. - Next morning:
Shape the loaf and allow it to rise at room temperature. - Late morning:
Bake the bread.
With this schedule, you’ll have fresh sourdough by lunchtime.
Pastry Chef tips for making artisan Sourdough at home
A wet dough will feel sticky and a bit fussy at first, but the long fermentation gives the dough time to develop plenty of gluten without aggressive kneading.
The liveliness of your starter matters. For best results, use your starter after it has been fed and just before it reaches its peak rise.
If you maintain a starter at a hydration other than 100%, you’ll need to adjust the flour and water in the dough accordingly.
A Dutch oven creates the moist environment needed for a thick, crisp crust. Any heavy, oven-safe pot with a lid can work if you don’t own a Dutch oven.
FAQs for making sourdough bread at home:
Yes, start the dough early in the morning and skip the refrigeration step.
You can proof the dough right on the parchment paper .
Use any heavy, oven-safe pot with a lid, or bake on a sheet pan. The crust may be slightly less crisp.
You can, but I recommend using my dedicated Sourdough Baguettes recipe for best results.
About 2–3 days at room temperature.
Yes. Freeze the loaf or slices in a freezer bag for up to three months. If you freeze the whole loaf, allow it to defrost in the bag then heat about 15 minutes in a 200F oven to re-crisp the crust.
If You Want to Try Another Crusty Loaf
If you enjoy this bread and want to experiment further, try Sourdough Semolina Bread for an extra-crisp crust and a slightly different flavor profile.
I know you hate to throw away that sourdough discard. Check out these recipes that use sourdough discard.

If you love this recipe as much as I do, I’d really appreciate a star rating and a quick comment. Ratings and comments help my recipes show in search results. Thanks!

Artisan Sourdough Bread Recipe
Ingredients
- 8 ounces active sourdough starter ((100% hydration))
- 12 ounces warm water
- 17 ½ ounces bread flour
- 1 ½ teaspoons table salt
- Rice flour for proofing basket
Instructions
- Combine 8 ounces active sourdough starter, 12 ounces warm water and 10 ½ ounces Bread Flour of the flour. Mix with the paddle on low speed until it forms a thick batter. Cover the bowl and set aside for 30-60 minutes.
- Switch to the dough hook and add 1 ½ teaspoons table salt and remaining 7 ounces Bread Flour. Mix until combined and the dough begins to clear the sides of the bowl, about 5 minutes.If mixing by hand, stir with a wooden spoon or bowl scraper. The dough will be sticky and cannot be kneaded by hand—structure will develop through fermentation and folding.
- Transfer the dough to a lightly oiled bowl, turning once to coat. Cover and leave at room temperature.
- After 60 minutes, uncover the dough. Lift one side and fold it into the center. Repeat with the remaining three sides, then flip the dough over. Repeat this folding process every hour for 3–5 hours, until the dough is lively, elastic, and airy. If the dough still feels sluggish, allow another hour or two at room temperature.
- Cover tightly and refrigerate overnight.
- Turn the cold dough out onto a lightly floured surface. Without kneading, fold each side into the center to form a compact package. Flip the dough and use cupped hands to shape it into a smooth ball. Cover lightly and rest for 20–30 minutes. If the dough spreads, reshape and rest again—this helps confirm the dough has enough strength to hold its shape.
- Lightly reshape the dough. Place seam-side up in a well-floured proofing basket (I use a 50/50 mix of rice flour and all-purpose flour). If you don’t have a basket, place the dough seam-side down on parchment and lightly dust the top with flour. Cover and let rise in a warm place until nearly doubled and the dough springs back slowly when pressed, about 3–4 hours.
- Preheat the oven to 425°F with a Dutch oven with the lid inside.
- Turn the loaf out onto parchment, score the top, and carefully lower it into the preheated Dutch oven. Cover and bake for 20 minutes. Remove the lid and continue baking another 20 minutes until the loaf is well browned.
- Remove the loaf from the pot and place it directly on the oven rack. Bake an additional 5–10 minutes until deeply browned and very crisp. Total baking time is about 40–50 minutes.
- Cool completely on a wire rack before slicing.
Would you like to save this recipe?


As an Amazon Associate and member of other affiliate programs, I earn from qualifying purchases.
I love the way the Dutch oven works,but is there any way to get a round loaf using this recipe?
By round do you mean higher and almost a ball shape?
@Eileen Gray,
Yes. Is it possible to keep it from flattening out?
Well, you need to make a super tight dough ball with very strong gluten so the bread rises up without flattening. You could try adding a little more flour. That will tighten up the dough but the crumb will also be a bit tighter.
Love this recipe so much. I wonder, can I can put this dough in a loaf pan & bake it?
Sure.
@Eileen Gray, do I bake it at 425 and for how long?
425 should be fine. I can’t say for sure since I haven’t tried it, but I’d guess it will bake a bit faster. You probably want to lightly grease the pan since there is no fat in the dough. Also, depending on the size of the pan, I would make sure not to fill it more than about 1/2 way with the unrisen dough. Any extra dough could be baked as a mini loaf on a pan.
Hi I fed my starter yesterday used a cup after it had doubled fora loaf and put the rest in the frig. It grew a bit more overnight and still looked bubbly ,active and it would float
still in the morning. Do I still have to re feed today before using?
I find that the bread is always better with a starter that’s been feed recently and is at the peak of activity. You could probably get away without feeding, but the dough won’t be as lively.
I am new to sourdough and really enjoying your tips and lessons. Question, do I have to discard when I feed?
You don’t have to, but if you don’t at some point you’ll end up drowning in sourdough starter because it will grow exponentially. If you keep a 12oz starter and add 12oz water and 12oz flour to feed you’ll have 36oz of starter. If you feed that without discarding you’ll have 108oz of starter. Even if you keep a small starter, it will grow pretty quickly. But keeping a small starter does mean much less discard each time, 2oz vs. 8oz discard. The drawback is that you do have to do 2 feedings each time you want to bake using a small starter. Don’t forget that you can also bake with sourdough discard.
What size Dutch oven do you use for this recipe? Will a 5.5 qt. Le Creuset work?
I use a 7.5 qt Dutch oven. The bread almost fills the pot, but there is a bit of room. My Dutch oven is 11″ across, to give you a comparison.