Sourdough Bread Recipe
This basic sourdough bread recipe produces an artisan-style loaf with a crisp crust and chewy crumb—the kind of bread most people picture when they think of sourdough. It’s best baked in a Dutch oven, but the method is flexible and adaptable for home kitchens.
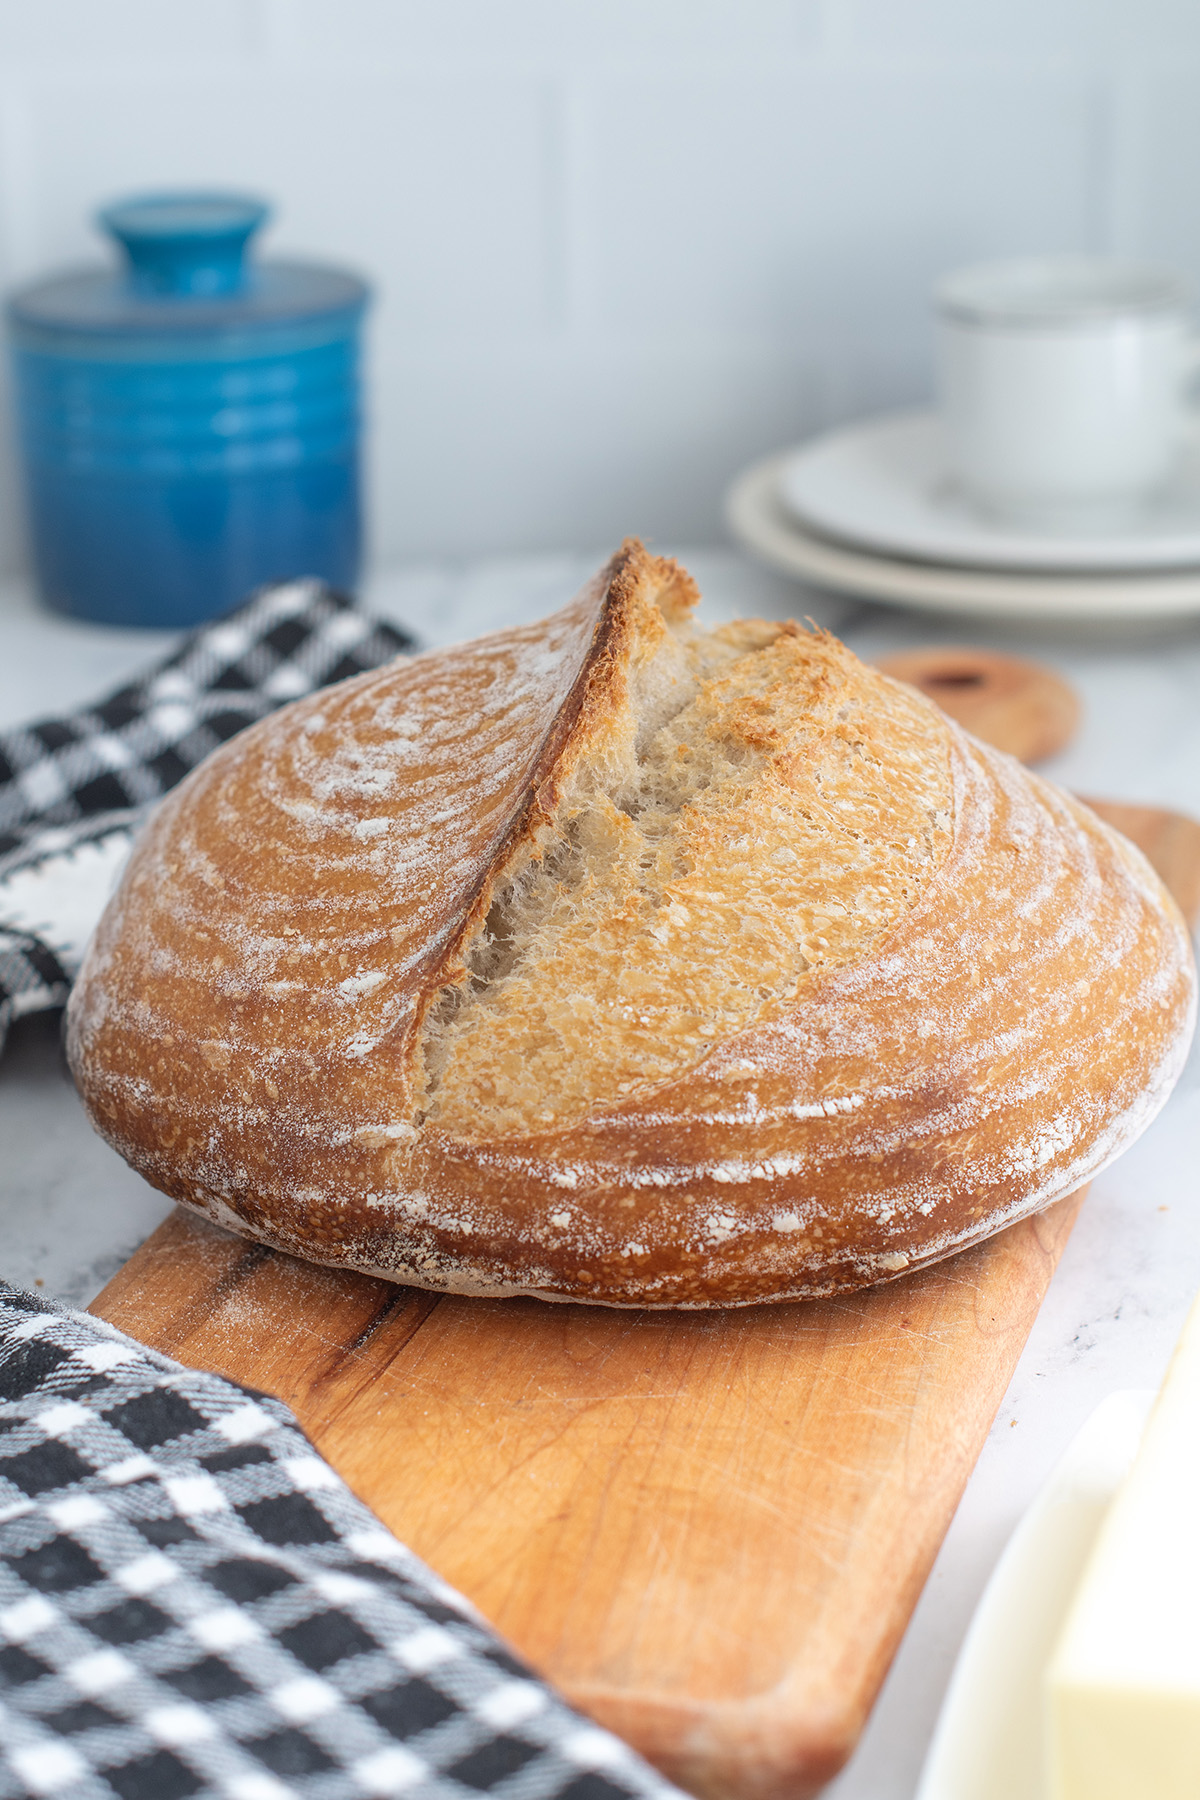
Table of contents
For me, this loaf alone is reason enough to keep a sourdough starter. The wild yeast in a starter gives the bread depth of flavor and texture that’s hard to match with commercial yeast.
Because the bread freezes beautifully, I often make a loaf each time I feed my starter. One bake now means good bread on hand later.
What Makes This a Classic Sourdough Loaf
Any bread made with a sourdough starter is technically “sourdough,” but a few key choices produce the light, crusty, and chewy loaf most people associate with artisan sourdough bread.
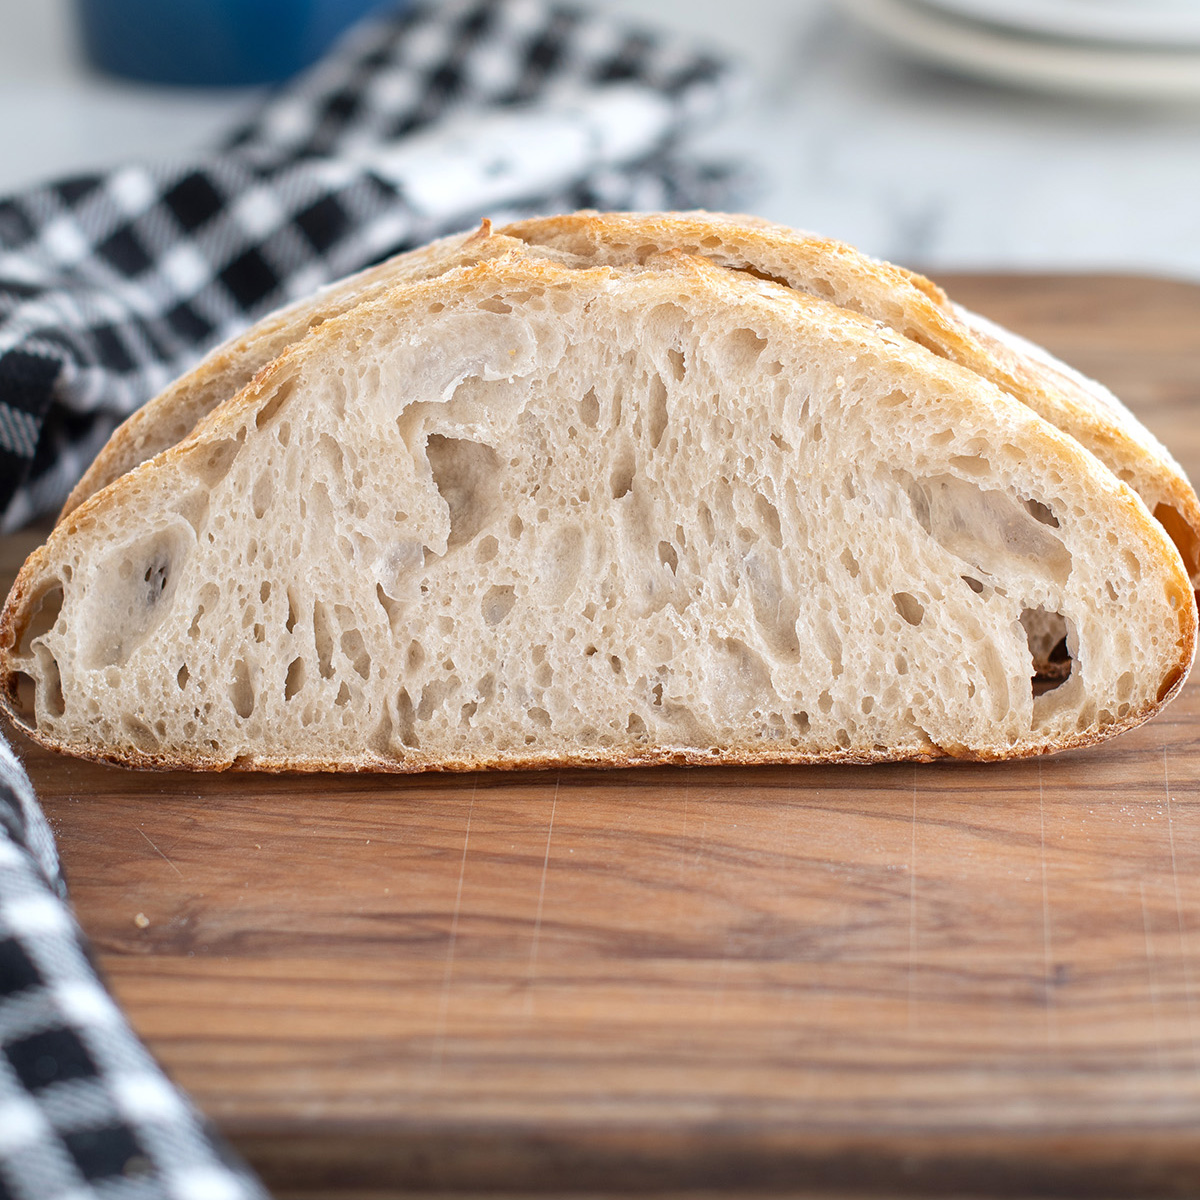
This recipe relies on a naturally leavened dough, a relatively high-hydration dough and a long, slow fermentation. Together, those elements allow the dough to develop strength and flavor without intensive kneading, resulting in an open crumb and a deeply flavorful crust.
Ingredients
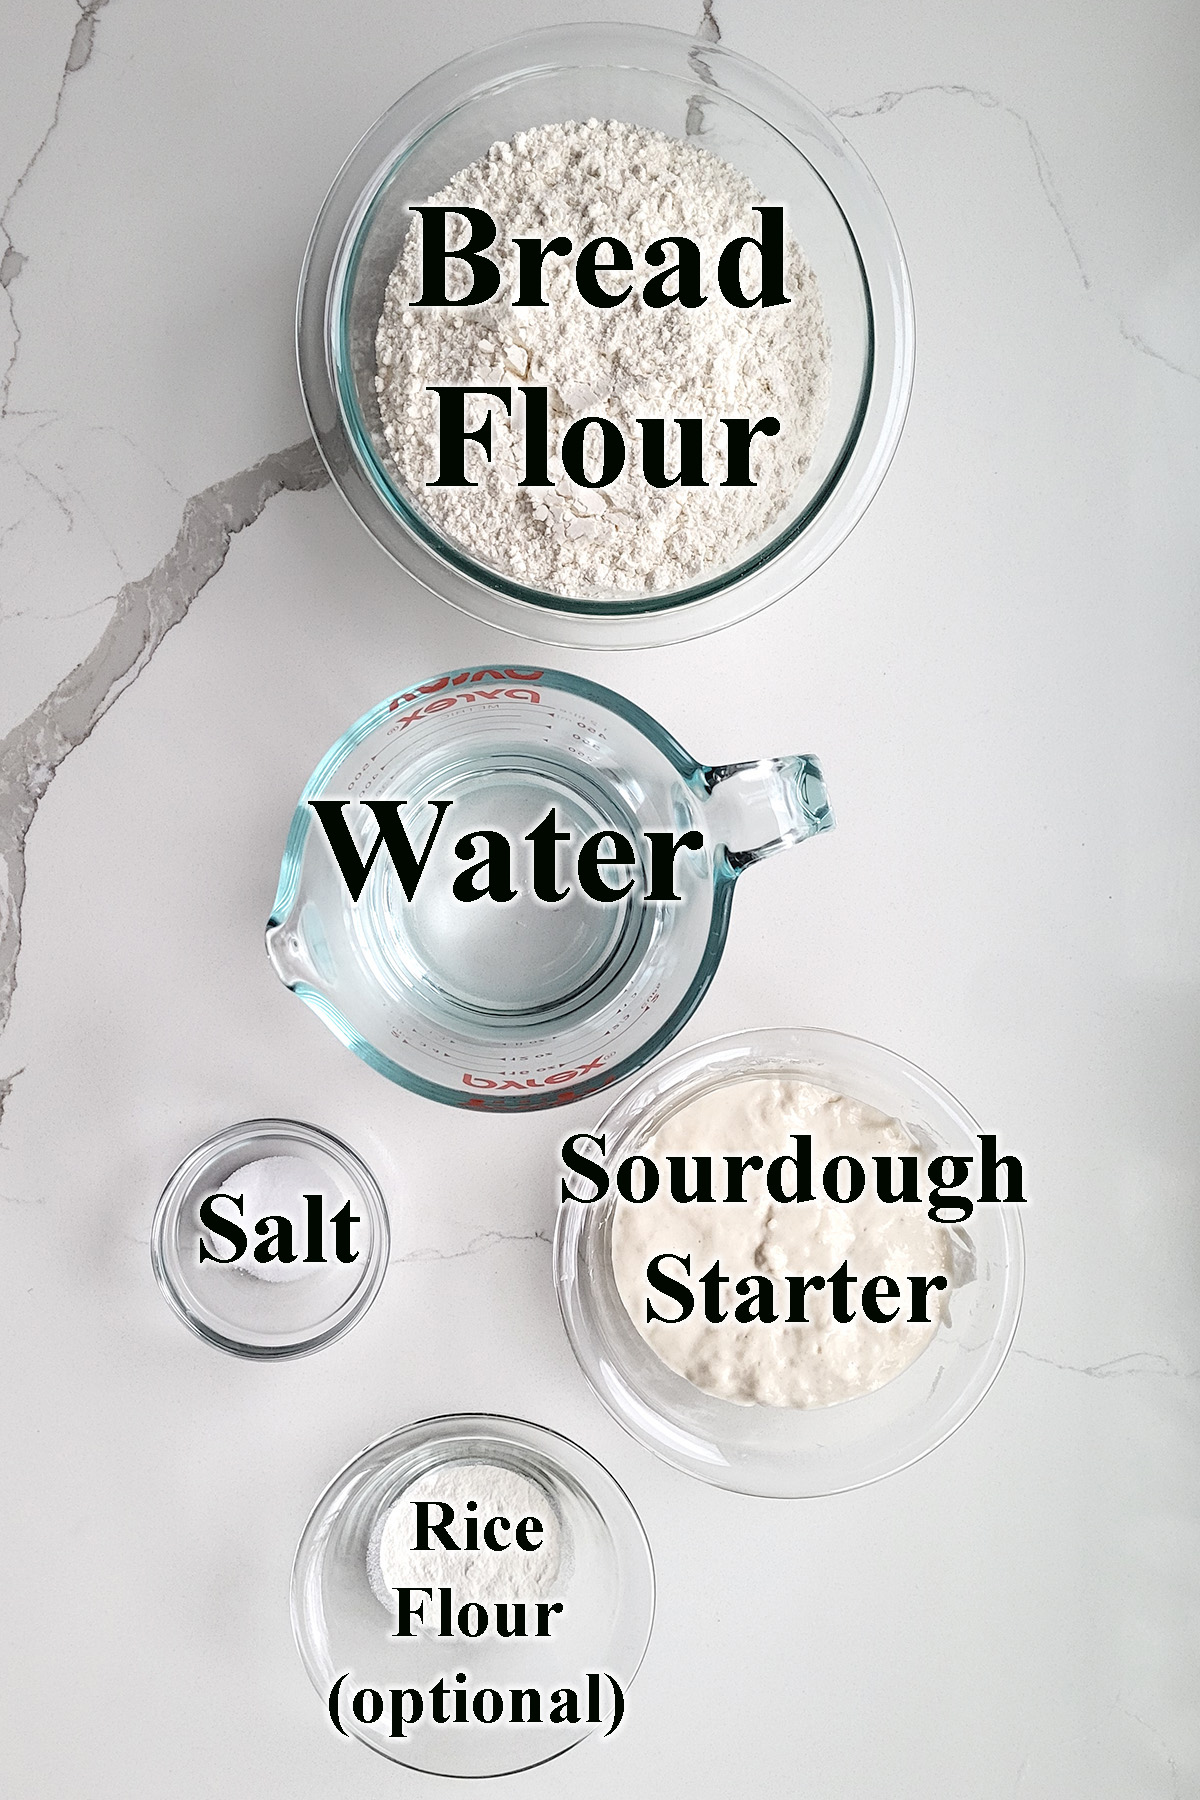
Ingredient Notes
- Active sourdough starter (100% hydration): This recipe is written for a starter fed with equal weights of flour and water. The starter should be active and near its peak when mixed into the dough.
- Warm water: Slightly warm water helps kick-start fermentation, especially if your kitchen runs cool.
- Unbleached Bread Flour: Bread flour’s higher protein content encourages stronger gluten development, which supports the structure of this relatively wet dough.
- Salt: Salt strengthens gluten and balances flavor.
- Rice flour (optional): Used for dusting a proofing basket. Rice flour resists sticking better than wheat flour.
If your starter is maintained at a different hydration, you’ll need to adjust the flour and water slightly. You’ll find guidance for that in the Sourdough Baking Guide.
Process Photos — How This Dough Comes Together
Here’s what the recipe process looks like at each stage. Refer to the recipe card below for measurements and exact instructions.
Mixing and Bulk Fermentation
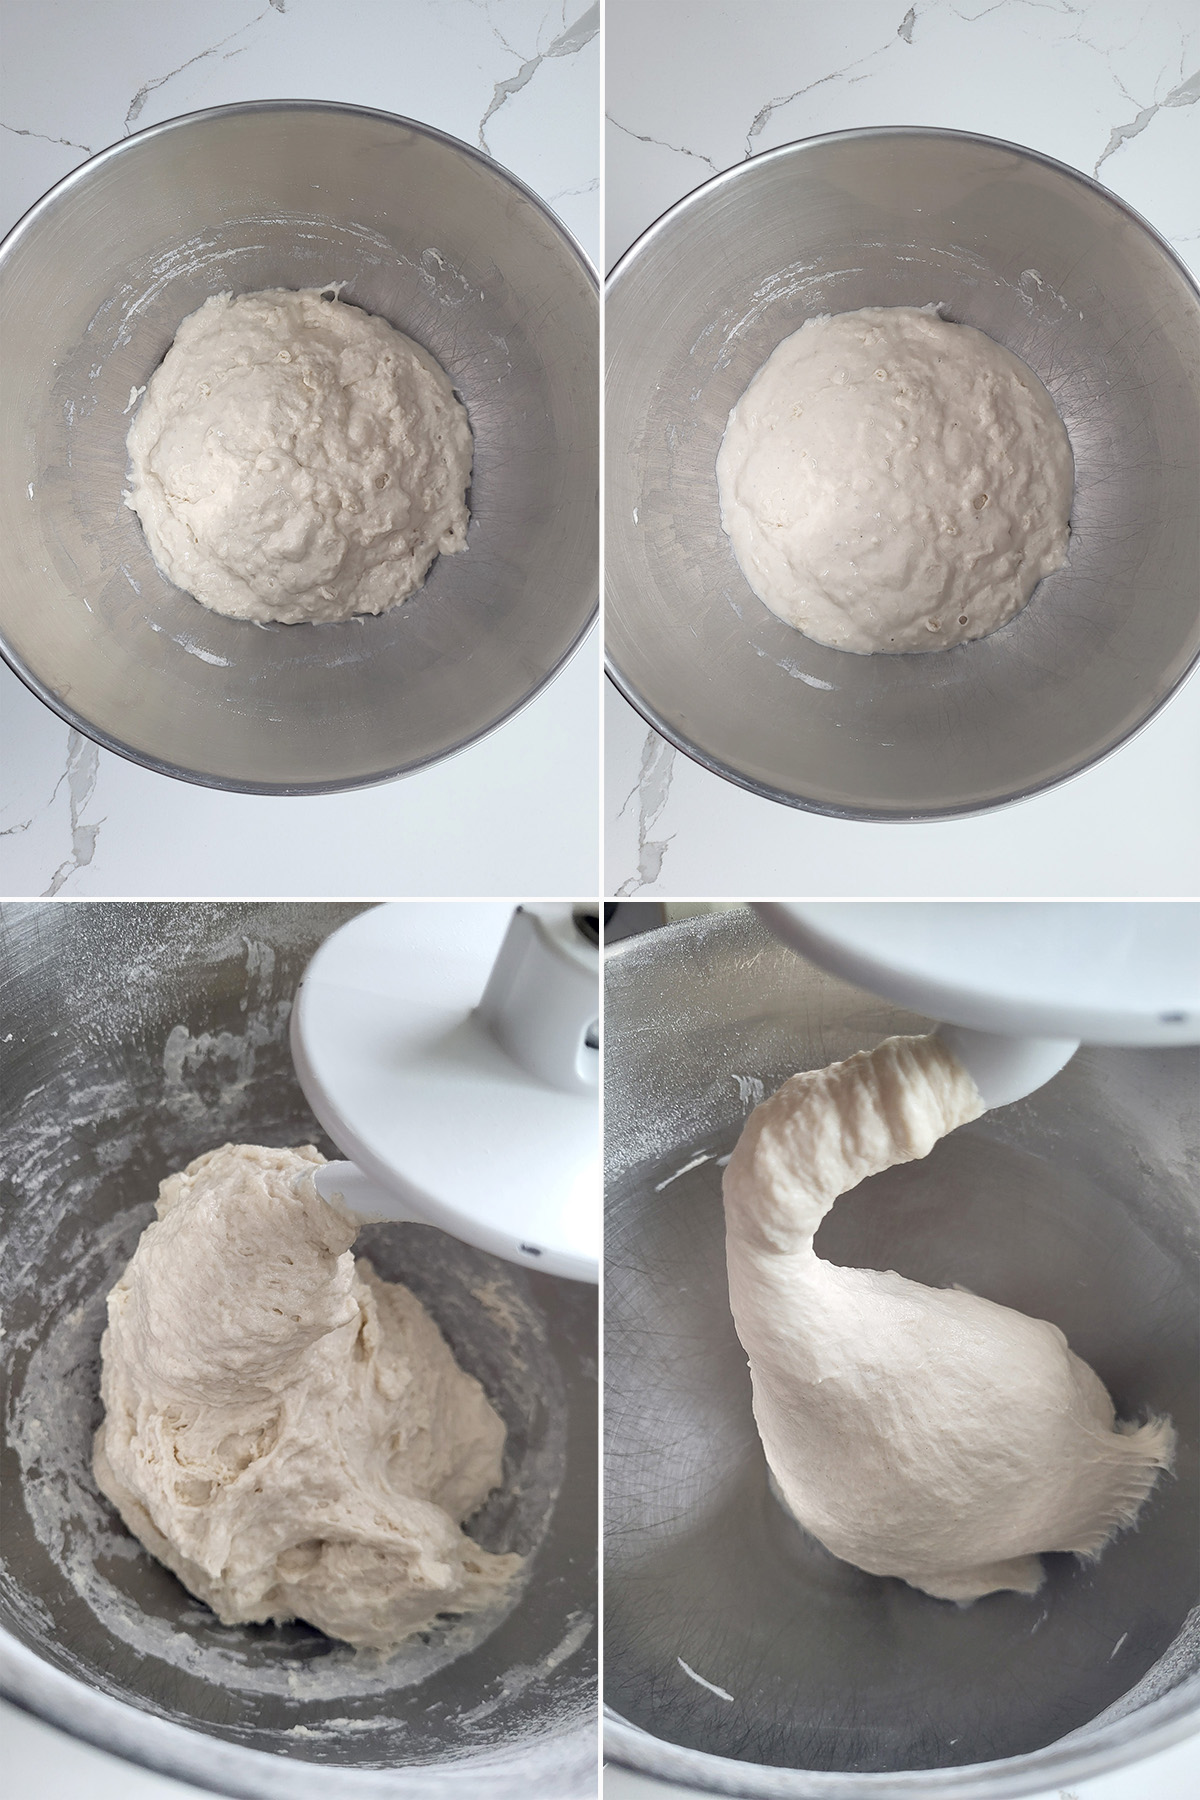
- The dough can be mixed by hand or on a stand mixer. For the autolyse, mix the starter, water, and a portion of the flour, then set it aside.
- Add the salt and remaining flour. If kneading in a mixer, the dough should clear the sides of the bowl.
- The dough will start out quite sticky but will become more cohesive as fermentation progresses. This transformation happens gradually—don’t worry if the dough still feels sticky early on.
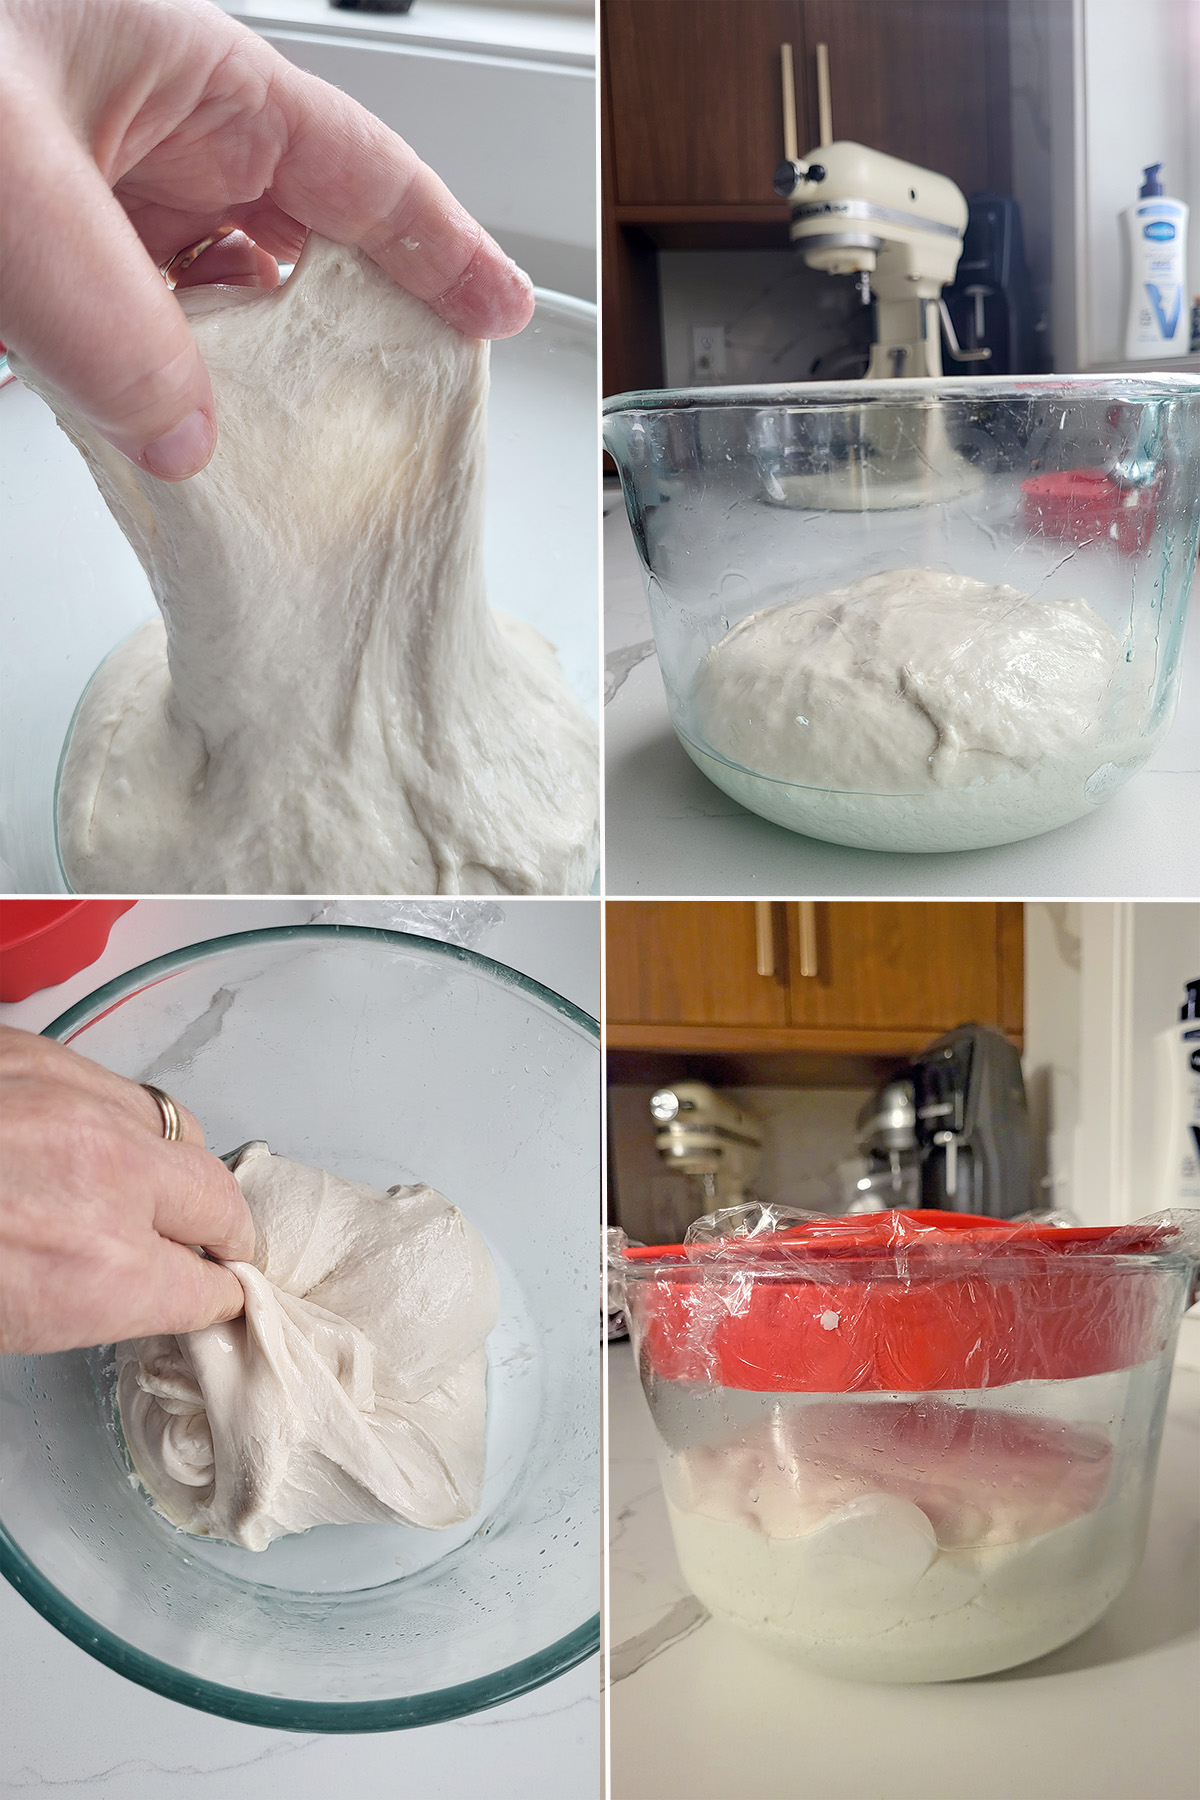
- Although the dough is sticky, it should show signs of gluten development, such as stretching without tearing.
- Set the dough aside for bulk fermentation, about 3–5 hours. Stretch and fold the dough hourly during this time. The dough will become livelier and more aerated as it ferments.
- After bulk fermentation, cover the bowl and transfer it to the refrigerator.
Cold Fermentation
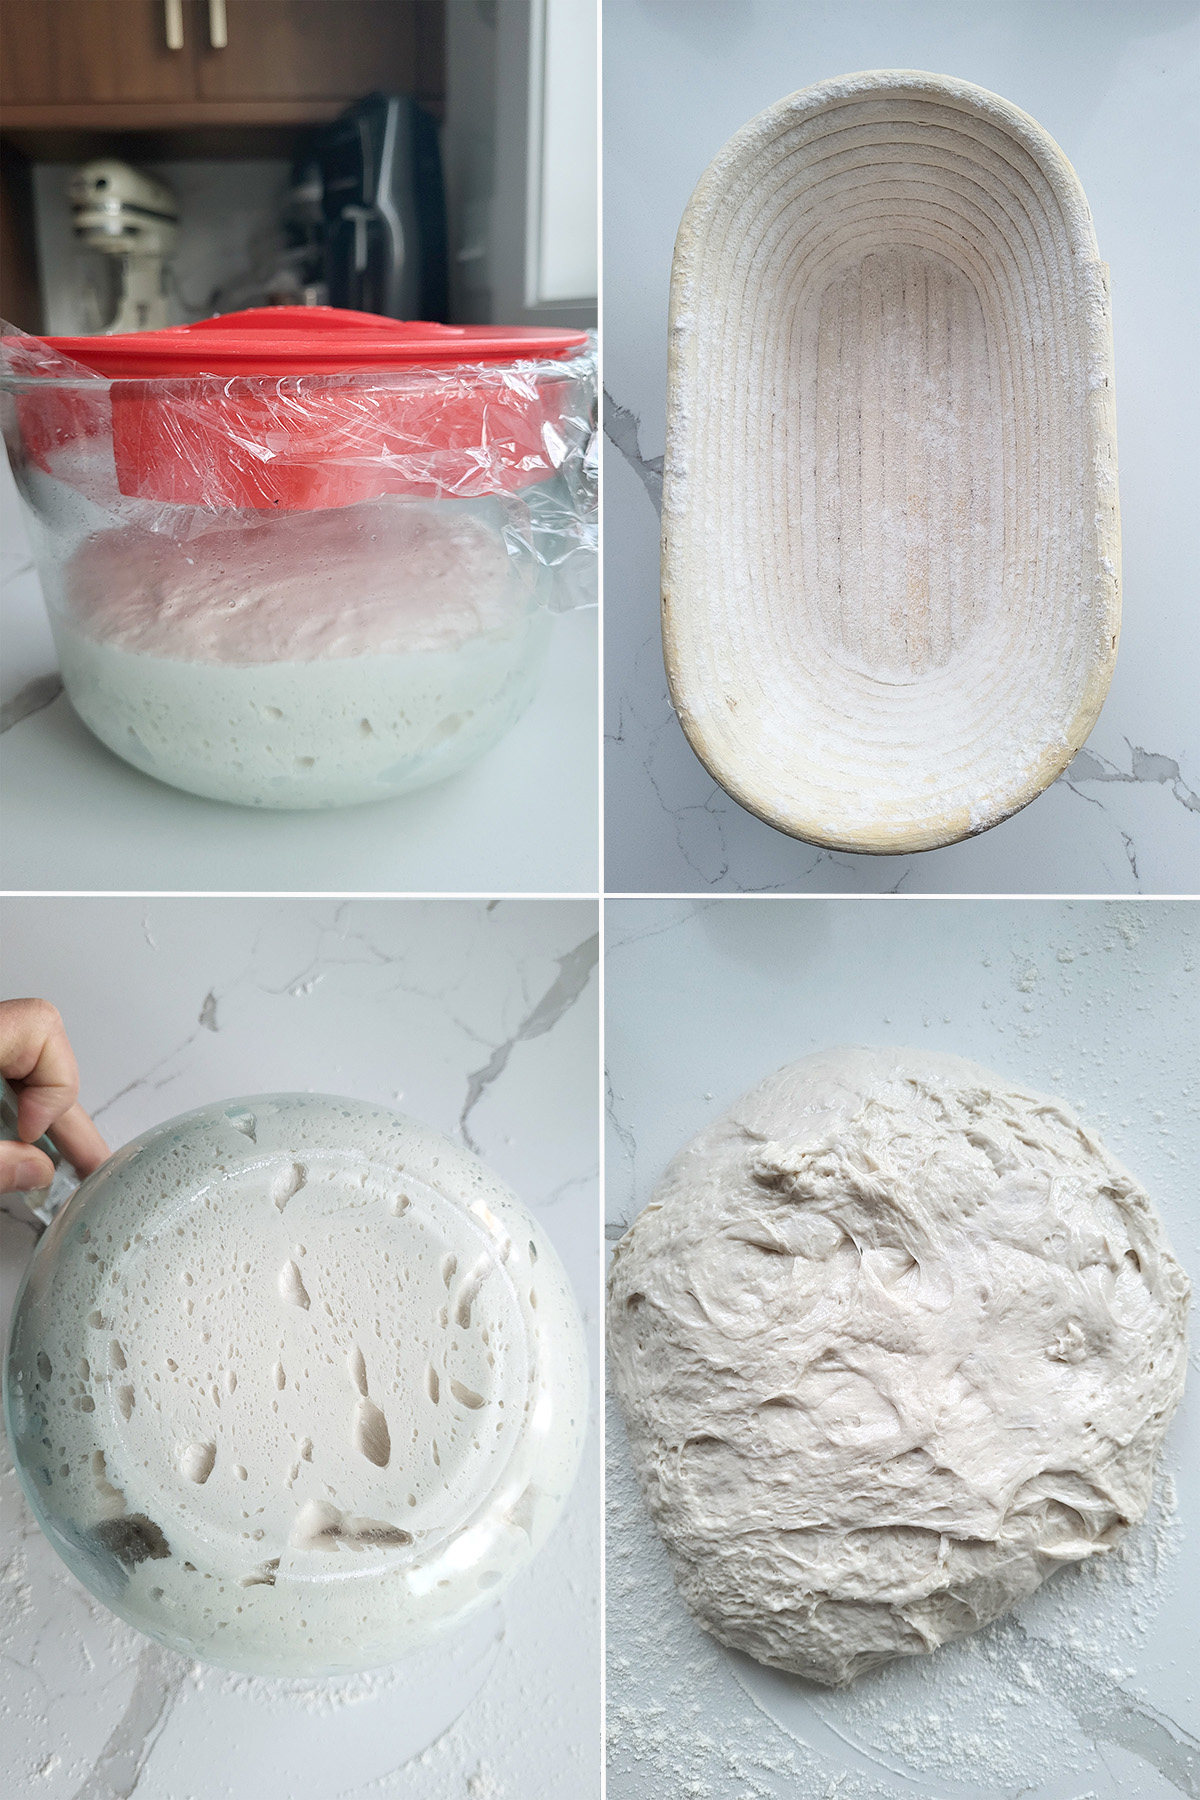
- Refrigerate the dough overnight. The dough can remain refrigerated for up to two days.
- While the dough is chilling, prepare your proofing basket or parchment paper.
- Turn the dough out onto a lightly floured surface. Do not knead the dough.
Shaping and Final Rise
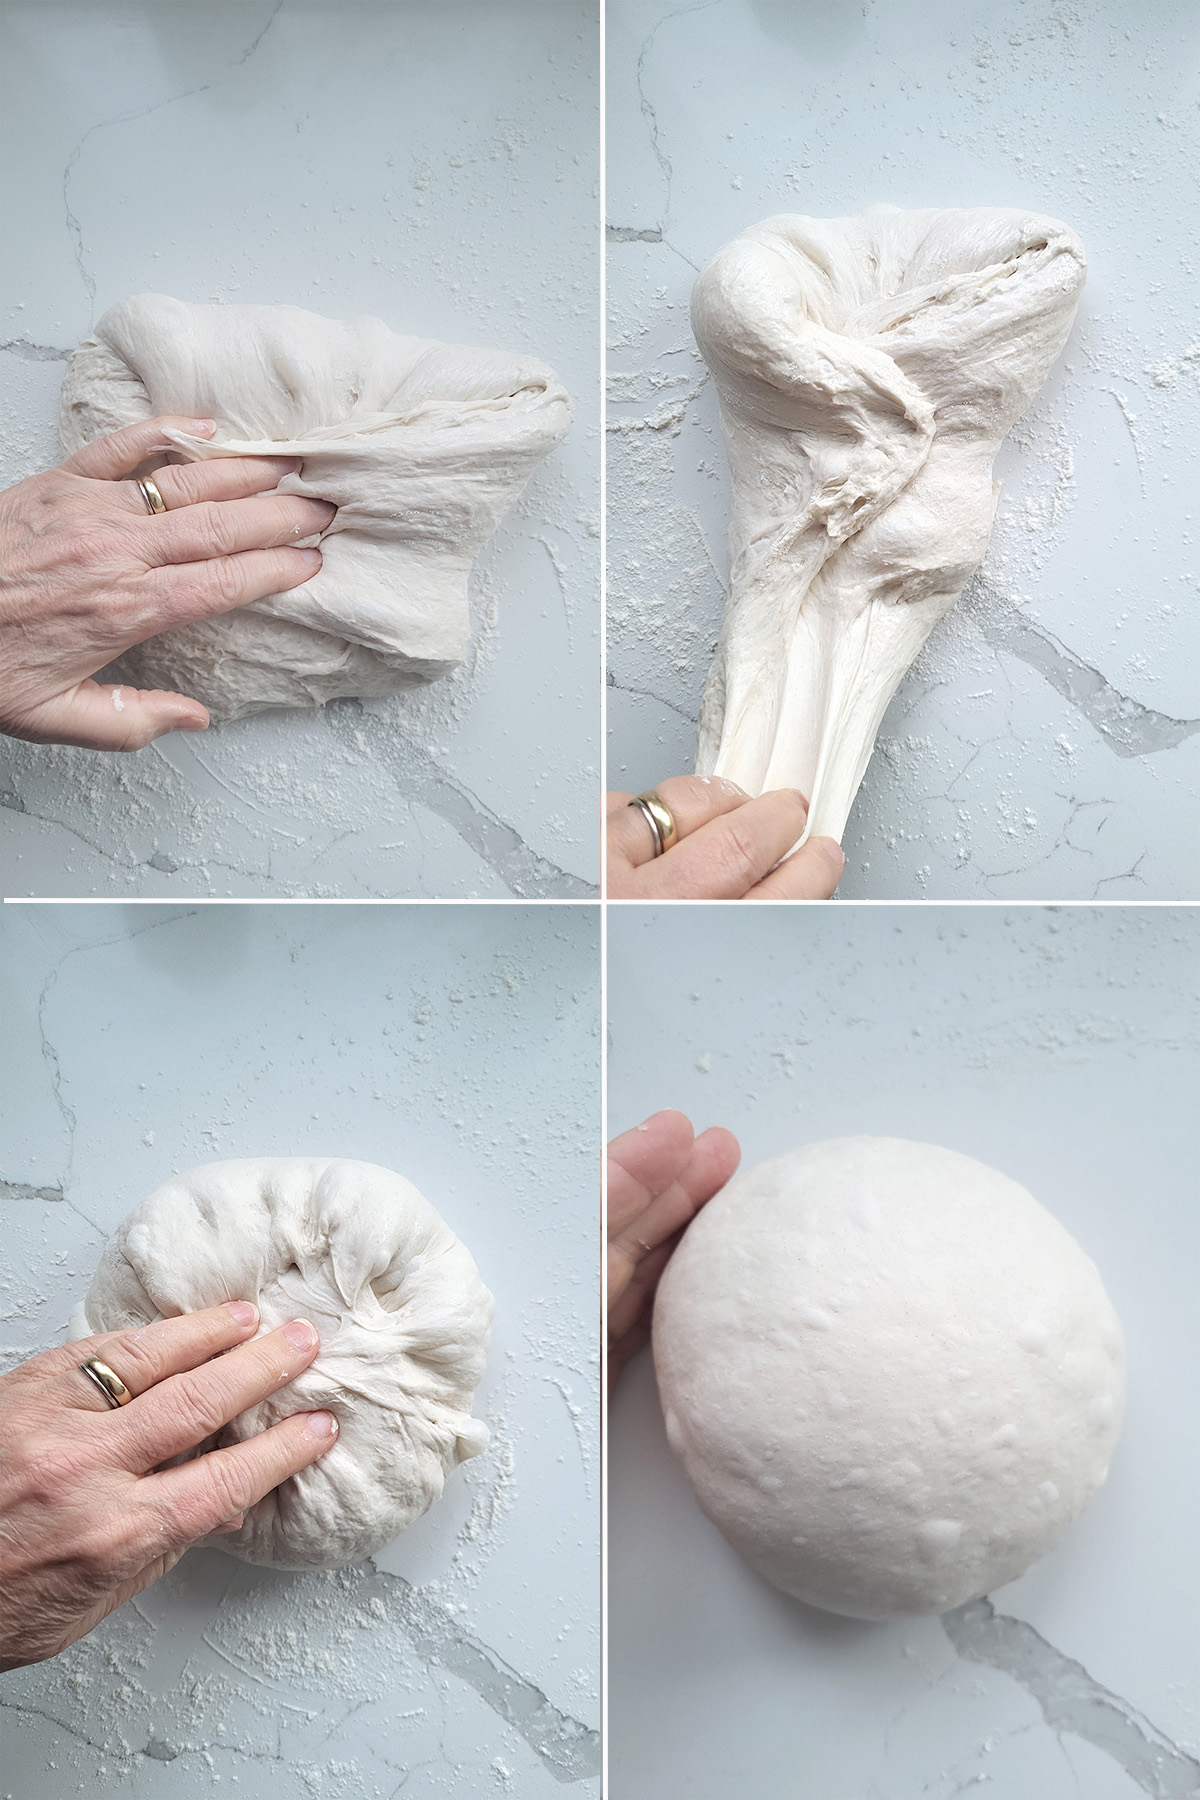
- Stretch and pull the dough on the top side and fold it toward the center. Continue stretching and folding all sides of the dough.
- Flip the dough seam-side down and use cupped hands to rotate it in circles, forming a tight ball.
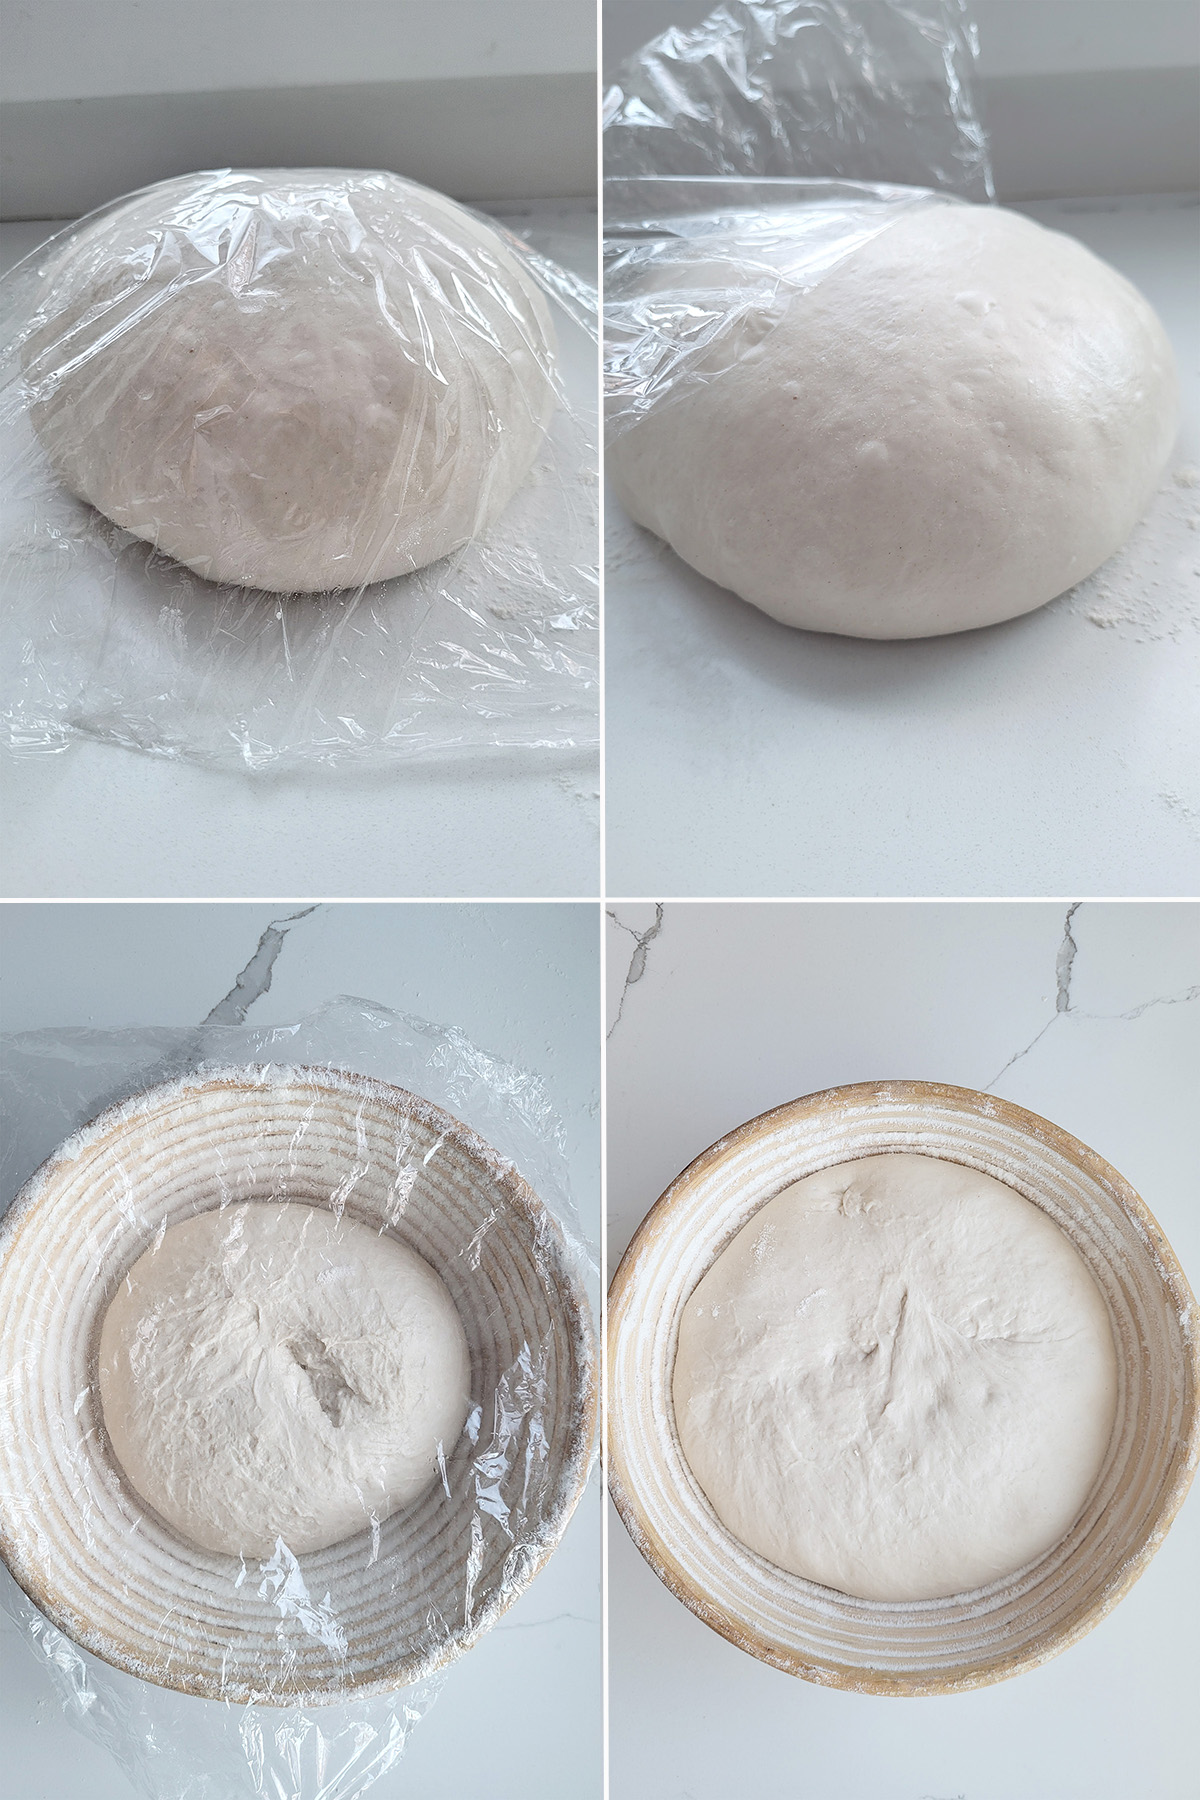
- Cover and let the dough rest for 20–30 minutes. If the dough spreads during this time, repeat the folding and shaping to strengthen the structure.
- Once the dough holds its shape, place it seam-side up in a prepared proofing basket. If you don’t have a basket, place the dough seam-side down on parchment paper for rising.
- Cover and let rise for 2–3 hours, until the dough has visibly expanded. Rise time will vary depending on dough and room temperature.
Baking the Loaf
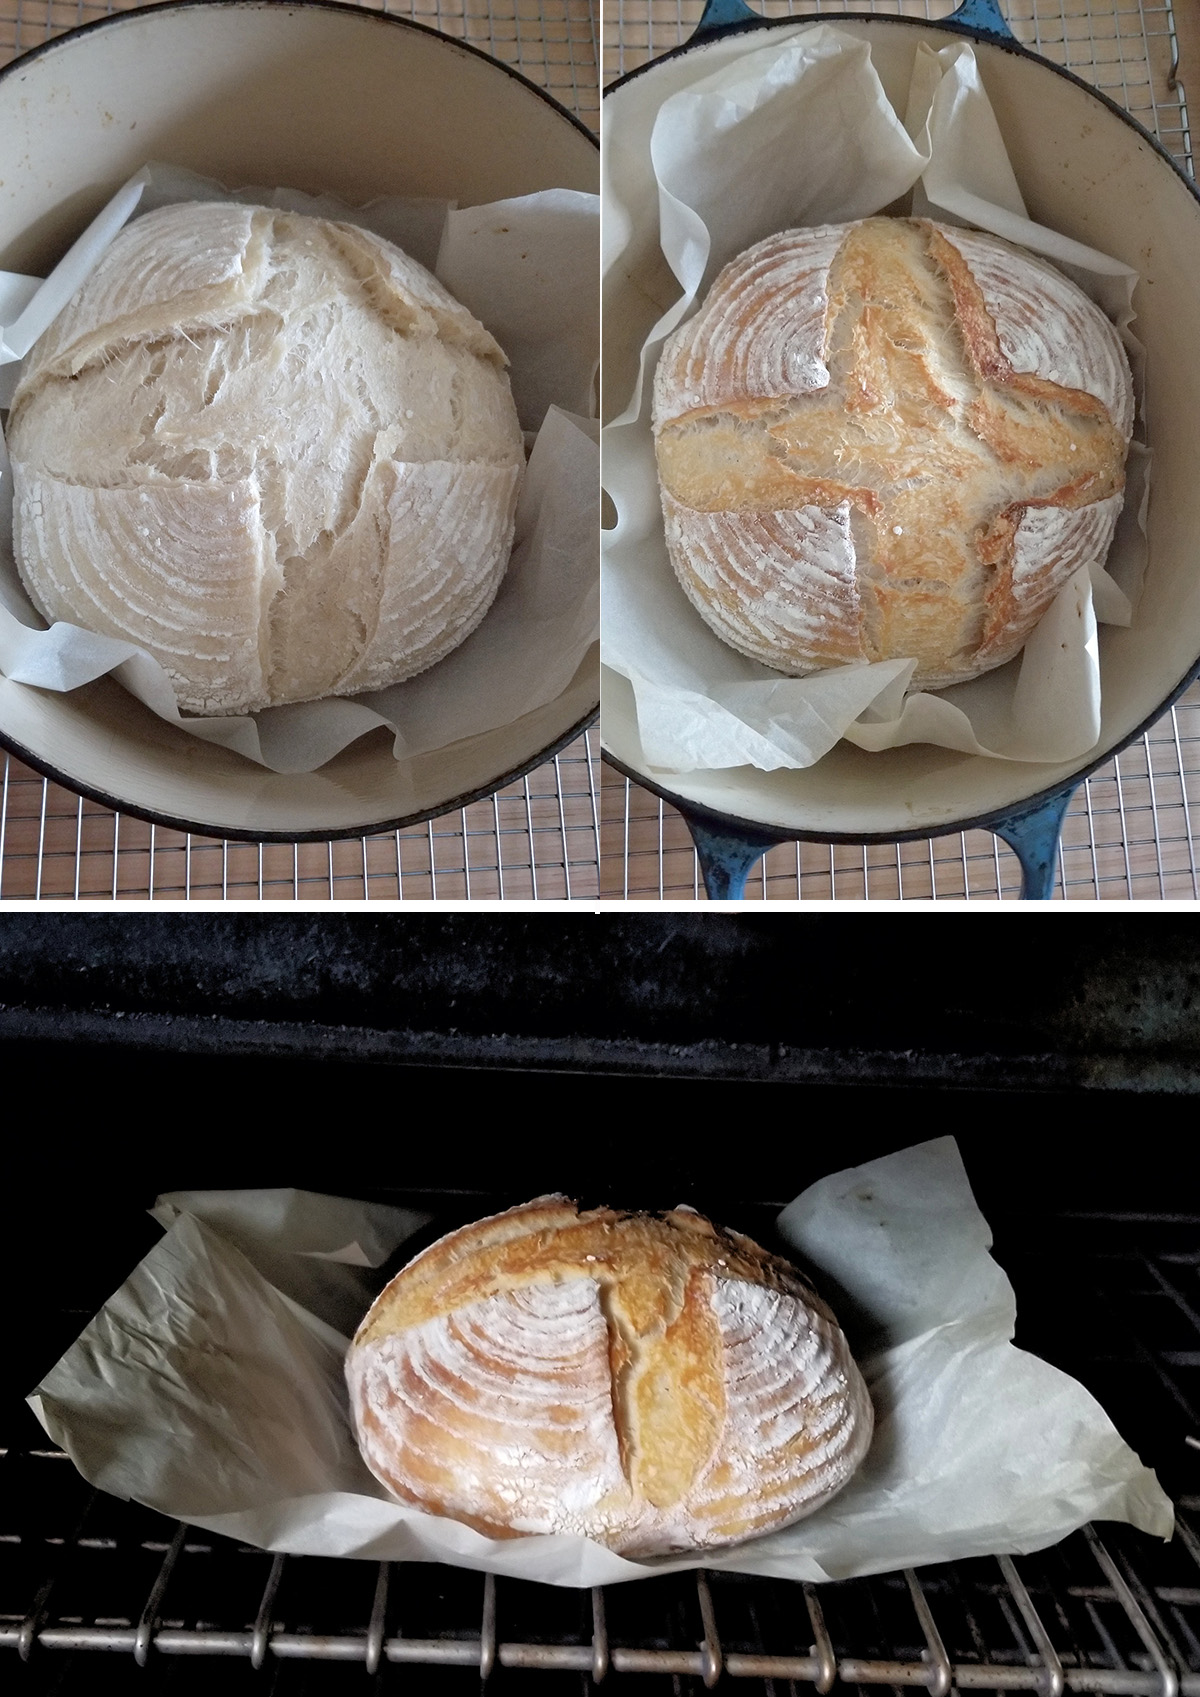
- Flip the loaf onto a piece of parchment paper, score the top, then use the paper to lower the loaf into the preheated Dutch oven. After 20 minutes baking the loaf is well-risen but still pale.
- Remove the lid and continue baking another 20 minutes until the loaf is golden brown.
- Remove the loaf from the Dutch oven and place it directly on the oven rack. Bake until deeply golden brown and very crisp.
Timeline for Making Sourdough Bread:
- Before mixing:
Feed your starter the night before or early in the morning. - Late Morning/Early Afternoon:
Mix the dough and allow it to ferment at room temperature. - Evening:
Refrigerate the dough before going to bed. - Next morning:
Shape the loaf and allow it to rise at room temperature. - Late morning:
Bake the bread.
With this schedule, you’ll have fresh sourdough by lunchtime.
Pastry Chef tips for making artisan Sourdough at home
A wet dough will feel sticky and a bit fussy at first, but the long fermentation gives the dough time to develop plenty of gluten without aggressive kneading.
The liveliness of your starter matters. For best results, use your starter after it has been fed and just before it reaches its peak rise.
If you maintain a starter at a hydration other than 100%, you’ll need to adjust the flour and water in the dough accordingly.
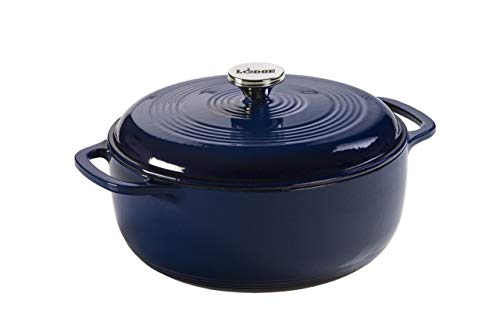
A Dutch oven creates the moist environment needed for a thick, crisp crust. Any heavy, oven-safe pot with a lid can work if you don’t own a Dutch oven.
FAQs for making sourdough bread at home:
Yes, start the dough early in the morning and skip the refrigeration step.
You can proof the dough right on the parchment paper .
Use any heavy, oven-safe pot with a lid, or bake on a sheet pan. The crust may be slightly less crisp.
You can, but I recommend using my dedicated Sourdough Baguettes recipe for best results.
About 2–3 days at room temperature.
Yes. Freeze the loaf or slices in a freezer bag for up to three months. If you freeze the whole loaf, allow it to defrost in the bag then heat about 15 minutes in a 200F oven to re-crisp the crust.
If You Want to Try Another Crusty Loaf
If you enjoy this bread and want to experiment further, try Sourdough Semolina Bread for an extra-crisp crust and a slightly different flavor profile.
I know you hate to throw away that sourdough discard. Check out these recipes that use sourdough discard.
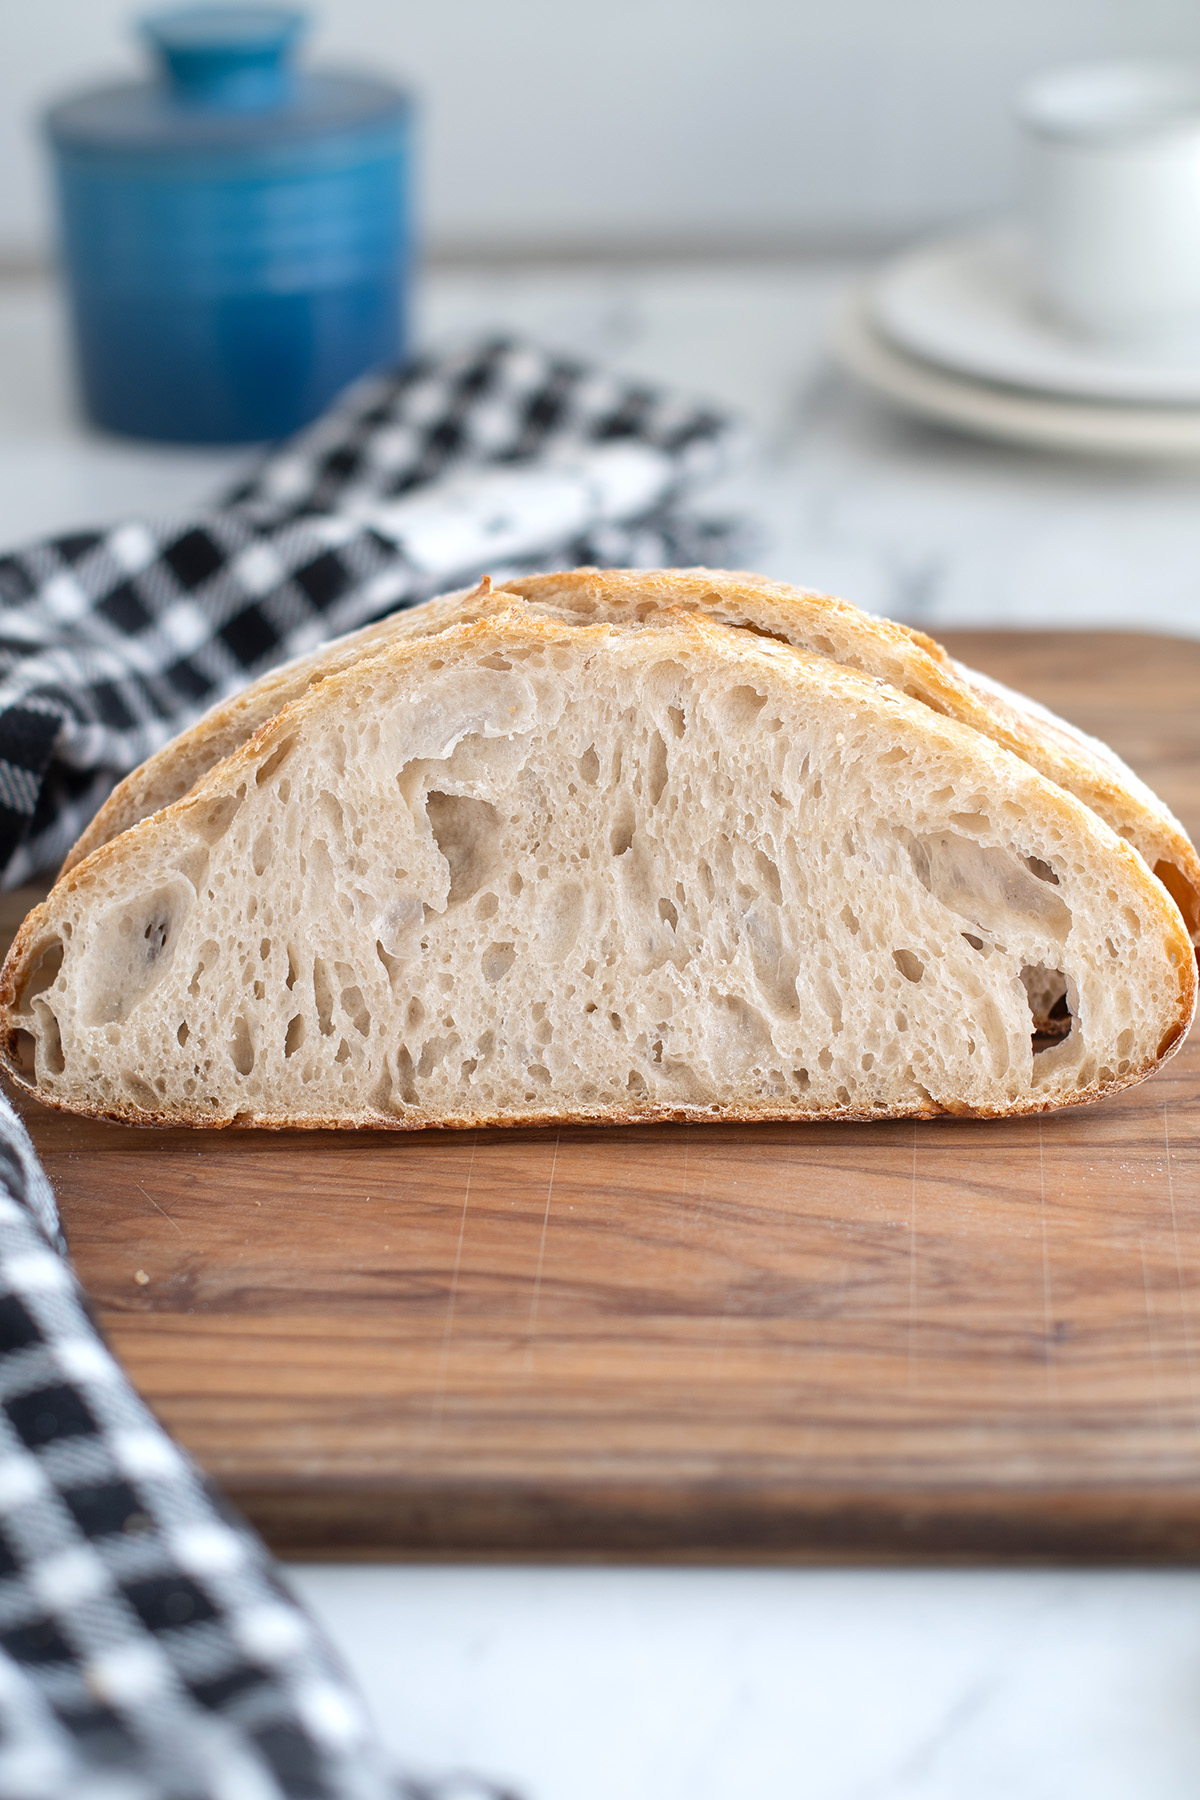
If you love this recipe as much as I do, I’d really appreciate a star rating and a quick comment. Ratings and comments help my recipes show in search results. Thanks!
Artisan Sourdough Bread Recipe
Ingredients
- 8 ounces active sourdough starter (1 cup (100% hydration))
- 8 ounces warm water (1 cup)
- 12 ½ ounces bread flour (2 ½ cups, see note)
- 1 ½ teaspoons table salt
- Rice flour for proofing basket
Instructions
- Combine 8 ounces active sourdough starter, 8 ounces warm water and 7 ½ ounces bread flour of the flour. Mix with the paddle on low speed until it forms a thick batter. Cover the bowl and set aside for 30-60 minutes.
- Switch to the dough hook and add 1 ½ teaspoons table salt and remaining 5 ounces bread flour. Mix until combined and the dough begins to clear the sides of the bowl, about 5 minutes.If mixing by hand, stir with a wooden spoon or bowl scraper. The dough will be sticky and cannot be kneaded by hand—structure will develop through fermentation and folding.
- Transfer the dough to a lightly oiled bowl, turning once to coat. Cover and leave at room temperature.
- After 60 minutes, uncover the dough. Lift one side and fold it into the center. Repeat with the remaining three sides, then flip the dough over. Repeat this folding process every hour for 3–5 hours, until the dough is lively, elastic, and airy. If the dough still feels sluggish, allow another hour or two at room temperature.
- Cover tightly and refrigerate overnight.
- Turn the cold dough out onto a lightly floured surface. Without kneading, fold each side into the center to form a compact package. Flip the dough and use cupped hands to shape it into a smooth ball. Cover lightly and rest for 20–30 minutes. If the dough spreads, reshape and rest again—this helps confirm the dough has enough strength to hold its shape.
- Lightly reshape the dough. Place seam-side up in a well-floured proofing basket (I use a 50/50 mix of rice flour and all-purpose flour). If you don’t have a basket, place the dough seam-side down on parchment and lightly dust the top with flour. Cover and let rise in a warm place until nearly doubled and the dough springs back slowly when pressed, about 3–4 hours.
- Preheat the oven to 425°F with a Dutch oven with the lid inside.
- Turn the loaf out onto parchment, score the top, and carefully lower it into the preheated Dutch oven. Cover and bake for 20 minutes. Remove the lid and continue baking another 20 minutes until the loaf is well browned.
- Remove the loaf from the pot and place it directly on the oven rack. Bake an additional 5–10 minutes until deeply browned and very crisp. Total baking time is about 40–50 minutes.
- Cool completely on a wire rack before slicing.
Would you like to save this recipe?
As an Amazon Associate and member of other affiliate programs, I earn from qualifying purchases.







Would this recipe with adding King Arthur pizza dough flavoring and pizza flavoring? I want to try an inclusion loaf.
Is the pizza flavoring a spice mix? I don’t see any reason you couldn’t add a spice mix.
Yes, it is a spice mix. Thank you!
This is my first sourdough loaf attempt, and it turned out great! Your instructions were amazing.
I’m trying this recipe for my first time.
My starter was feed this morning and used at its peak.
I also noted, as did another commenter, that when I did the add in of the second amount of flour (1 cup) and mixed it in it did not form a ball but a very shaggy mess. I mixed it fully and dumped it into my lightly oiled bowl hoping for the best. I know the stretch & fold does help build firmness.
I’m also wondering what you consider “room temp”? My house is at 68° F. I have generally put my mixtures into my oven, with the light, on to create a warmer space. I’d that too warm. It gets quite warm in there which really surprised me.
Hi Cathy, My kitchen is quite cool at this time of year. I have a few ways of keeping my sourdough warm enough. I will sometimes turn on the oven just long enough for the heating element to come on, then turn it off. It warms to maybe 75-80F and it’s perfect for keeping the dough. The dough will should become more cohesive during the fermentation and from the folding. If you look at the first process photo in the post you’ll see that the dough in the bowl with the hook is quite sticky. Do you have a thermometer in your oven to track the temp with the light on? Maybe you can toggle the light on and off if you think it’s getting too warm.
Love this recipe, it’s definitely my go to! Thank you!
Eileen, I have a few questions on your Sourdough Bread Recipe.
I have made it, perhaps, 10-12 times and always get a delicious loaf of bread. This week, after refeeding my starter, I made another loaf and had the following questions about the process.
I have noticed that when doing the second mix that the dough begins to form a ball on the dough hook but before the flour has been incorporated, and once the flour is, the dough is not a ball on the dough hook, but a puddle in the bottom of the mixer bowl. I need to use a spatula to move it to the lightly oiled bowl as well as turning the dough to coat it.
The dough seems to firm up, somewhat, when I stretch and fold it, but it never looked like your photos. It was very loose and didn’t have any structure to speak of. It was not holding it’s shape when forming it into a ball prior to placing in the proofing basket. The final loaf looked flat although it was dense with a nice flavor.
I am asking this because I followed up this loaf with my first Semolina Sourdough Bread recipe and had a quite different experience. The dough was so much more dense and easier to work with.
I’m wondering if the additional ¼ cup of flour could be the answer. I know that the semolina flour probably adsorb water differently than All Purpose. Is that what could make the difference?
Thank you for all your fantastic recipes. I haven’t found a 4 star one yet. They all seem to be 5 stars to me.
Hi David, are you saying you’ve always had this experience with this recipe, or just this time? The semolina flour is higher in protein and will absorb more water than the ap flour in this recipe. Are you weighing your ingredients? If you are using cup measurements be sure to use the “dip and sweep” method for filling the measuring cup. Read more about measuring baking ingredients here. Is your starter 100% hydration and fully active when you mix the dough? Are you using unbleached AP flour? You can make this recipe using bread flour for a tighter dough if that is easier for you to work with.
Eileen, I do measure out everything. I use King Arthur Unbleached AP flour in the red bag. I have to say that it happens pretty much every time, but this last time it was more noticeable, especially after I had the experience with the Semolina Sourdough recipe.
My starter is 100% hydrated. I weigh out the starter, flour and the water (4oz. each), so I’m going to assume that is what you mean by 100% hydrated. I started back at the beginning several years ago watching the starter grow in the container and waiting till it dropped back to it’s previous level, but grew to understand that I needed to use it right after it reaches it’s peak, and that is the condition I it was in for this latest loaf.
I assume that it could be that the room temperature was a little cooler than normal.
I just discovered that my KitchenAid range has a Bread Proofing setting that I think is 100 degrees. I would think that is a little to warm. Your thoughts.
Please understand that the bread comes out delicious. I’m just wondering if it’s me or the conditions I proof it or something else and I hope this might be helpful for some other beginning bakers.
Thanks for your comments.
Proofing at 100F is fine, especially for the final proof. Yes, I get the best results when I use my starter just as it has peaked. Are you putting the dough into the fridge overnight? I find the chilled dough easy to shape.
Yes, I put the dough in the refrigerator over night and that does seem to help, but still too loose to be able to hold. It’s a quick transfer from bowl floured surface, forming into ball, repeat then again a quick transfer into the banneton to proof. I’m able to use the lame to cut 1/4″ cuts in the surface before baking.
The bread looks good, although a little less rise than I would hope, and tastes great.
I think i’ll try the Bread Proofing setting on the range next time.
Thanks again for your comments.