Homemade Sourdough Bagels – With Video


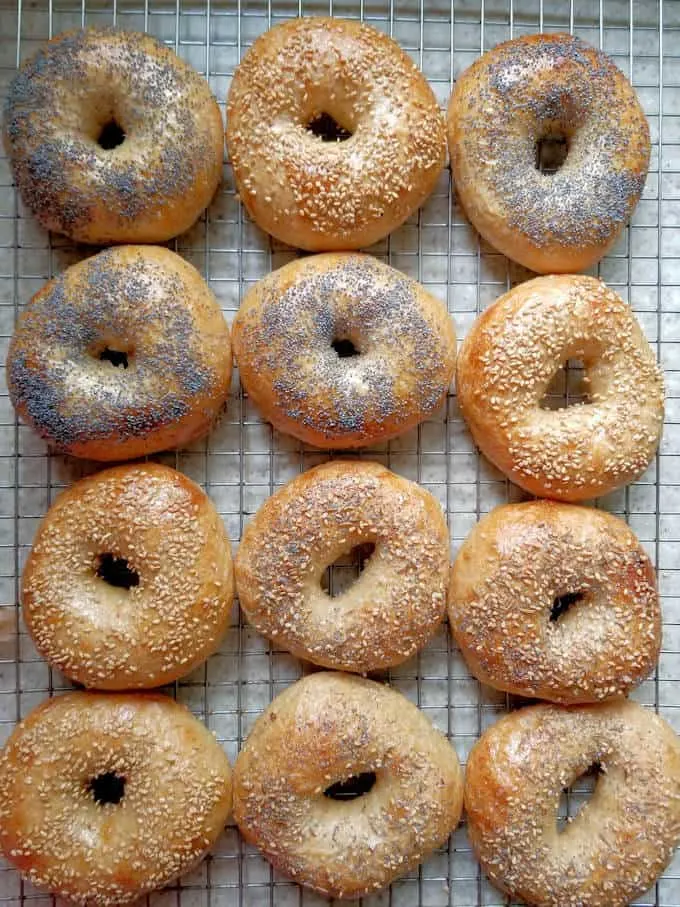
Sourdough bagels are chewy, crusty and properly dense. They have an extra deep flavor thanks to the sourdough starter in the recipe. This recipe take more than 12 hours to make, but the vast majority of the time is hands-off.
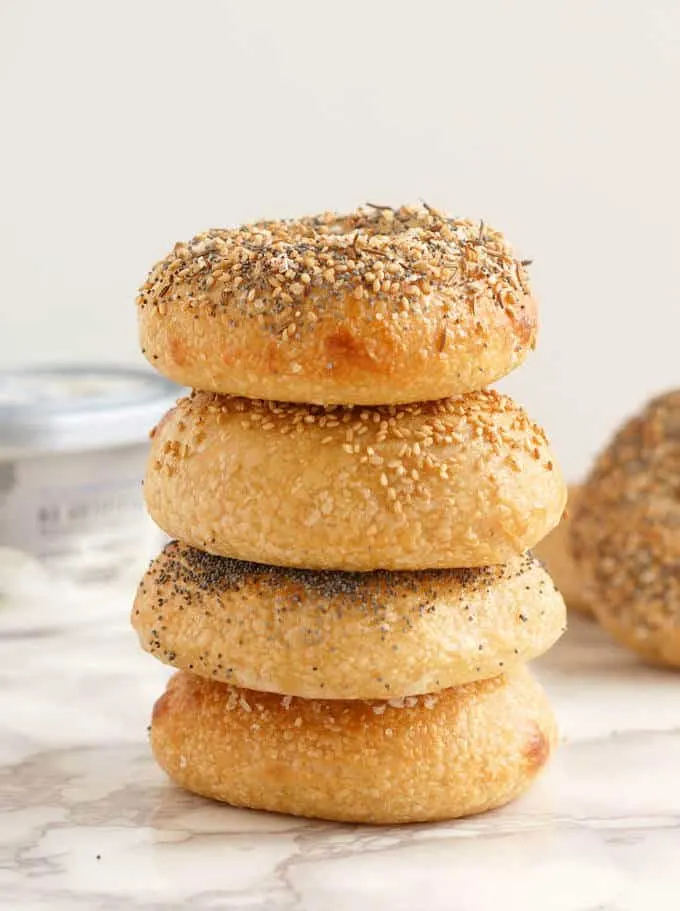
I’ve said it before, I think a good bagel should have a nicely dense and chewy texture with a toothsome crust. Forget the frozen hockey pucks from the grocery store, and the bagels from chain bakeries that are way too fluffy to be a real bagel.
Homemade bagels are not hard to make and they freeze beautifully. If you set aside a little time over a weekend, you can stock up the freezer for weeks to come.
This Sourdough Bagel recipe is a variation of my popular recipe for New York Style Bagels.
Ingredients
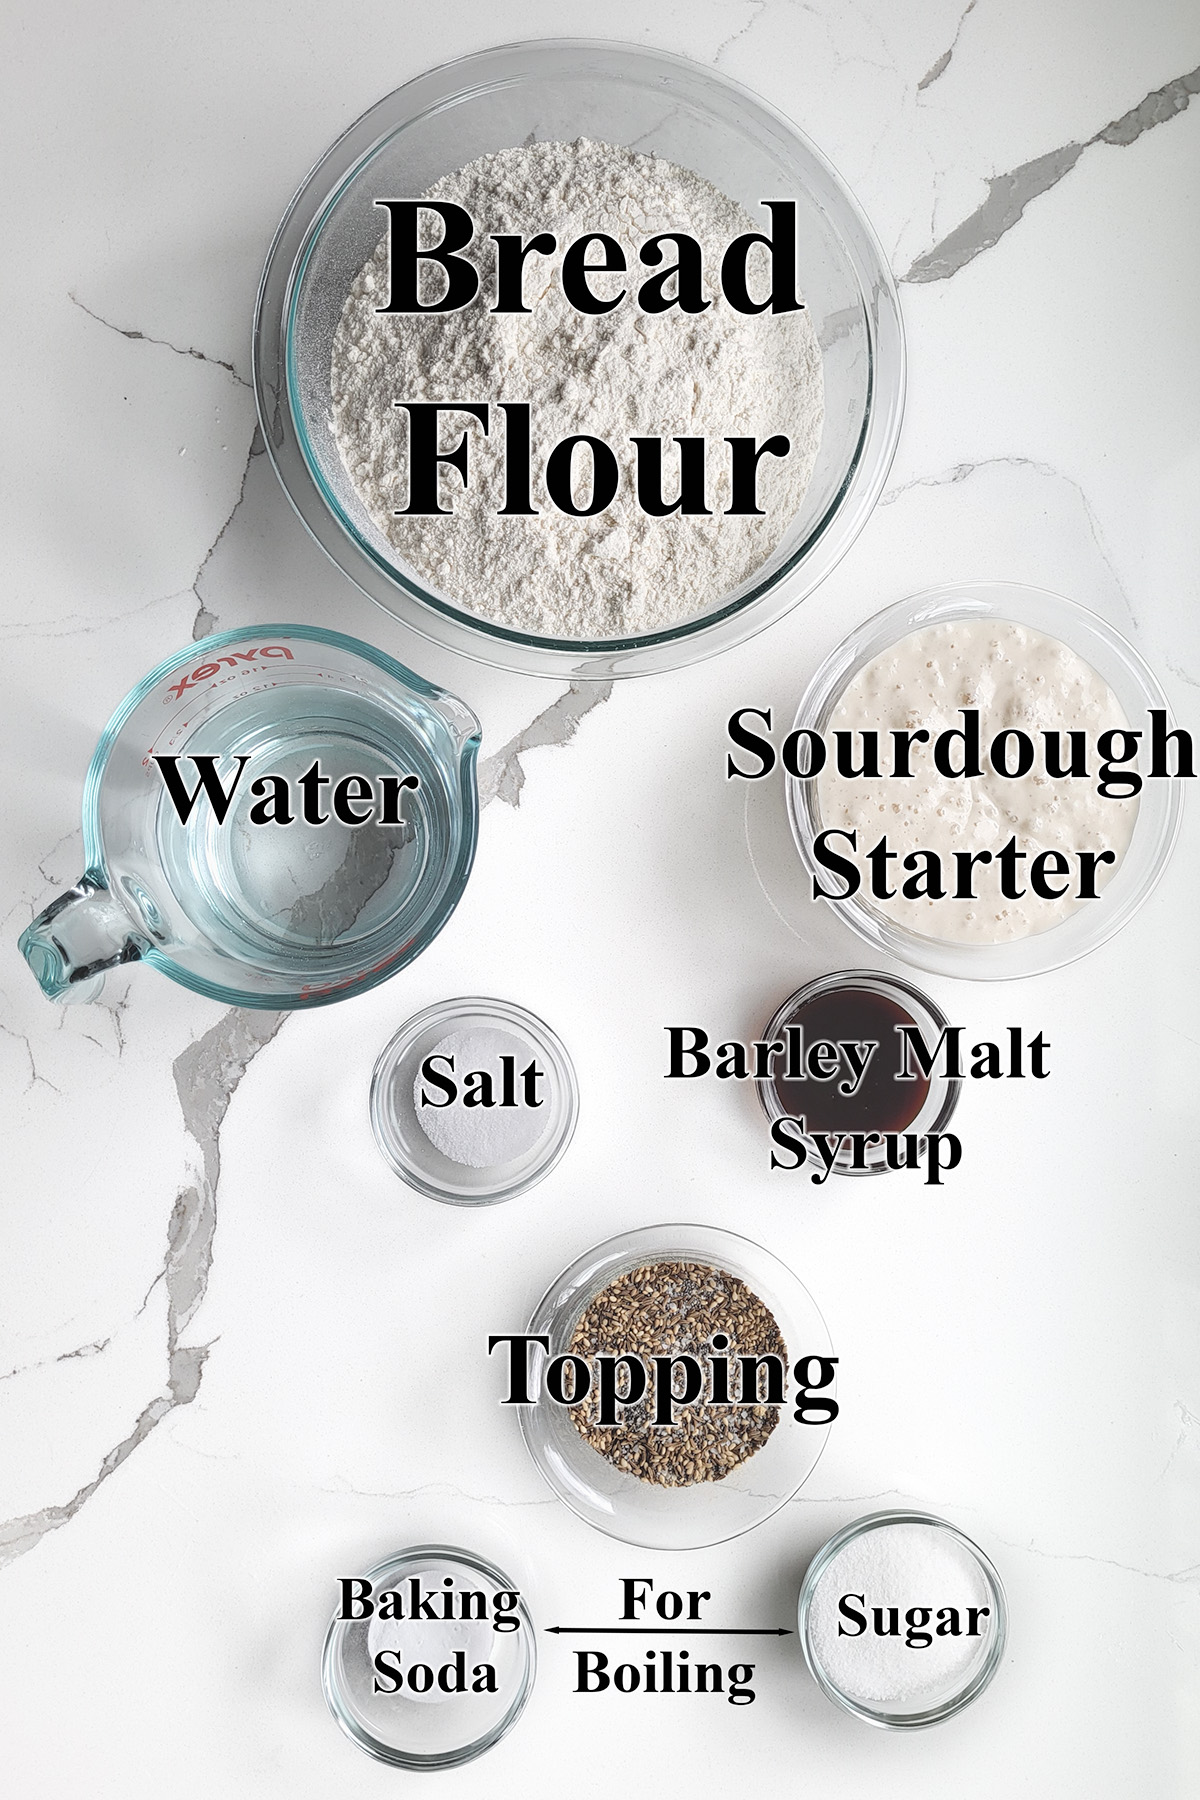
Ingredient Notes
- Bread Flour – Bagels should have a very chewy crumb from a strong gluten network in the dough. High protein bread flour develops plenty of gluten.
- Sourdough Starter – The recipe was developed using 100% hydration starter. You will need to adjust the liquid or flour in the recipe if you’re starter isn’t at 100% hydration. Your starter should be fed and active when you mix the bagel dough.
- Barley Malt Syrup – Adds a traditional slightly sweet note to the dough. You can substitute honey or a combination or honey and molasses for the barley malt syrup.
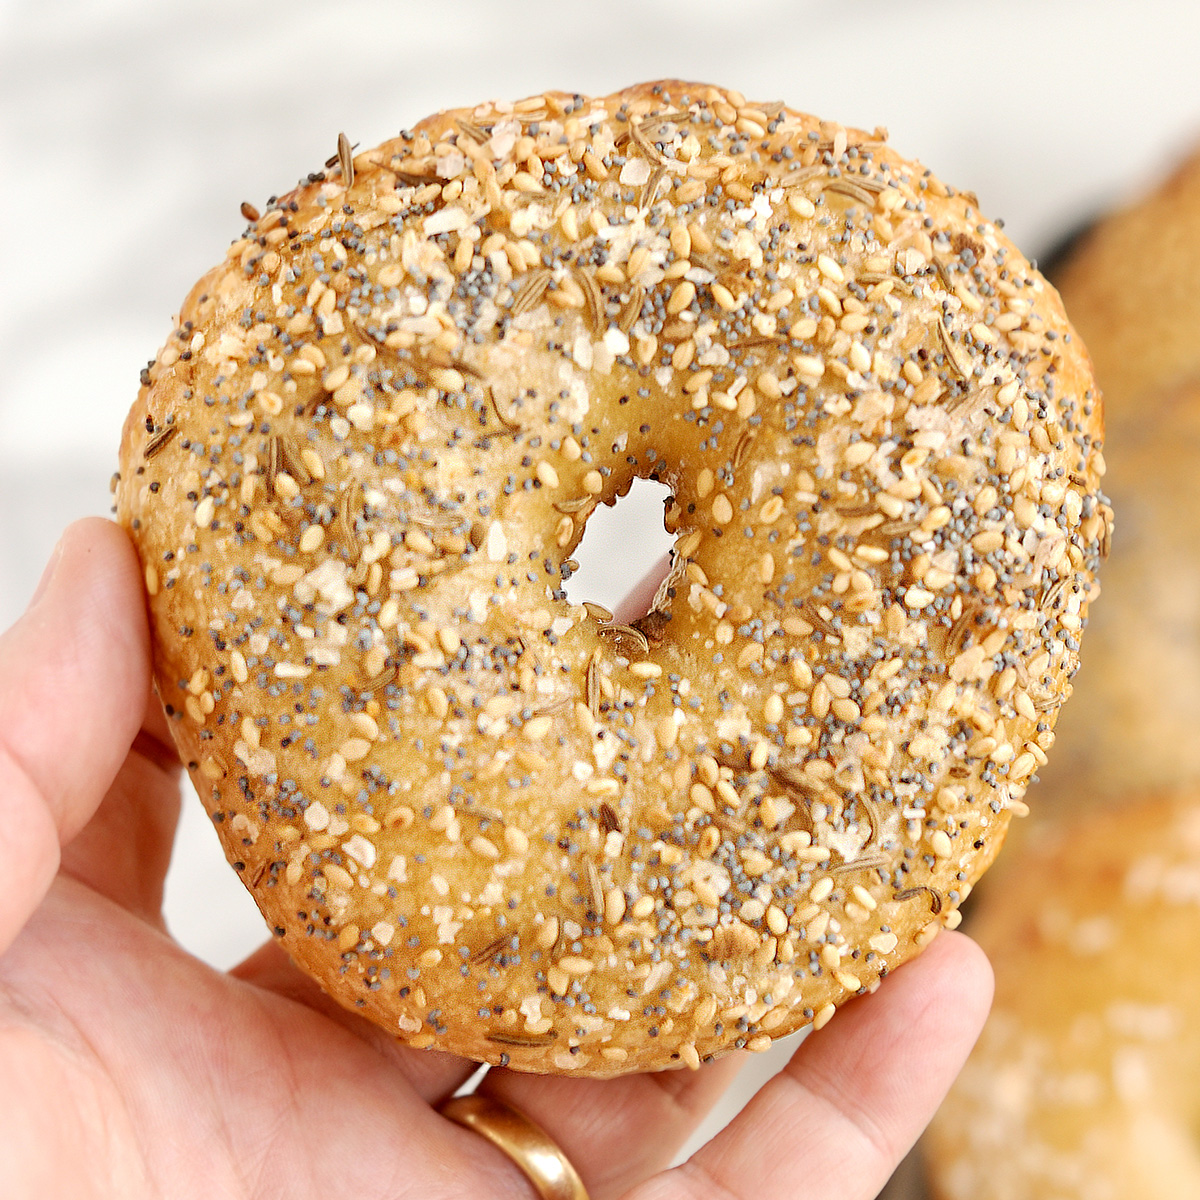
- Toppings – Leave the bagels plain or use your favorite seed for topping. You can mix seeds with salt to make your own “everything” bagel topping”. See the recipe card for details.
- Baking Soda & Sugar – For boiling the bagels. The boiling process creates the specific shiny and chewy bagel crust.
Process photos for making Sourdough Bagels
Here’s what the recipe process looks like at each stage. Refer to the recipe card below for measurements and exact instructions.
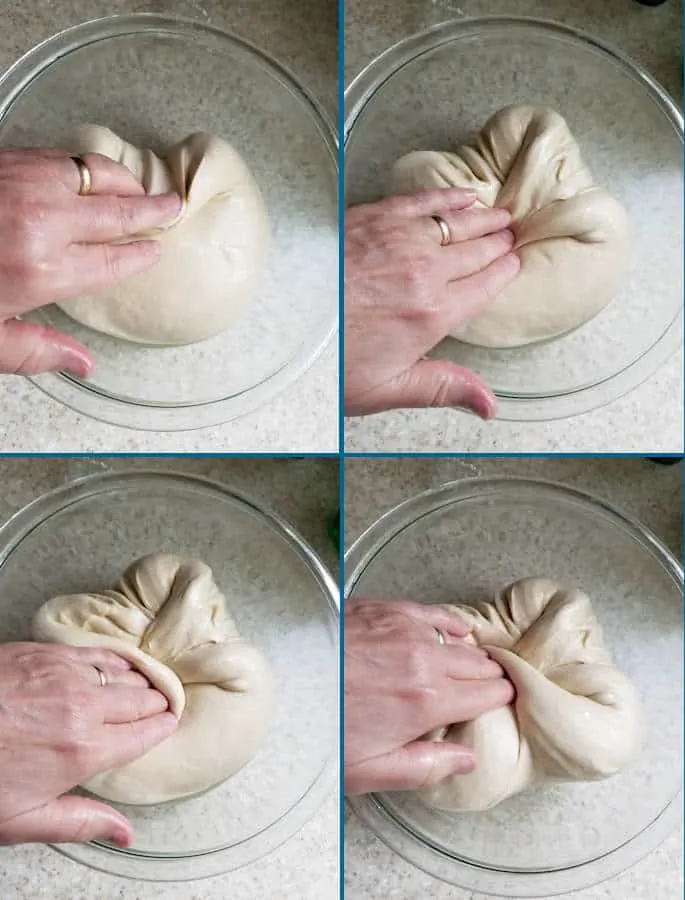
- As the dough ferments, it should be folded onto itself every hour or so to redistribute the yeast.
- Fold from each side into the middle, then flip the dough over.
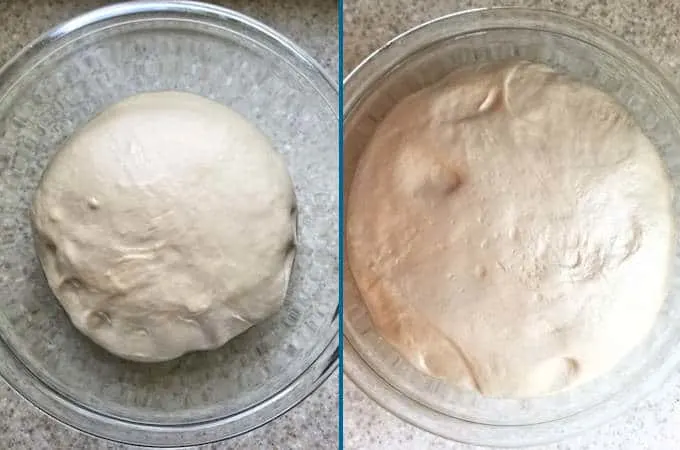
- After 30 minutes there’s not much activity in the dough (left).
- After 3 hours the dough should be active and nicely aerated (right).
- After fermentation it’s time to shape the bagels.
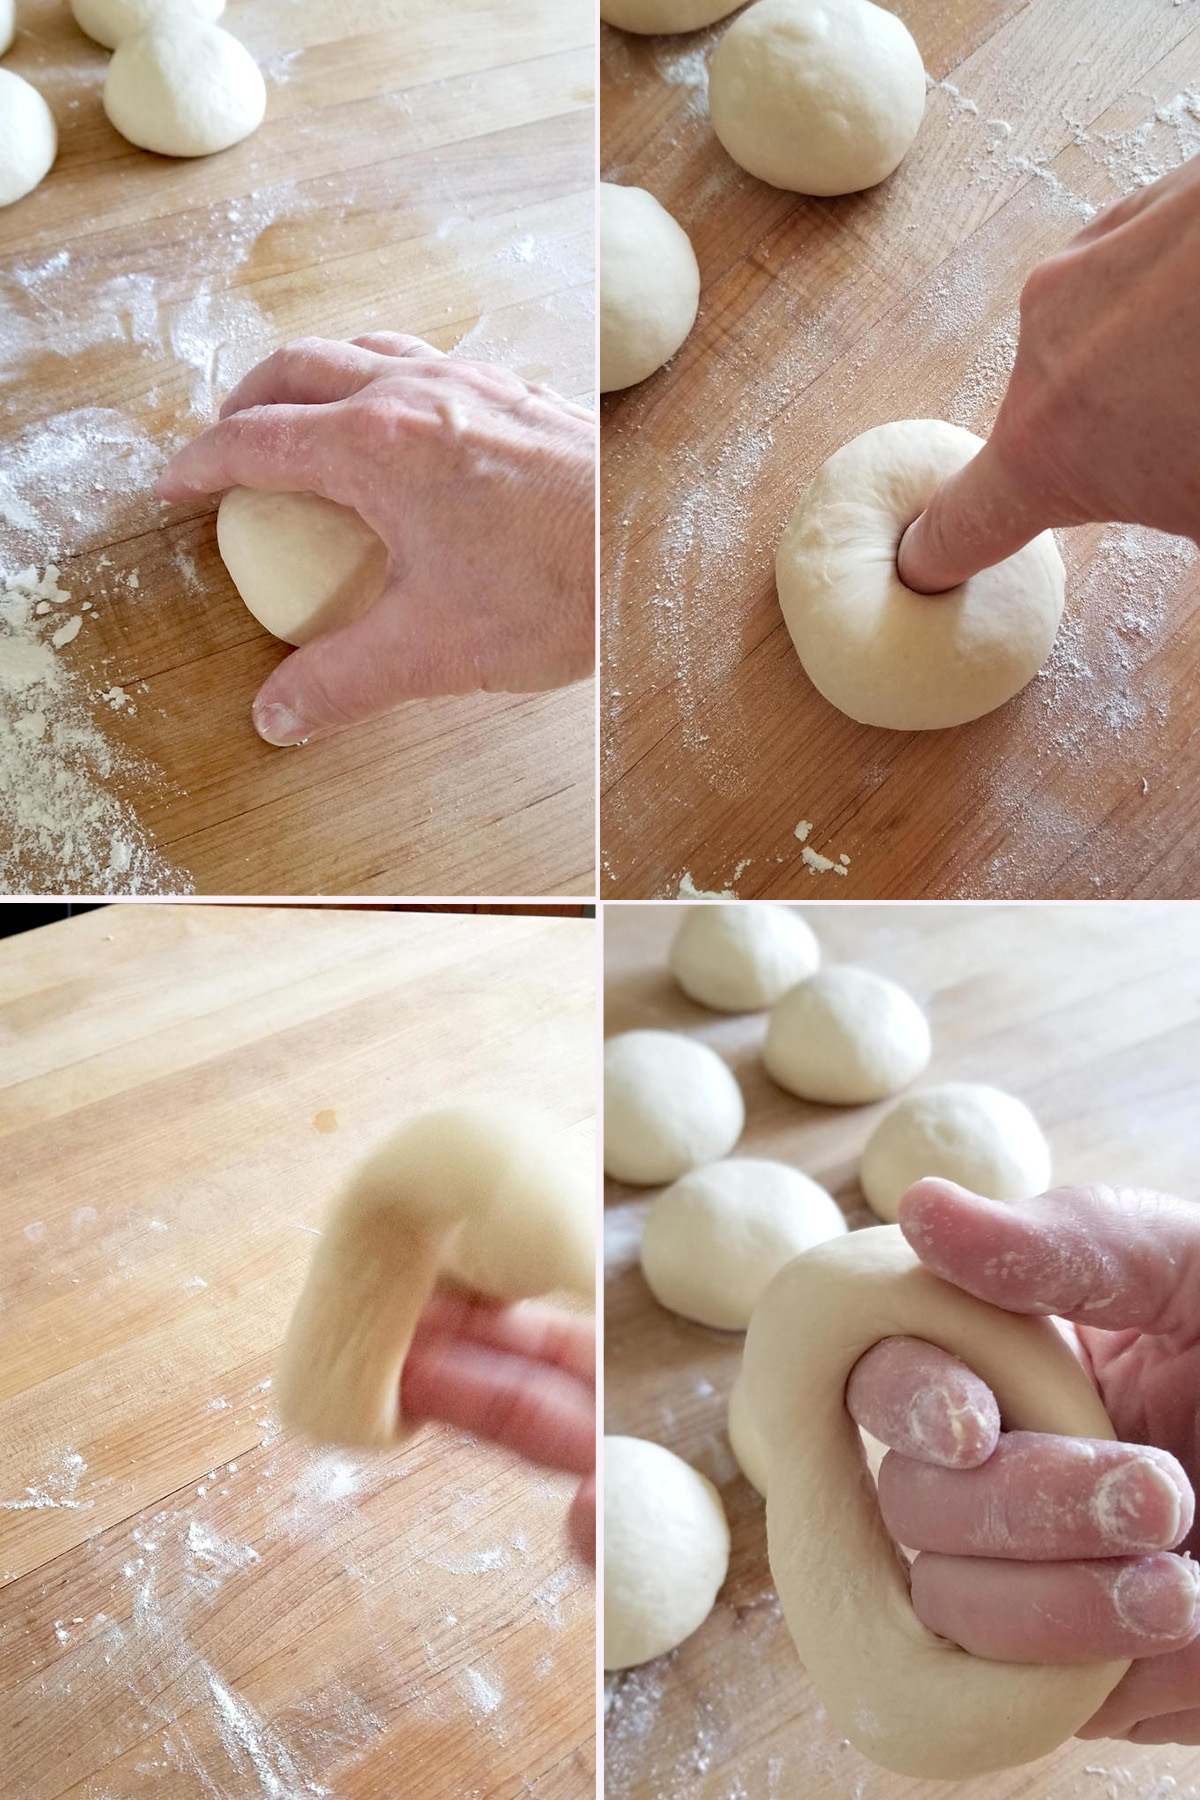
- Use a cupped hand to form the a piece of dough into a tight ball. Repeat with all the pieces of dough.
- Poke your finger all the way through the center of the ball to make a hole.
- Twirl the dough around your fingers to widen the center hole.
- Set the bagel onto the baking sheet and continue with the rest of the dough.
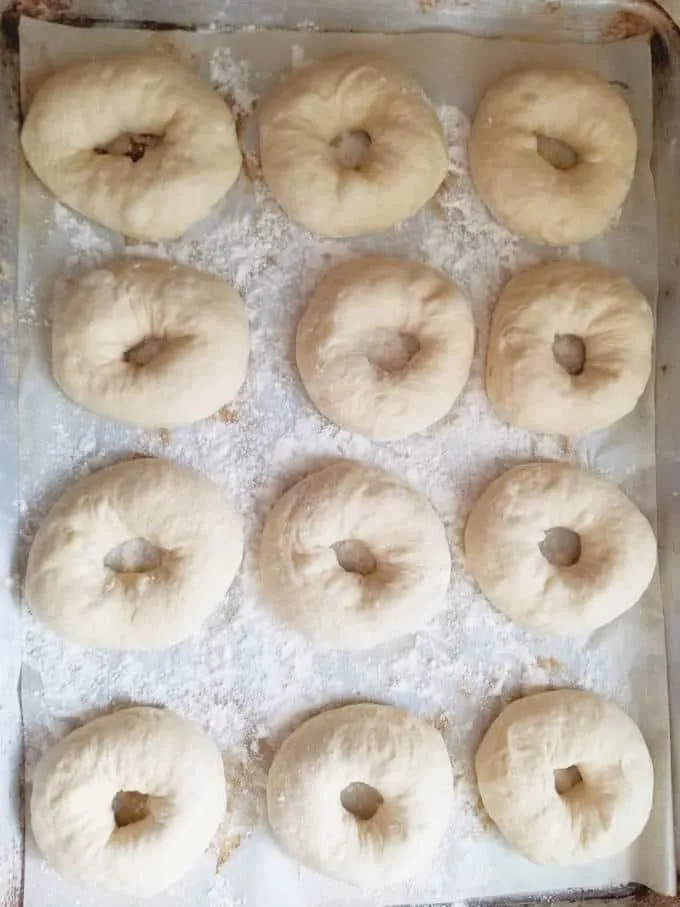
- Line the formed bagels onto a well-floured (or use cornmeal) sheet pan to prevent sticking.
- Cover the pan and place it in the refrigerator overnight.
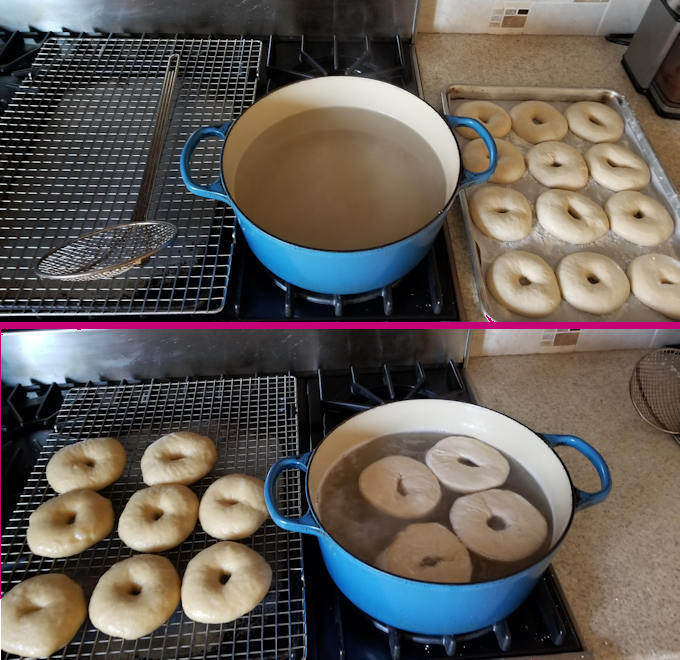
- Bring a pot of water with baking soda and sugar to a boil. Preheat the oven.
- Boil the bagels a few at a time, flipping them every thirty seconds. Boil each batch for 2 minutes.
- Transfer the bagels to a rack to drain while you finish boiling the rest of the bagels.
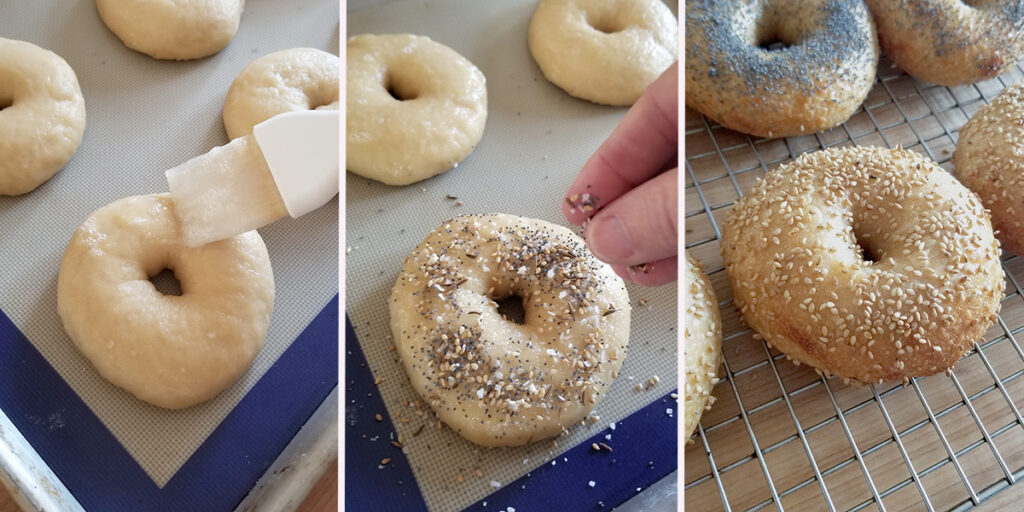
- Brush the boiled bagels with egg white.
- Sprinkle seeds or bagel topping if desired.
- Bake until the bagels are golden brown.
Recipe Tips
- Make sure your starter is very active and lively.
- To get a good bagel shape that will rise properly, you must create a tight ball of dough before making the ring. Use a cupped hand and surface friction to roll the dough into a ball. You can see how it’s done in the recipe video.
- Place the shaped bagels on sheet pan which has been sprinkled liberally with cornmeal or flour. If the bagels stick to the pan you will loose volume when transferring them to the water. I find cornmeal works best, but flour will work too.
- In the morning, take the bagels out of the fridge and leave them out until the dough comes to room temp.
- Don’t start boiling the bagels until the oven is preheated. They should go into the oven within minutes of coming out of the water.
Storage
- Bagels are best the day they are baked. For longer term storage, slice the bagels about 3/4 the way through and pack them into freezer bags.
- Previously frozen bagels are best if toasted before serving.
I know you hate to throw away that sourdough discard. Check out these recipes that use sourdough discard.
If you love this recipe as much as I do, please consider giving it a 5-star review.

Sourdough Bagel Recipe
Video
Ingredients
- 8 oz active sourdough starter (1 cup (100% hydration))
- 12 oz warm water (1 ½ cups)
- 22 ½ oz bread flour (4 ½ cups, divided, see note)
- 1 ½ oz barley malt syrup (2 tablespoons (or honey + molasses))
- 1 tablespoon table salt
- 2 oz granulated sugar (¼ cup (for boiling))
- 2 teaspoons baking soda (for boiling)
- corn meal (for pan prep)
- 1 egg white (whisked lightly)
- Topping (sesame seeds, poppy seeds, caraway seeds or coarse salt)
Instructions
- Combine 8 oz active sourdough starter, 12 oz warm water and 2 cups (10 oz) of the flour in a mixing bowl. Mix to form a thick batter. Cover the bowl and set aside for 30-60 minutes.
- Add 1 ½ oz barley malt syrup and 1 tablespoon table salt. Switch to the dough hook. Add the remaining 2 ½ cups (12 ½ oz) flour and mix to combine. The dough should eventually cling to the hook and start to clear the sides of the bowl.
- Knead 5 minutes on medium speed. If working by hand, stir in as much of the flour as you can, then turn the dough out onto a lightly floured surface and knead in the remaining flour. Knead 5 minutes. Form the dough into a smooth ball.
- Put the dough into a lightly oiled bowl, turning once to coat the dough. Cover the bowl and set it aside at room temperature. After 30 minutes uncover the bowl, lift one side of the dough and fold it into the middle of the dough. Repeat with the other three sides of the dough then flip the dough over. You're basically turning the dough inside-out to redistribute the yeast. Cover the bowl and repeat the procedure every 60 minutes for a total fermentation time of about 3 hours. The dough should be lively, elastic and airy. If the dough is still sluggish give it another hour or two at room temperature.
- Line a baking pan with parchment paper then generously sprinkle the paper with cornmeal (or flour). Turn the dough out onto a lightly floured surface without kneading out the air. Divide the dough into 10 even pieces. Use a cupped hand to roll each piece into a smooth, tight ball.
- To form a bagel, poke your finger all the way through the center of a ball to make a hole. Use two fingers to gently open up the hole. Continue gently stretching to form the bagel or twirl the dough around your fingers to widen the center hole to 1 – 1½" wide.
- Place the bagel on the prepared sheet pan and continue to form the remaining bagels. The dough will probably spring back a bit so you can go back and re-stretch the holes once you're done forming all the bagels. Cover the pan with plastic wrap. If the dough and the ambient temperature is on the cooler side, leave the shaped bagels at room temperature for 30 minutes then place the pan in the refrigerator overnight. If the dough and ambient temp is warmer and the dough is quite active, place the bagels into the refrigerator without leaving them out for 30 minutes.
- In the morning take the bagels out of the refrigerator and bring them to room temperature.
- Preheat the oven to 450 °F. In a large pot combine 1 gallon of water with 2 oz granulated sugar and 2 teaspoons baking soda and bring it to a boil. Reduce the heat to keep the water at a rolling simmer. Set a cooling rack over a sheet pan or kitchen towel and place it next to the stove. Line two half-sheet pans with parchment paper or silicone baking mats and generously sprinkle with corn meal.
- Once the oven is preheated, you're ready to boil. Gently lift a bagel off the sheet pan and lower it into the water, bottom side down. Depending on the size of your pot, you can boil 3-4 bagels at a time. Boil the bagels for 30 seconds then flip them. Boil the other side for 30 seconds. Repeat the process again for a total of 2 minutes boiling time. Remove the boiled bagels from the water and set them on the cooling rack to drain.
- Place 5 of the boiled bagels on each sheet pan. You could fit them all on one pan but they may stick together as they bake.
- Brush the bagels with egg white. Add the topping(s) of your choice. To make "everything" bagels combine a tablespoon of each of sesame seeds, poppy seeds & salt with a 1/8 teaspoon garlic powder and onion powder. Bake until golden brown, about 20 minutes.
Would you like to save this recipe?


As an Amazon Associate and member of other affiliate programs, I earn from qualifying purchases.
I made the dough today and have some pretty nice looking bagels sitting on the baking sheets in the refrigerator right now. We shall see in the morning how they turn out
Baked these this morning for the first time. Followed your recipe except I did substitute 25% whole wheat flour which worked out well. Great crust and crumb. I topped with everything topping on half and the other half sesame and poppy. Everyone loved them! Thanks
Sounds good with the whole wheat flour.
Many flaws to this recipe.
1. These completely stuck to the pan. Could not even pry them off. Need to be baked with parchment paper and the surface needs to be dusted with flour (per Peter Reinhart’s recipe)
2. The end product are not like bagels – just like bread in the shape of bagels.
Very disappointed overall, especially since the rise and everything on the first day went so well.
Step 5 and step 9 of the recipe clearly instruct you to line the sheet pans with parchment paper. If you prefer someone else’s recipe please feel free to use that recipe instead.
Oh my gosh, I am sorry – somehow I totally missed that. I was so bummed about the stickage that I lost my cool. I sincerely apologize. The bagel flavor ended up being really good too. Don’t know what came over me.
A couple recommendations I do have is to boil a bit longer on a rolling boil to increase chewiness and start the bake at 500 to make for a better golden brown color. The prep, rise, and flavor were all fantastic. Apologies again!
I have made these twice now and they have come out delicious. I don’t have molasses so I used an Amber coconut nectar/Honey combo which seamed to work fine. Also I used the everything bagel topping they sell at Trader Joe’s for the top of the bagels. I had a question though…my husband is vegan and for the first batch I made 3 without the egg white and he gobbled them up in a flash. So for the second batch I skipped the egg white for all of them. I have noticed that topping doesn’t stay on very well with out the egg white. Is there a Vegan substitute that would work for egg white?
Maybe aquafaba (the water from chickpeas)?
Hi Eileen, thanks for the recipe and instructions… they were super easy to follow and it’s great to have another use for the sourdough starter, I hate throwing out starter but now I make bread, pizza dough, breakfast pancakes and bagels as well as giving the starter to other friends…
Maybe I should start a bakery
Pictures on Instagram!! #apg479 and tagged with #eileen.bakingsense!!
I usually leave my sourdough outside to prove as I think the fridge is quite a ‘harsh’ temp, but summers are a bit warm here so the cool cellar will be used… I had to put the bagels in a 30degree C oven to do a final raise after the night in fridge.
Nice chewy texture and crisp crust… kids liked them too, unfortunately, now I’ll have to share them!!
Glad you enjoyed them. There’s a world of great baking in that container of starter.
I’ve made a few batches of these recently and it turned out great!
I did swap out the barley malt syrup for just honey and it was fine (but did lack the “malty” flavour), so if you only have honey on hand you can use it instead but it will have a slightly different end taste.
I also found that I had to add a few more tablespoons of flour (on top of the whole 4.5 cups) to really the dough to stop sticking to the sides of the bowl and get a nice smooth dough.
I experimented and made these both with an overnight fridge prove and a room temperature prove. I found proving them at room temperature (approx 23c/74f) took approx 2 hours before I pre-heated the oven and boiled them. They weren’t as “sour” (as they lacked the time to develop that flavour overnight), but still turned out great and were delicious!
With the overnight fridge prove, I still gave them the 30 minute head start at room temperature before putting them in the fridge overnight. In the morning I found they were no where near 50% risen they should have been. I then had them at room temperature for approx another 2 hours in the morning before I started to see that 50% rise in the bagels. I then started the oven pre-heat and boiling the bagels.
To anyone making these who doesn’t see the 50% rise in your bagels overnight in the fridge make sure you leave them at room temperature for a few hours in the morning to give them that 50% rise before baking them. If you don’t you have life-less flat bagels (much like my very first batch!)
Well worth the effort once you get it right!
Thanks for all the tips and feedback. Sourdough baking does require a bit of flexibility.