Homemade Sourdough Bagels – With Video


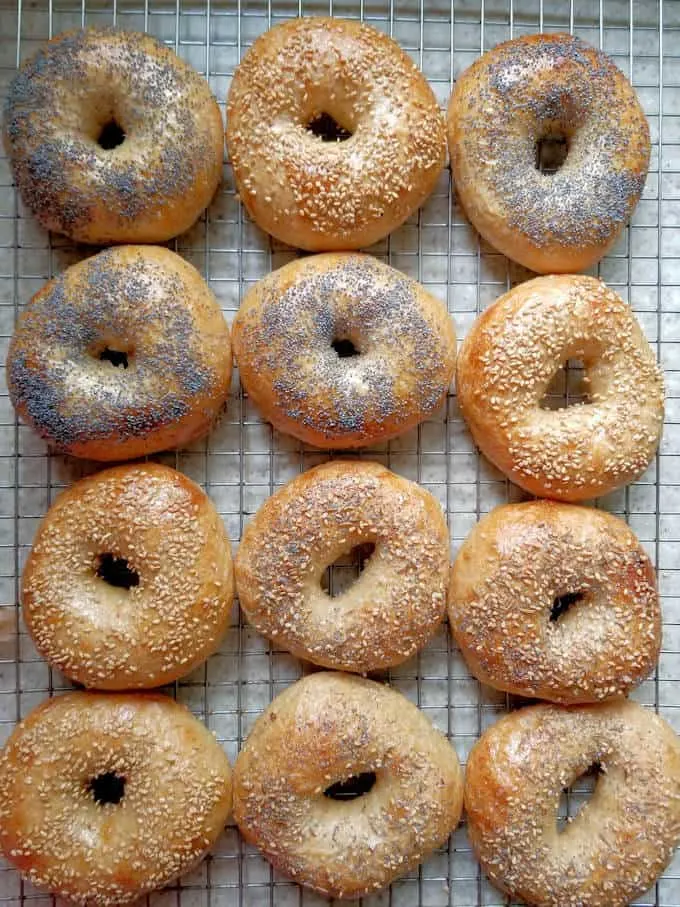
Sourdough bagels are chewy, crusty and properly dense. They have an extra deep flavor thanks to the sourdough starter in the recipe. This recipe take more than 12 hours to make, but the vast majority of the time is hands-off.
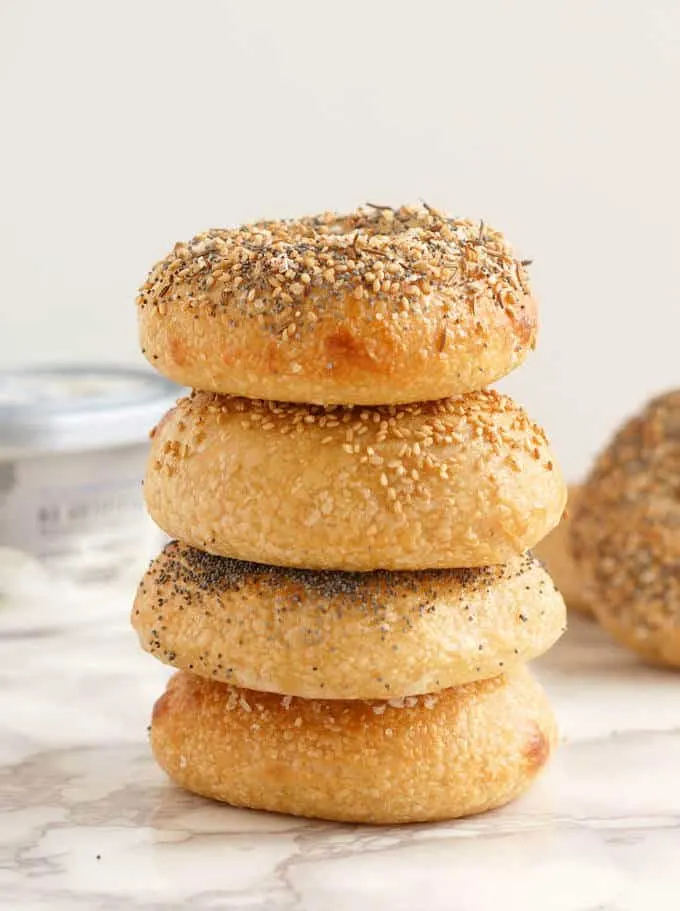
I’ve said it before, I think a good bagel should have a nicely dense and chewy texture with a toothsome crust. Forget the frozen hockey pucks from the grocery store, and the bagels from chain bakeries that are way too fluffy to be a real bagel.
Homemade bagels are not hard to make and they freeze beautifully. If you set aside a little time over a weekend, you can stock up the freezer for weeks to come.
This Sourdough Bagel recipe is a variation of my popular recipe for New York Style Bagels.
Ingredients
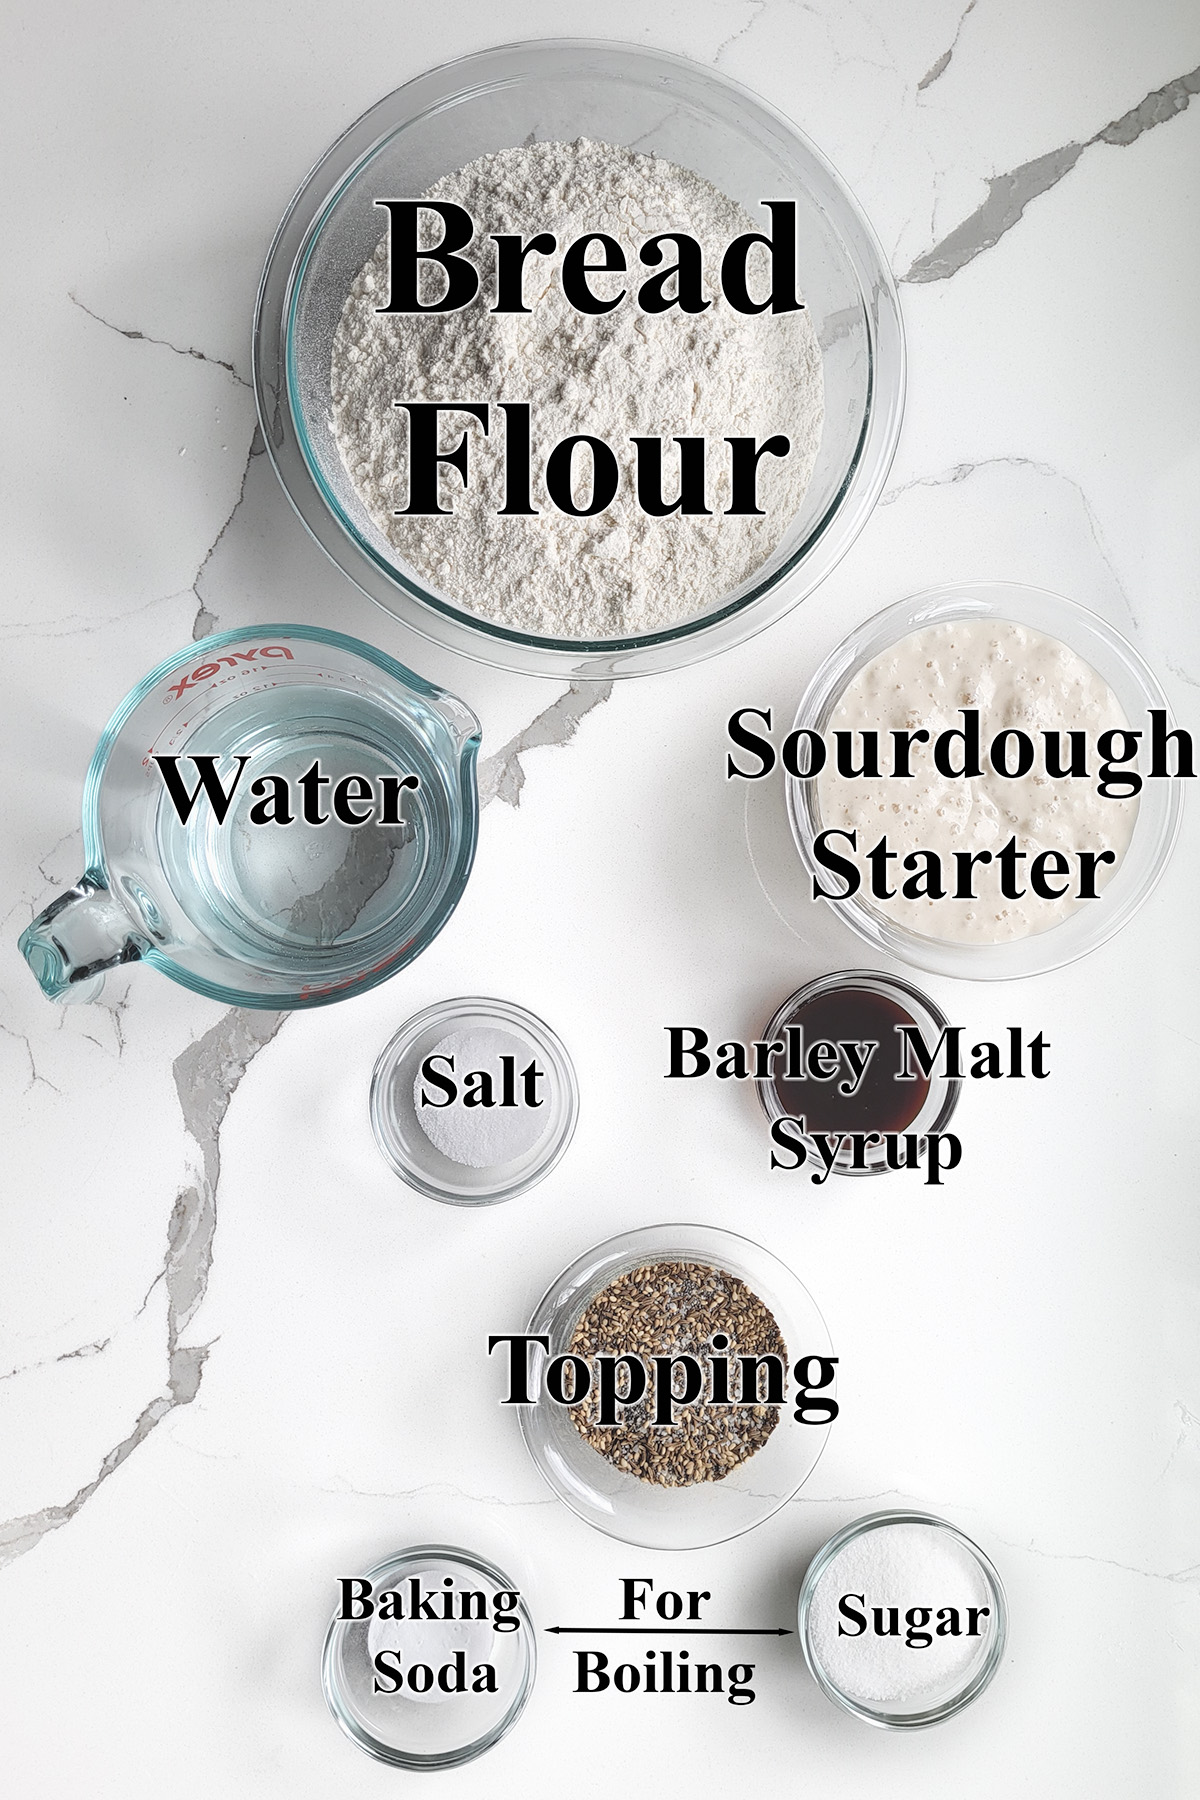
Ingredient Notes
- Bread Flour – Bagels should have a very chewy crumb from a strong gluten network in the dough. High protein bread flour develops plenty of gluten.
- Sourdough Starter – The recipe was developed using 100% hydration starter. You will need to adjust the liquid or flour in the recipe if you’re starter isn’t at 100% hydration. Your starter should be fed and active when you mix the bagel dough.
- Barley Malt Syrup – Adds a traditional slightly sweet note to the dough. You can substitute honey or a combination or honey and molasses for the barley malt syrup.
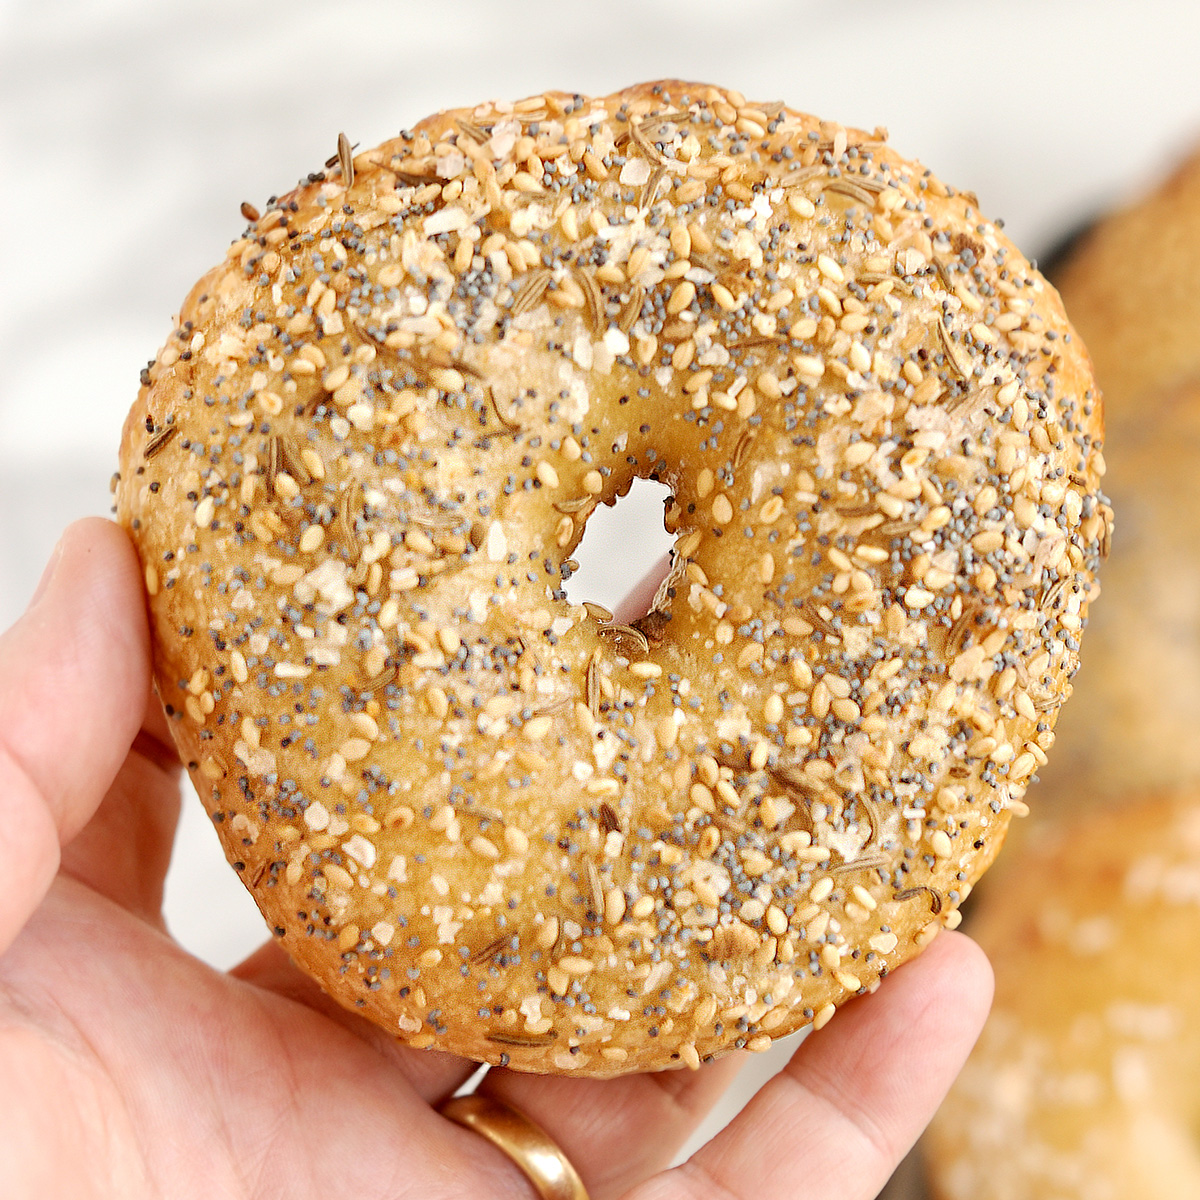
- Toppings – Leave the bagels plain or use your favorite seed for topping. You can mix seeds with salt to make your own “everything” bagel topping”. See the recipe card for details.
- Baking Soda & Sugar – For boiling the bagels. The boiling process creates the specific shiny and chewy bagel crust.
Process photos for making Sourdough Bagels
Here’s what the recipe process looks like at each stage. Refer to the recipe card below for measurements and exact instructions.
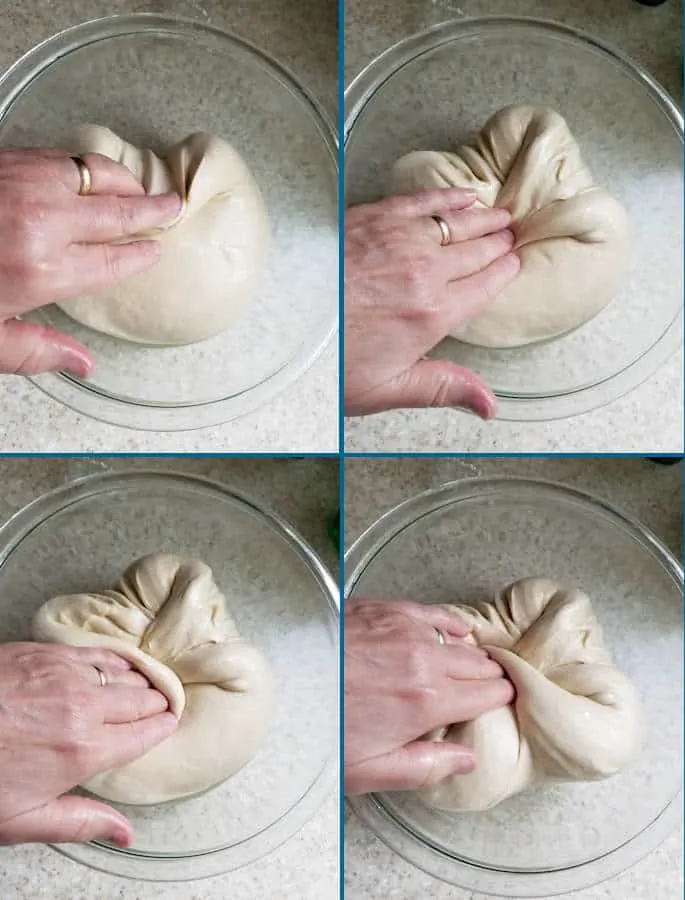
- As the dough ferments, it should be folded onto itself every hour or so to redistribute the yeast.
- Fold from each side into the middle, then flip the dough over.
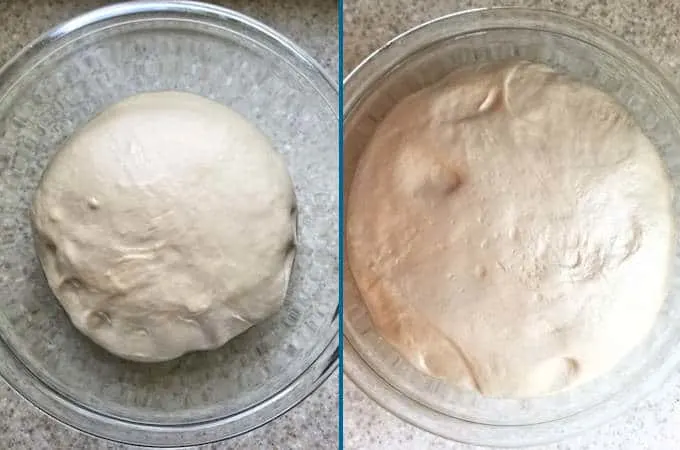
- After 30 minutes there’s not much activity in the dough (left).
- After 3 hours the dough should be active and nicely aerated (right).
- After fermentation it’s time to shape the bagels.
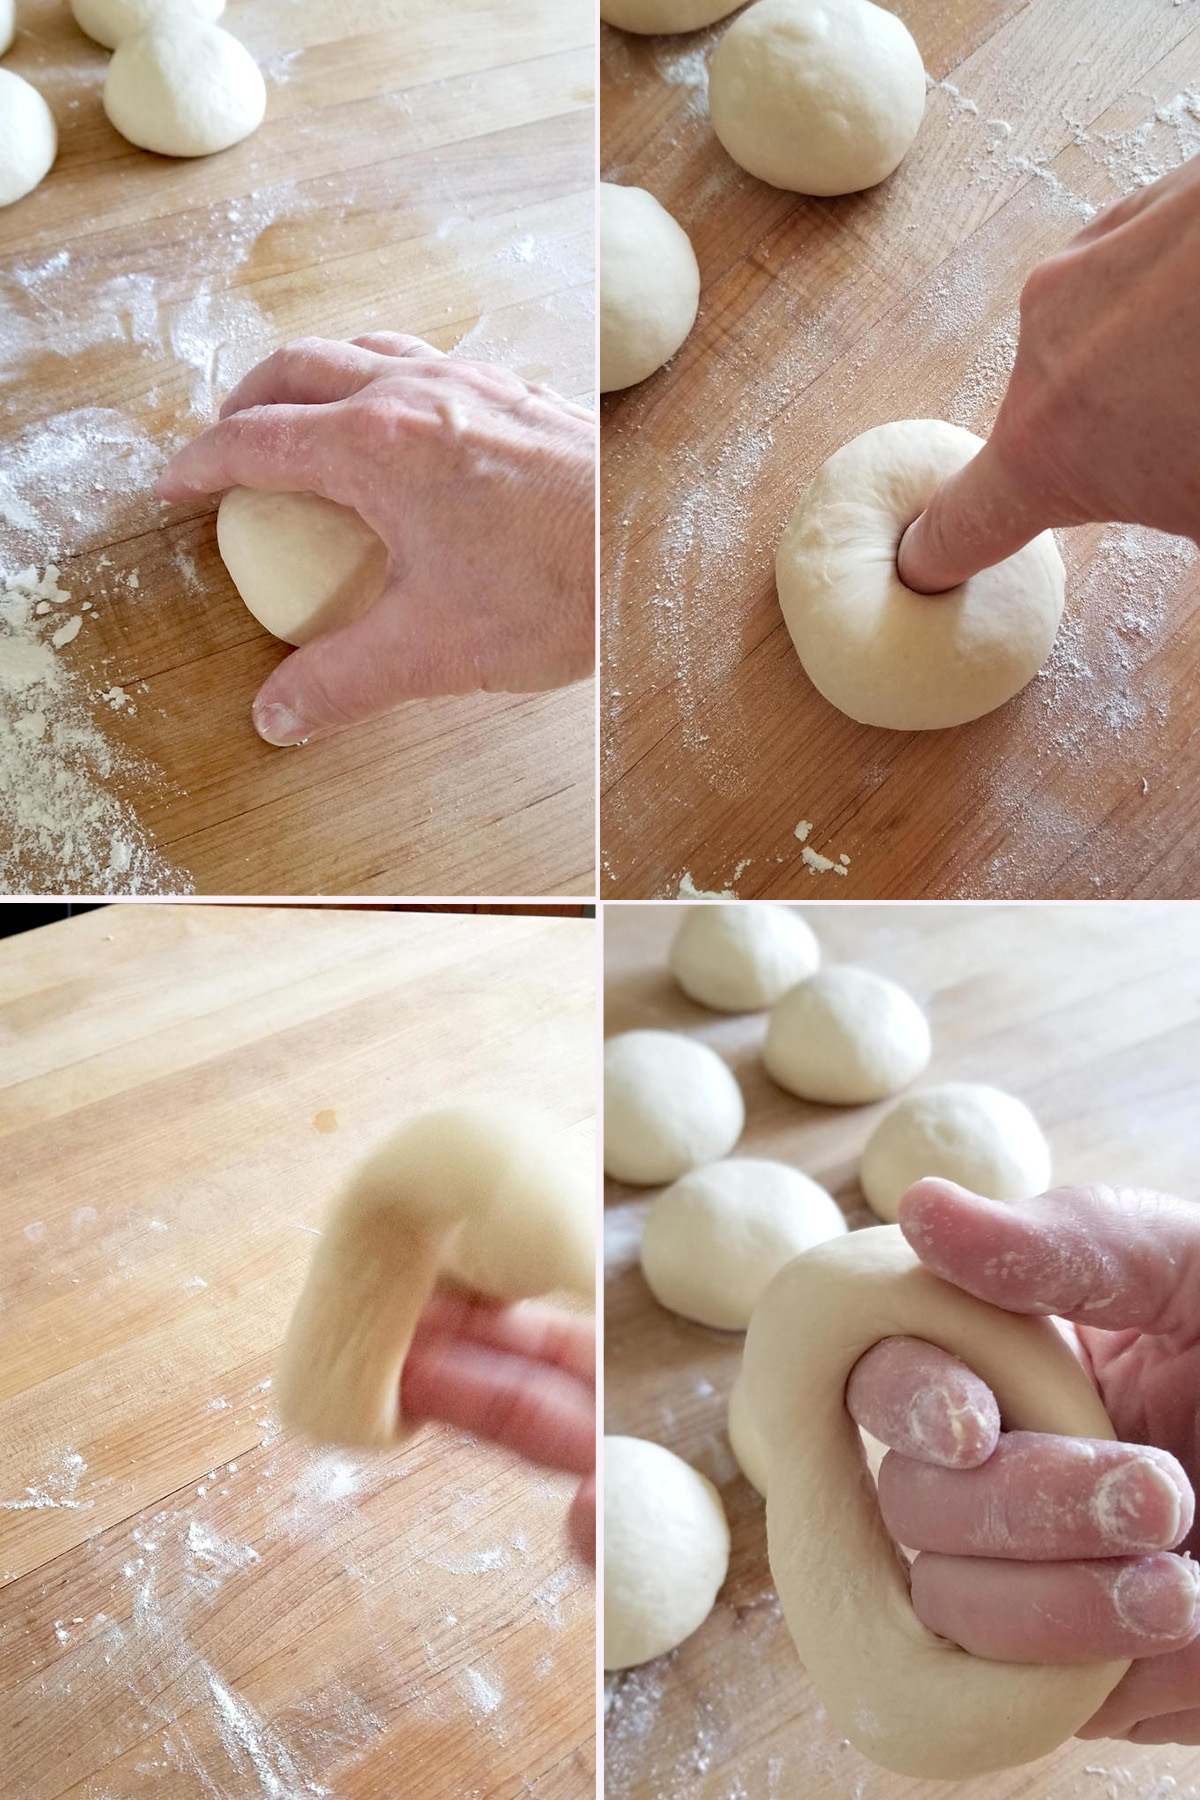
- Use a cupped hand to form the a piece of dough into a tight ball. Repeat with all the pieces of dough.
- Poke your finger all the way through the center of the ball to make a hole.
- Twirl the dough around your fingers to widen the center hole.
- Set the bagel onto the baking sheet and continue with the rest of the dough.
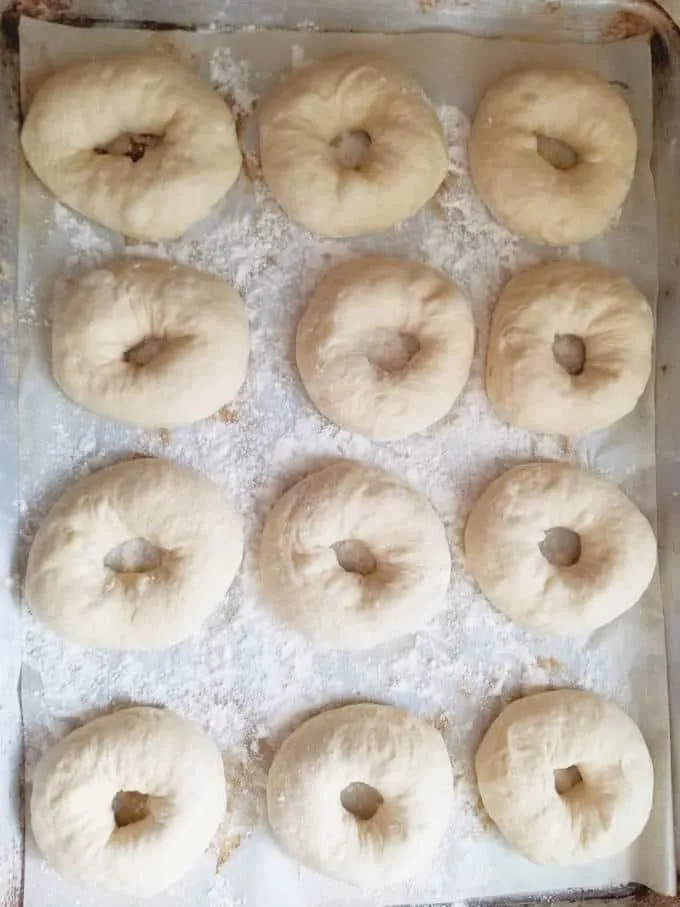
- Line the formed bagels onto a well-floured (or use cornmeal) sheet pan to prevent sticking.
- Cover the pan and place it in the refrigerator overnight.
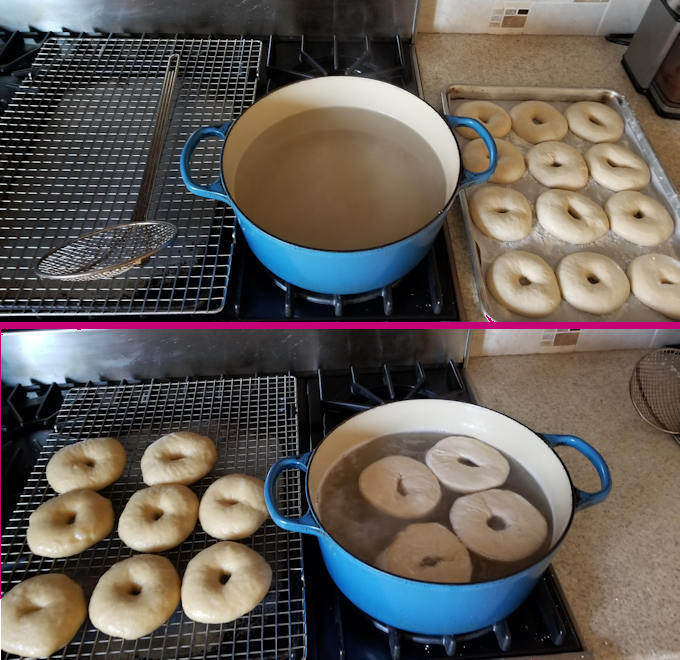
- Bring a pot of water with baking soda and sugar to a boil. Preheat the oven.
- Boil the bagels a few at a time, flipping them every thirty seconds. Boil each batch for 2 minutes.
- Transfer the bagels to a rack to drain while you finish boiling the rest of the bagels.
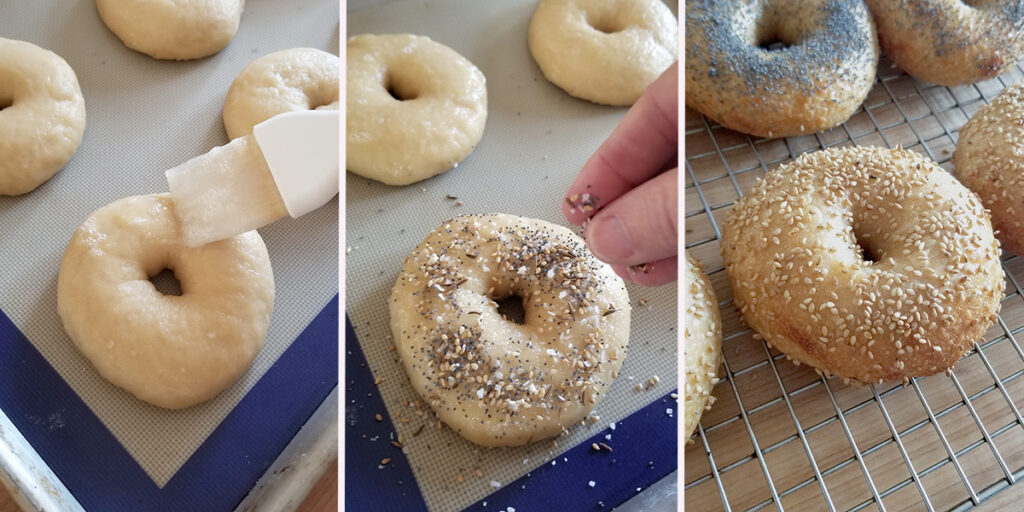
- Brush the boiled bagels with egg white.
- Sprinkle seeds or bagel topping if desired.
- Bake until the bagels are golden brown.
Recipe Tips
- Make sure your starter is very active and lively.
- To get a good bagel shape that will rise properly, you must create a tight ball of dough before making the ring. Use a cupped hand and surface friction to roll the dough into a ball. You can see how it’s done in the recipe video.
- Place the shaped bagels on sheet pan which has been sprinkled liberally with cornmeal or flour. If the bagels stick to the pan you will loose volume when transferring them to the water. I find cornmeal works best, but flour will work too.
- In the morning, take the bagels out of the fridge and leave them out until the dough comes to room temp.
- Don’t start boiling the bagels until the oven is preheated. They should go into the oven within minutes of coming out of the water.
Storage
- Bagels are best the day they are baked. For longer term storage, slice the bagels about 3/4 the way through and pack them into freezer bags.
- Previously frozen bagels are best if toasted before serving.
I know you hate to throw away that sourdough discard. Check out these recipes that use sourdough discard.
If you love this recipe as much as I do, please consider giving it a 5-star review.

Sourdough Bagel Recipe
Video
Ingredients
- 8 oz active sourdough starter (1 cup (100% hydration))
- 12 oz warm water (1 ½ cups)
- 22 ½ oz bread flour (4 ½ cups, divided, see note)
- 1 ½ oz barley malt syrup (2 tablespoons (or honey + molasses))
- 1 tablespoon table salt
- 2 oz granulated sugar (¼ cup (for boiling))
- 2 teaspoons baking soda (for boiling)
- corn meal (for pan prep)
- 1 egg white (whisked lightly)
- Topping (sesame seeds, poppy seeds, caraway seeds or coarse salt)
Instructions
- Combine 8 oz active sourdough starter, 12 oz warm water and 2 cups (10 oz) of the flour in a mixing bowl. Mix to form a thick batter. Cover the bowl and set aside for 30-60 minutes.
- Add 1 ½ oz barley malt syrup and 1 tablespoon table salt. Switch to the dough hook. Add the remaining 2 ½ cups (12 ½ oz) flour and mix to combine. The dough should eventually cling to the hook and start to clear the sides of the bowl.
- Knead 5 minutes on medium speed. If working by hand, stir in as much of the flour as you can, then turn the dough out onto a lightly floured surface and knead in the remaining flour. Knead 5 minutes. Form the dough into a smooth ball.
- Put the dough into a lightly oiled bowl, turning once to coat the dough. Cover the bowl and set it aside at room temperature. After 30 minutes uncover the bowl, lift one side of the dough and fold it into the middle of the dough. Repeat with the other three sides of the dough then flip the dough over. You're basically turning the dough inside-out to redistribute the yeast. Cover the bowl and repeat the procedure every 60 minutes for a total fermentation time of about 3 hours. The dough should be lively, elastic and airy. If the dough is still sluggish give it another hour or two at room temperature.
- Line a baking pan with parchment paper then generously sprinkle the paper with cornmeal (or flour). Turn the dough out onto a lightly floured surface without kneading out the air. Divide the dough into 10 even pieces. Use a cupped hand to roll each piece into a smooth, tight ball.
- To form a bagel, poke your finger all the way through the center of a ball to make a hole. Use two fingers to gently open up the hole. Continue gently stretching to form the bagel or twirl the dough around your fingers to widen the center hole to 1 – 1½" wide.
- Place the bagel on the prepared sheet pan and continue to form the remaining bagels. The dough will probably spring back a bit so you can go back and re-stretch the holes once you're done forming all the bagels. Cover the pan with plastic wrap. If the dough and the ambient temperature is on the cooler side, leave the shaped bagels at room temperature for 30 minutes then place the pan in the refrigerator overnight. If the dough and ambient temp is warmer and the dough is quite active, place the bagels into the refrigerator without leaving them out for 30 minutes.
- In the morning take the bagels out of the refrigerator and bring them to room temperature.
- Preheat the oven to 450 °F. In a large pot combine 1 gallon of water with 2 oz granulated sugar and 2 teaspoons baking soda and bring it to a boil. Reduce the heat to keep the water at a rolling simmer. Set a cooling rack over a sheet pan or kitchen towel and place it next to the stove. Line two half-sheet pans with parchment paper or silicone baking mats and generously sprinkle with corn meal.
- Once the oven is preheated, you're ready to boil. Gently lift a bagel off the sheet pan and lower it into the water, bottom side down. Depending on the size of your pot, you can boil 3-4 bagels at a time. Boil the bagels for 30 seconds then flip them. Boil the other side for 30 seconds. Repeat the process again for a total of 2 minutes boiling time. Remove the boiled bagels from the water and set them on the cooling rack to drain.
- Place 5 of the boiled bagels on each sheet pan. You could fit them all on one pan but they may stick together as they bake.
- Brush the bagels with egg white. Add the topping(s) of your choice. To make "everything" bagels combine a tablespoon of each of sesame seeds, poppy seeds & salt with a 1/8 teaspoon garlic powder and onion powder. Bake until golden brown, about 20 minutes.
Would you like to save this recipe?


As an Amazon Associate and member of other affiliate programs, I earn from qualifying purchases.
Hi! I love this recipe and I’ve made it several times. Thank you for sharing it with us! I usually do your overnight in the fridge method but tomorrow I’d like to make them all in one day. How long do you think the last rise should take if you don’t put them in the fridge? Thanks again!
Hi Jessi. I don’t think that last rise will take long at all. I just made these again the other day and after leaving them for 1/2 hour at room temp before putting them in the fridge they were already rising nicely. Depending, as always, on how active your starter/dough are, I would think an hour or so would be enough.
When you say “2 tablespoons (1.5 oz, 42g) barley malt syrup (or honey + molasses)” is the substitute equal parts honey and molasses, eg 1tbsp honey, 1 tbsp molasses?
Yes!
Do you think of a sub of just honey for the barley malt syrup would work? I don’t have barley malt syrup or molasses and am trying not to venture out if I don’t absolutely have to.
Yes, the flavor will be slightly different, but still delicious.
These look great. My starter is active, I have non-diastatic malt powder. Can I use that to substitute for the malt syrup or do I need both?
The non-diastatic malt powder will add some flavor to the dough, but it’s not the same as the malt syrup. The malt powder has more of a cereal flavor and the syrup has a sweeter flavor. I think the best substitute for the malt syrup is a combination of honey and molasses.
Hi I’m having a problem with these rising over night. The dough did rise when I was fermenting but it just never rises over night. This is my second time trying to make them. How do I know if I need to knead the dough more? I timed it 5 minutes and the dough is still a bit sticky. The dough springs back but does not create a window pane. Idk if that’s what it needs to do but I’ve seen other bagel videos and that’s what is suggested to know when the dough is ready. Trying to revive this dough now. Please help.
Did you leave the formed bagels at room temp for 30 minutes before refrigerating for the night? I find that makes a big difference in giving them a head start on rising. If they don’t look like they’ve risen much in the fridge, give them more time at room temp in the morning. Even if the dough starts out a bit sticky, after the long fermentation it should become quite cohesive. Make sure your starter is a 100% starter and not wetter since that can affect the texture. Also be sure to use unbleached bread flour. I even added half ap flour the other day by mistake and still got a nice dough that was not overly sticky. I don’t do the window pane test, I just knead for 5 minutes. This dough does behave a little differently than a simple bread dough since it has sugar (malt syrup) and a good amount of salt.
How do I know if it’s 100% starter? I just have a normal sourdough starter and measured 1 cup of that. I do let it rest 30 minutes before putting it in the fridge. Even after the 3 hour fermentation, the dough is still kinda sticky. I use King Arthur bread flour.
100% starter means that you feed the starter with equal parts starter-water-flour. So I use 4 oz of starter (discard or use the rest) and feed it with 4 oz of water and 4 oz of flour.
Hi There – thank you so much for these wonderful recipes. I have been making the instant=yeast version of this recipe for a little while now, and decided to finally venture into the sourdough variant. Unfortunately, it didn’t work out too well. I tried to follow the recipe closely, but I had to make a few deviations: 1) added more flour because the dough was very sticky. 2) let the bagels sit longer before putting them in the fridge overnight. 3) Bagels didn’t seem to rise at all over night, so I left them at room temperature for a while. After a couple of hours with very little rise, I put them in the oven on “proof” setting (I believe it’s ~ 100F). After being out of the fridge for multiple hours, I was close to throwing the whole batch in the garbage. But then I decided to boil+bake them. When I dropped them in the pot they sunk to the bottom. After a while of boiling they floated. Then I did the bake. They are edible, but not very good. There are a few bubbles of air in the dough.
A couple places where I wasn’t sure what to do: 1) how sticky should the dough be before I place it in the bowl for the fermentation? Maybe I didn’t knead the dough enough? It’s kind of hard to time the 5 minutes because initially the dough’s just sticking to my fingers. Eventually when I get enough flour added, I can actually knead. 2) Maybe my starter wasn’t ready? I have a whole-rye starter that I used to create the AP-starter for this recipe. I fed it for about 3 days with AP flour until it seemed to get sort of bubbly. I did the float test, and it passed. 3) I am baking at altitude (~5k feet).
Sorry about the long-winded comment. Thanks so much!
Is the amount of salt a typo? I’ve tried making these twice and had next to no rise. Salt retards yeast and most recipes call for a TEAspoon or two. You have a tablespoon. I think it’s too much salt because my starter has no issues with any other bread recipe.
Hi Wendy, no that is not a typo. I like my bagels with a good amount of salt. I’ve made this recipe countless times and haven’t had trouble with the salt. The 30-60 rest after mixing the starter/water/flour should give the yeast a head start before the salt is added. Also, this recipe has 5 cups of flour (1/2 cup in the starter) so it is a larger total batch of dough than many other bread recipes. All that being said, if you prefer to use less salt, feel free to adapt the recipe.
Made these yesterday/today with my son and they are delicious. I didn’t have the barley malt syrup so I substituted black strap molasses… also I only had AP flour and it worked out well too. They are really beautiful and tasty and were fun to make! Thank you for the detailed recipe.