How to Make Sourdough Starter

I’ll teach you how to make sourdough starter from scratch—without any commercial yeast. You need just 3 ingredients and 7–10 days to begin making sourdough bread at home.
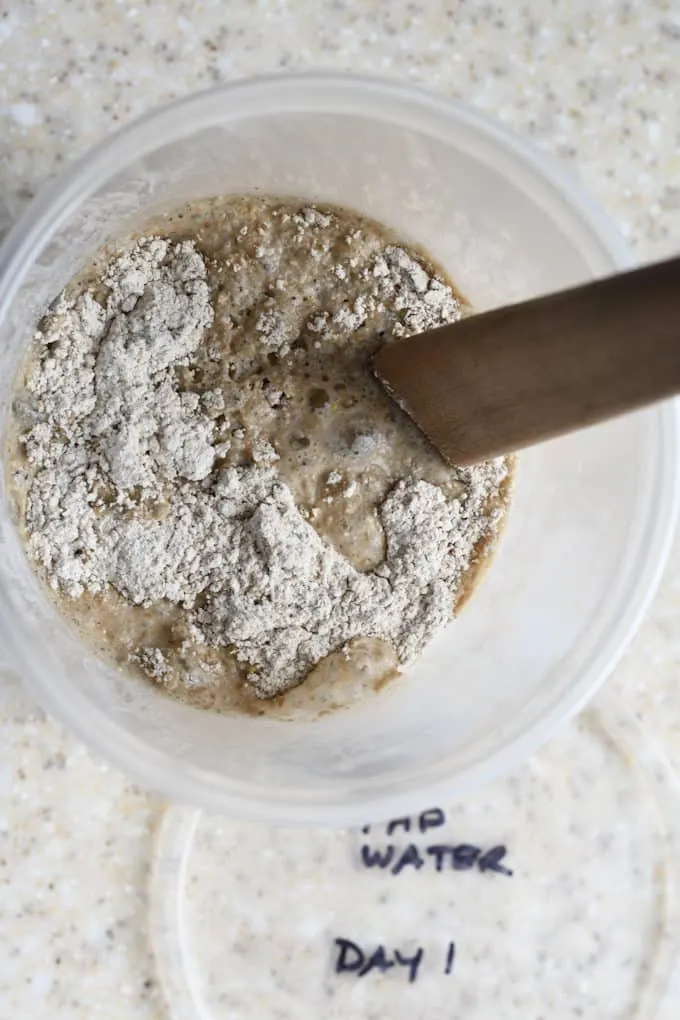
Table of contents
If you’re new to the world of sourdough baking, I’m so excited to get you “started” (pun intended!). Before you know it, I think you’ll be just as fascinated as I am by the incredible living thing that is sourdough.
Yes, a sourdough starter is a living batter. It is built over several days to cultivate wild yeast from the environment and from the flour itself.
There are many ways to create and maintain a sourdough starter.
You may have read all sorts of warnings…that you must use bottled water, that you should take it on vacation with you and treat it like a child. Relax—it’s really not that complicated.
I’m going to explain to you, step by step, how I created my starter. Along the way I’ll bust some myths about sourdough starters and, hopefully, show you that it’s really a very simple and forgiving process.
Once you have a starter, as long as you feed it periodically it can, theoretically, live forever.
What’s Different About This Process
Although flour is usually inexpensive and easy to come by, it’s always good to create less waste.
So I revamped my process for creating a sourdough starter to dramatically reduce waste. With this new recipe, the total amount of flour used is reduced from 30 oz (about 6 cups) down to less than 2 1/2 cups (12 oz).
The key is to keep the starter very small for the first 6 days of the process.
On day 7 we begin to bulk up the starter. By day 8—usually when a starter is active enough for baking—you’ll have a full 12 oz of 100% hydration starter. That’s enough to bake a loaf of bread and use what remains to continue feeding the starter.
All of my notes and photos for making a starter are still accurate with the revised flour amounts.
Ingredients

- All-Purpose Flour: Medium protein flour is used for growing and feeding the starter.
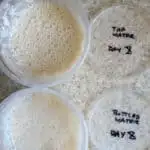
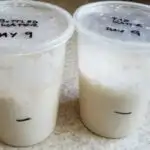
- Water: You don’t have to use bottled water to make sourdough starter. I mixed two starters side by side, one with bottled water and one with tap water. You can see in the process photos that they behaved exactly the same. As long as your tap water is good to drink and is not excessively chlorinated, there is no need to use bottled water. I baked with both starters with good results.
- Rye Flour (or whole wheat): The wild yeast likes the extra nutrients in the whole grain flour, which gives the starter a bit of a boost and nice flavor. But you can use only all-purpose flour if that’s what you have on hand.
Tips for making a successful Sourdough Starter:
- For best results, weigh your ingredients. The weight of the flour can vary based on how you fill a measuring cup. Weight measurements are most consistent and accurate, especially when working with small amounts in the beginning of the process.
- The warmer the room, the faster your starter will activate. About 75°F is a great temperature for nurturing a starter.
- About day 4 or 5, the starter may start to smell cheesy (like sour milk) and may not rise as much. Don’t give up! The smell will gradually become more yeasty/fermenty and less cheesy. It will sort itself out as random bacteria die out and the good yeasts take over.
- Use a plastic or glass container so you can see the progress of your starter. I like to use plastic, quart-size deli containers. They’re cheap and reusable. Get extra containers so you can transfer the starter to a clean container each time you feed it. They’re also handy for giving away starter to your baking friends.
Detailed Process Photos
Below is a visual overview of how the starter develops over time. Don’t worry if your starter doesn’t look exactly like mine—timing and activity can vary.
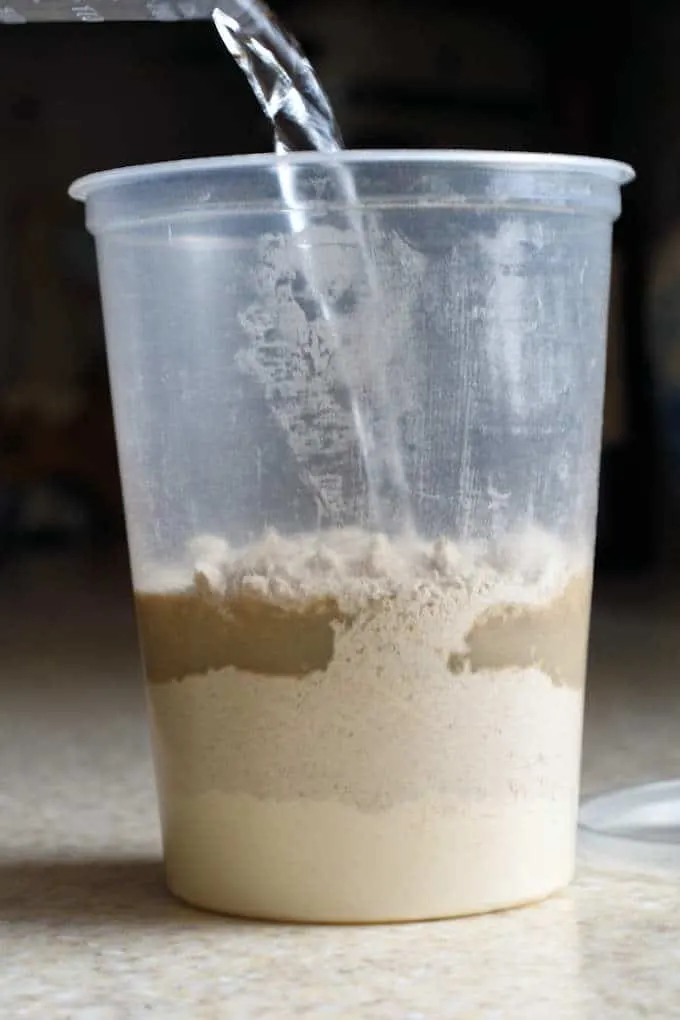
- On day 1, mix equal weights of all-purpose/whole grain flour and water.
- Tap water is fine if you have good drinking water.
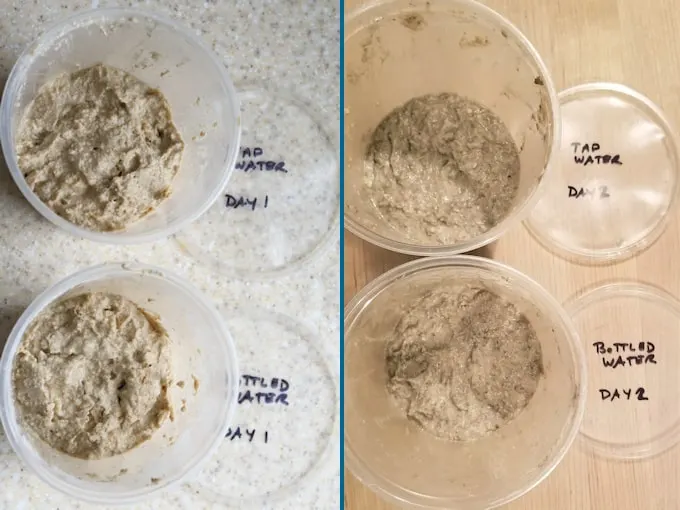
- From day 1 to day 2 there may not be much activity. Don’t feed it at this point.
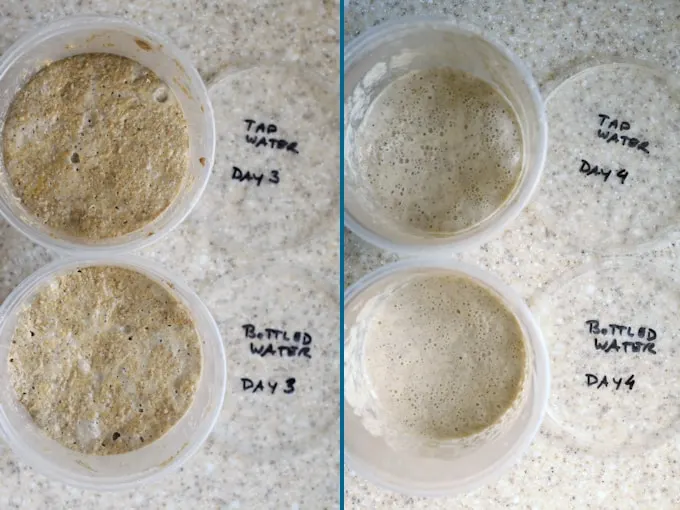
- By day 3 there should be some activity. Now you can start feeding.
- Day 4 will see more activity. In my testing, there was no difference in activity between the tap water and bottled water starters.
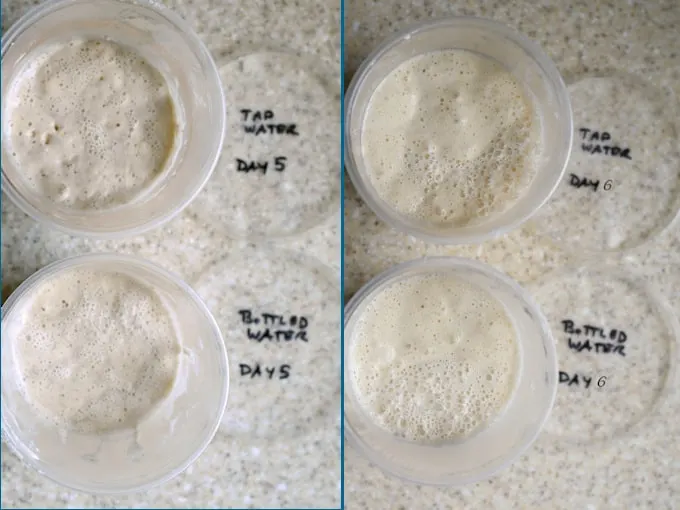
- The starter will become progressively more active and fragrant.
- Feed about the same time each day.
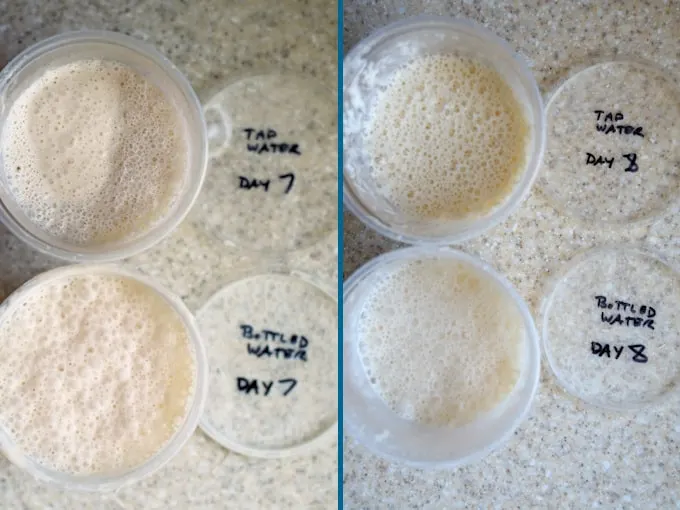
- By day 8 your starter should be ready to use.
- A starter is ready to bake when it reliably doubles in volume within 4–6 hours of feeding and smells pleasantly yeasty—not sharp or cheesy.
- Baking day. The starter should be bubbly, should have doubled in size in less than 6 hours and have a yeasty and lightly fermented aroma.
Daily Notes on Growing My Sourdough Starter:
- Day 1. Mixed at 11am.
- Day 2. No activity.
- Day 3. Doubled in volume, smelled “grainy”, like wet rye. Not pungent. Fed at 11 am.
- Day 4. Rose to fill the container overnight, then collapsed. Smelled cheesy. Fed at 1 pm
- Day 5. Didn’t rise much, cheesy but less pungent, fed at 12 noon
- Day 6. Rose almost double. Smelled less cheesy, more sharp. Fed at 12 noon.
- Day 7. Rose to double and almost overflowed the container. No cheesy smell, just yeasty and lightly fermented smell.
- Day 8. Rose to fill the container. Smelled yeasty and lightly fermented. Ready to use.
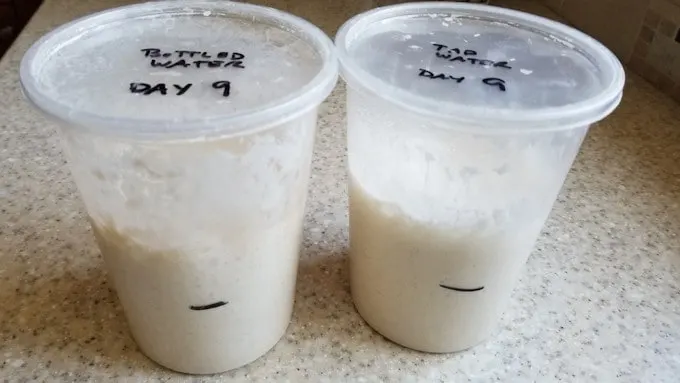
- Day 9. Left at cooler room temp overnight. Rose to double in less than 6 hours and didn’t collapse by 24 hours. Nice yeasty, beery smell. First day baking.
Congratulations—you’ve done it. You’ve created a living batter filled with wild yeast.
Next Steps:
- Sourdough Baking Guide – My overall approach to sourdough baking, from starter care to baking recipes.
- How to Feed & Maintain Your Starter – Find a detailed schedule for feeding your starter.
- How to Dry Sourdough Starter – Store starter long-term without feeding
- My Best Sourdough Recipes – What to bake once your starter is ready
- My Best Discard Recipes – If you’d rather not throw away discard.
If you love this recipe as much as I do, I’d really appreciate a star rating and a quick comment. Ratings and comments help my recipes show in search results. Thanks!
Sourdough Starter Recipe
Ingredients
- 1 oz unbleached all purpose flour
- 1 oz whole grain rye or whole wheat flour (see note)
- 2 oz water (room temperature)
- 10 oz unbleached all purpose flour (for feeding)
Instructions
- On Day 1, combine 1 oz unbleached all purpose flour, 1 oz whole grain rye or whole wheat flour and 2 oz water in a pint size glass or plastic container. Mix until it forms a thick batter. Loosely cover with plastic wrap or a lid.
- Set aside at warm room temperature (75 °F) until the mixture starts to bubble. The warmer the room temperature, the faster the starter will become active. This usually takes 48 hours, so there is no feeding on day 2.
- On day 3 weigh out 1 oz (28g) of the starter and discard the rest. Combine the reserved starter with 1 oz (28g) all purpose flour and 1 oz (28g) room temp water. Stir to form a thick batter, cover and set aside at warm room temperature for 24 hours. After 3 or 4 days the starter might smell cheesy. It's fine. Keep feeding.
- On days 4, 5 and 6 feed with the same procedure. Weigh out 1 oz (28g) of the starter and discard the rest. Combine the reserved starter with 1 oz (28g) all purpose flour and 1 oz (28g) room temp water. Stir to form a thick batter, cover and set aside at warm room temperature for 24 hours.
- On day 7 weigh out 2 oz (56g) of the starter and discard the rest. Combine the reserved starter with 2 oz (56g) all purpose flour and 2 oz (56g) room temp water. Stir to form a thick batter, cover and set aside at warm room temperature for 24 hours.
- On day 8 you'll need to transfer the starter to a quart size container. Weigh out 4 oz (112g) of the starter and discard the rest. Combine the reserved starter with 4 oz (112g) all purpose flour and 4 oz (112g) room temp water. Stir to form a thick batter, cover and set aside at warm room temperature for 6-24 hours.
- The starter is often ready at this point. The starter is ready to use for baking when it doubles in volume within 8 hours of feeding and has a pleasant, slightly fermented yeasty aroma. If that hasn't happened by day 8 continue feeding until the starter is ready.
Would you like to save this recipe?


As an Amazon Associate and member of other affiliate programs, I earn from qualifying purchases.
Up to stage 5 of the feeding Sourdough starter, can the discard portion be used? Such as in the Zucchini Discard Sourdough Bread recipe.
The starter goes through some pretty funky stages as it’s growing. I wouldn’t use the discard until you have an active, growing starter. Once it’s rising consistently and smells nice and yeast-y/ferment-y then the discard is good to use.
I’m a little confused. Is the starter ready to use only while it is doubled and only useful in discard recipes after it has fallen?
There are so so many ways and so many variables when working with sourdough. In general, I like to use my starter to bake when it has just reached peak activity. I use it as discard if it has passed it’s peak.
Sorry, I posted this in the feeding page on accident. I’m on day 6 of starting the starter and I’ve been following the directions. I went to feed it today and there’s a fuzzy white layer on top. When I put it in a jar is the jar supposed to be sealed or should it just be covered? I’ve had mine in a canning jar with plastic wrap over the opening and then the lid and seal on top of that.
If there is fuzzy stuff on it throw it away. The jar should be lightly covered. Just plastic wrap or the lid, ajar, is good. I think the mold might have taken hold because there was no breathing space.
Thank you. I’m trying it with plastic wrap. So far so good. It was doubled and bubbly about 36 hours in so I fed it woke up to it being doubled and bubbly about 12 hours later. Should I keep feeding it every 12 hours if it keeps doubling in that time frame?