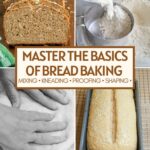
Your Guide to Scoring, Baking & Storing Bread
Once your dough is mixed, kneaded, shaped, and fully proofed, the final steps—scoring, baking, cooling, and storing—determine the loaf’s crust, crumb, and shelf life.
This guide brings everything together. You’ll learn how to score for controlled oven spring, how to bake using different equipment and techniques, how to judge doneness, and why proper cooling and storage matter just as much as the bake itself.
For shaping and proofing tips, see How to Shape and Proof Bread Dough.
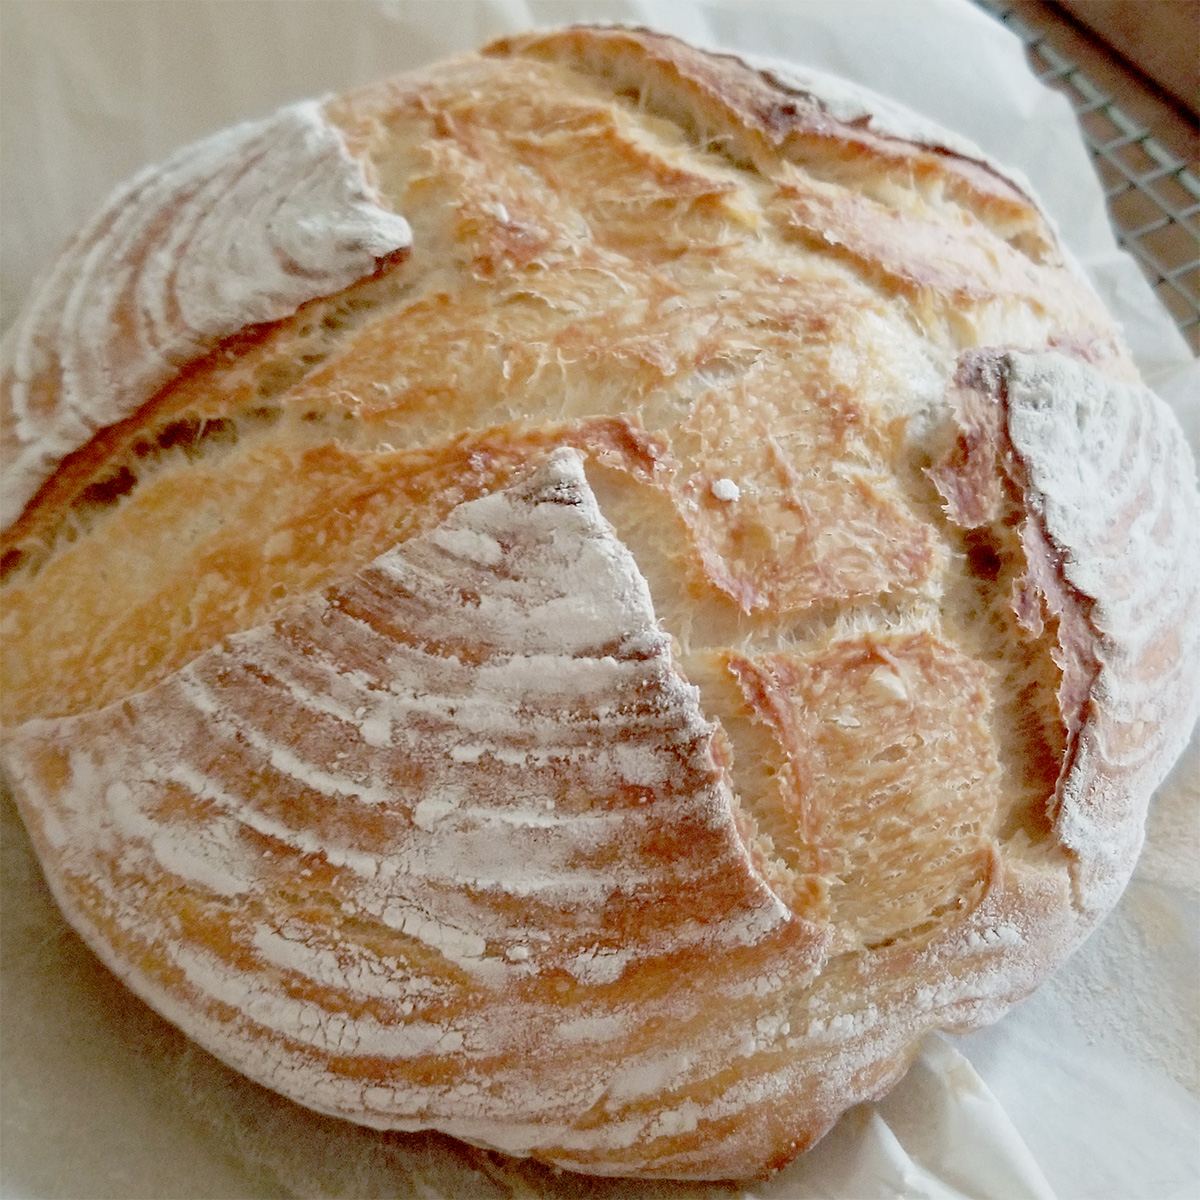
Table of contents
Equipment
I’ve listed the scoring and baking tools I recommend. You can make a nice loaf of bread without any specialty tools at all, but the right tools do make the job easier.
**As an Amazon Associate and member of other affiliate programs, I earn from qualifying purchases.**


Baking Sense Tip
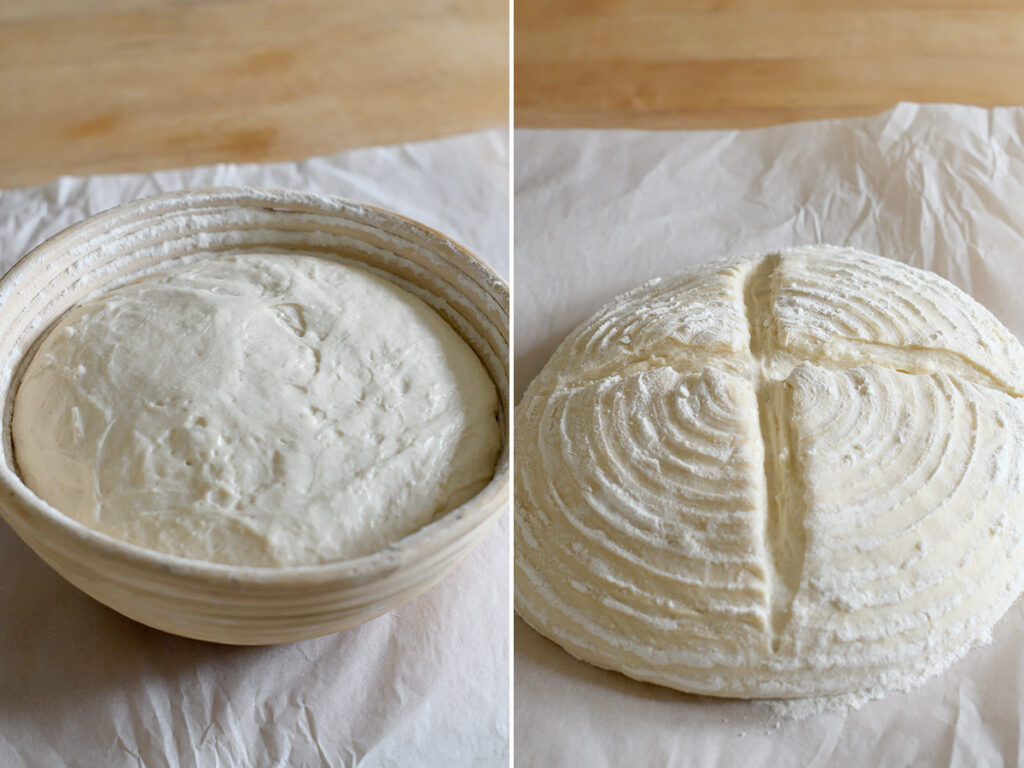
How to Transfer Your Proofed Dough
Before scoring, you need to transfer the dough if it was proofed in a basket (banneton).
Place a piece of parchment or a peel over the basket, invert to release the dough, brush off excess flour, and score right away.
Scoring Bread
Once the dough is transferred and positioned on its baking surface, it’s time to score.
Scoring is your final chance to guide the shape of the loaf. A well-placed slash gives the dough a controlled place to expand during oven spring. Without scoring, pressure builds unpredictably and the loaf will burst along weak spots, usually in unattractive and uneven ways.
A good score improves both the appearance and the structure of the baked loaf. The depth, angle, and confidence of the cut all affect how the dough opens in the oven.
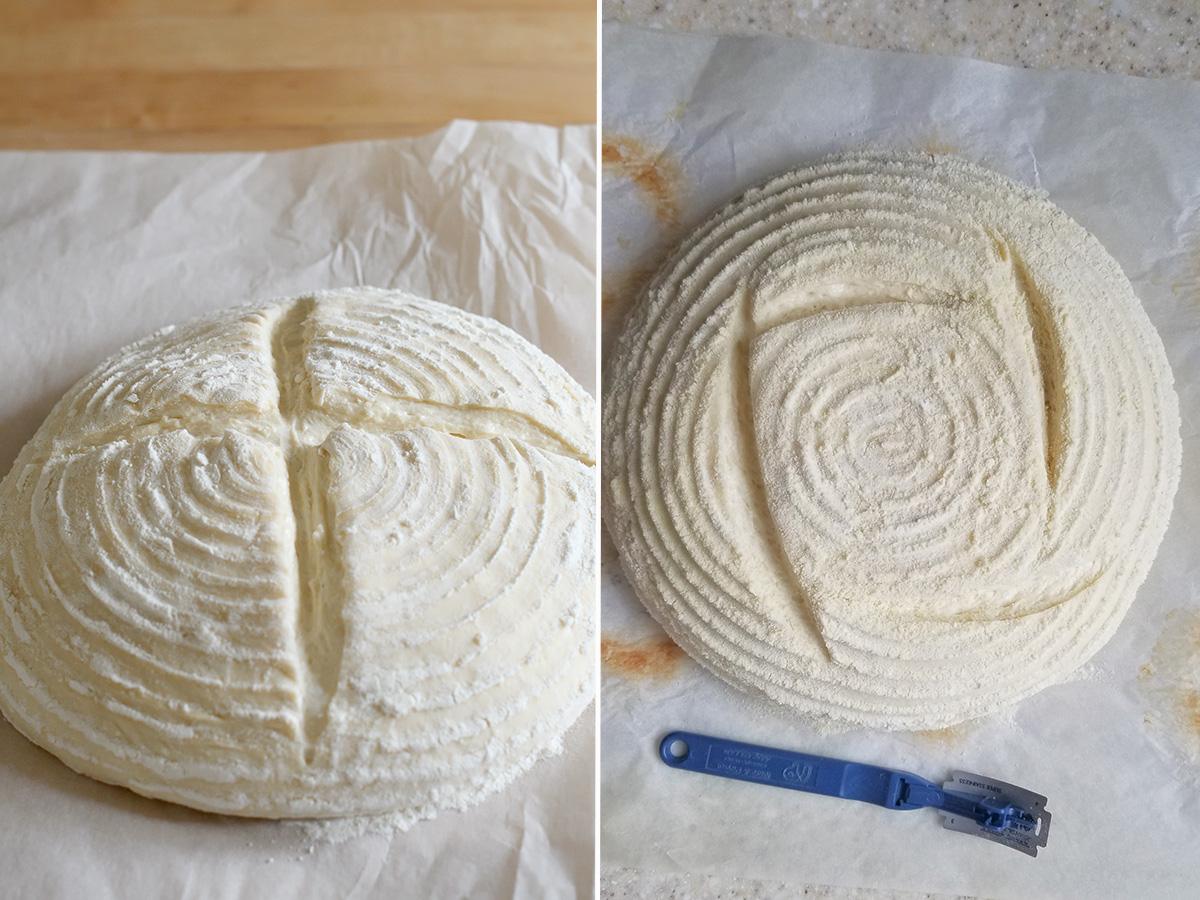
Scoring Basics
For most lean, free-form loaves, aim for a cut that is ¼–½ inch (6–12 mm). Too shallow and the dough will close up as it rises; too deep and you risk deflating the top of the loaf.
A few practical guidelines:
- Score immediately before baking. Don’t score ahead of time or during proofing.
- Angle the blade 20–30° for loaves where you want an “ear” to form.
- Use swift, confident cuts. Hesitation drags the blade and distorts the dough.
- Keep patterns simple. One or two clean cuts are better than a complicated design unless you’re experienced.
How to Score Different Types of Loaves
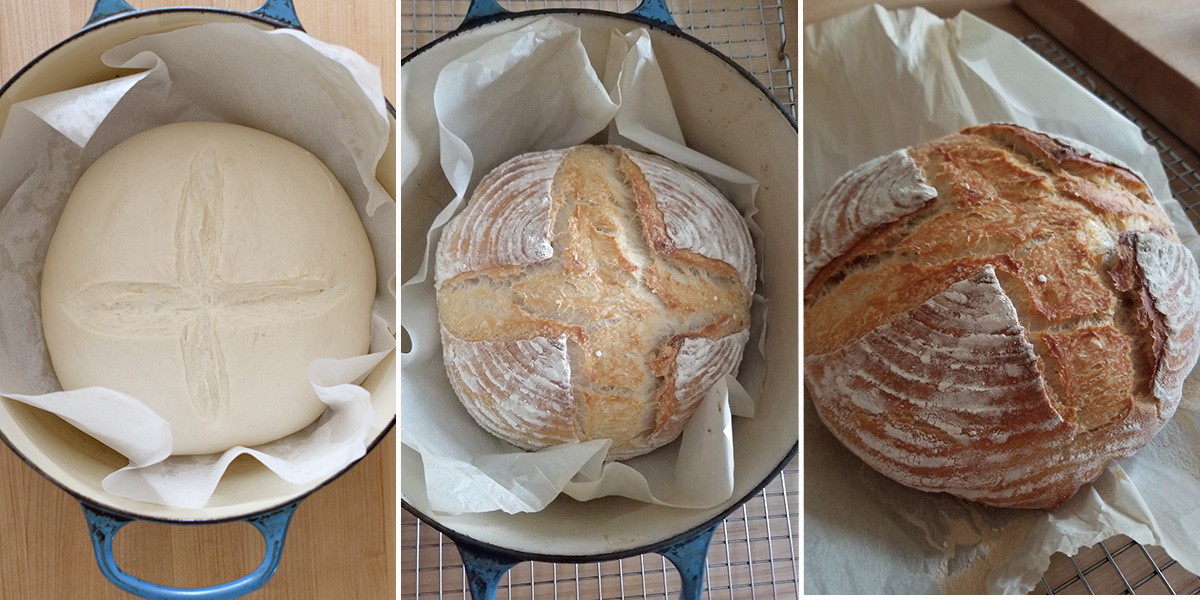
Boules (round loaves)
Boules can be scored with a single large slash, a cross, or a simple star pattern. Hold the blade mostly upright unless you want a defined ear. A single off-center cut encourages the loaf to bloom upward rather than out.
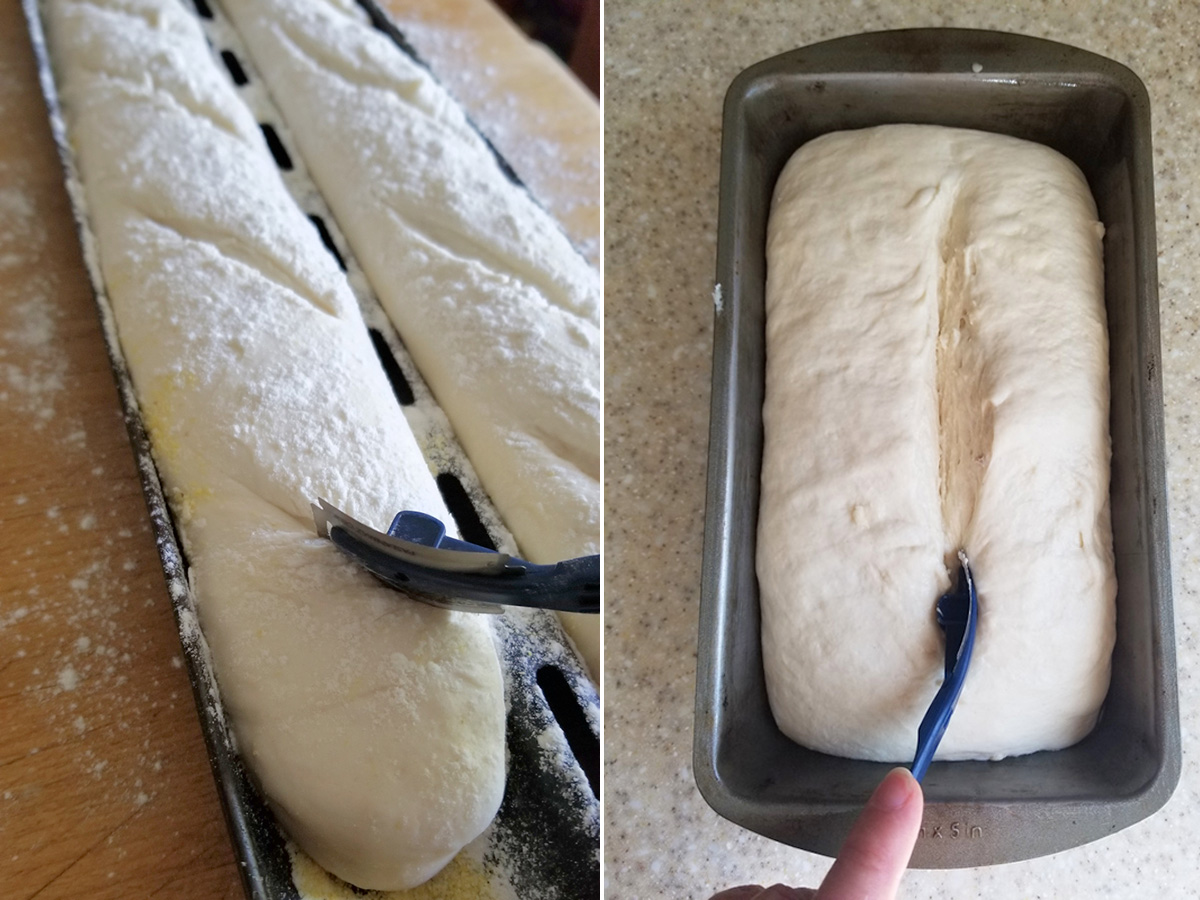
Batards (oval loaves)
The classic long slash, placed slightly off-center, helps the loaf rise along a controlled “spine.” For a more decorative look, use a chevron pattern—several overlapping diagonal cuts that run the length of the loaf.

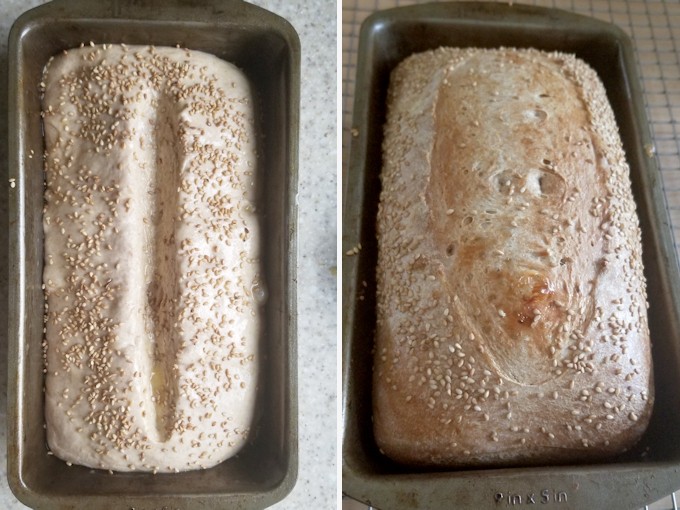
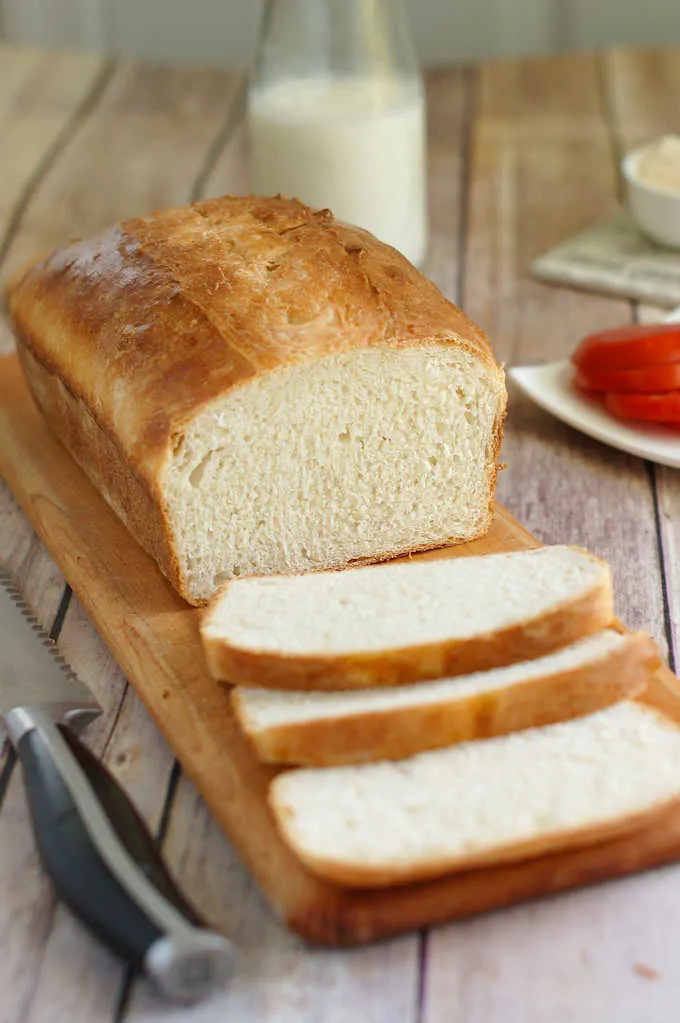
Pan Loaves (sandwich loaves)
A single long slash down the center creates controlled expansion. For a rustic look, add two or three shallow diagonal cuts, but keep them light to avoid deflating the dough.
Pan loaves rise straight up because the pan supports the sides, so even a single shallow score helps prevent a domed “blowout” at the top edge.
Enriched or Soft Doughs
These doughs are more delicate, so score gently. Some enriched breads need only a shallow decorative cut; others bake best without any scoring at all.
Baking Sense Tip
Decorating a Loaf Before Baking
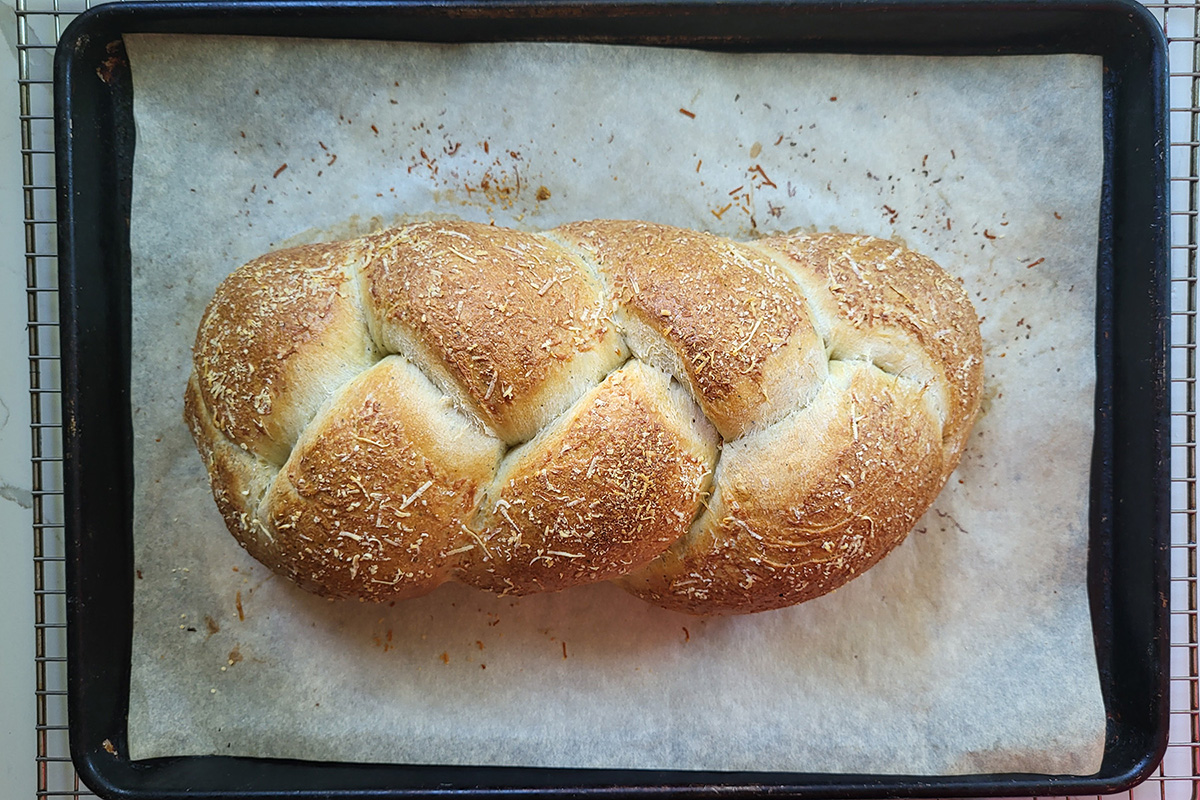
I often finish sandwich-style loaves with a light egg wash and a sprinkle of seeds or oats before baking. Egg wash adds shine, helps browning, and gives toppings something to cling to. It’s not something I typically use on rustic or “artisan-style” loaves, where I prefer the natural, flour-dusted crust.
Baking Bread
Baking is where the dough’s potential becomes reality. Heat sets the internal structure, steam influences crust quality, and the baking surface affects oven spring. Your method and equipment determine how the crust forms, how evenly the loaf bakes, and the final texture.
Baking Methods
Dutch Oven Baking
A Dutch oven traps steam naturally, creating ideal conditions for a bold rise and a thin, glossy crust. Preheat the Dutch oven, load the dough using parchment as a sling, bake covered for the first part of the bake, and uncover to brown.
Baking on a Sheet Pan
A sheet pan produces gentler bottom heat and a more even bake. It’s ideal for rolls, focaccia, enriched loaves, or any dough that’s scored and baked on the same surface.
If you prefer a slightly thicker bottom crust, preheat the pan for 10 minutes before loading the dough.
Baking on a Stone or Baking Steel
Stones and steels store significant heat, producing excellent oven spring.
- Preheat for 45–60 minutes.
- Transfer the dough with a peel or parchment.
- Expect a deep, even bottom crust and fast initial rise.
Baking in a Loaf Pan or Baguette Pan
Pans shape and support the dough, making them ideal for structured loaves or enriched breads. Baking time varies depending on the density and moisture content of the dough.
Using Steam
Steam keeps the crust flexible during the early minutes of baking, allowing the loaf to expand fully. It also contributes to shine and a thinner, more delicate crust.
Ways to create steam:
- My preferred method is to use a preheated metal pan on the oven floor. Add water or ice cubes just after loading the dough and immediately close the oven. I keep a small aluminum pan just for this purpose.
- Spraying the oven walls is less effective and can cause a drop in oven temperature.
- Natural steam inside a closed Dutch oven.
Steam is most important for lean, crusty loaves. It’s less necessary for enriched or pan breads.
Baking Temperature & Timing
Different breads require different heat levels:
- Artisan, lean loaves: 425-450°F
- Pan loaves and enriched doughs: 350–375°F
- Rolls: 375–425°F depending on size
Ovens vary, so adjust racks for even browning. Artisan loaves can be started hot and finished at a lower temperature to ensure full baking without over-browning.
Learn more about how heat and steam affect yeast and oven spring in The Science of Yeast in Baking.
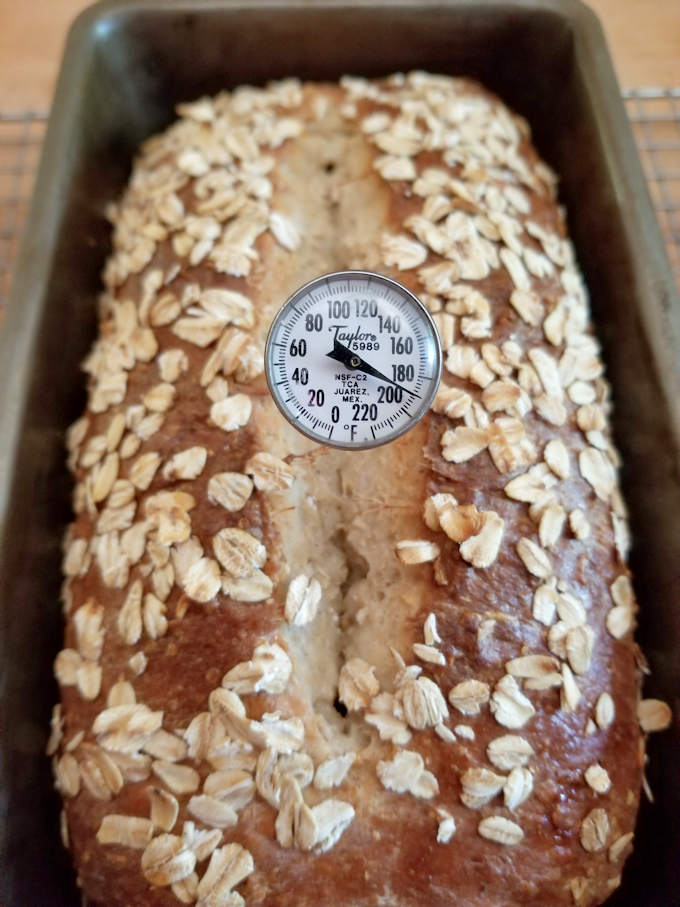
Checking for Doneness
A fully baked loaf has:
- Internal temperature:
- 190–200°F for enriched breads
- 200–210°F for lean, crusty loaves
- Color: Deep golden brown (pale bread usually means underbaking)
- Sound: Hollow when tapped on the bottom
- Texture: Pan loaves should pull slightly from the pan’s sides
When in doubt, bake a few extra minutes—underbaked bread will be gummy, but slightly overbaked bread is usually fine.
Cooling the Bread
Cooling is more than a formality. As the loaf cools, starches that gelatinized during baking begin to set and firm the crumb.

- Crusty loaves: Remove from the pan immediately and cool completely on a rack.
- Enriched or sweet breads: Cool in the pan for about 10 minutes to let the structure settle, then transfer to a rack.
- Always cool completely before storing. Warm bread traps steam, making the crust soggy.
- When to slice:
- 1–2 hours for crusty loaves
- For soft loaves, at least 45 minutes after removing from the pan.
Cutting too early results in a gummy interior, even if the loaf was fully baked.
Storing Bread
How you store bread determines how long its texture stays pleasant. Avoid storing bread in the refrigerator—cold temperatures speed up starch retrogradation, which makes bread go stale more quickly.
Short-Term Storage
Crusty breads:
- Store unwrapped or in a paper bag to keep the crust crisp.
- Once the loaf is cut, place it cut-side-down on a board or loosely cover with paper.
Soft-crust breads:
- Wrap tightly in plastic or place in a sealed bag to keep moisture in.
- Avoid refrigeration—cold temperatures accelerate staling.
Long-Term Storage
Freezing preserves bread better than any counter method.
- Wrap the loaf tightly in plastic or foil.
- Place in a freezer bag and press out excess air.
- Freeze whole or sliced (slices thaw faster and can be removed individually).
- Thaw at room temperature, partially unwrapped, to avoid condensation.
Bread will keep for up to a month in the freezer, though quality gradually declines.
FAQ
These are the questions bakers most often ask when something goes wrong during baking, cooling, or storing.
This usually means the loaf baked too quickly on the outside before the interior had time to fully cook.
Common causes:
Oven too hot — especially in small home ovens that run hotter than the dial.
Dense or under-proofed dough — the loaf needs more time to rise internally before baking.
Pan color — dark metal pans absorb heat and brown the crust faster.
Rack position — baking too high in the oven can over-brown the top.
How to fix it:
Get an oven thermometer to ensure your oven is calibrated. Bake on the center rack, and extend the bake time so the heat penetrates the entire loaf.
Most home ovens have hot spots, so one side of the loaf is exposed to more direct heat.
What causes this:
Uneven airflow inside the oven
Heating elements that favor one side
Baking too close to a wall of the oven
Placing a stone/steel off-center
How to fix it:
Rotate the loaf halfway through baking. For pan loaves, rotate the pan; for freeform loaves on a stone or steel, use a peel to turn the entire loaf.
Over-browned bottoms usually mean the baking surface is too hot.
Typical reasons:
Baking directly on a stone or steel without parchment
Thin or dark sheet pans
Rack placed too low
How to fix it:
Move the rack to the center, use a lighter-colored pan, add a spare sheet pan under the loaf for insulation, or bake on parchment to diffuse direct heat from a steel/stone.
Main causes:
Score too shallow — the cut closed as the loaf rose.
Score too late — the dough began forming a skin before baking.
Under-proofing — the loaf had a lot of pent-up energy during oven spring.
Improper angle — straight-down cuts may not encourage an “ear,” so the dough bursts elsewhere.
How to fix it:
Score immediately before baking, keep the blade at a shallow 20–30° angle for an ear, and make sure the loaf is properly proofed before it enters the oven.
A crisp crust depends on moisture management.
To keep the crust crisp:
Cool the loaf completely on a wire rack.
Don’t store crusty breads in plastic — they’ll soften within hours.
For the first day, keep the loaf unwrapped or in a paper bag.
Once sliced, place the loaf cut-side-down on a board to protect the interior without trapping steam.
If the crust softens over time, place the loaf back in a 350°F oven for 5–7 minutes to refresh it.
A pale loaf usually means the oven wasn’t hot enough or the bread didn’t bake long enough. Lack of steam can also prevent proper browning. Check that your oven is fully preheated, use steam for crusty loaves, and bake until the crust is a deep golden brown.
Gummy crumbs are almost always caused by underbaking, slicing the bread too soon, or excessively high hydration. Make sure the loaf reaches the proper internal temperature, cools completely, and has adequate bake time for moisture to evaporate and the crumb to set.
A very thick crust can come from insufficient steam, long bake times, or low hydration doughs. Very low-hydration doughs naturally produce a thicker crust, so consider increasing hydration slightly if you prefer a thinner crust. Try adding steam at the beginning of the bake and avoid baking too long after the loaf is fully colored.