How to Assemble a Layer Cake
Learn how to assemble a professional-looking layer cake – evenly stacked, perfectly level, and free of lopsided frosting. This tutorial walks you through every step of building a 4-layer cake with clean edges and a polished finish.
With the right tools and a few smart techniques, you’ll never have uneven layers or gummy edges again.
Whether you finish your cake with a smooth buttercream finish or a casual swirl, the process is the same — and the results are equally impressive.

Tools You’ll Need
Gather your tools before you start. The right setup makes the process easier and neater.
- Cake Turntable – Optional, but it makes frosting and smoothing much easier.
- Long Serrated Knife – For trimming and torting (splitting) your cake layers.
- Offset Spatula & Bench Scraper – Essential for spreading and smoothing frosting.
- Pastry Brush – For brushing syrup on the layers to keep the cake moist.
- Cardboard Cake Circle or Serving Plate – Provides a sturdy base for stacking and decorating.
How to Assemble a Layer Cake
Learn how to assemble a 4-layer cake that’s even, level, and beautifully finished.
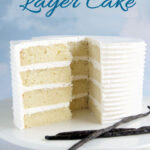
- Trim and Prepare the Layers
Use a long serrated knife to level the domed tops of each cake so they’re flat. This gives you a sturdy, even base for stacking.
Next, trim away the brown crust from the sides and bottom of each cake. Those edges taste great on a plain snack cake, but inside a frosted layer cake they can turn gummy.
Finally, split each cake horizontally into two even layers (a process called torting). You’ll end up with four thinner layers that create a balanced bite — even ratios of cake and filling in every forkful.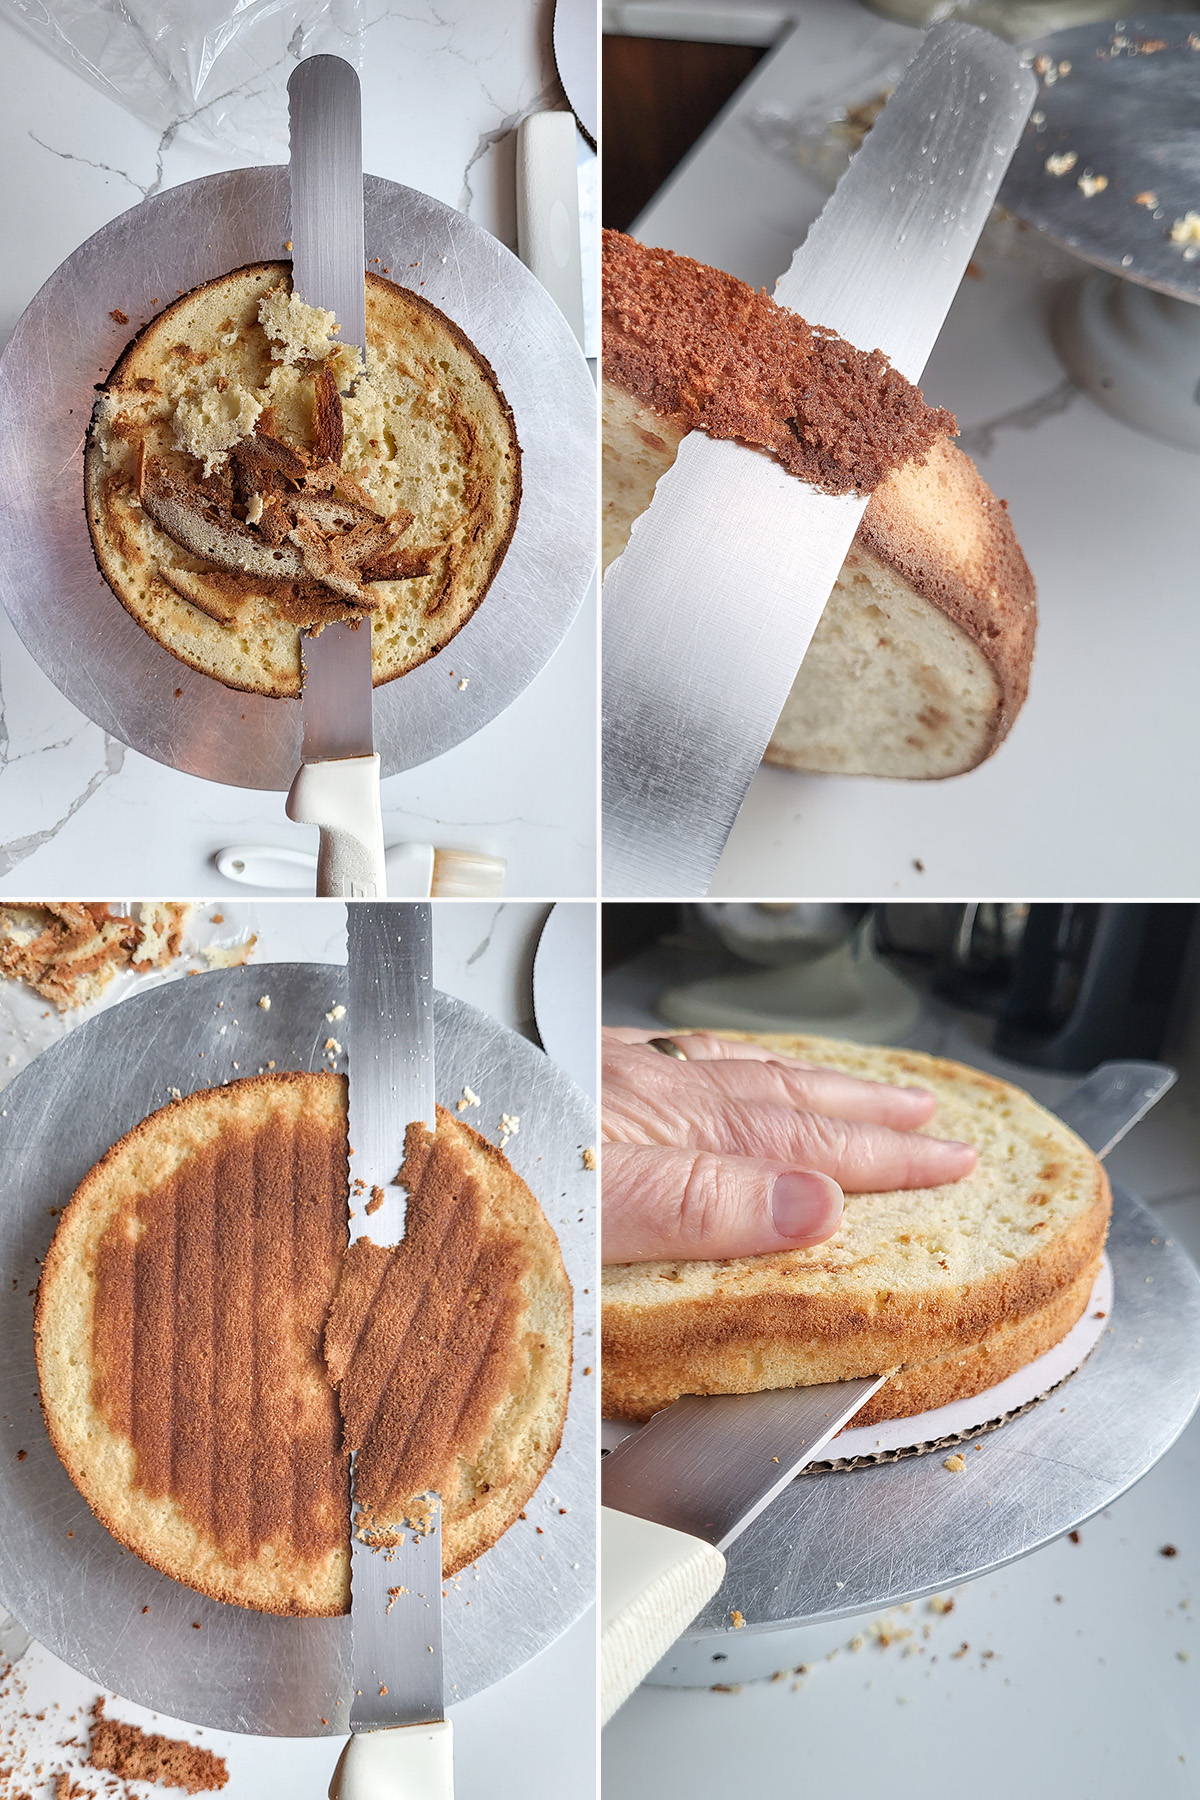
- Stack and Fill
Place one cake layer on a cardboard cake circle or plate — set it on a turntable if you have one.
If you’d like to add extra flavor and moisture, brush the layer lightly with simple syrup using a pastry brush.
Divide your frosting in half. Use about one-third of the first half for each filling layer. Spread the frosting evenly to the edges, then gently place the next cake layer on top.
Repeat the process with the remaining layers, keeping them level as you go.
By the end, you’ll have a tall, even stack of cake with clean, uniform layers and just the right balance of cake and filling.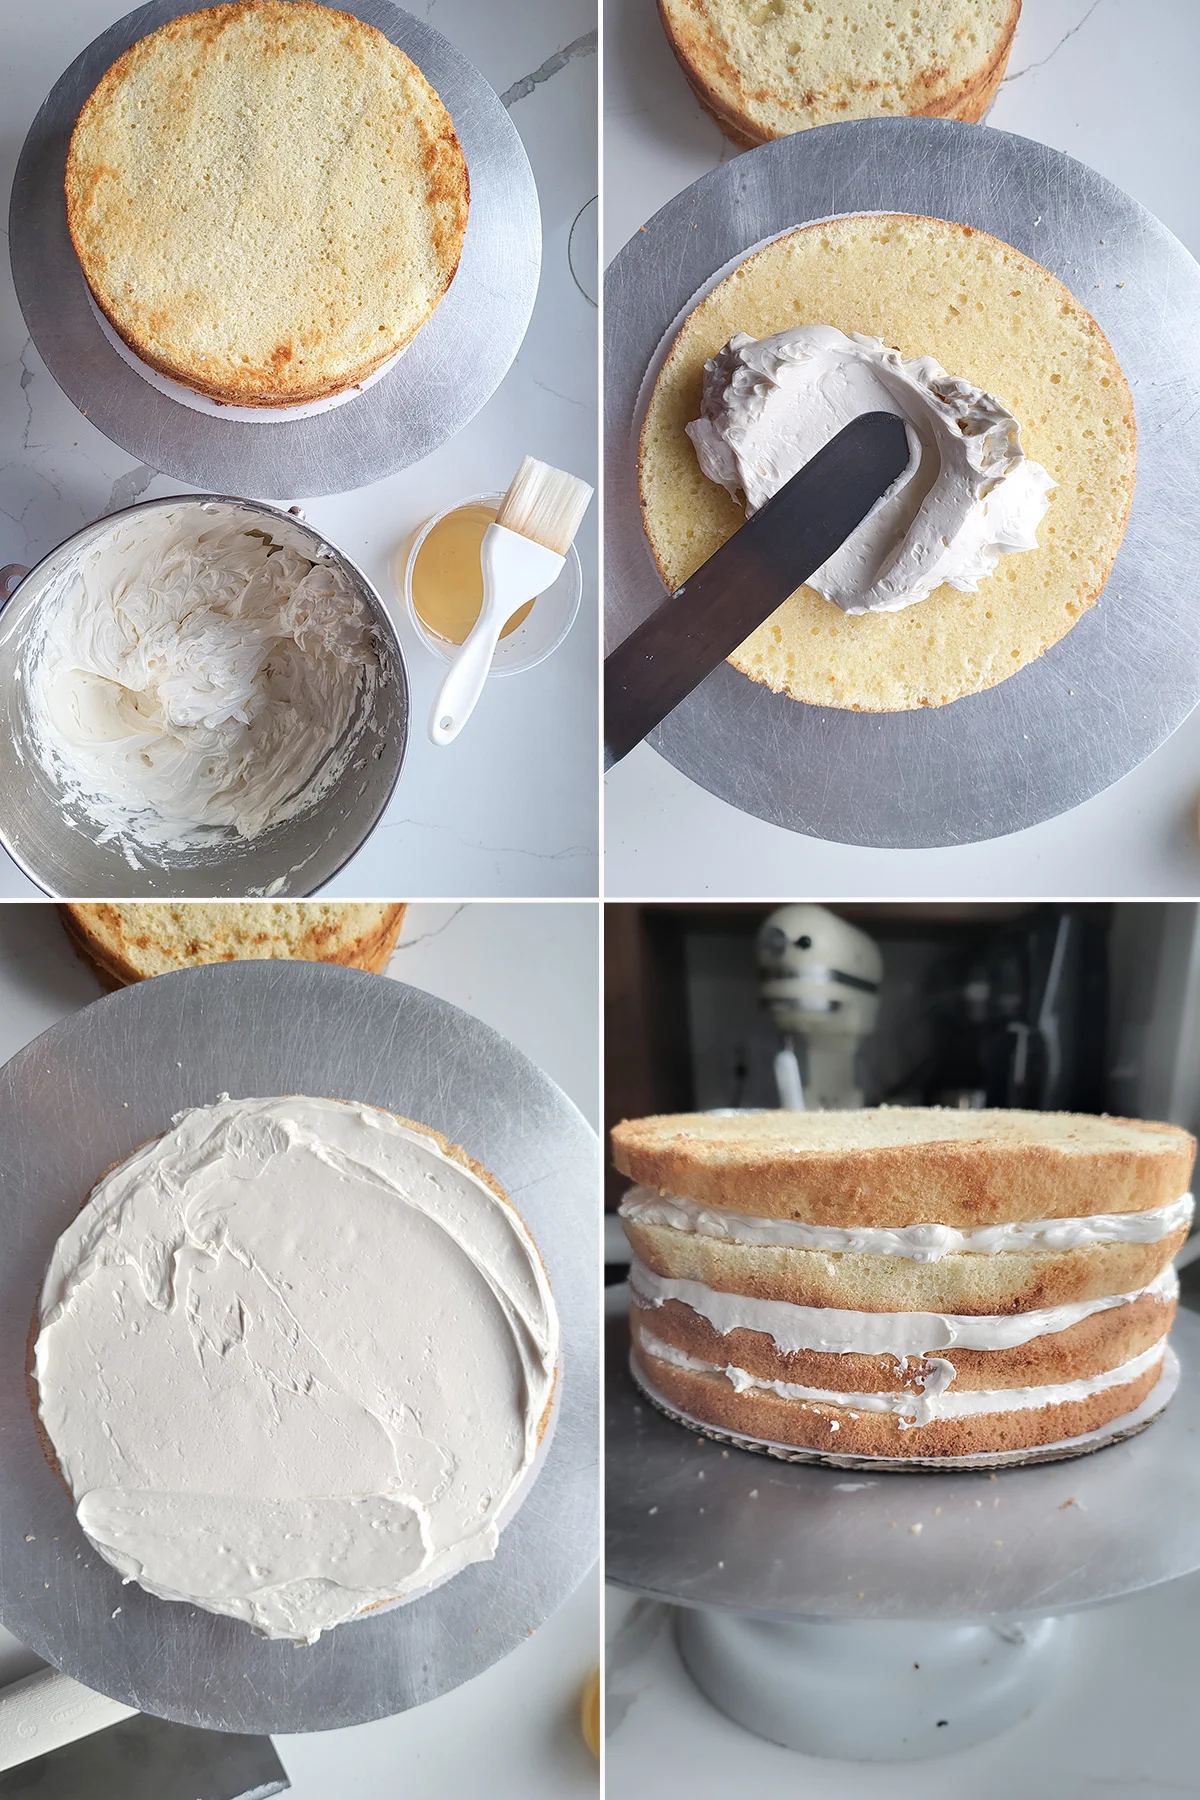
- Frost and Finish
Start by frosting the sides of the cake. Spin the turntable as you work, using an offset spatula to apply an even coat of frosting.
Then cover the top so the frosting on the sides and top meet cleanly at the edges.
For a rustic look, use your spatula to make soft swirls. For a smooth bakery finish, hold a bench scraper upright against the cake and spin the turntable to smooth the surface.
Once the cake looks the way you like it, clean the bottom edge with your spatula or a butter knife. Transfer the finished cake to a serving platter or stand.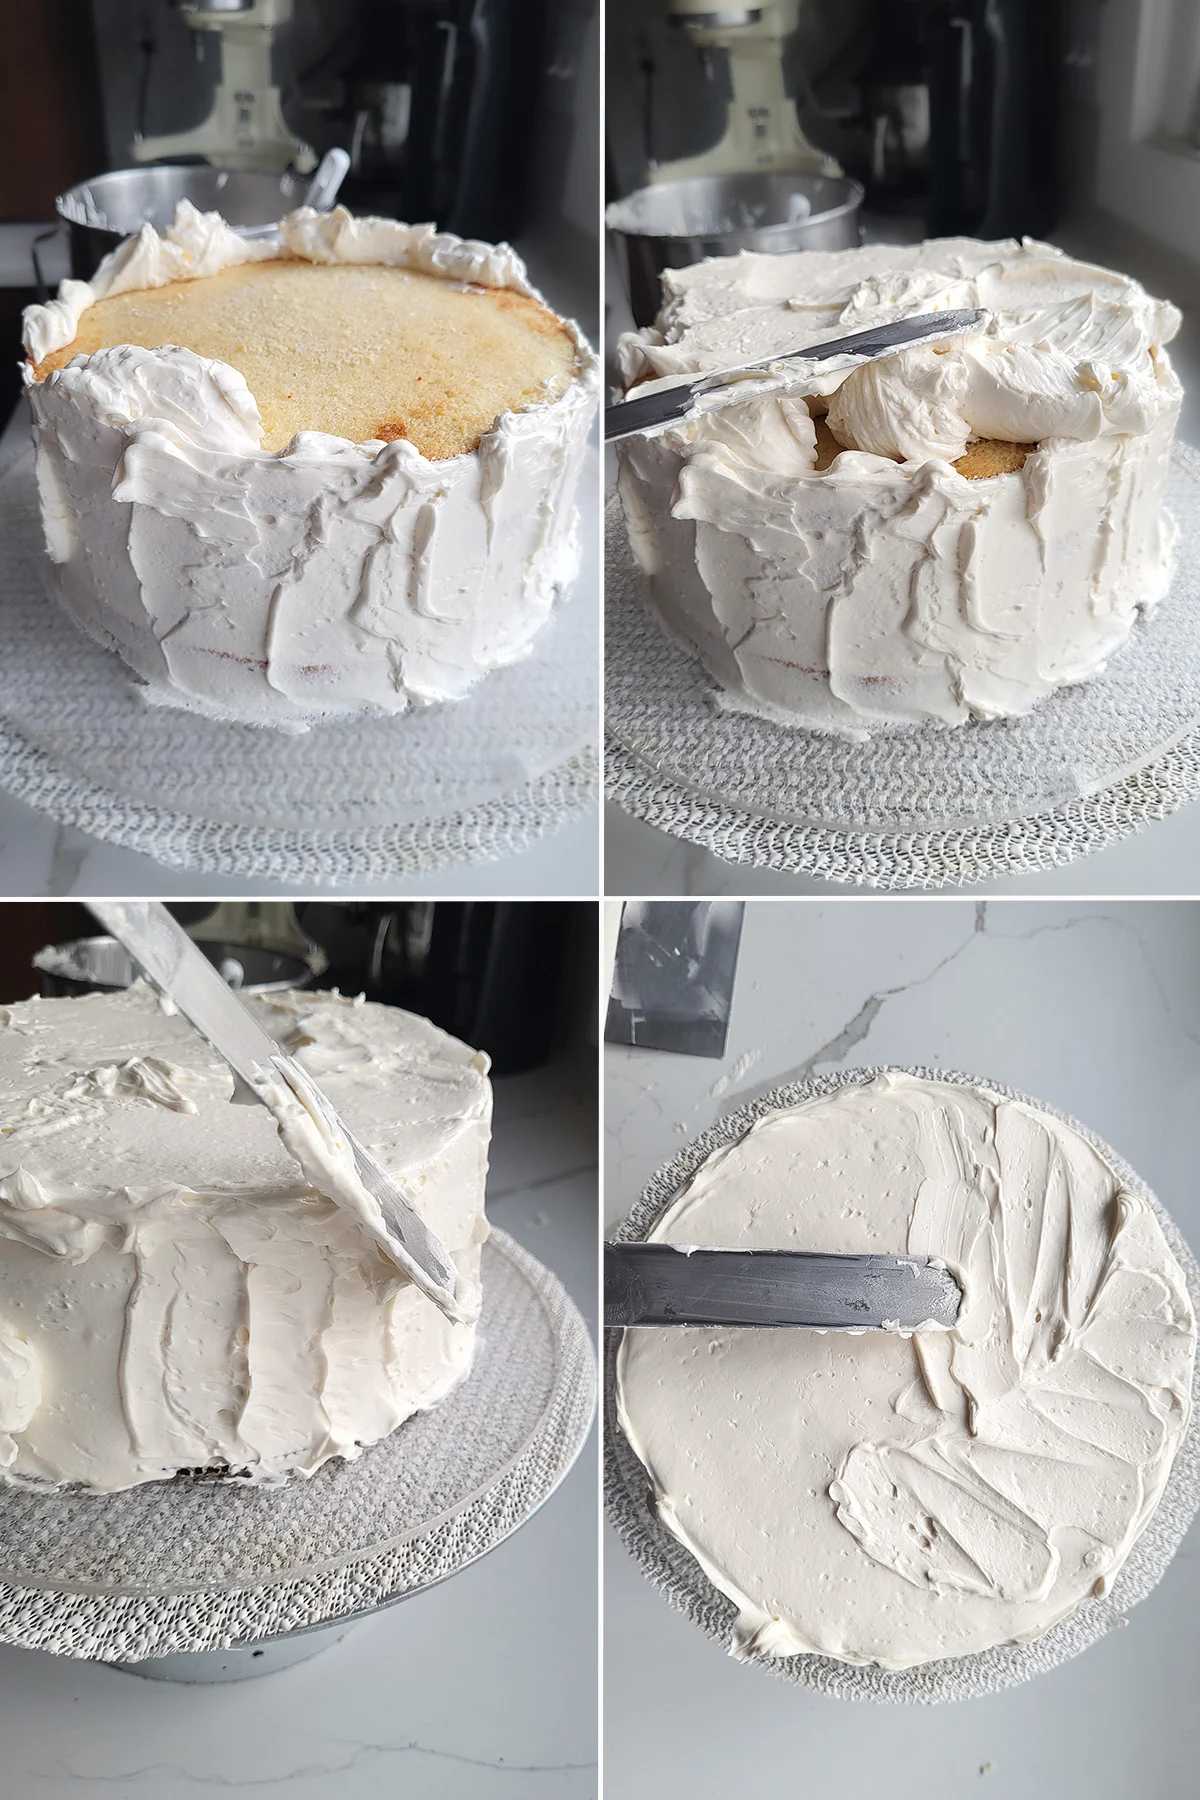
Watch the Process
Once your cake is neatly stacked and frosted, you’ve built the perfect foundation for decorating. From here, you can keep it simple with a swirl of buttercream or take it further with a smooth finish, piped borders, or a glossy ganache. Peruse my entire list of Cake Frostings ↗︎
If you’d like to learn how to get those bakery-sharp edges and a flawless surface, head over to my tutorial on How to Ice a Cake Like a Pastry Chef ↗︎